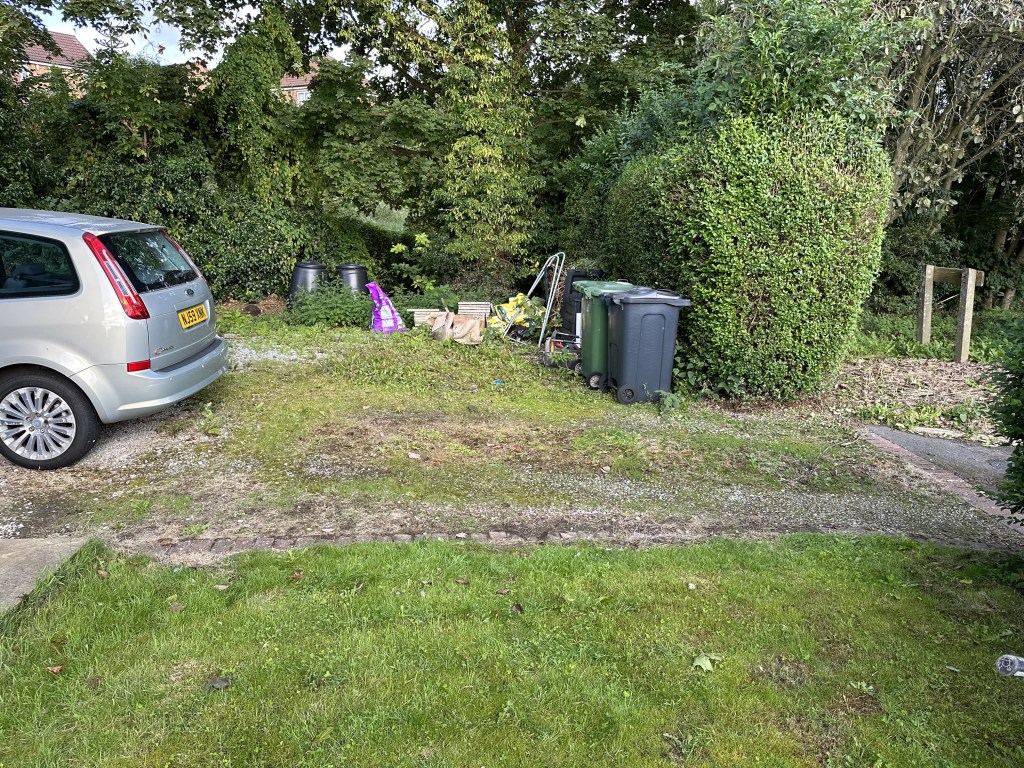
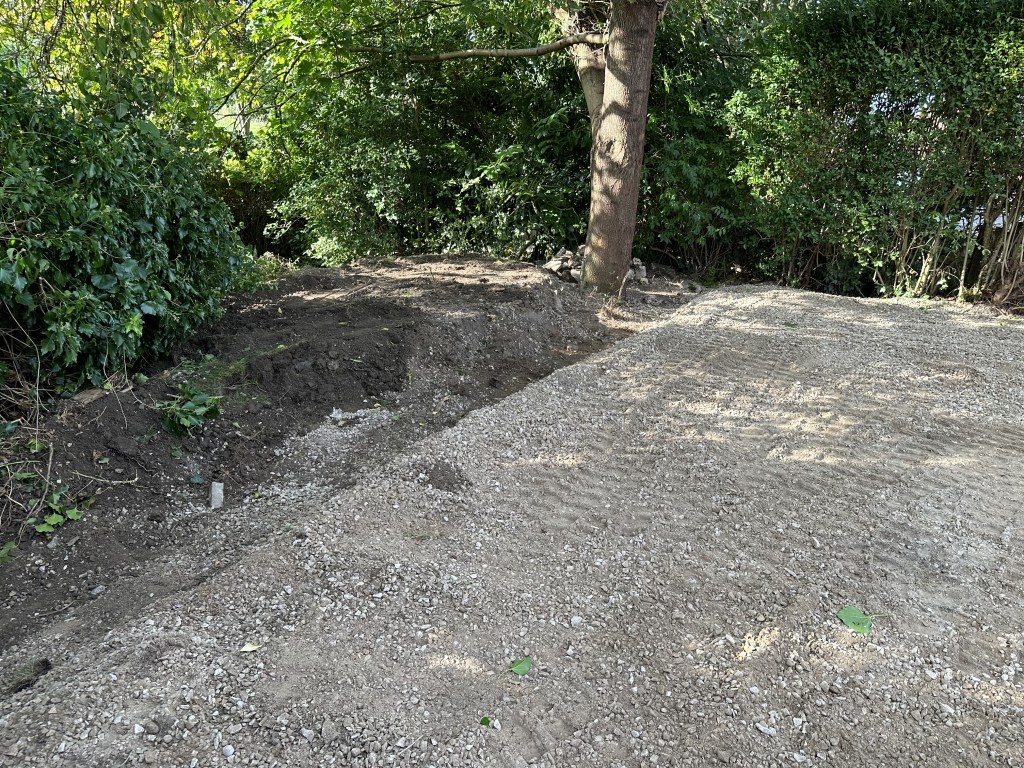
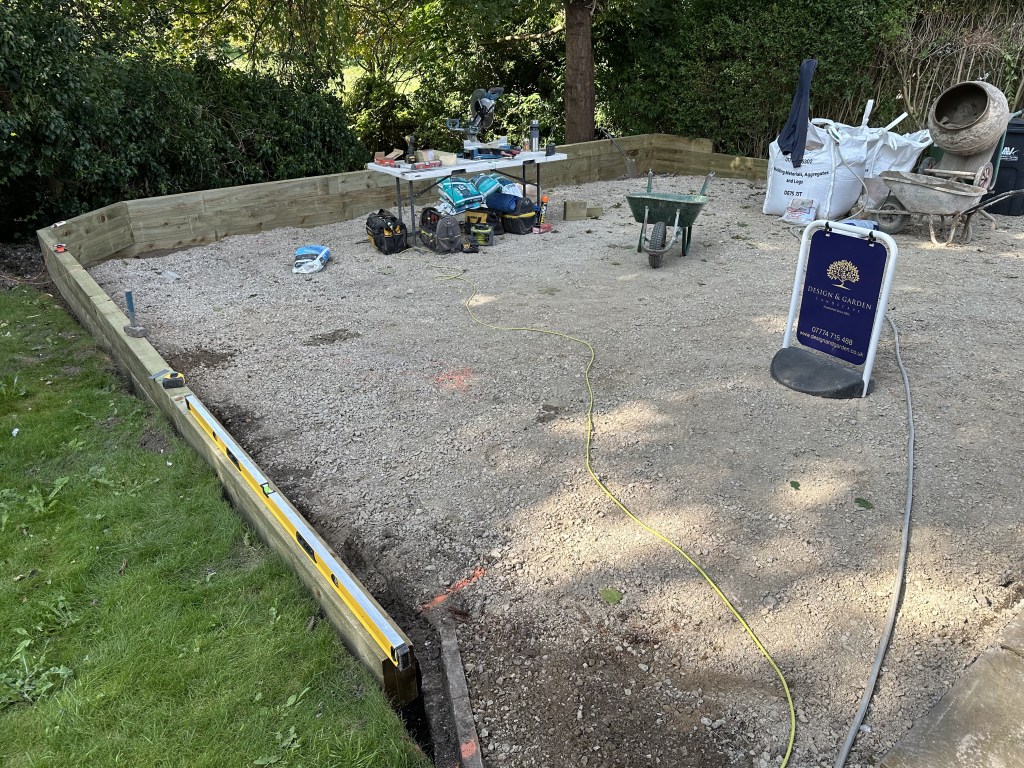
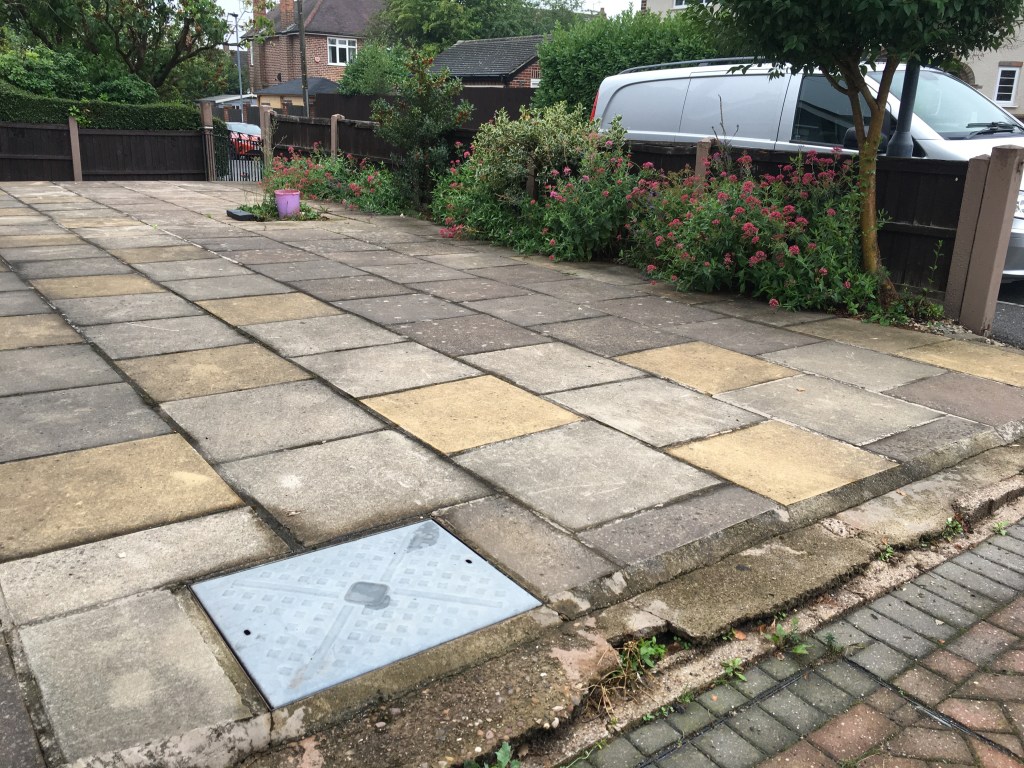
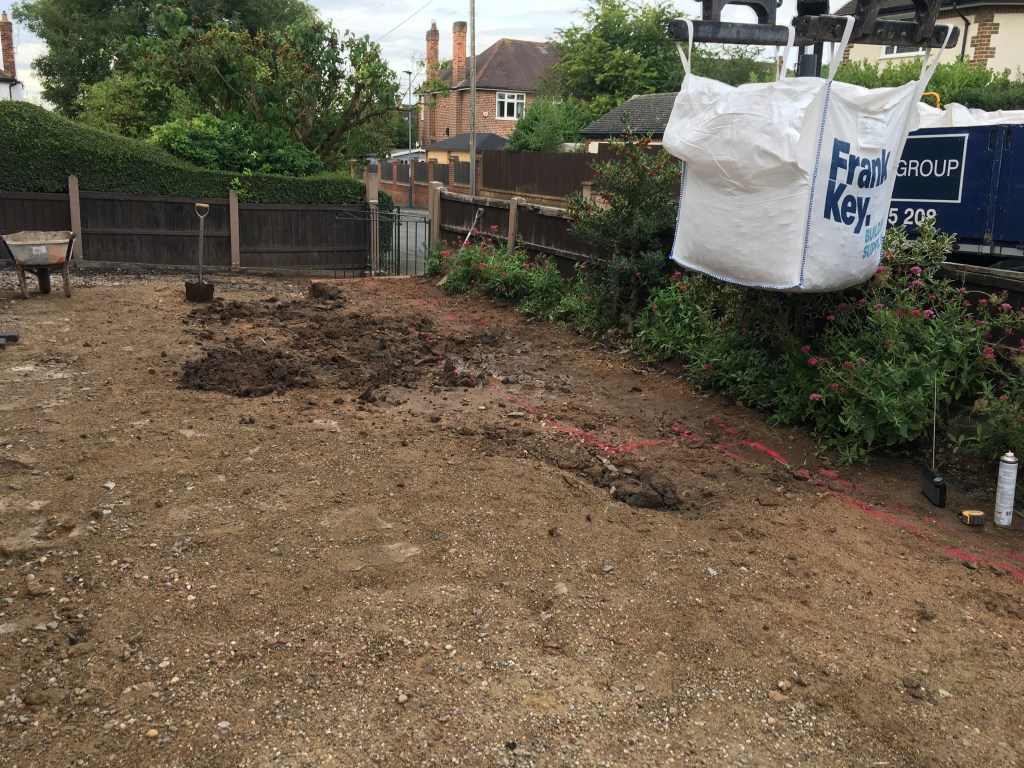
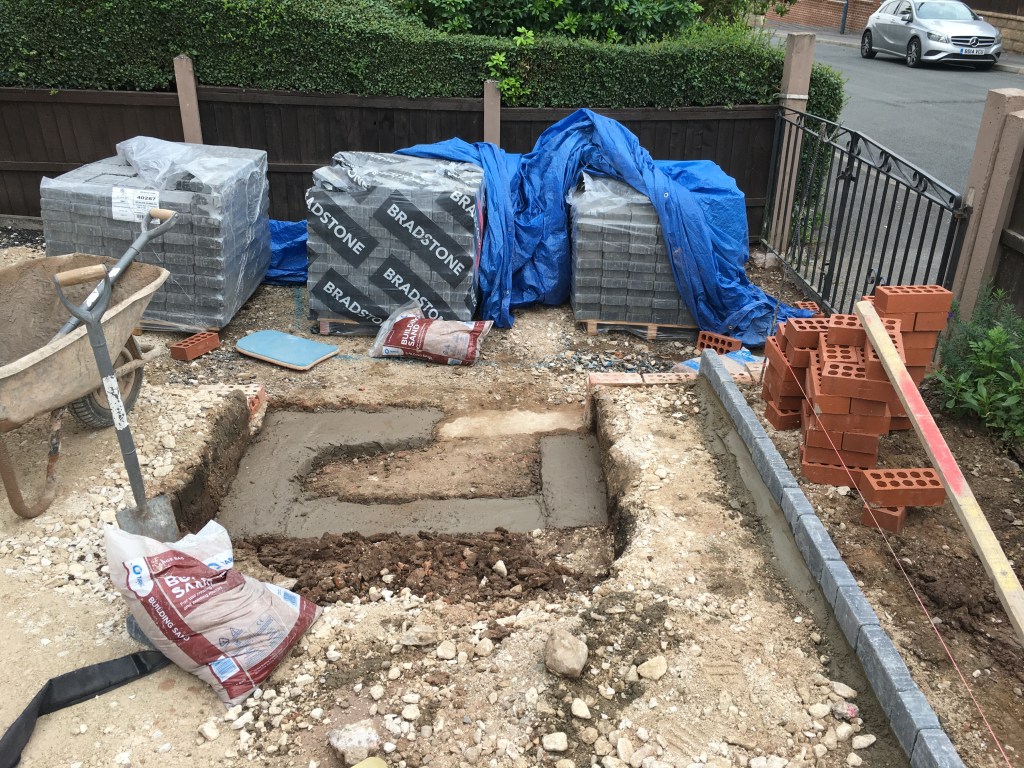
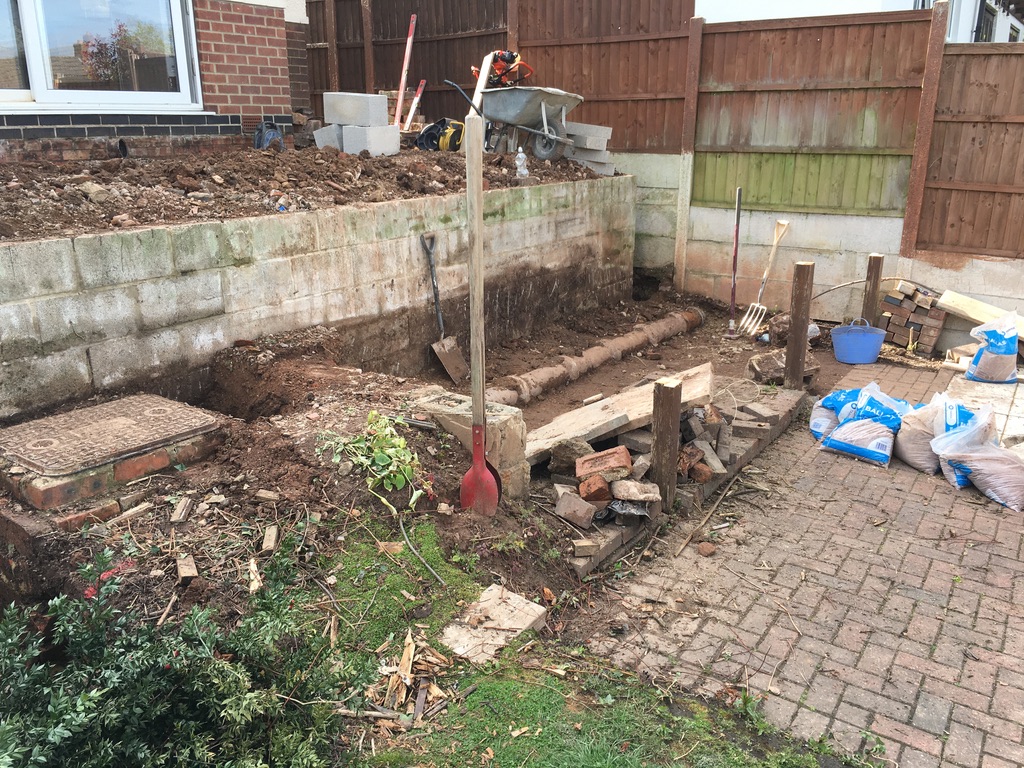
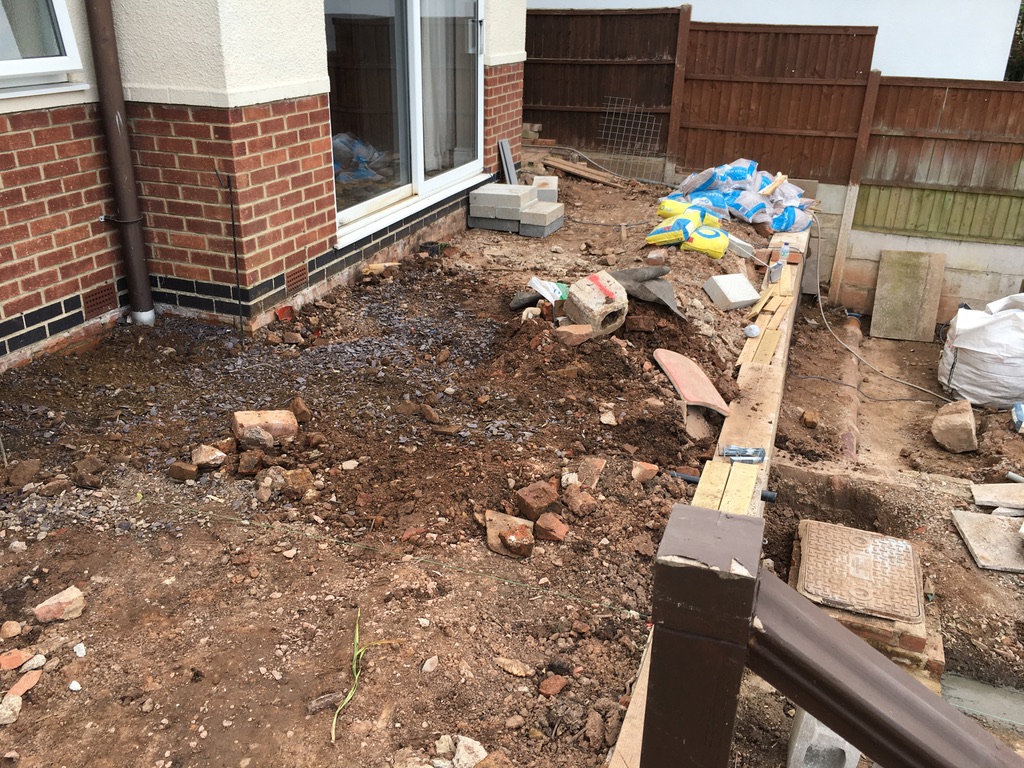
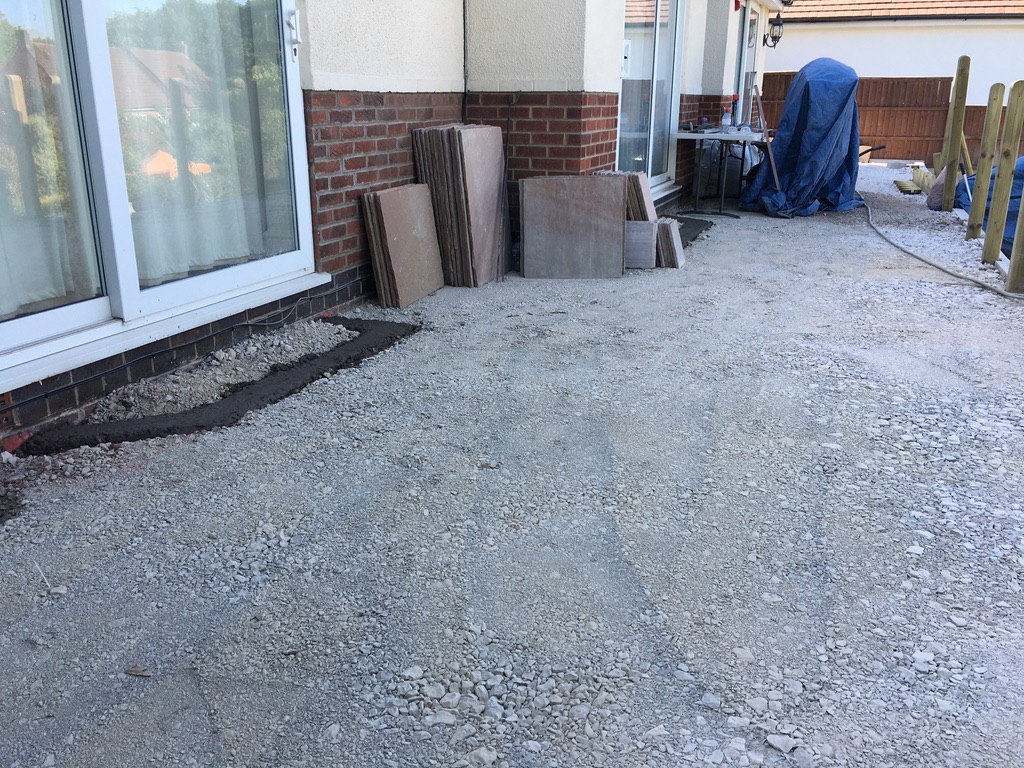
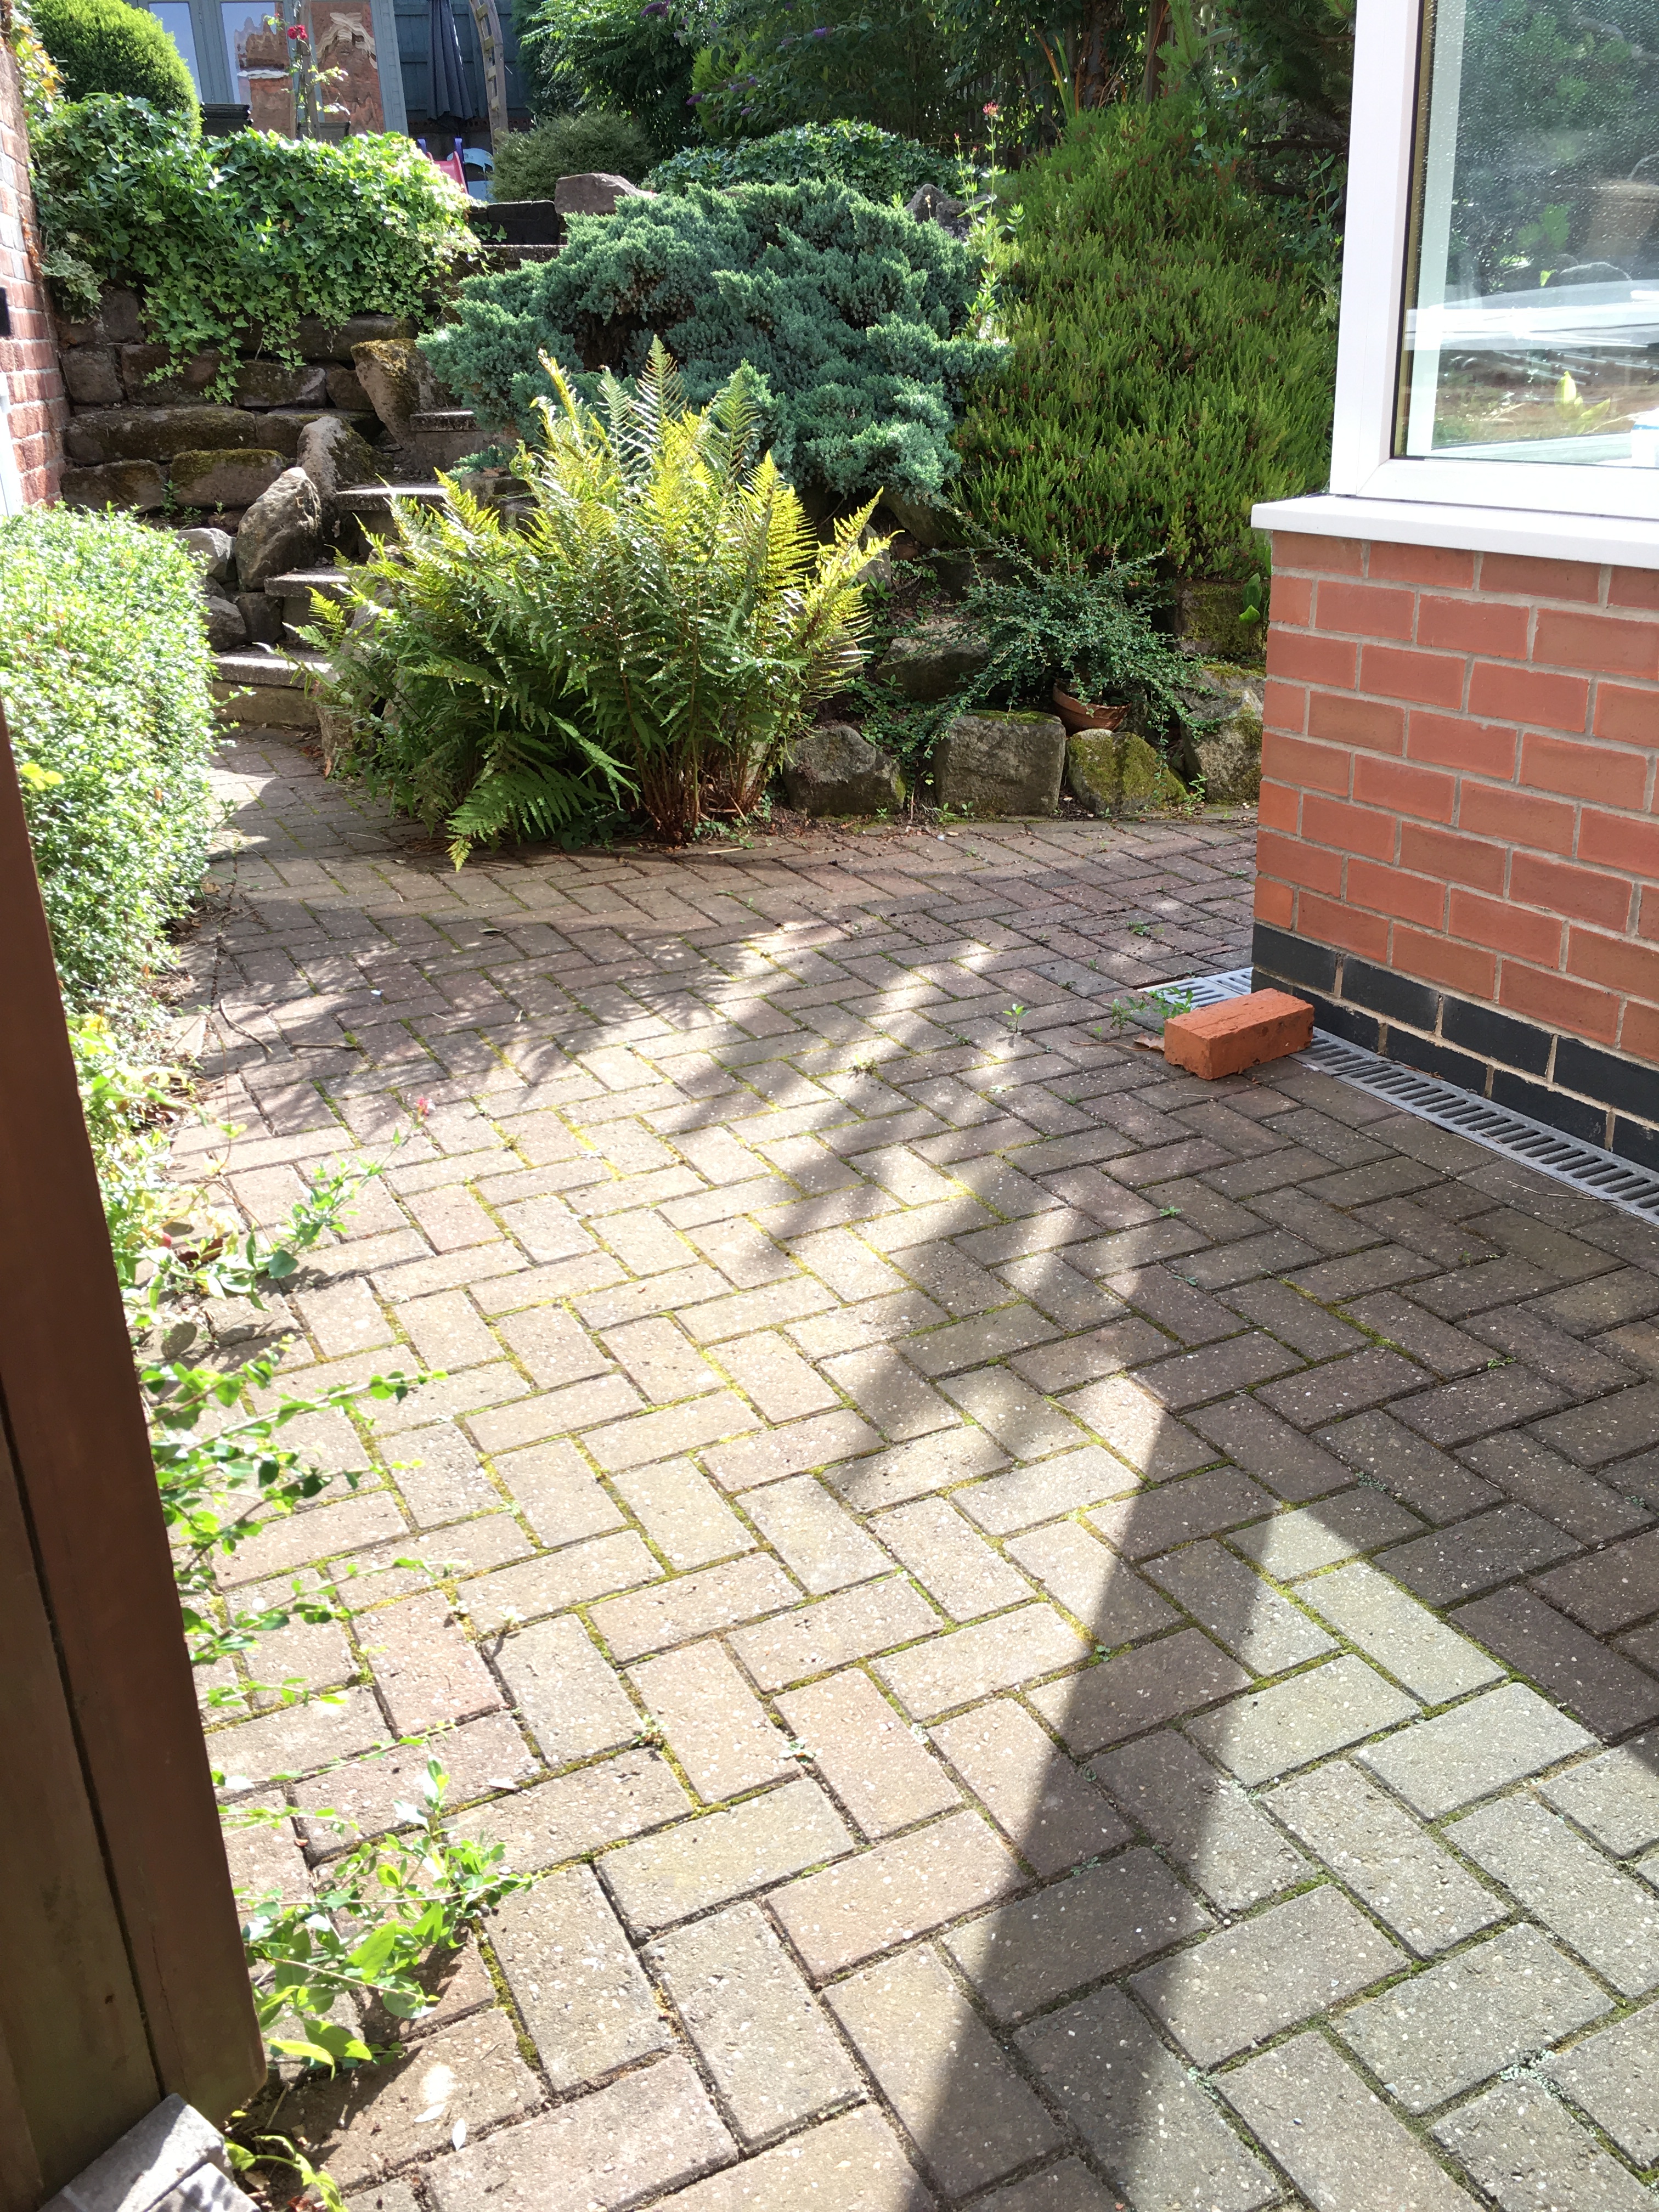
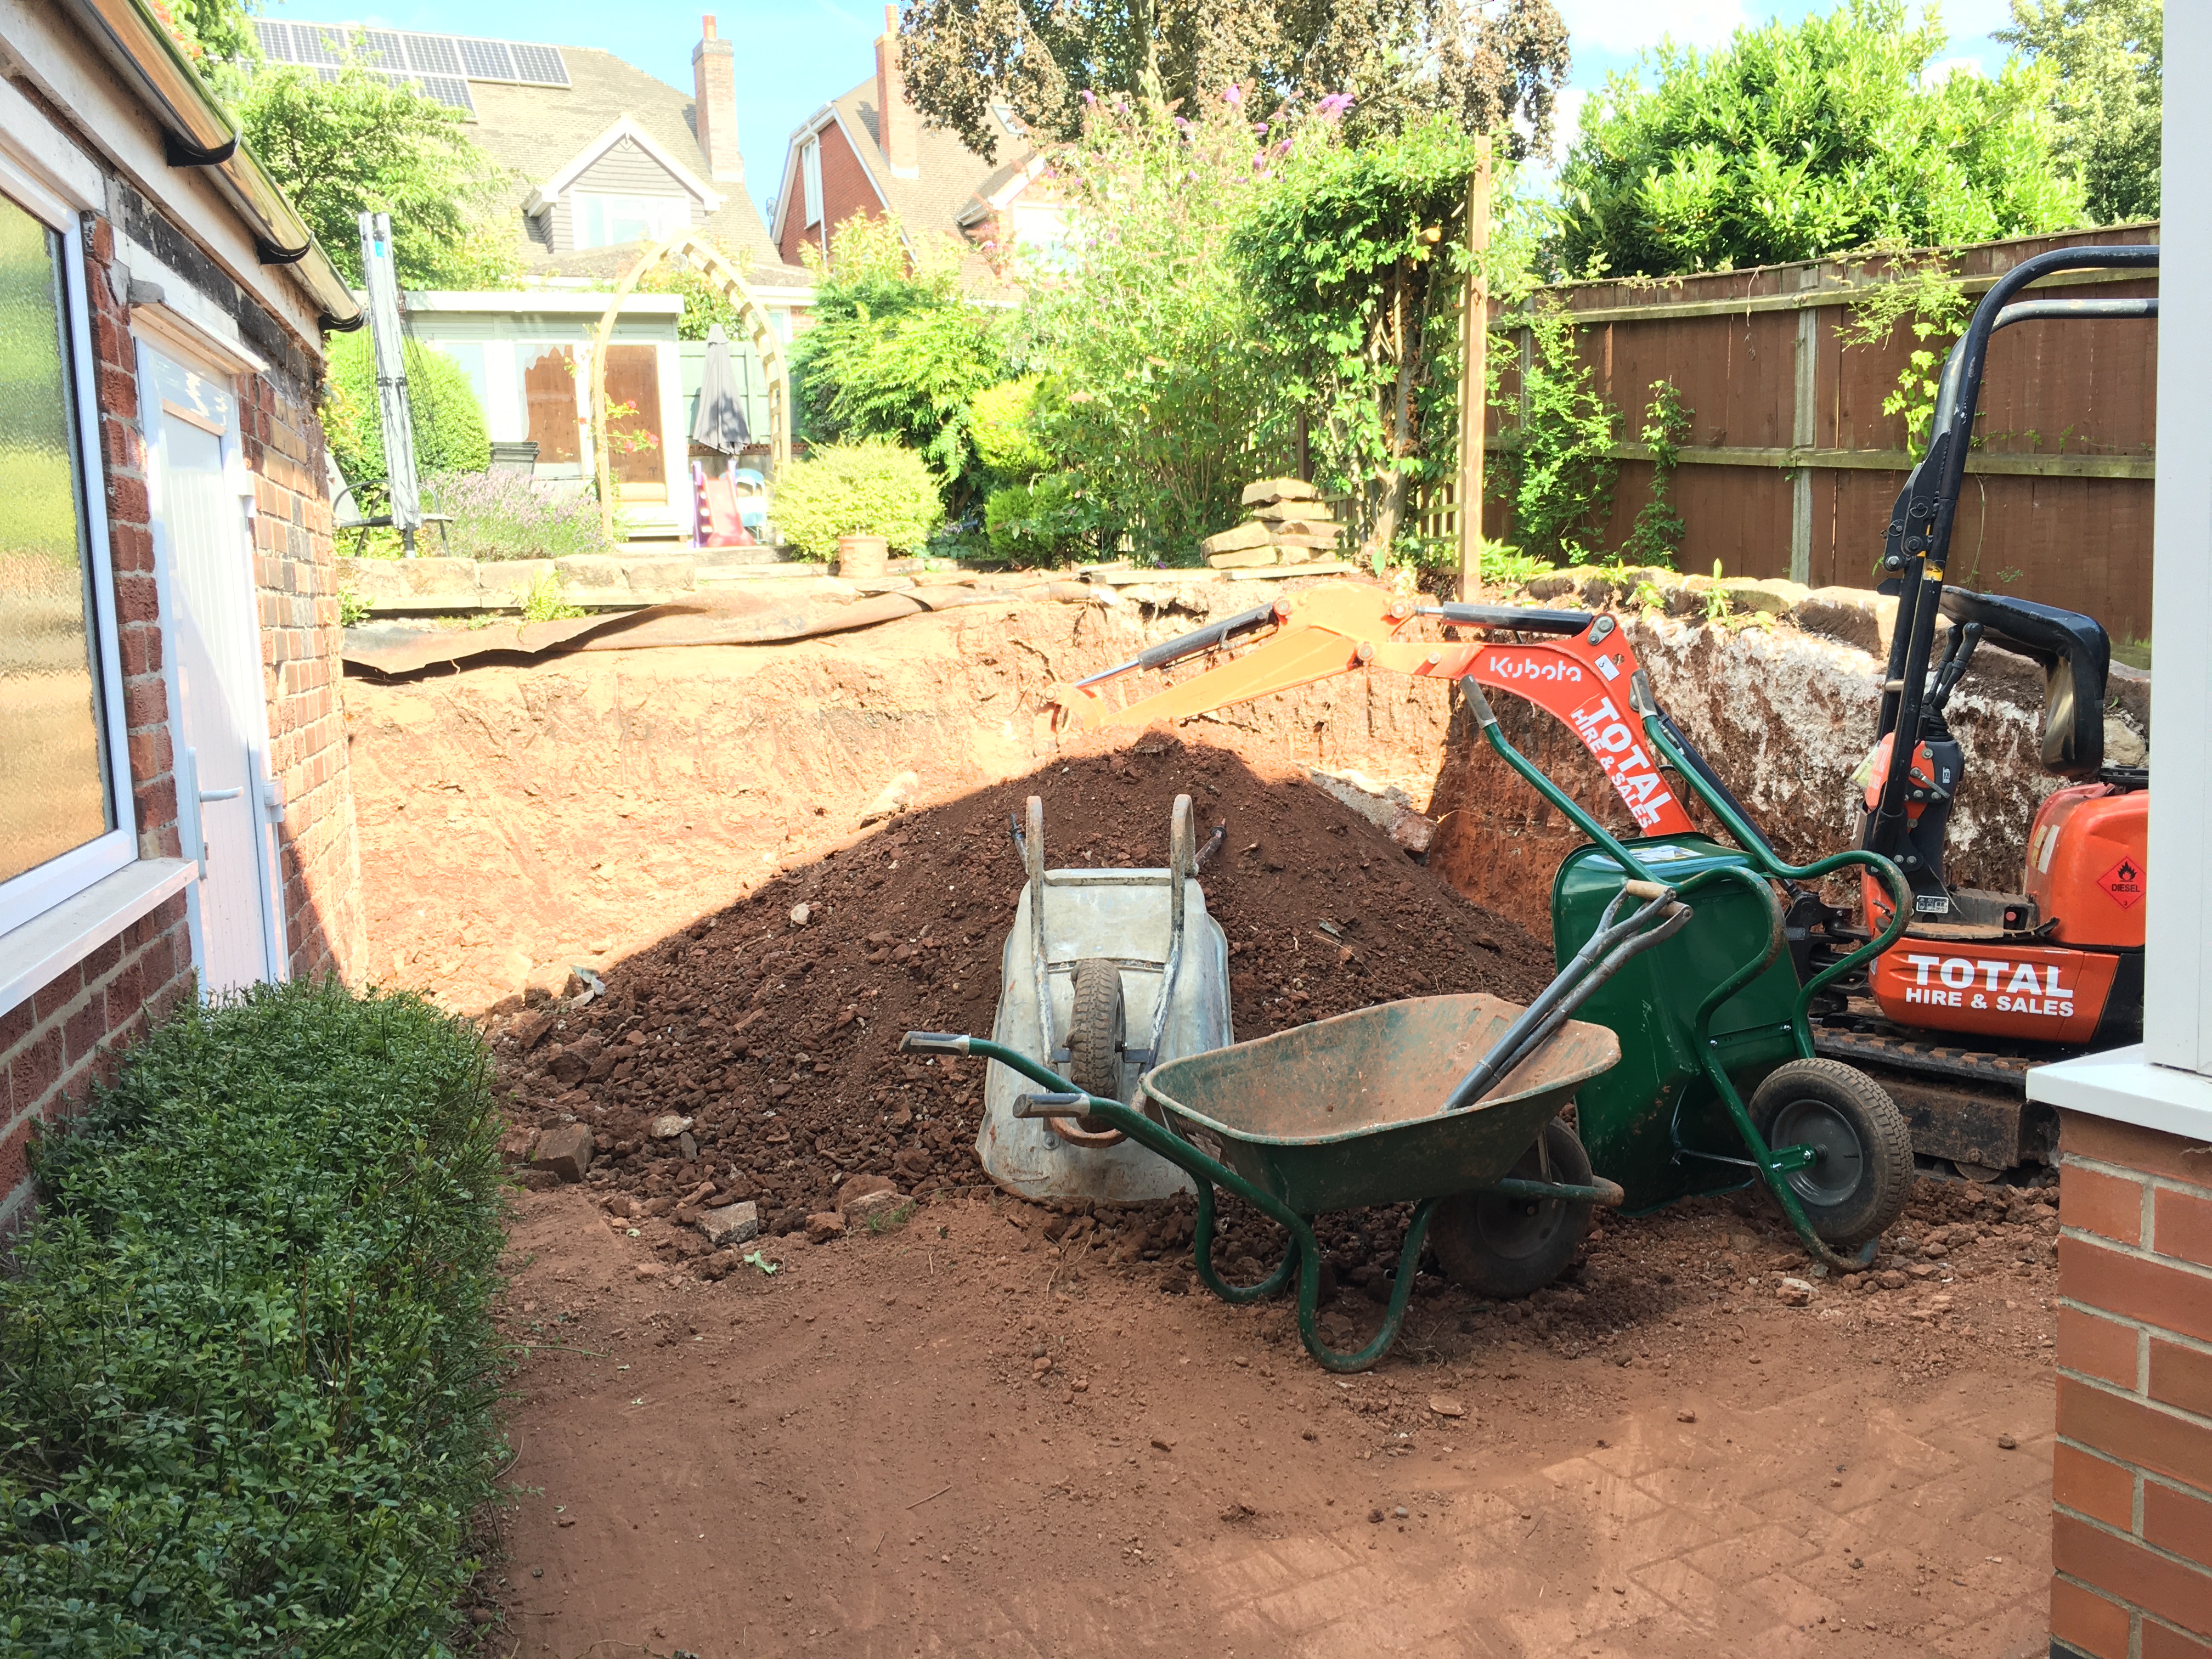
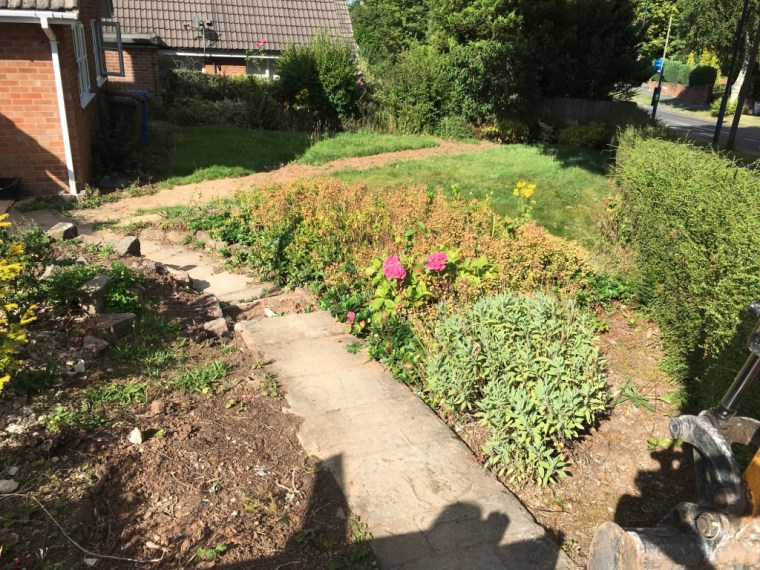
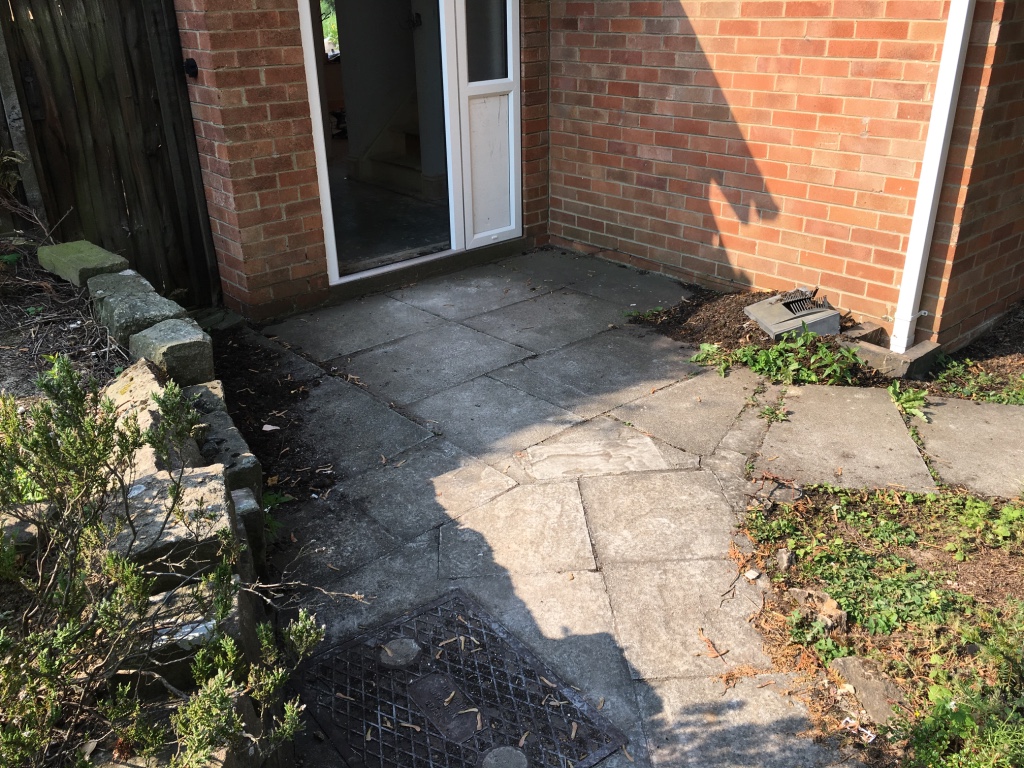
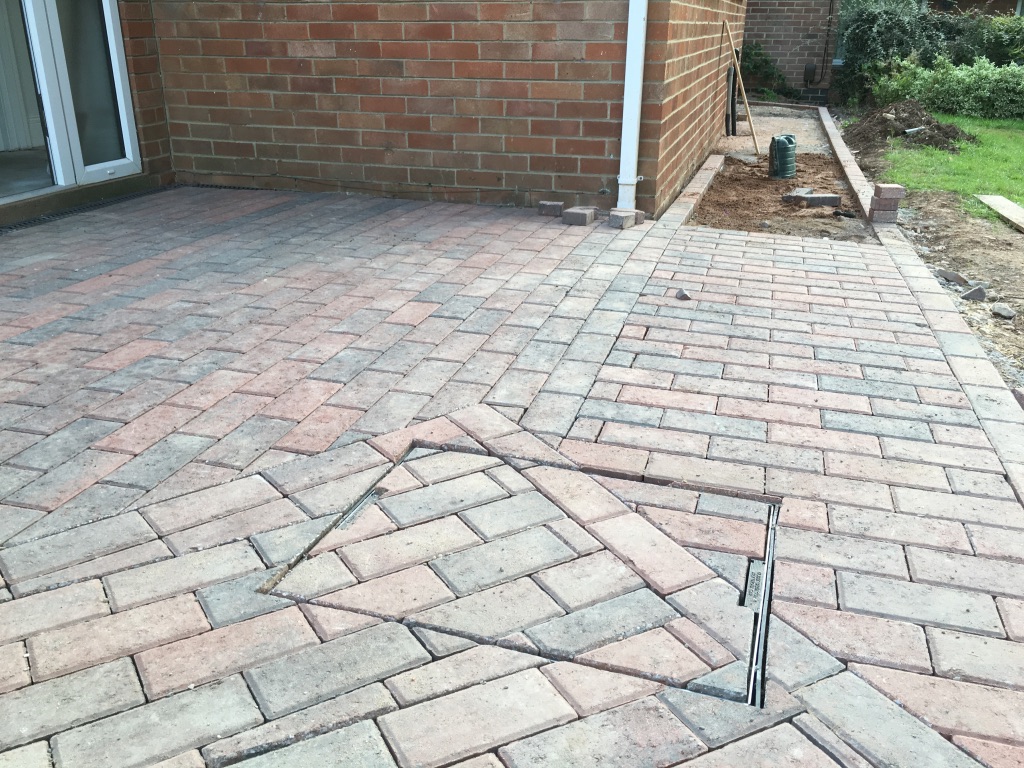
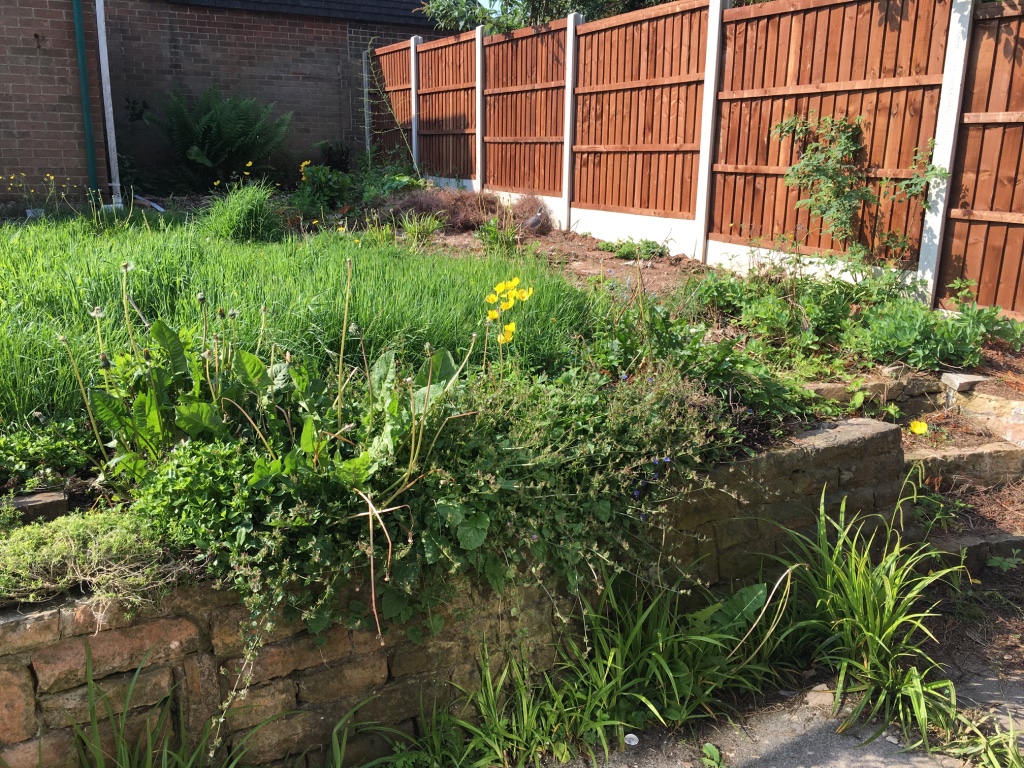
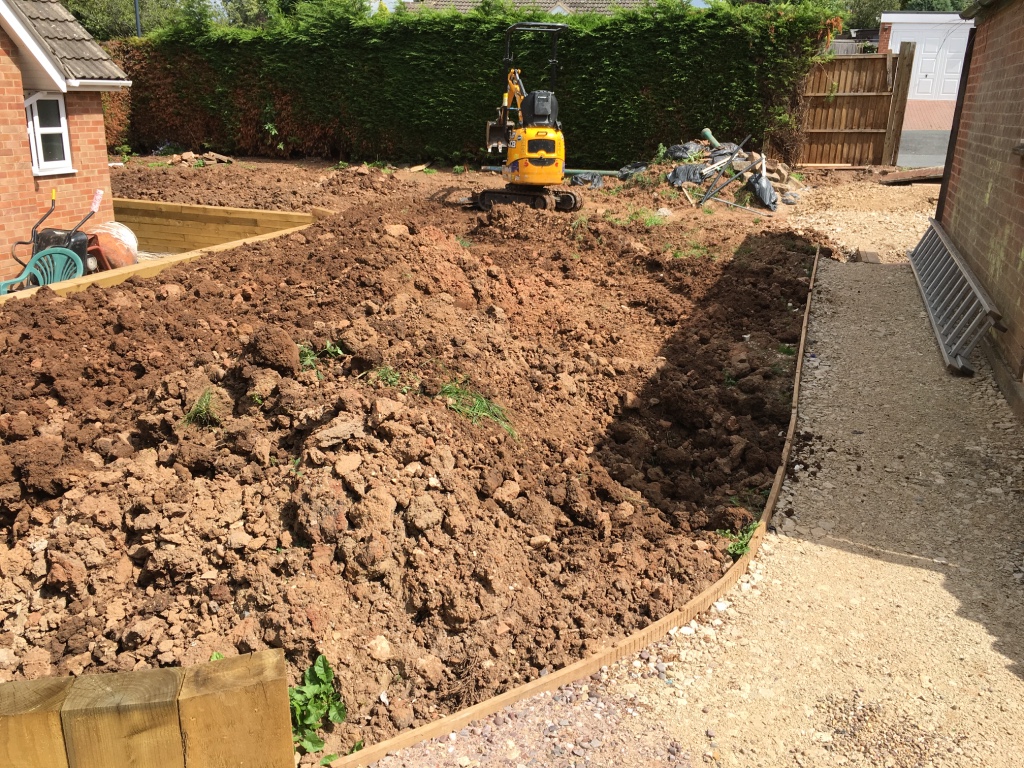
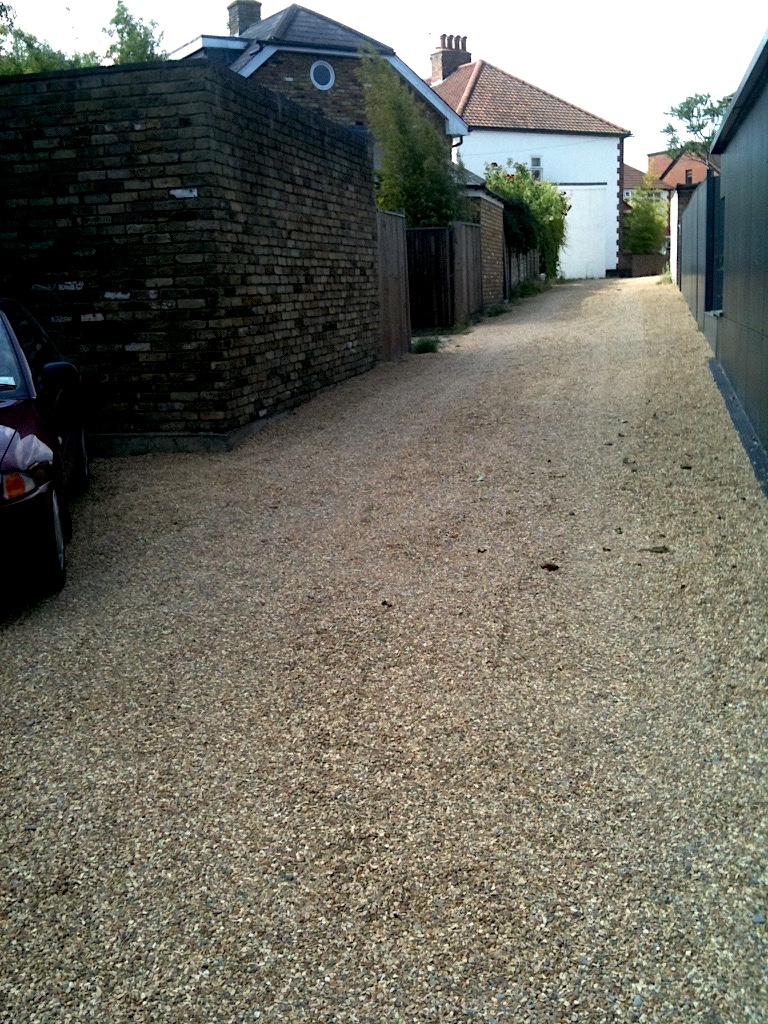
This was one of those jobs I see so often. An old driveway that’s been used daily and then becomes nearly impossible to keep clean, tidy, and weed-free.
No amount of weedkiller will sort this. It needs scraping out and starting again. And that’s what is about to happen.
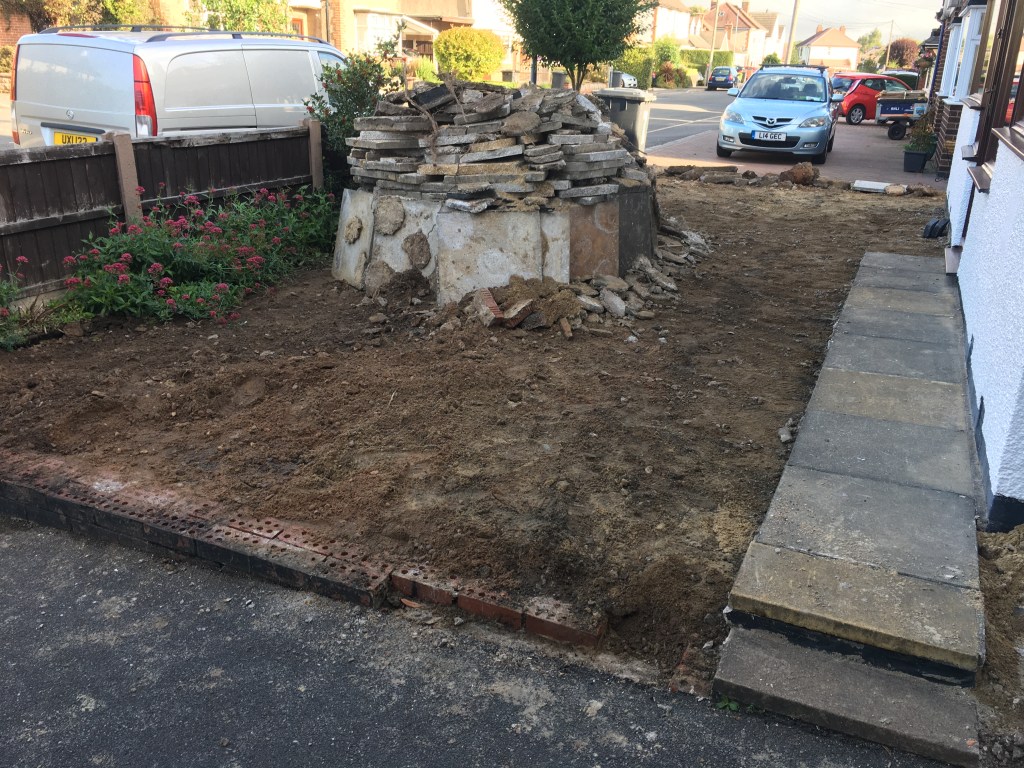
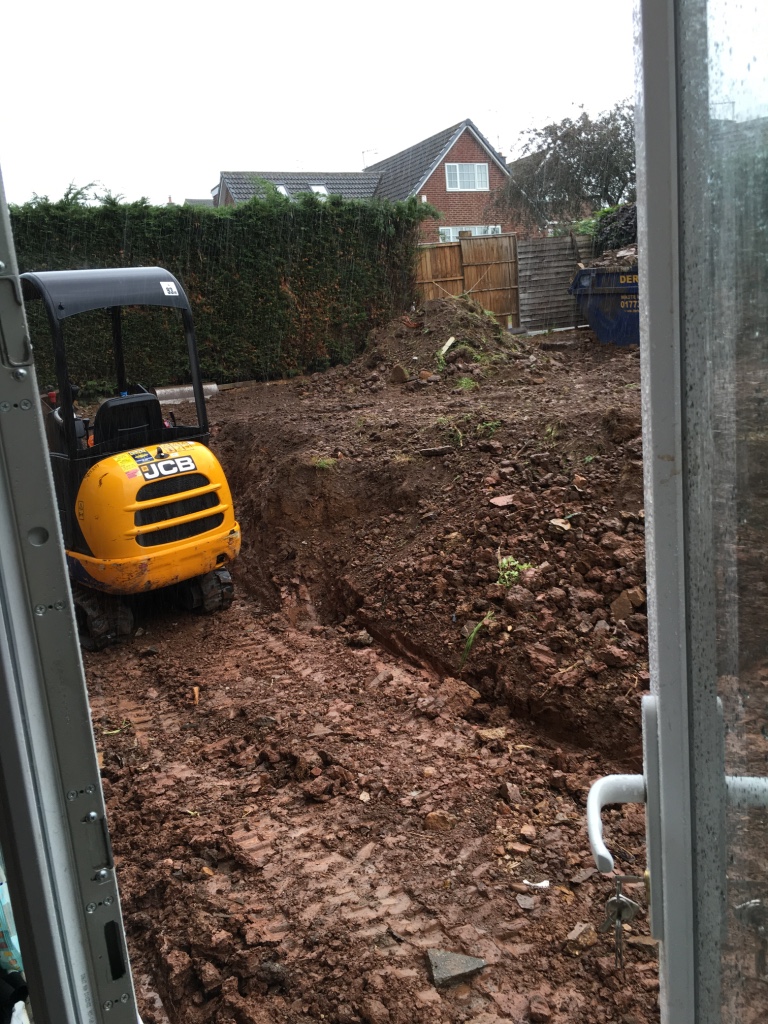
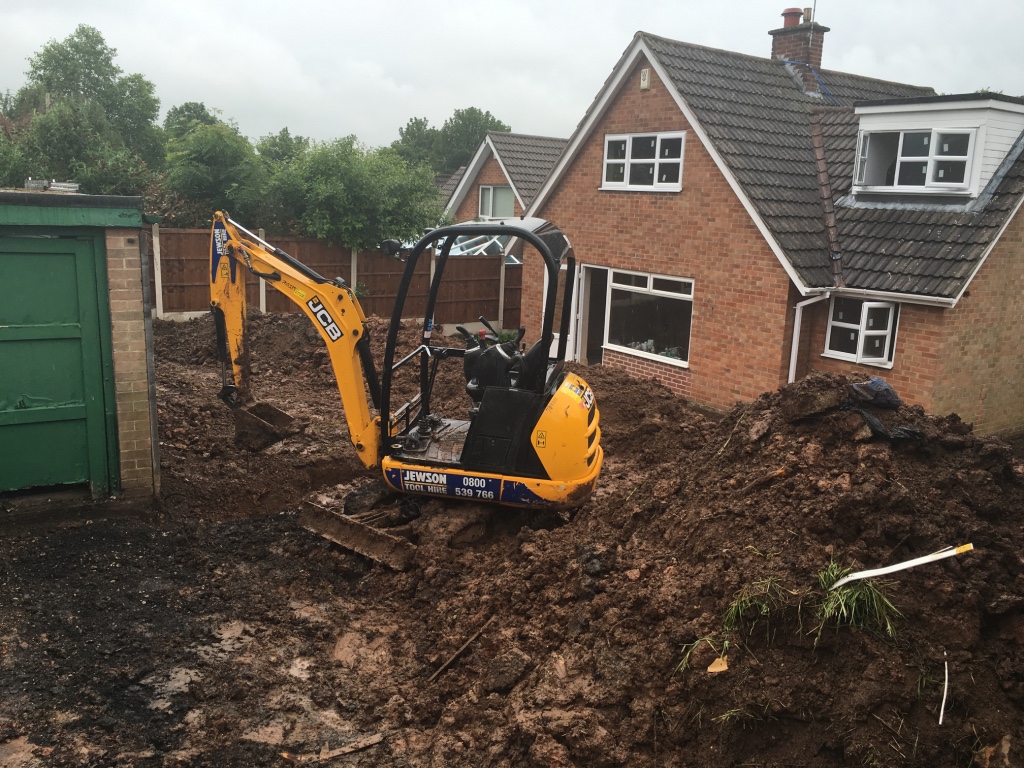
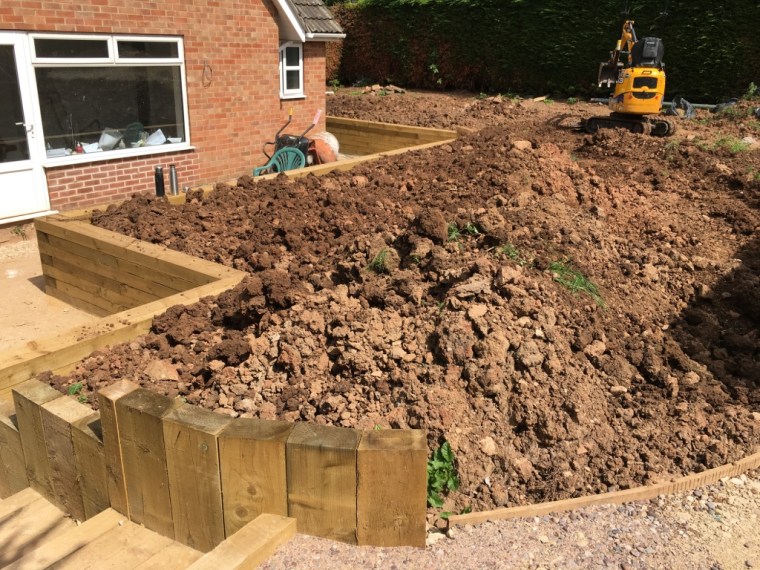
Let’s get the digger in…
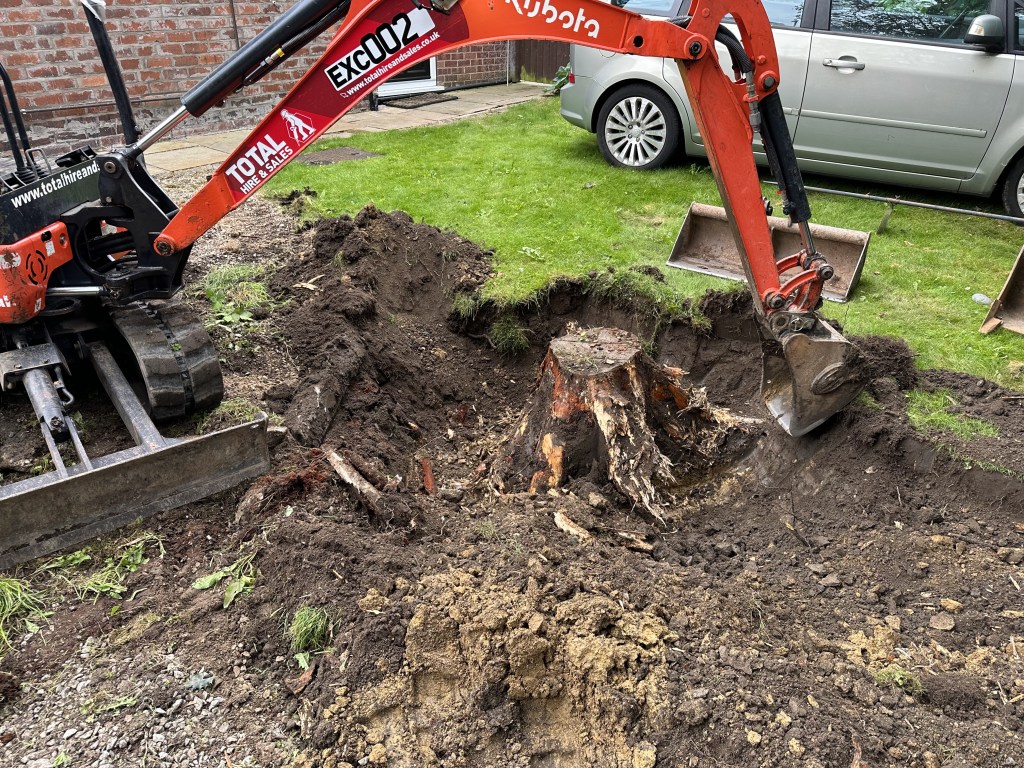
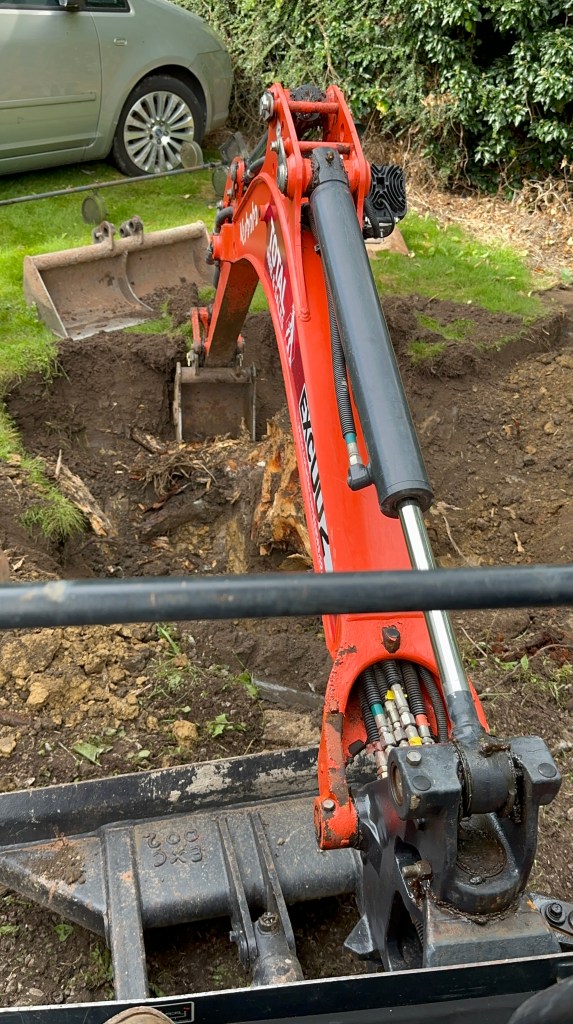
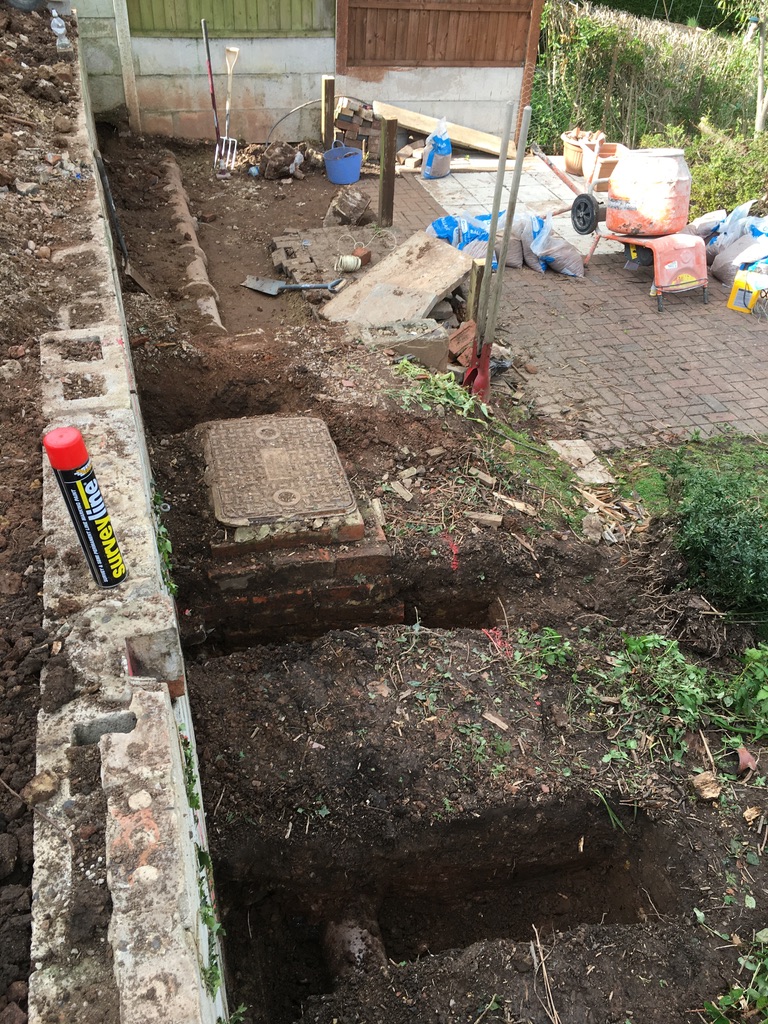
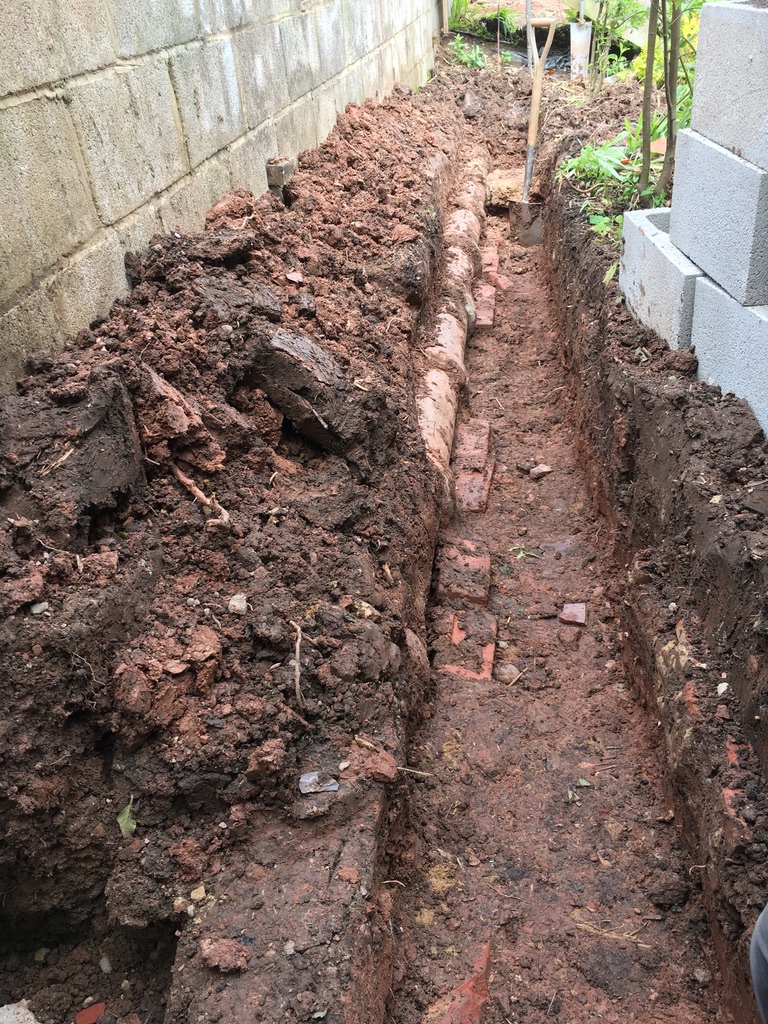
A huge tree root needed to be removed and with no help from the clay, it kicked and screamed its way out.
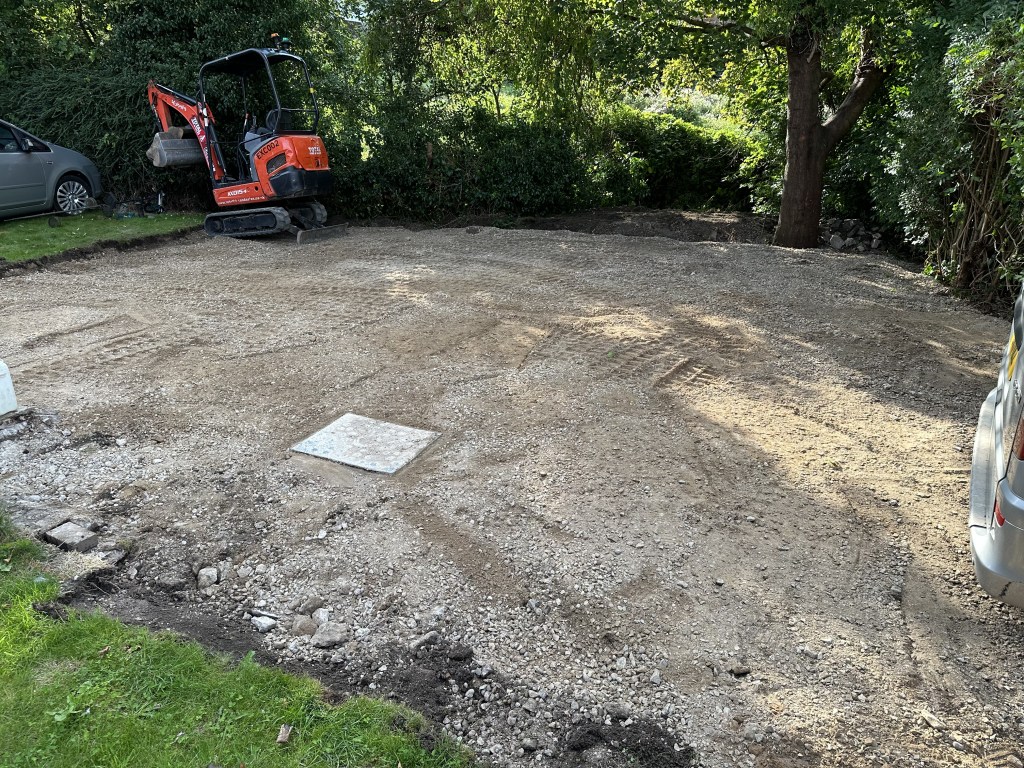
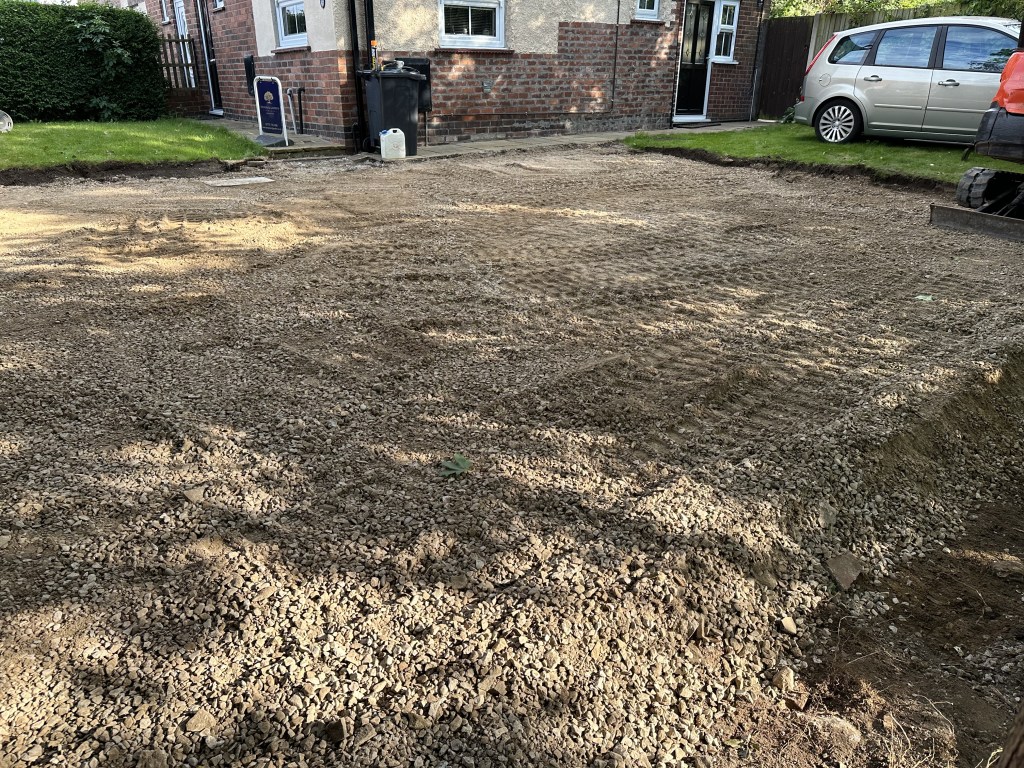
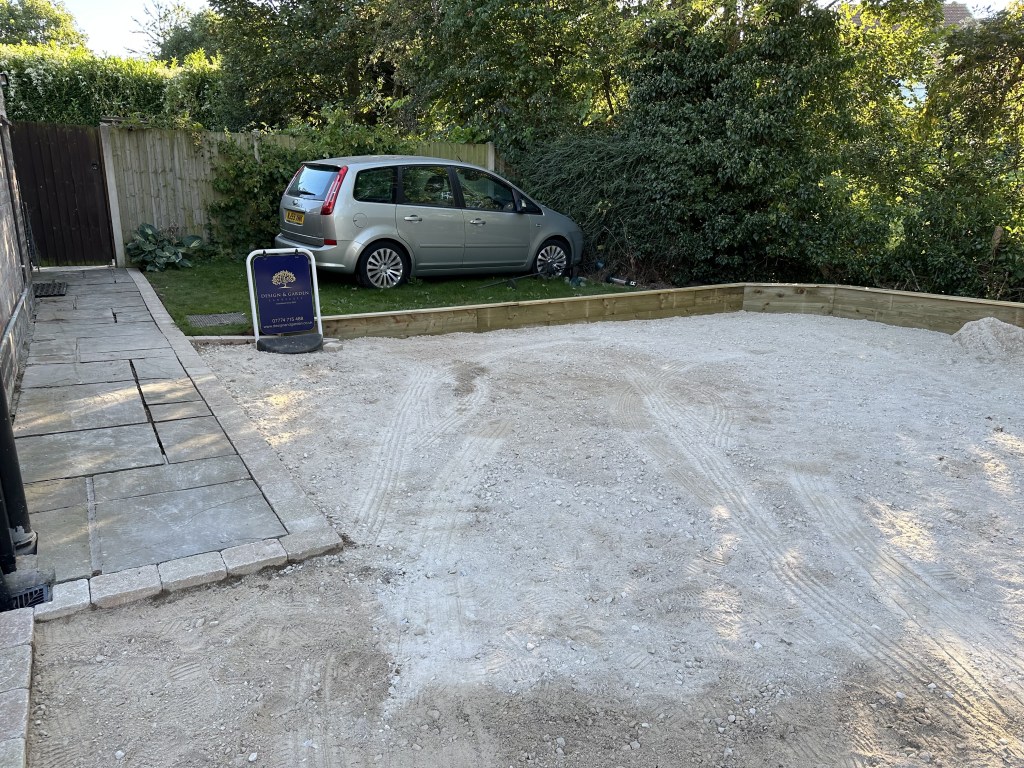
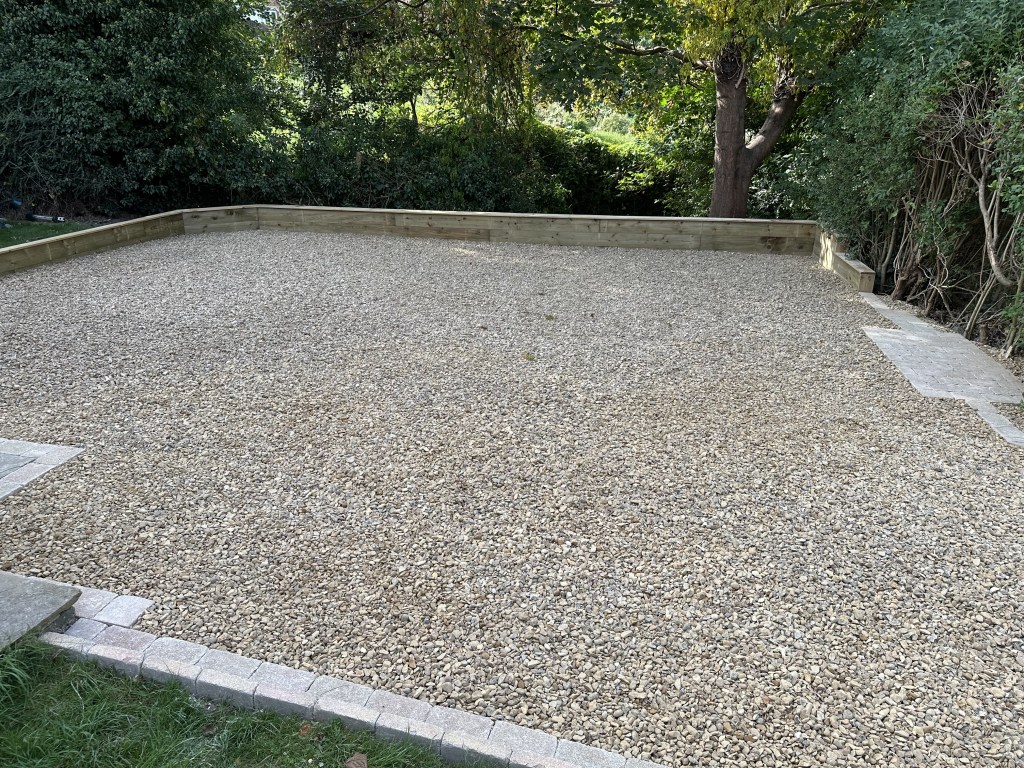
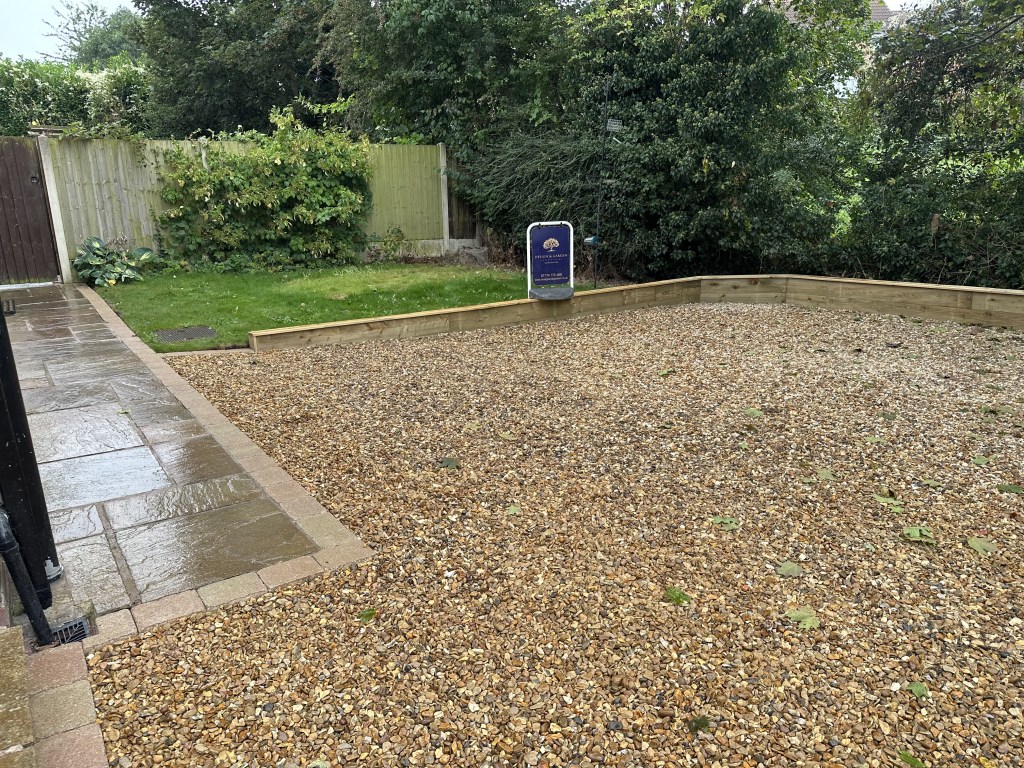
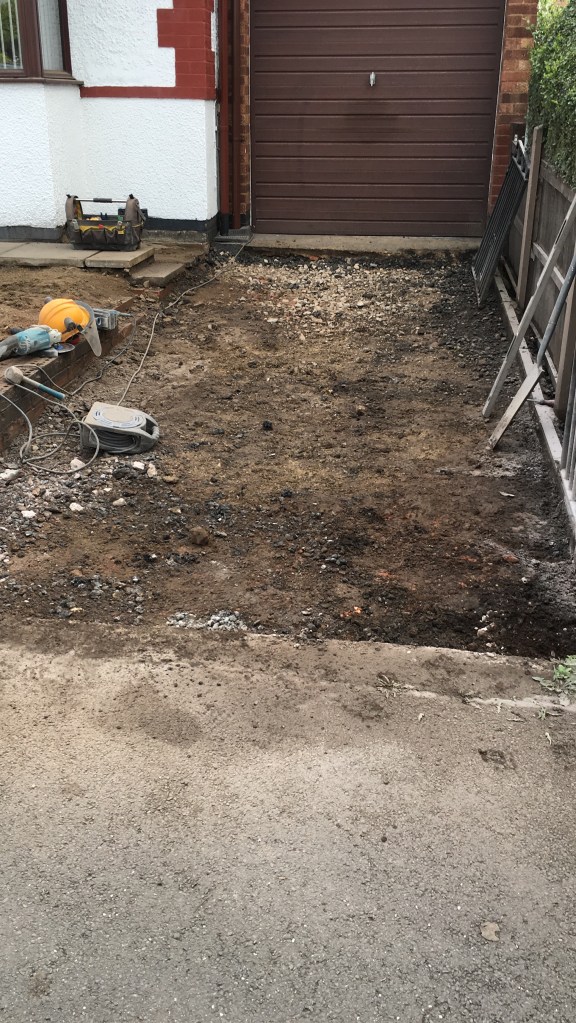
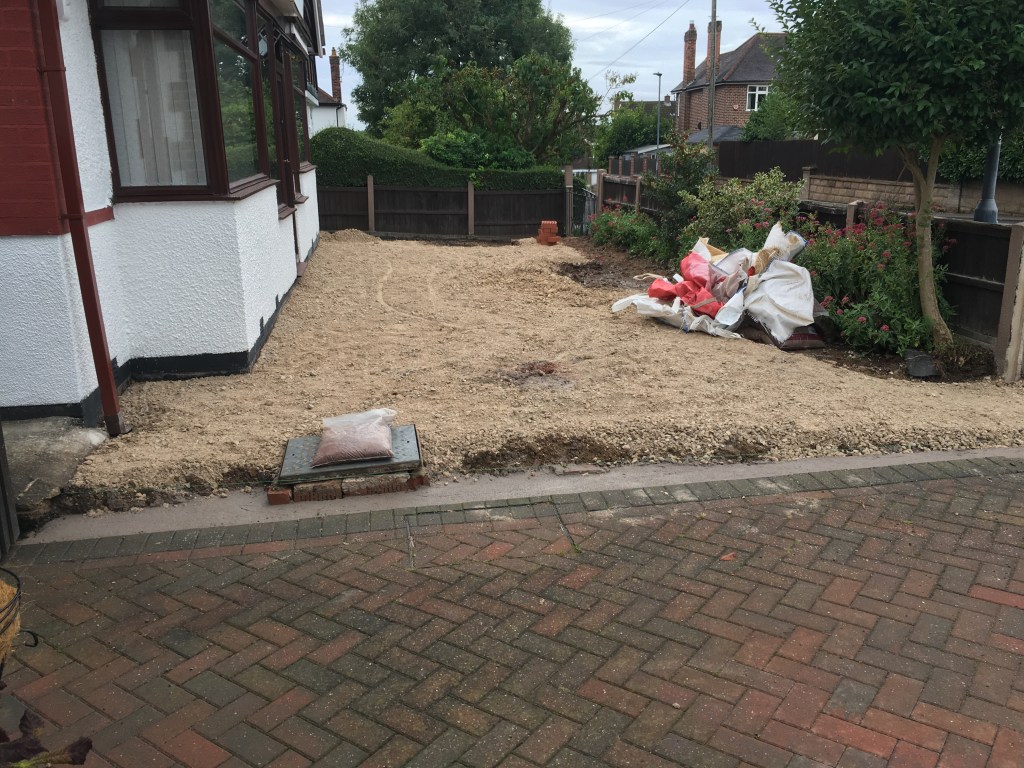
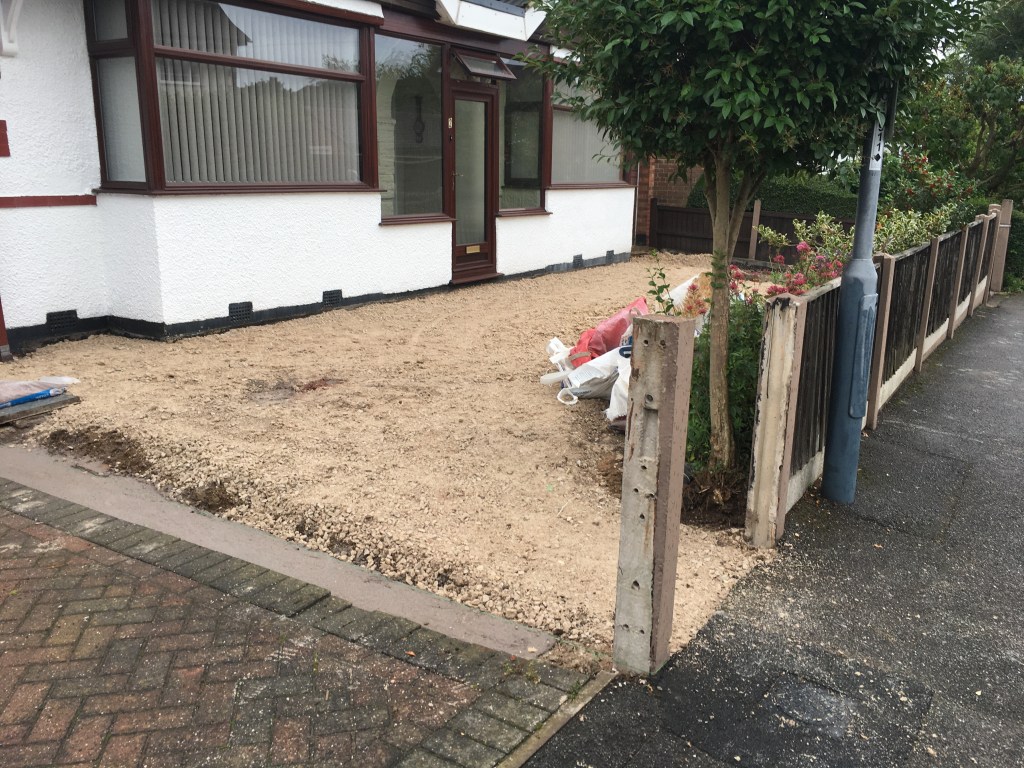
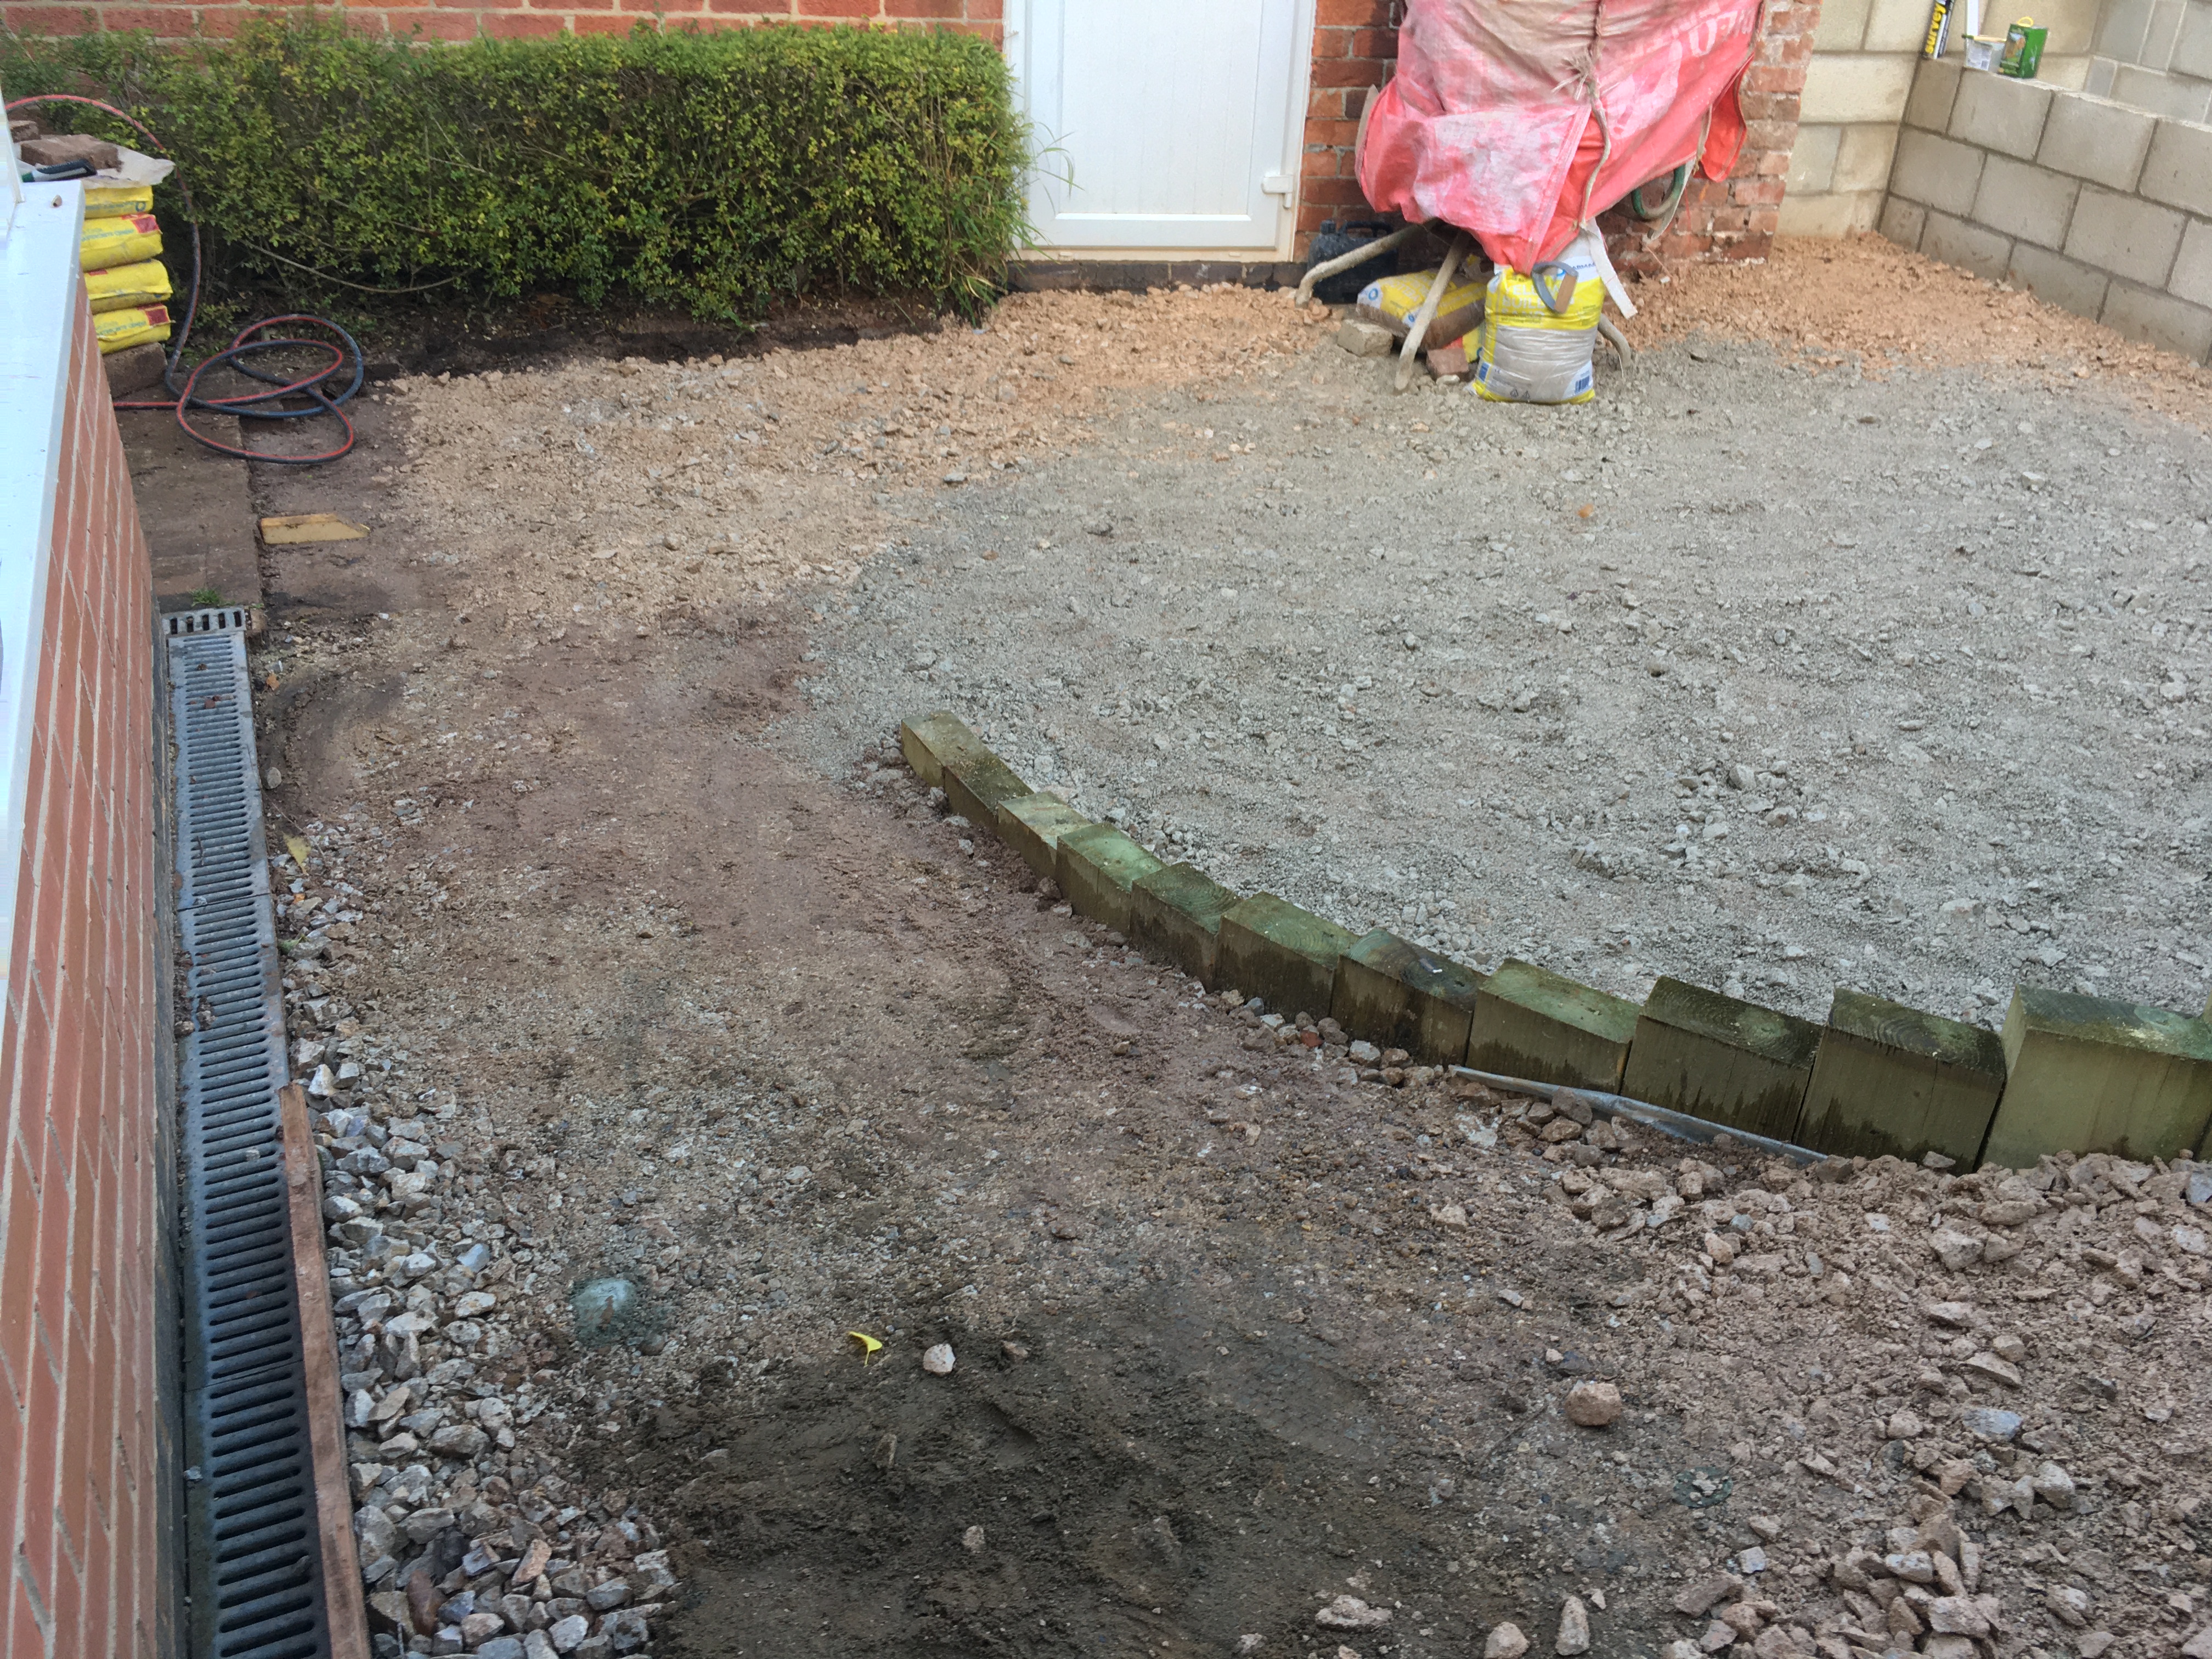
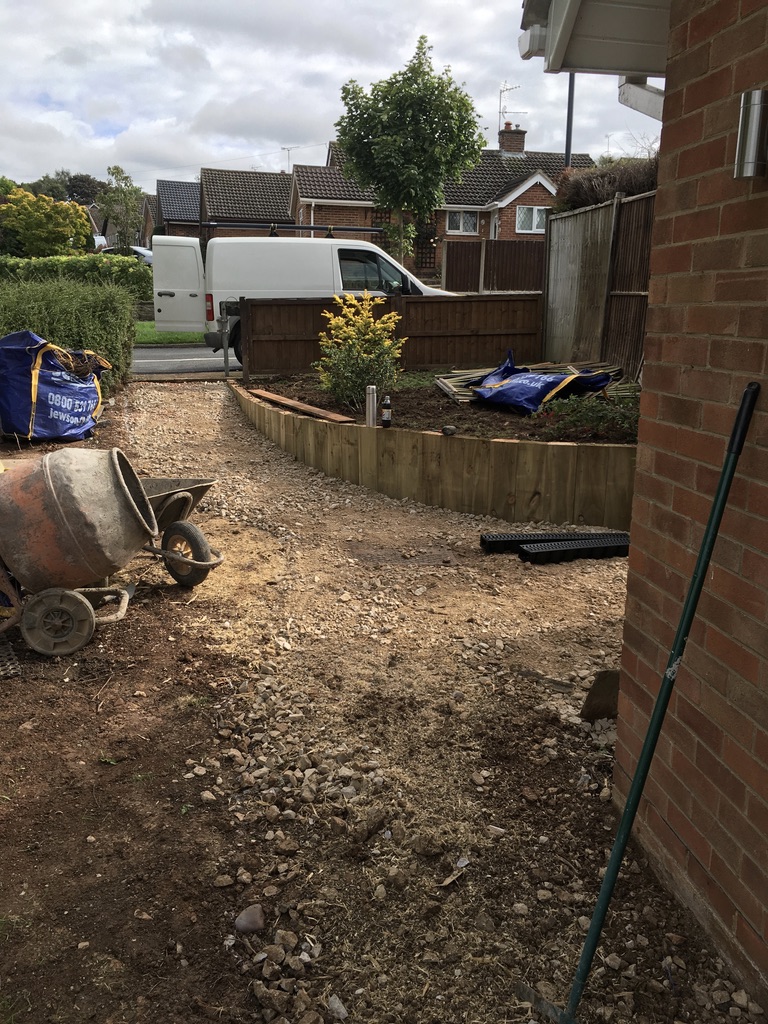
And then 6 tons of MOT stone were added on a weed protector to get the level back again.
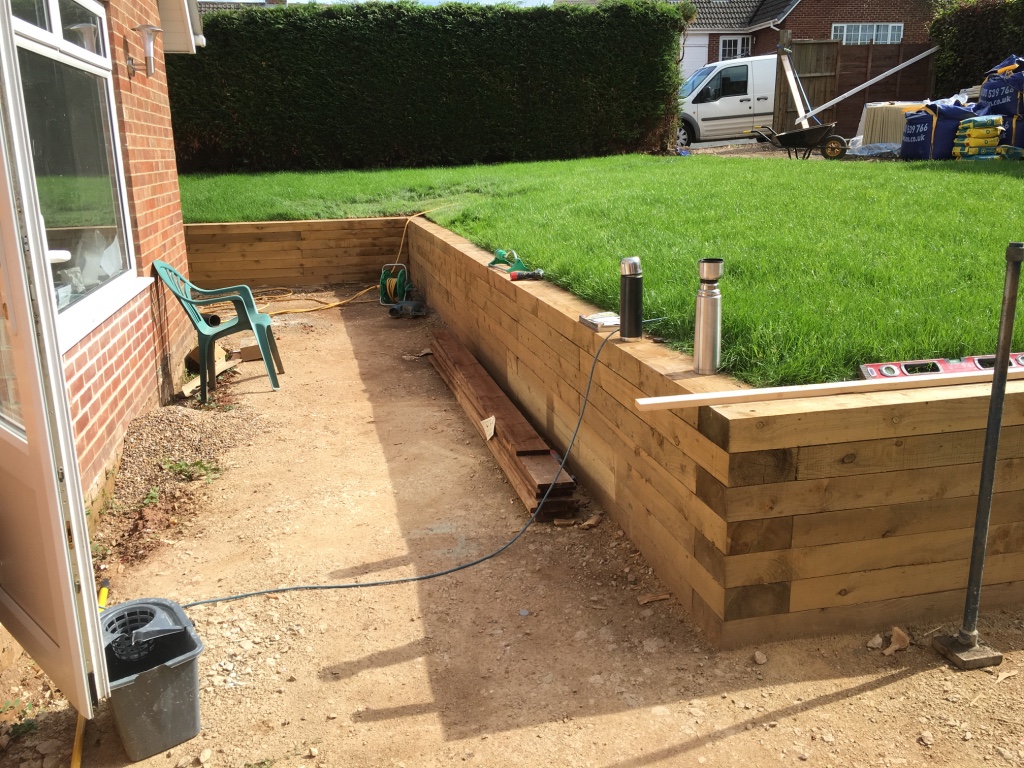
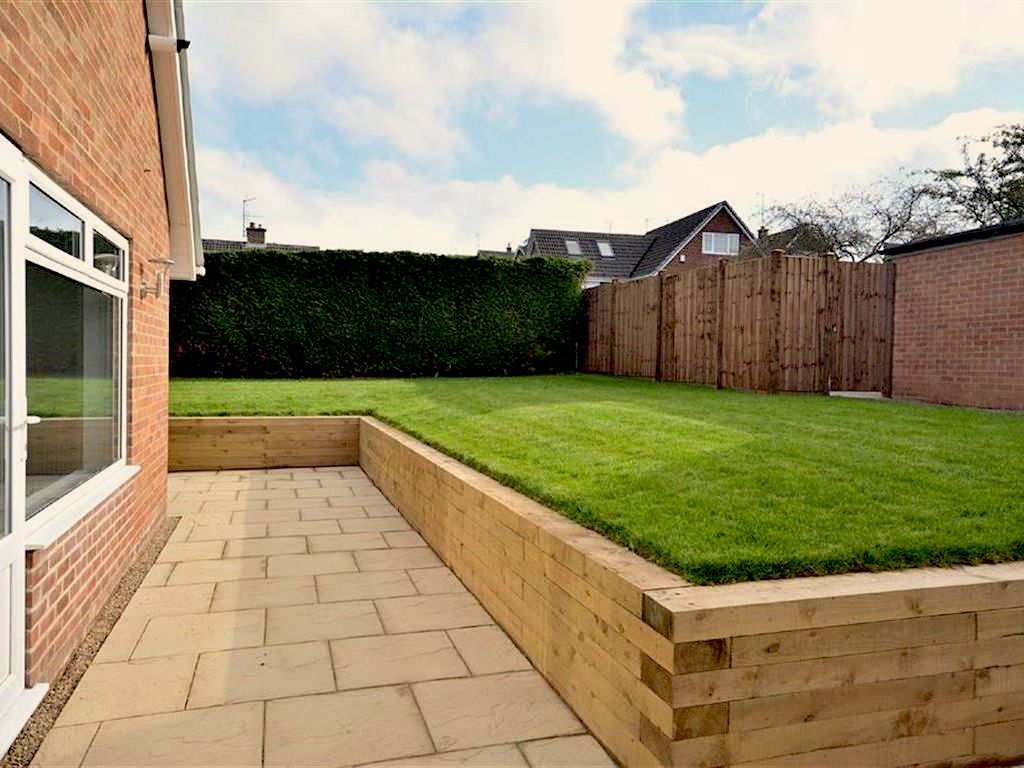
The outer area will be covered with sleepers for ease and to keep the price at a sensible level.
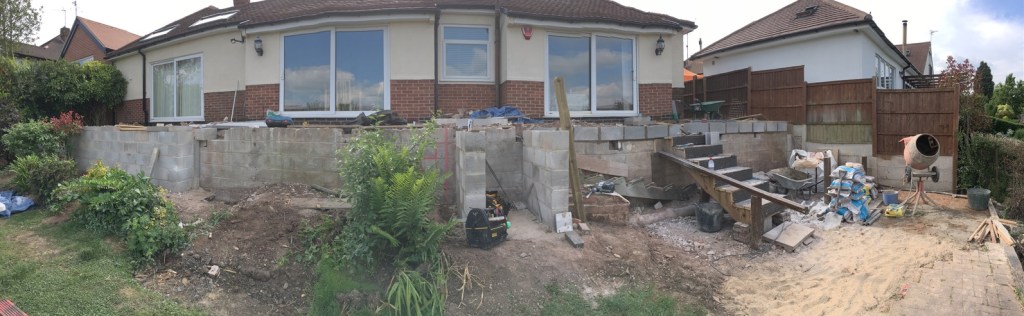
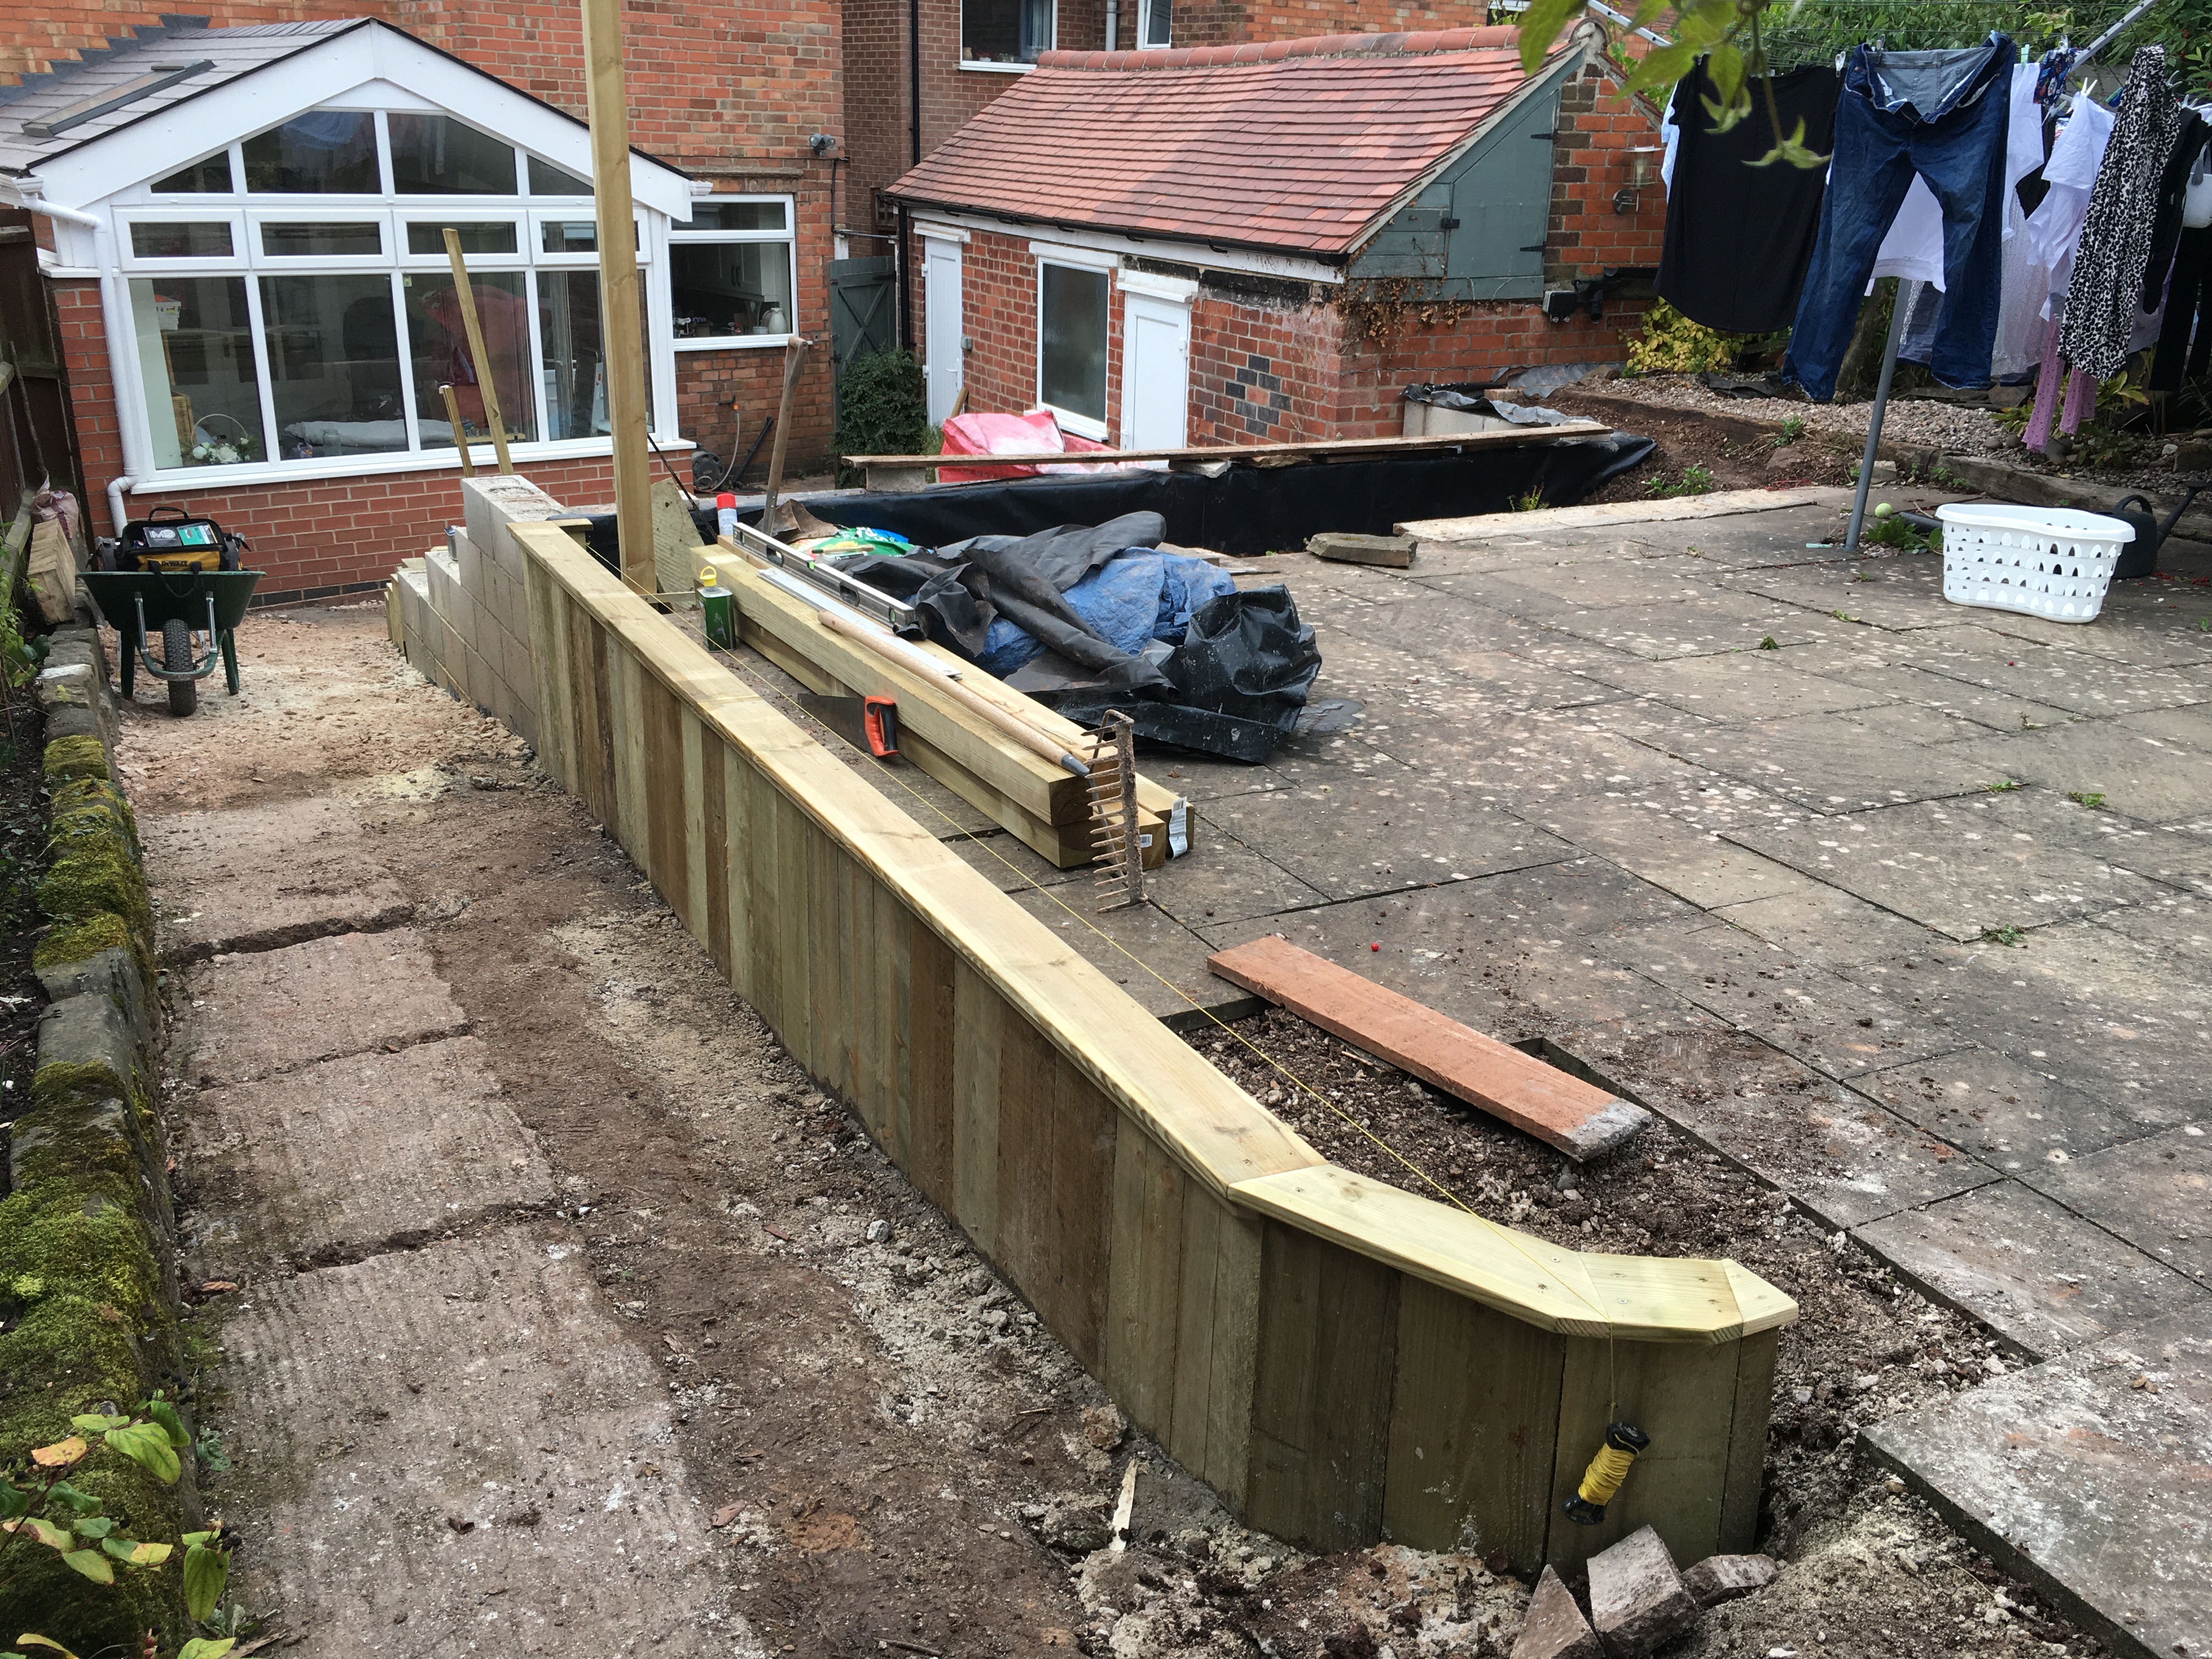
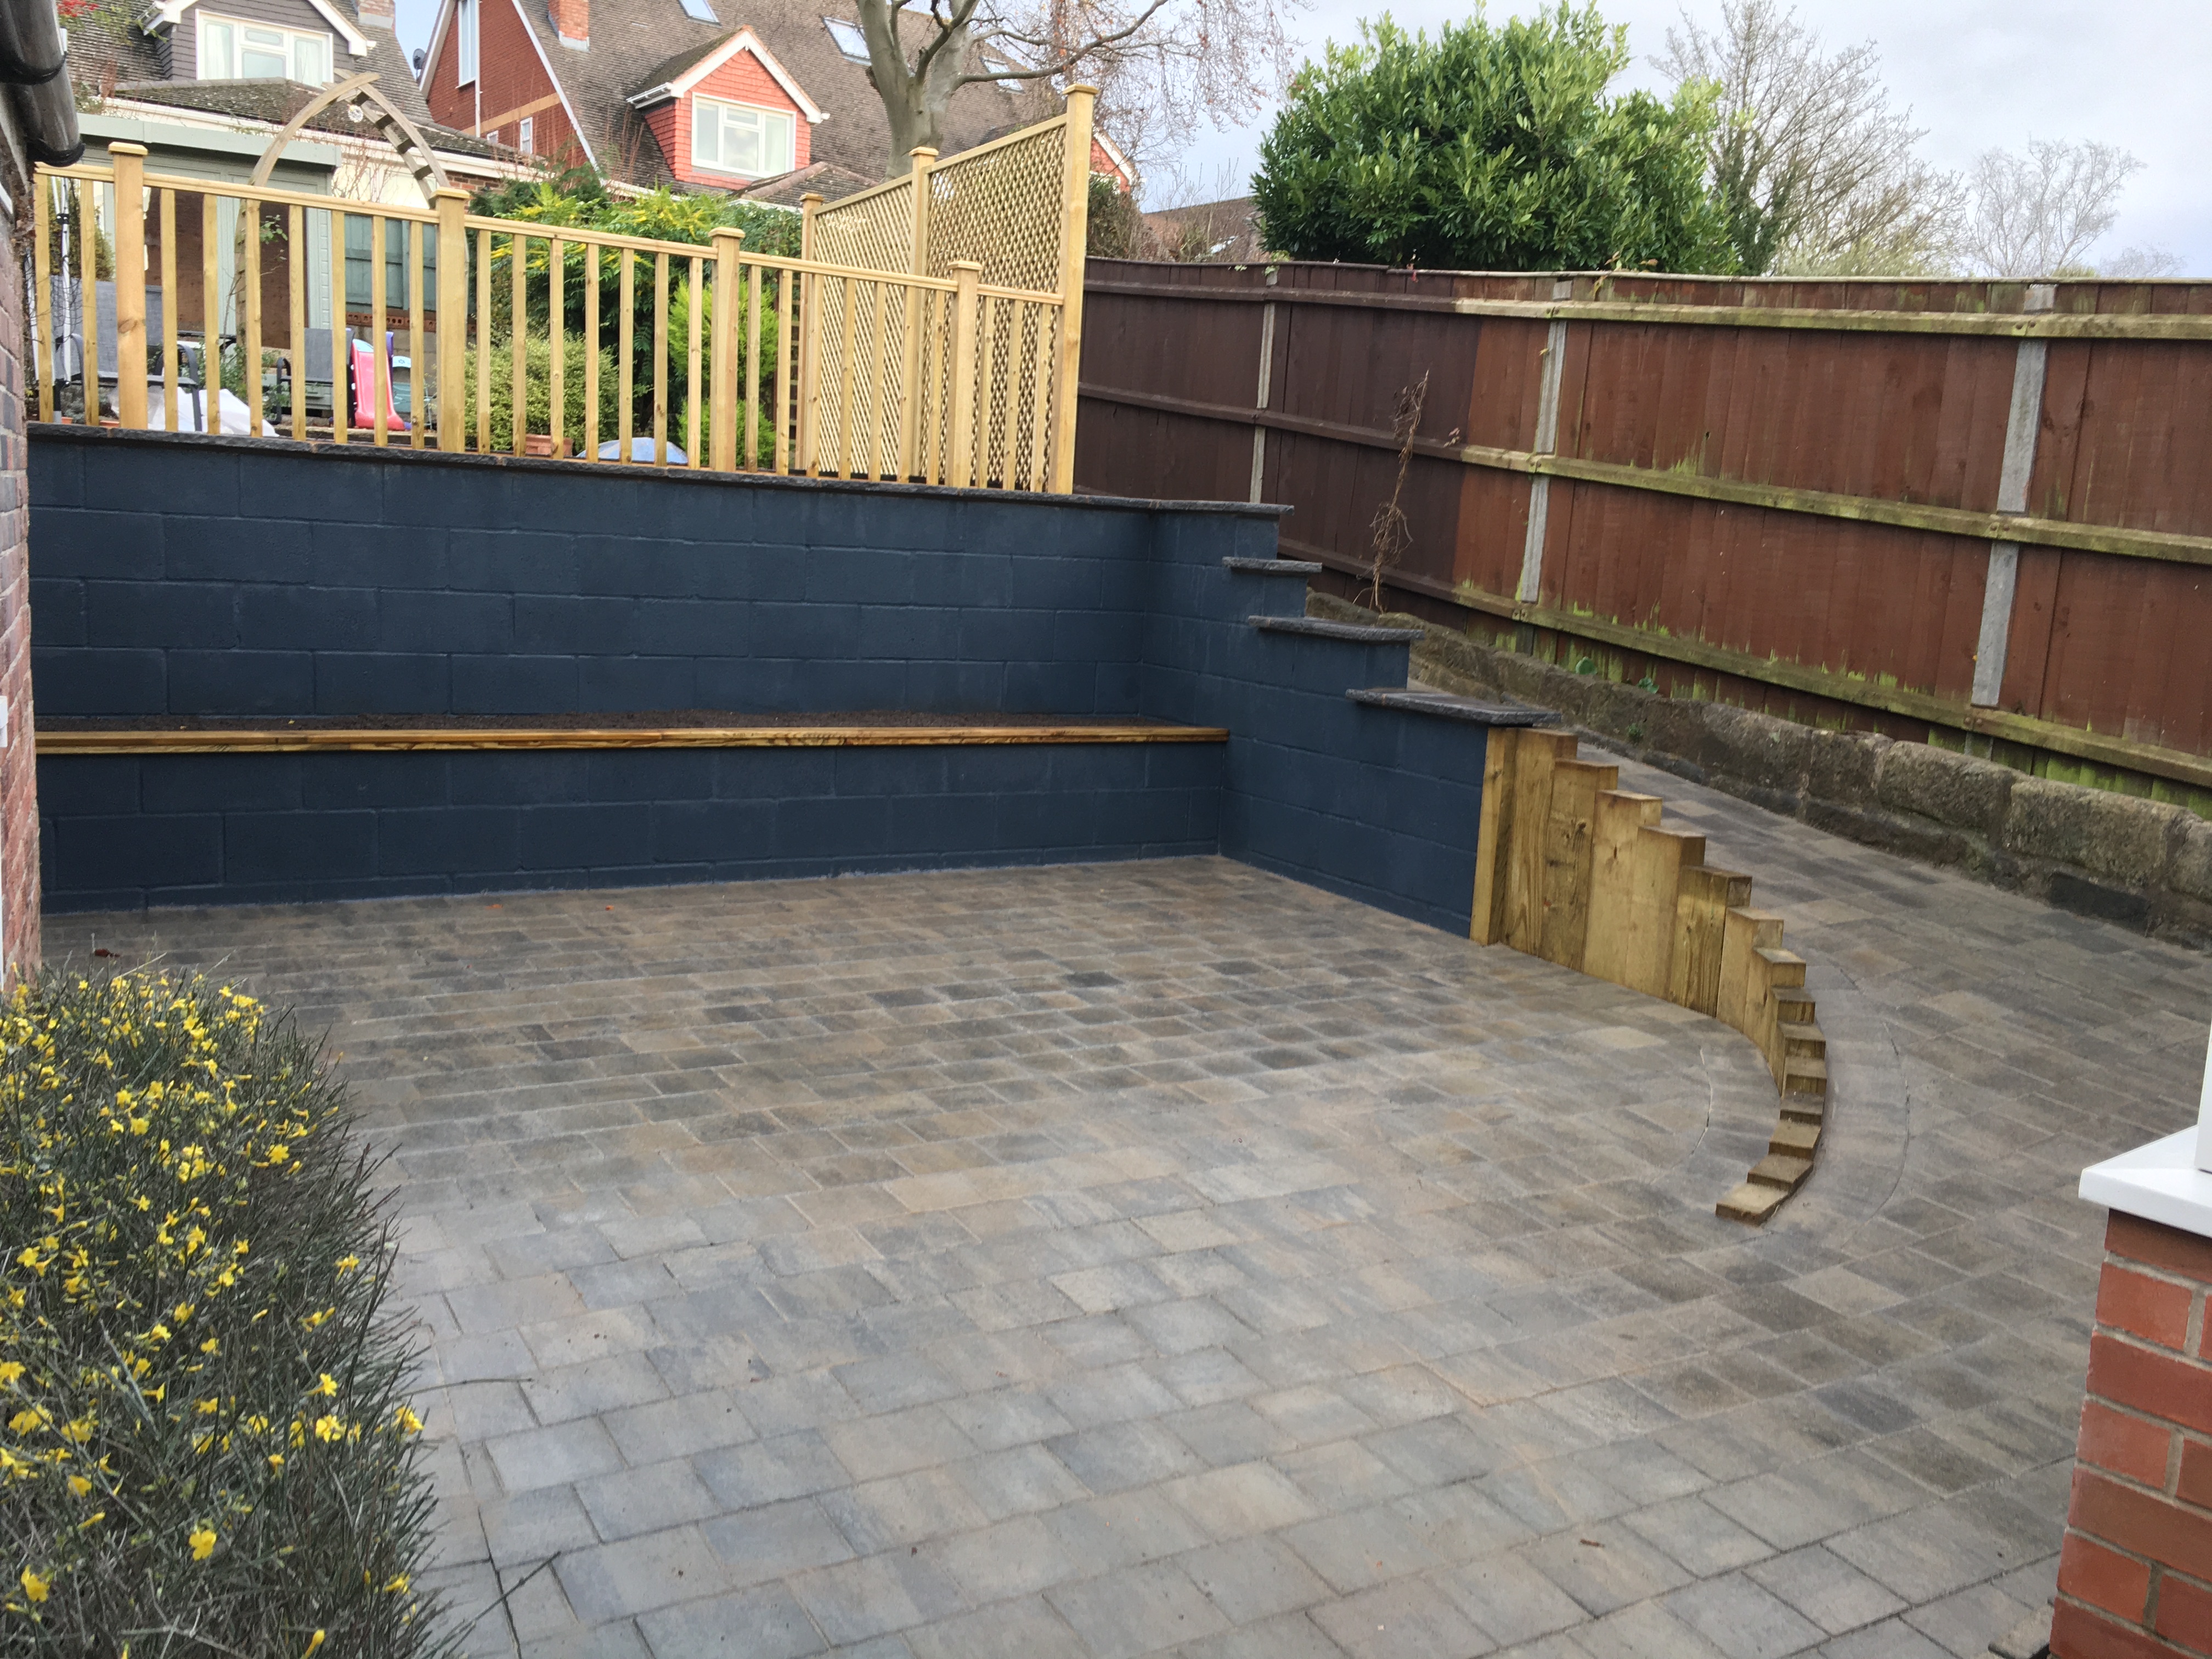
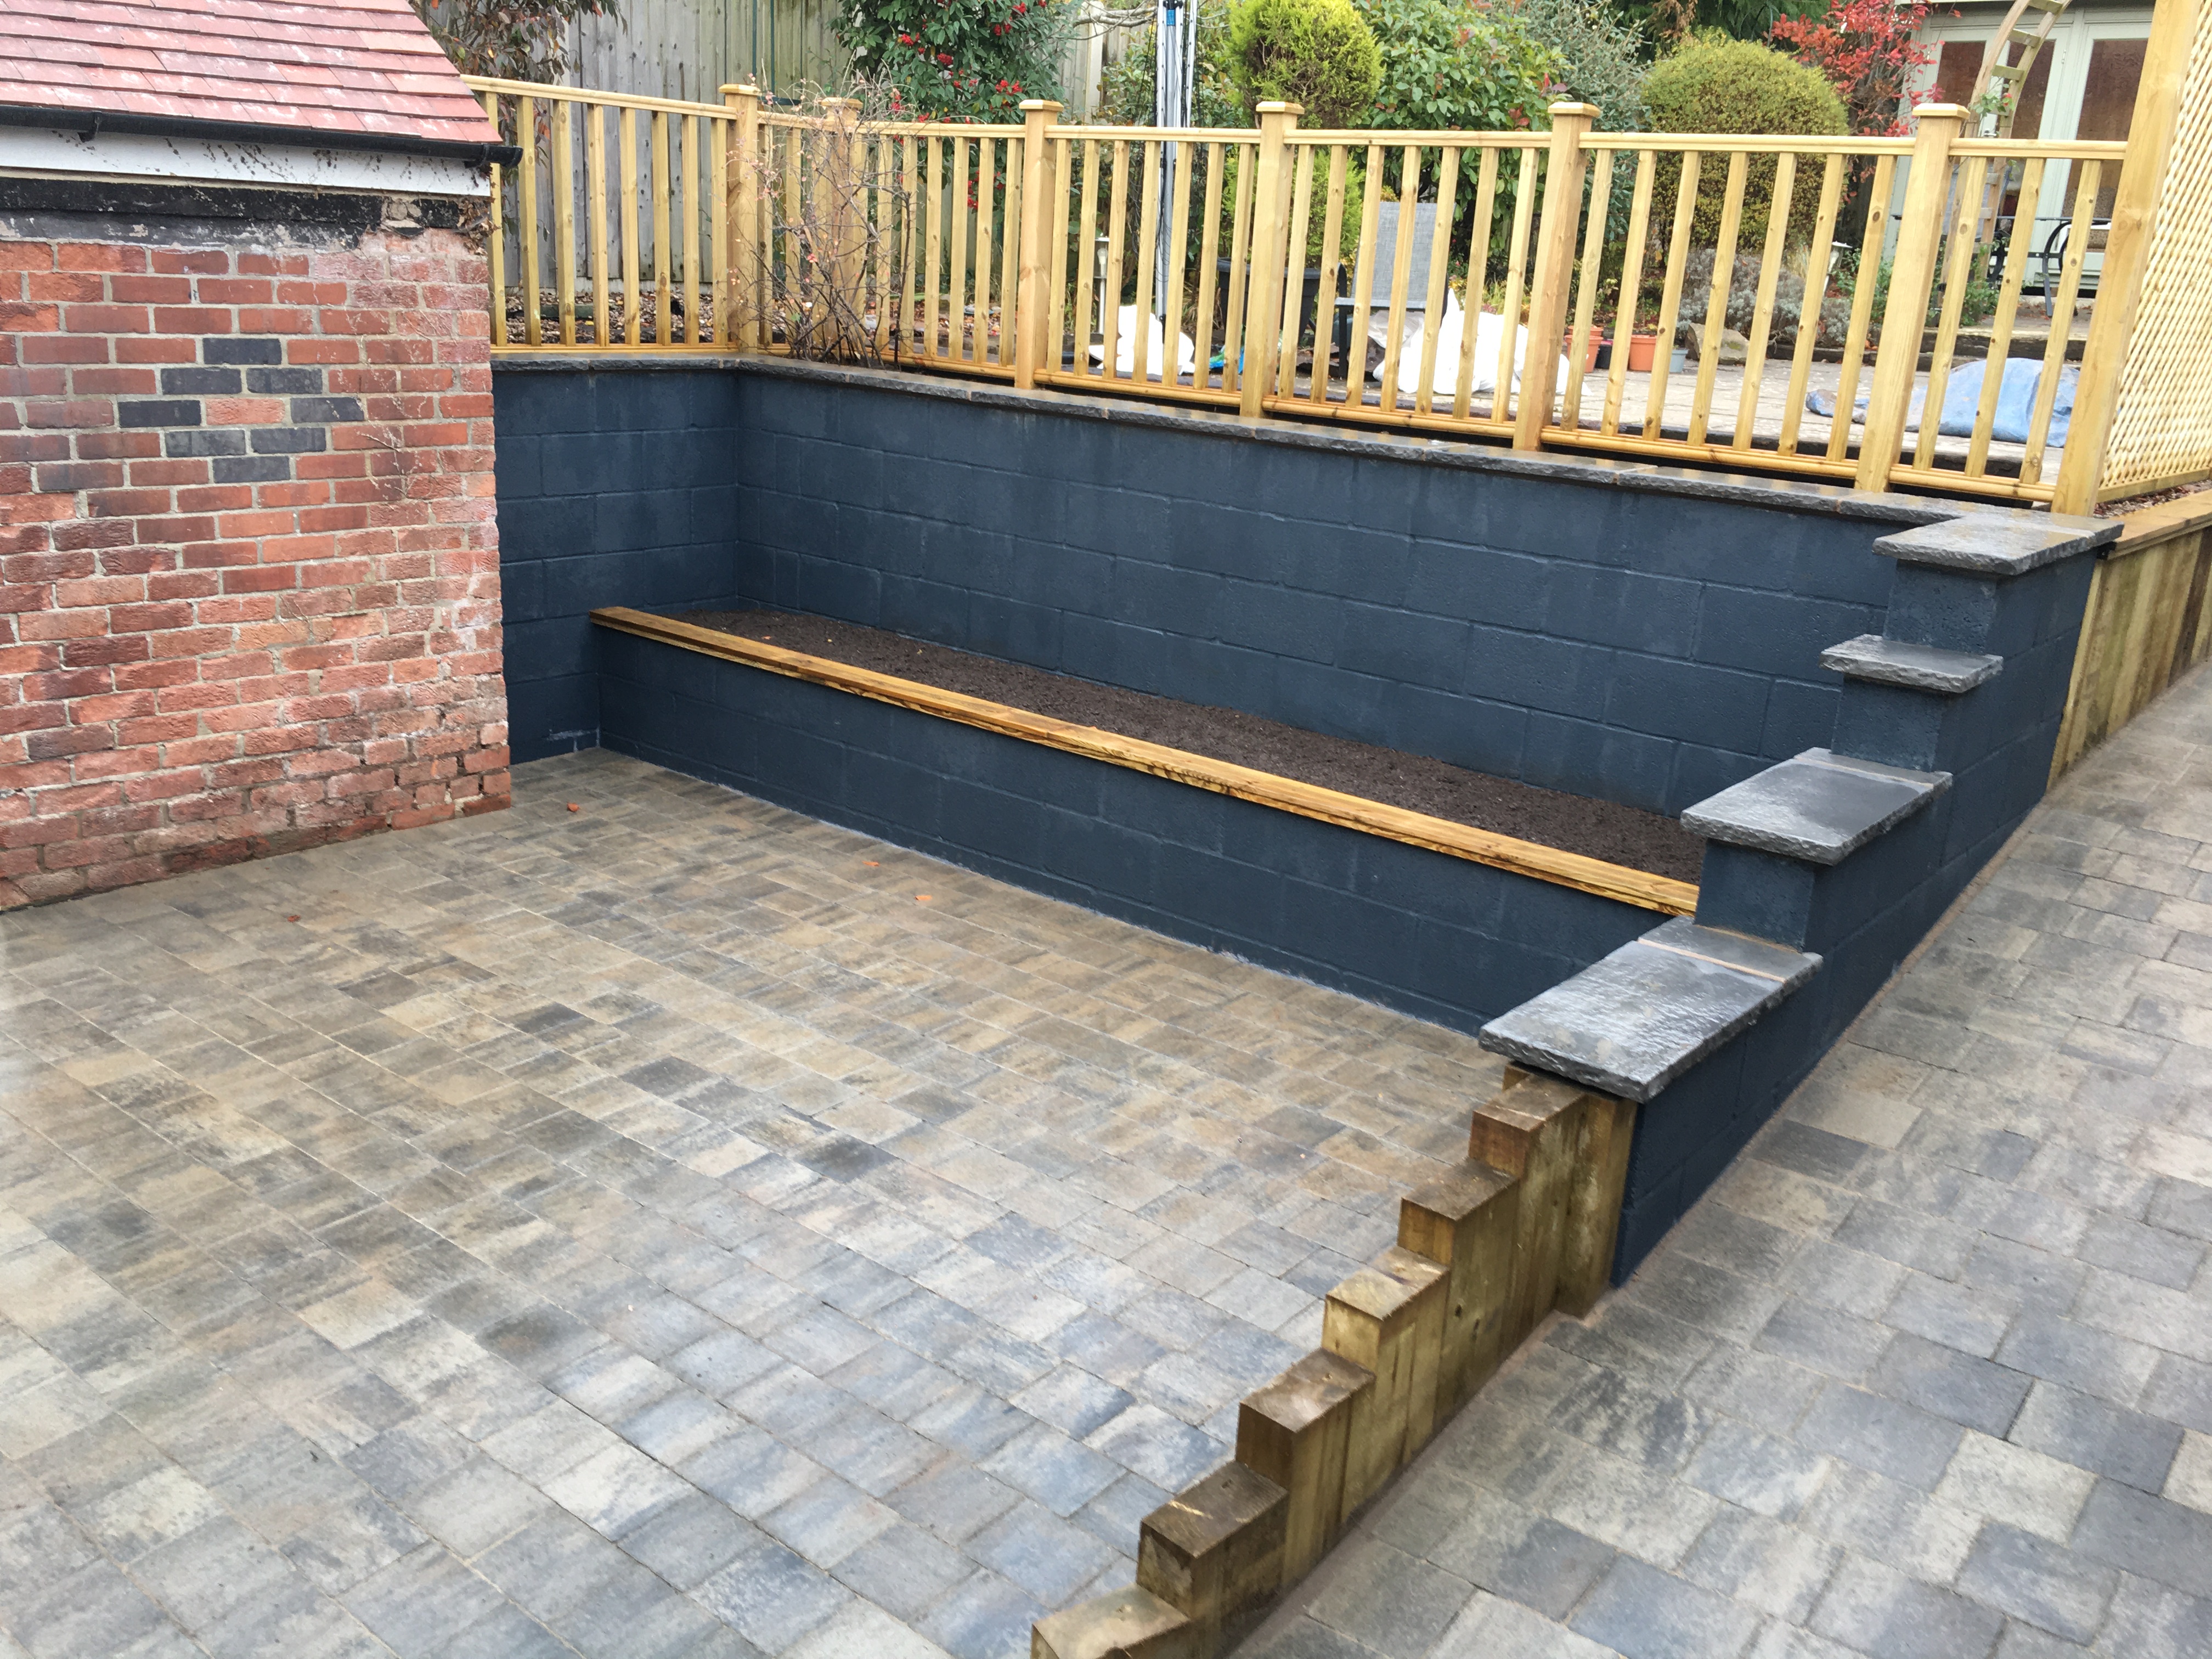
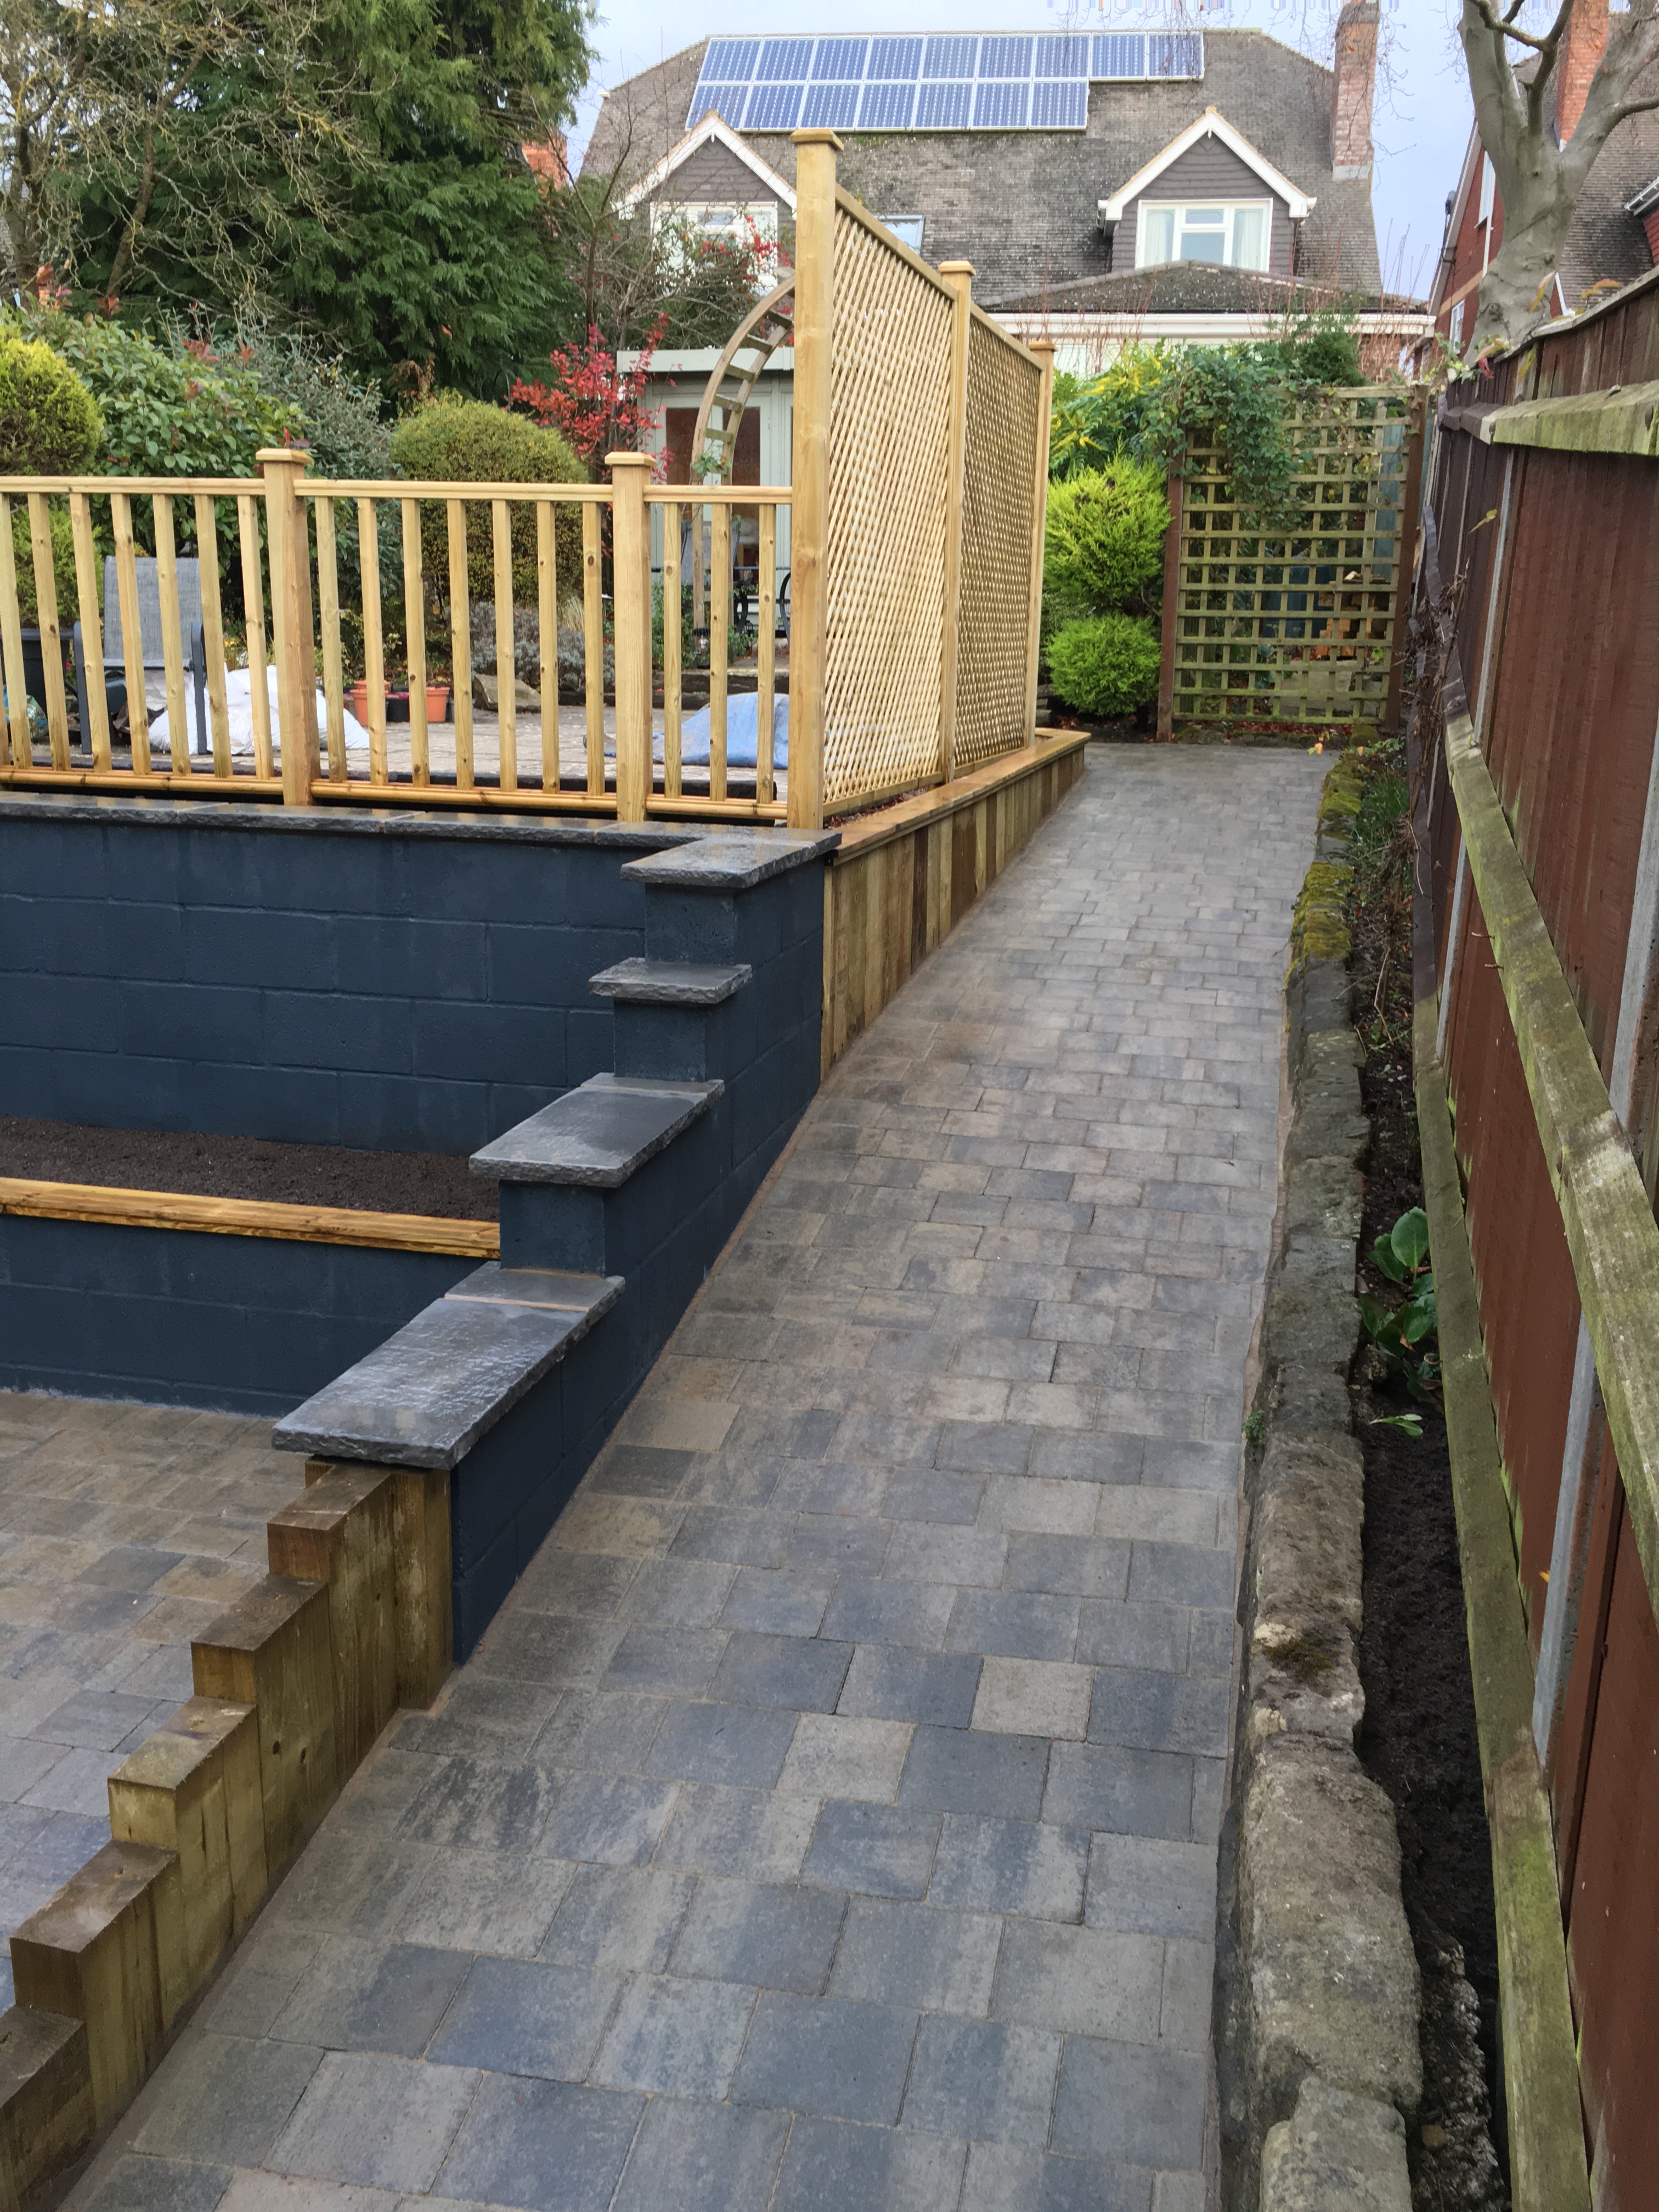
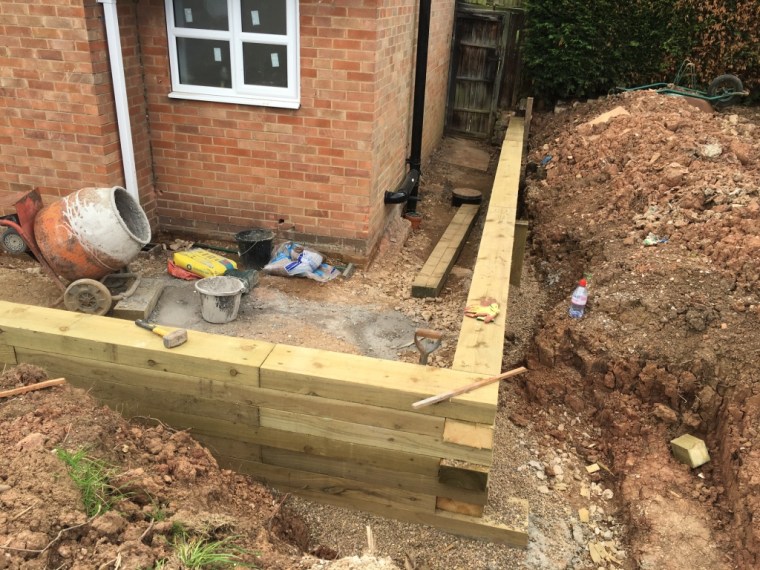
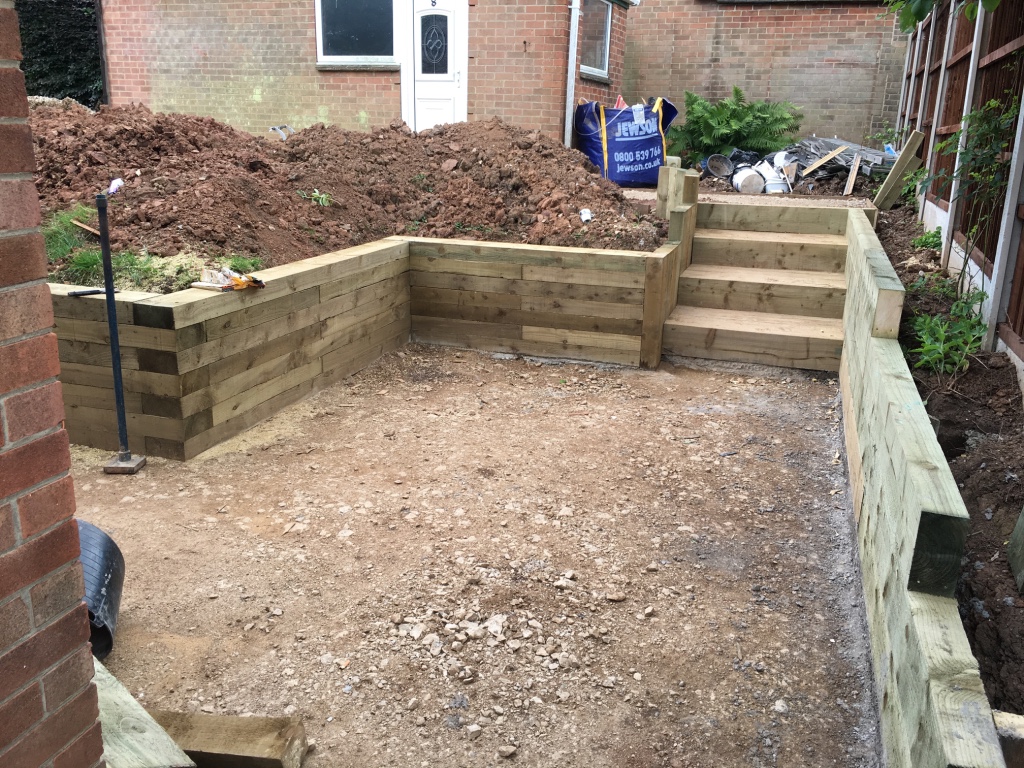
Sleepers now retain the boundary. This was problematic due to a drop of about 2 metres into an old brook below, so it needed deep footings, and heavy supports were added behind the woodwork to support any mishap that may occur whilst turning a car on the driveway.
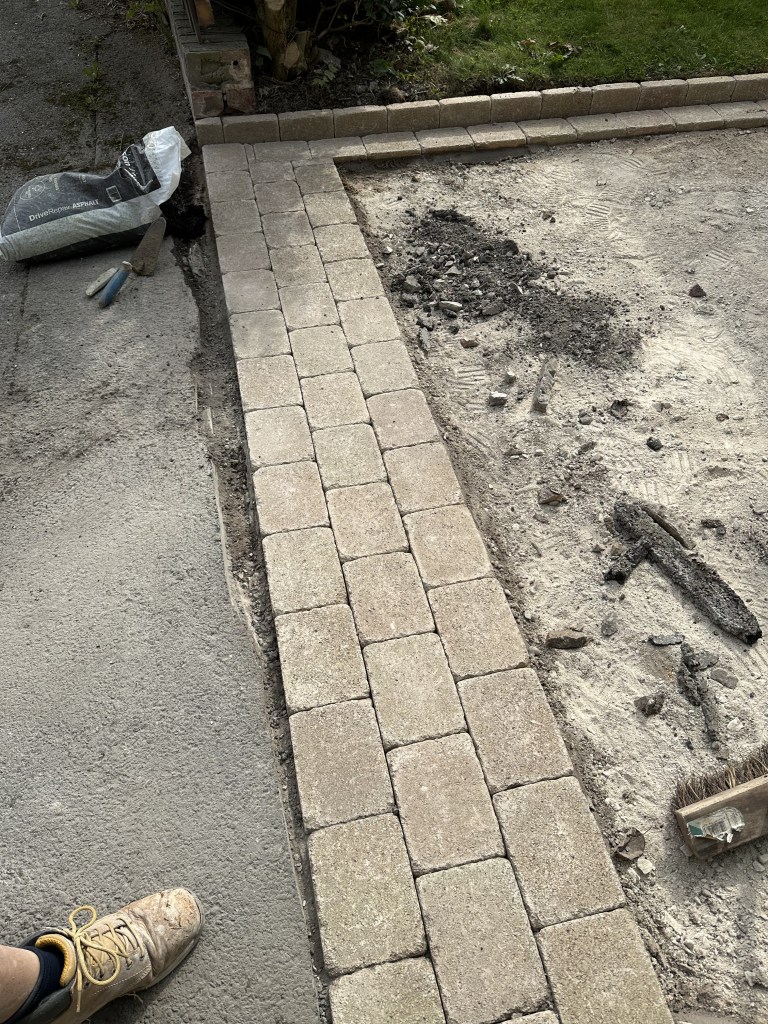
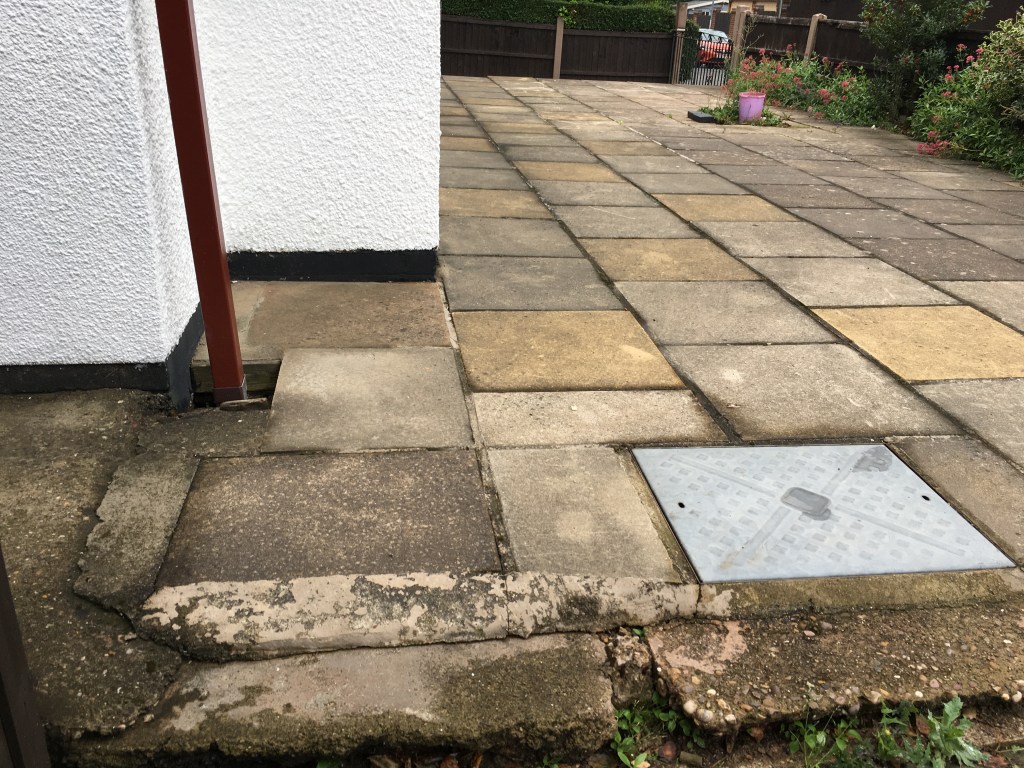
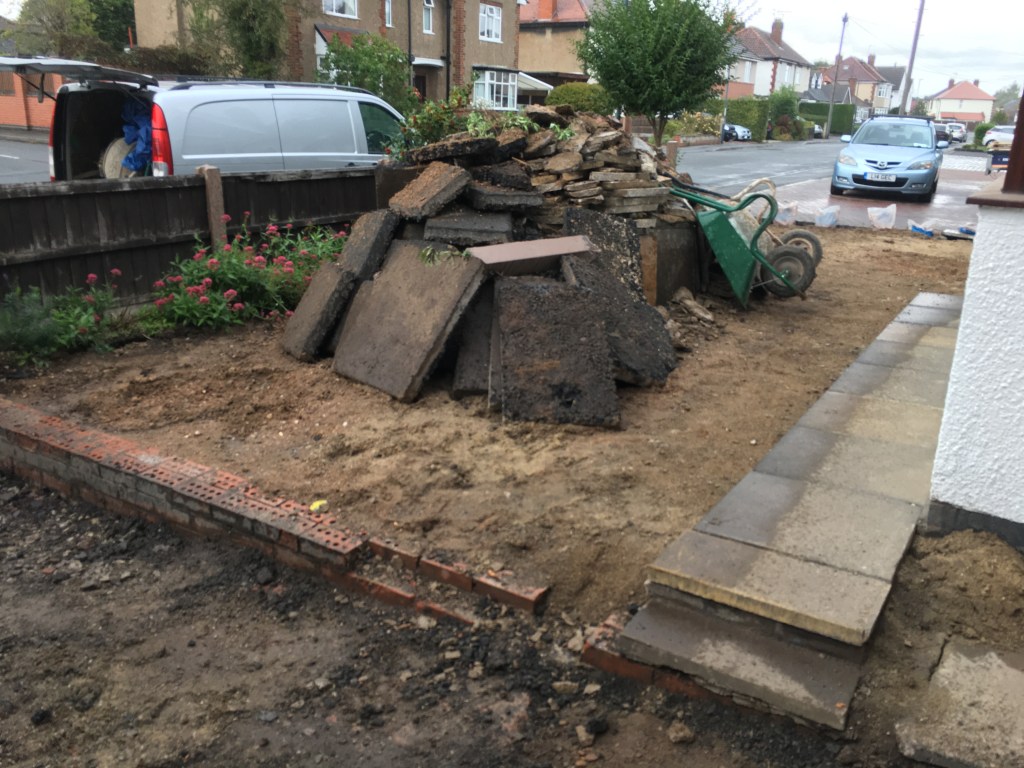
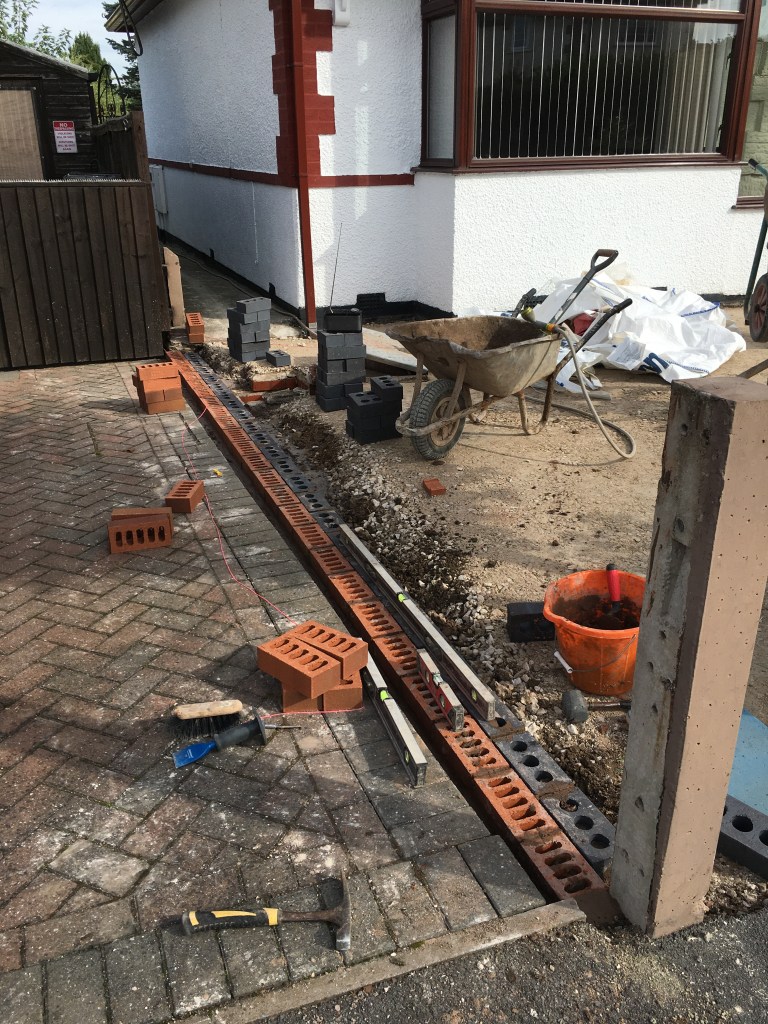
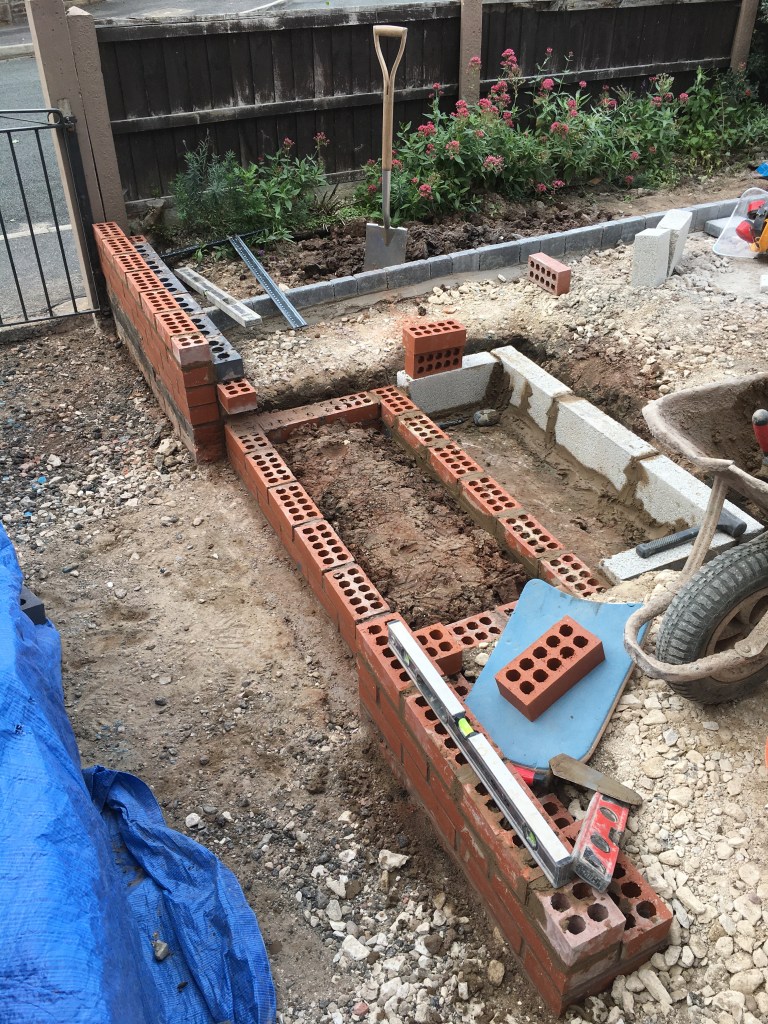
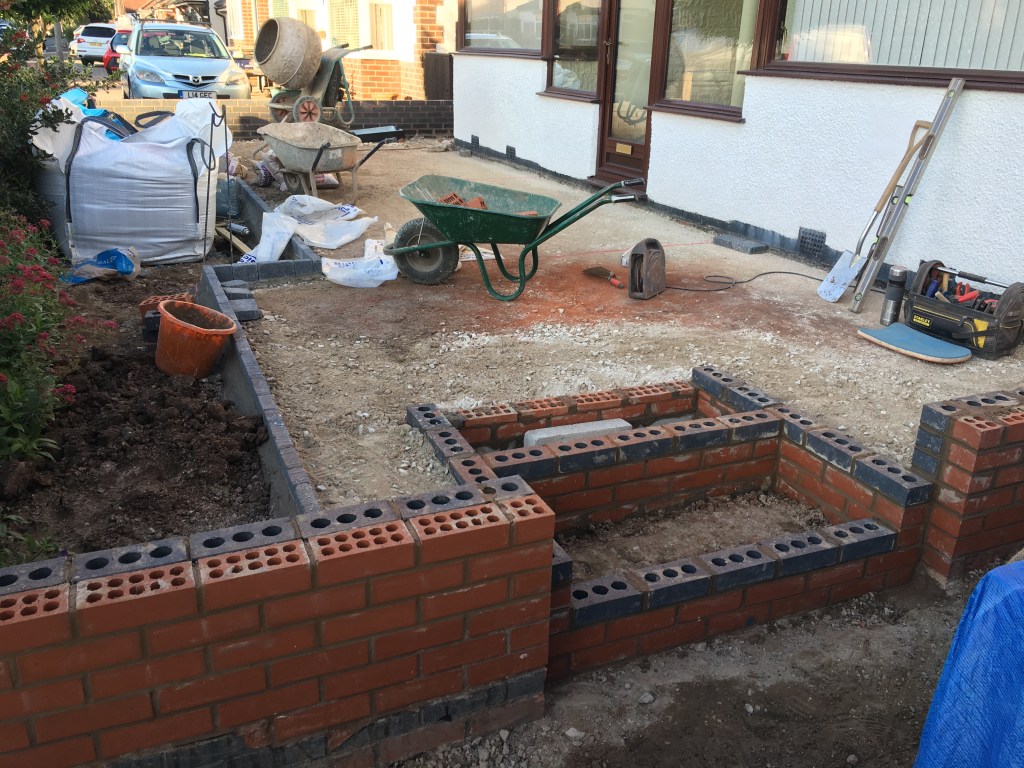
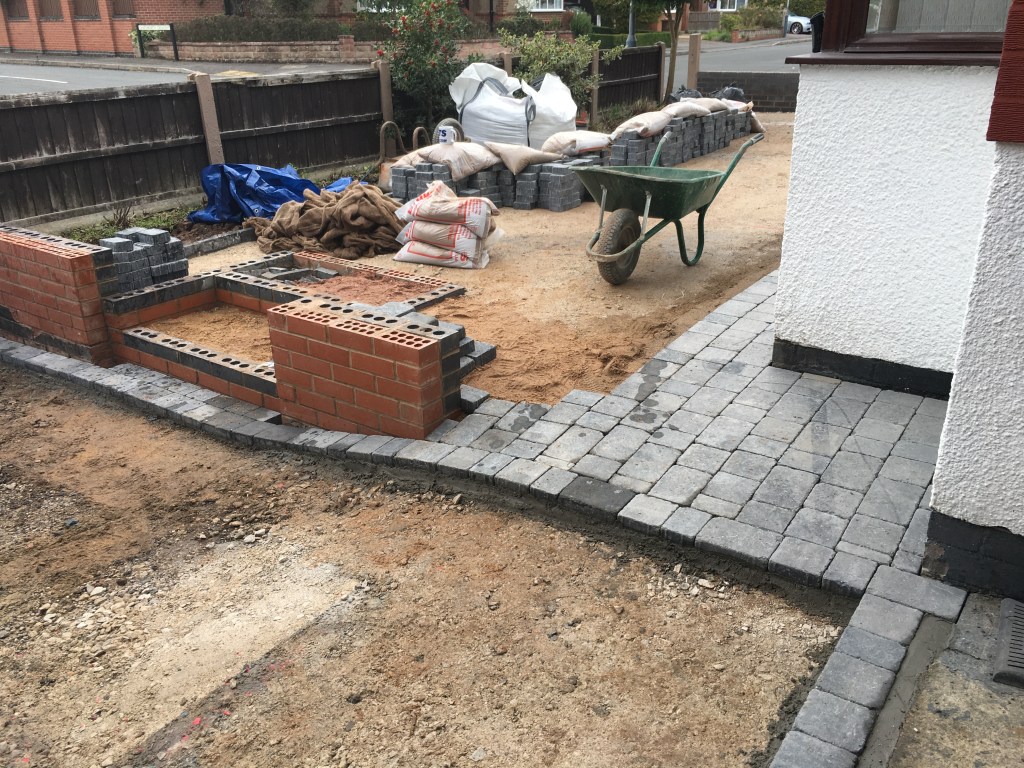
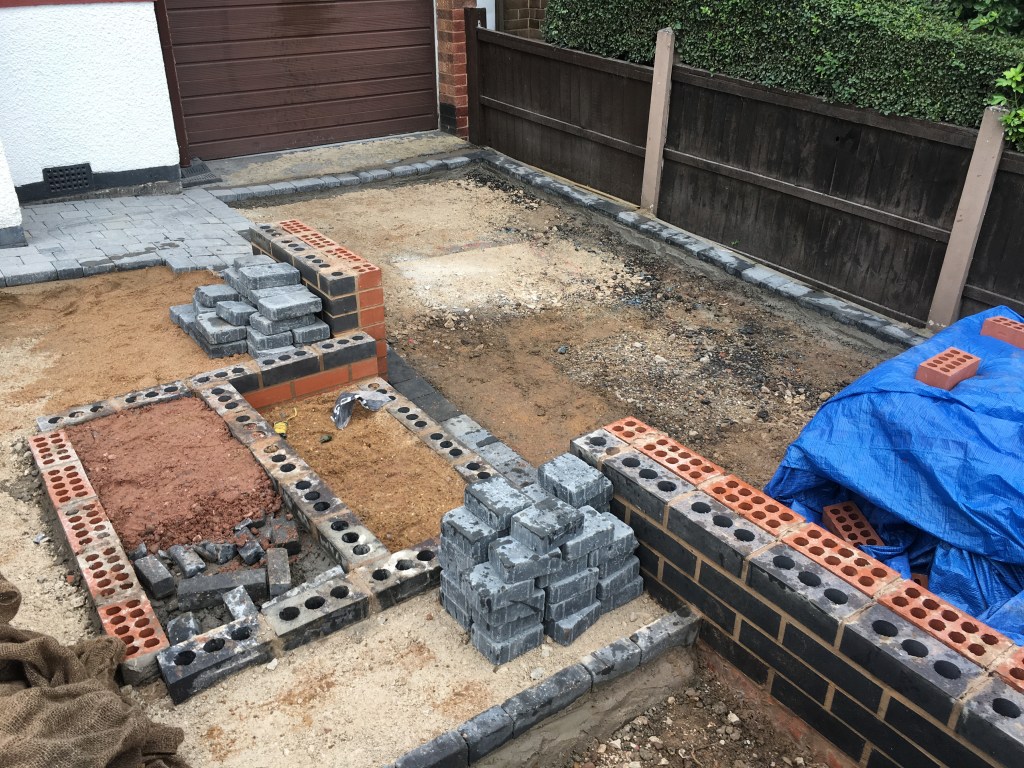
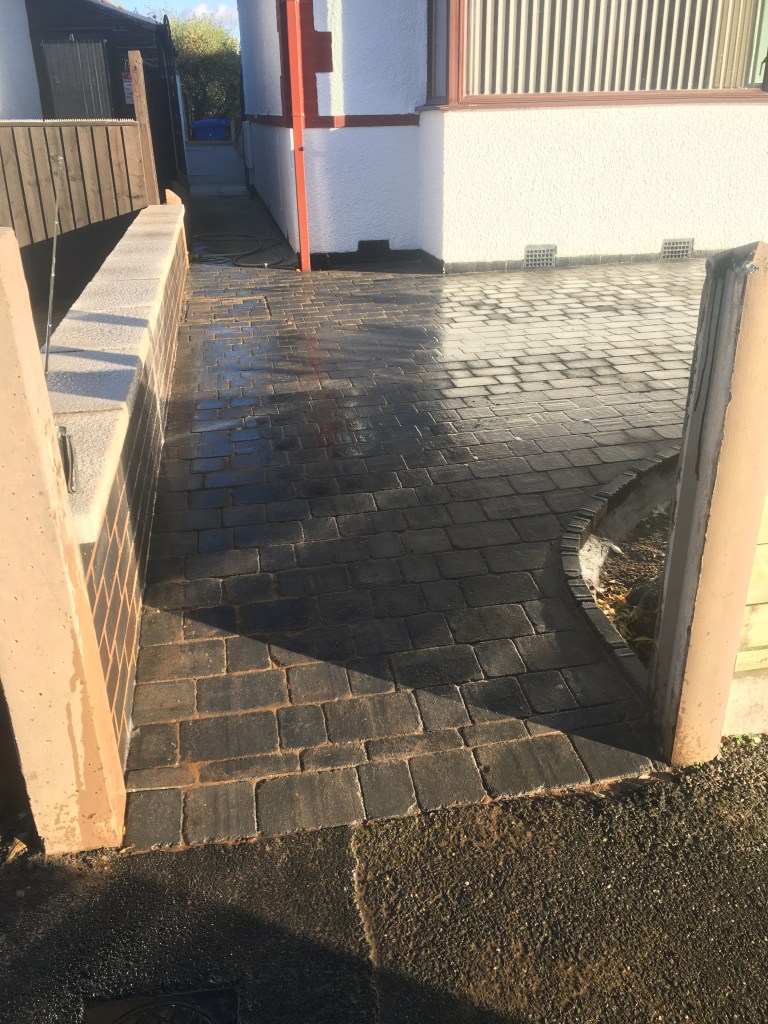
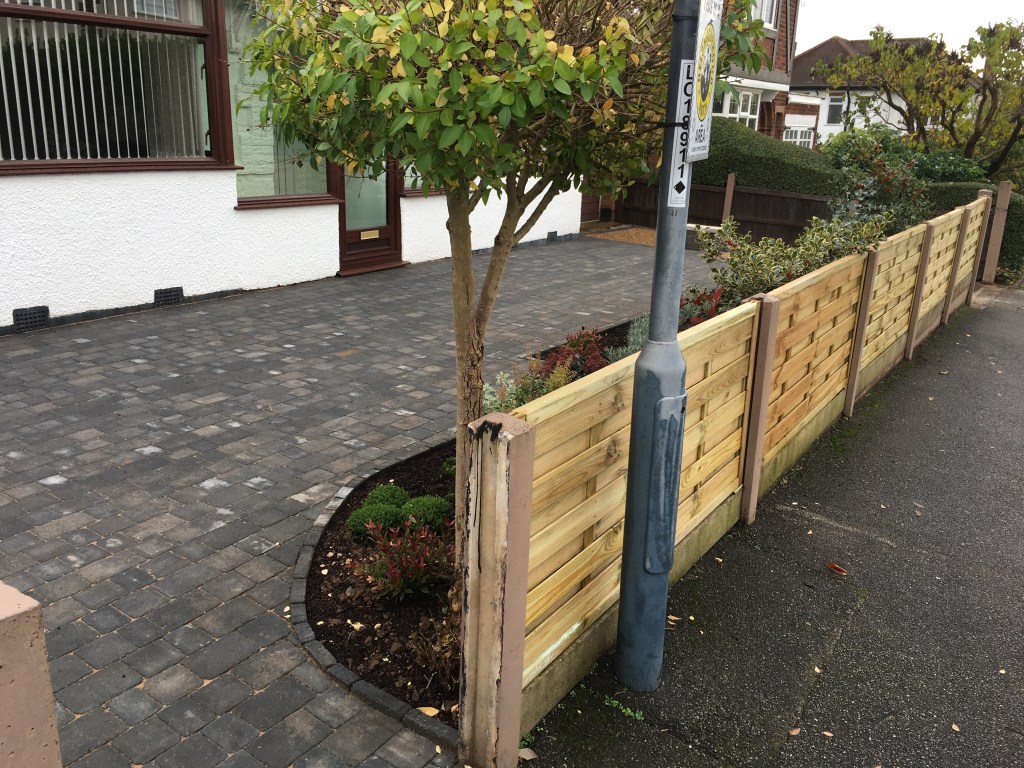
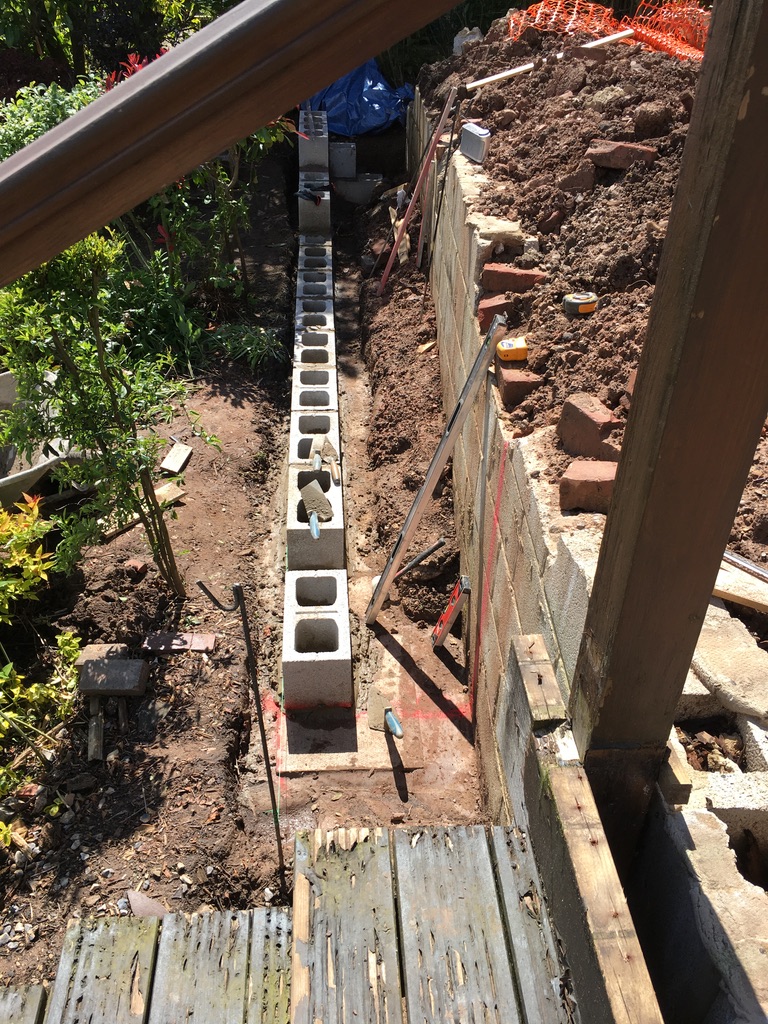
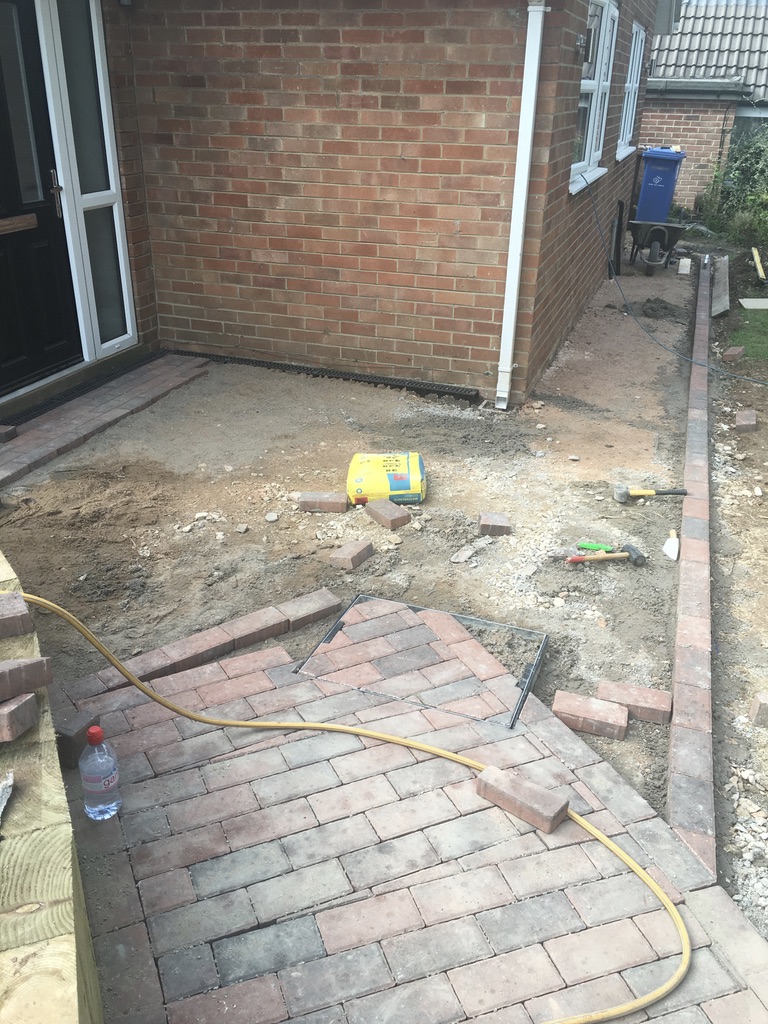
Now a new block edging is added to support and brace the other side of the drive.
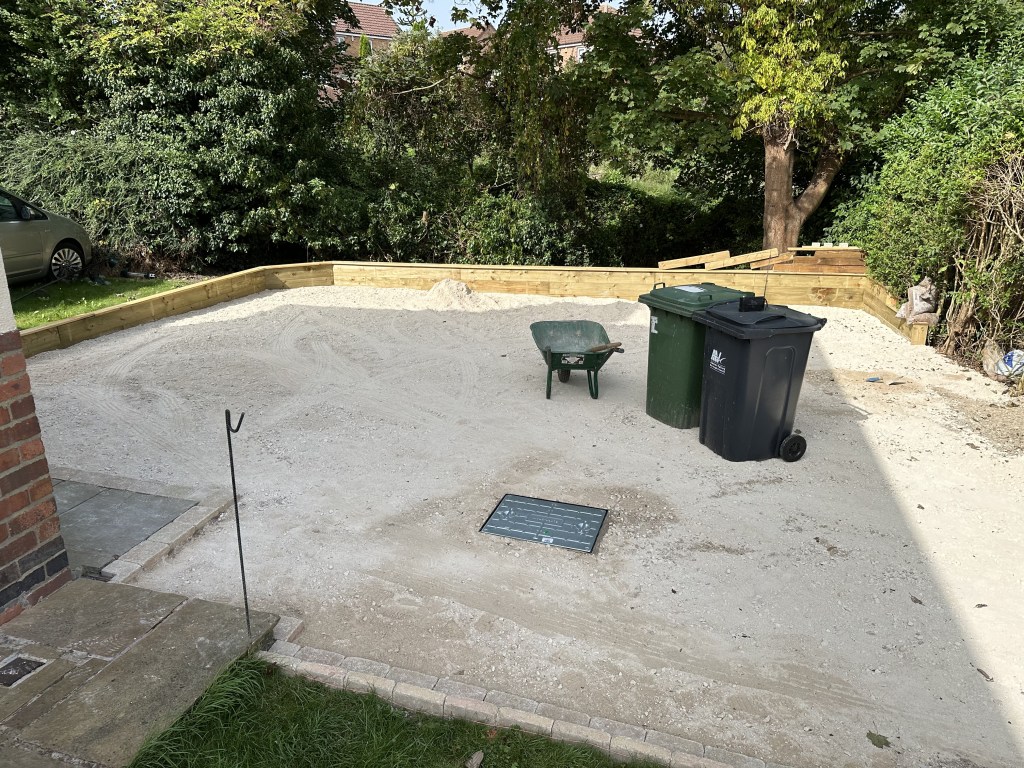
Block edging added. A new drain cover is fitted and leveled.
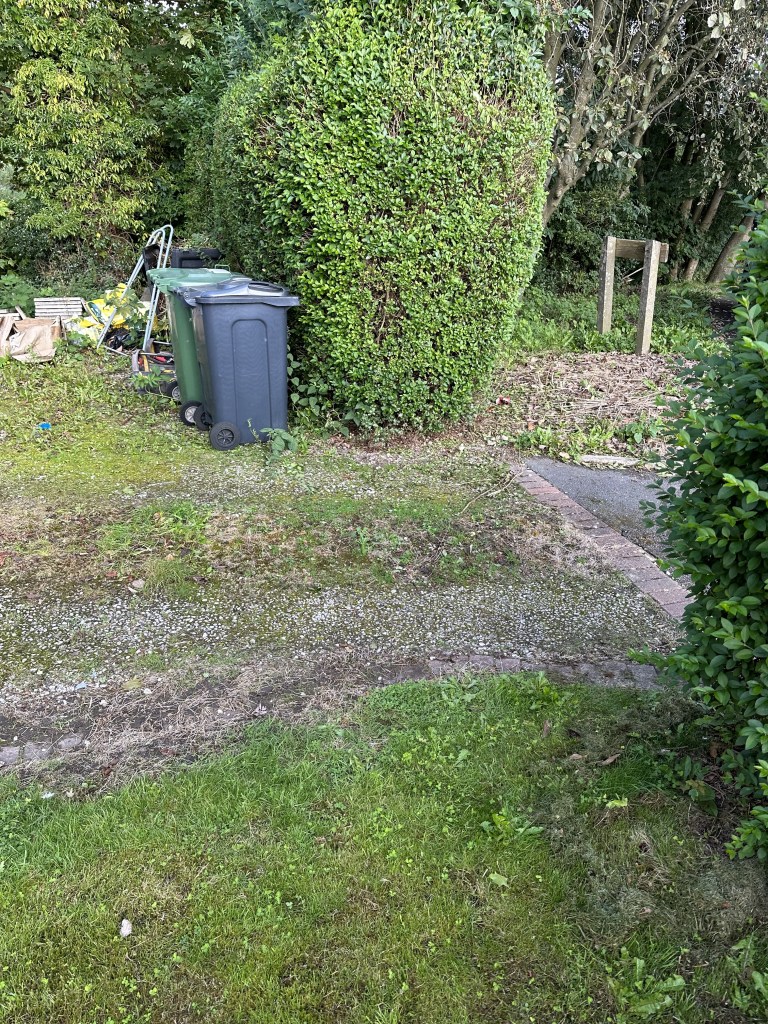
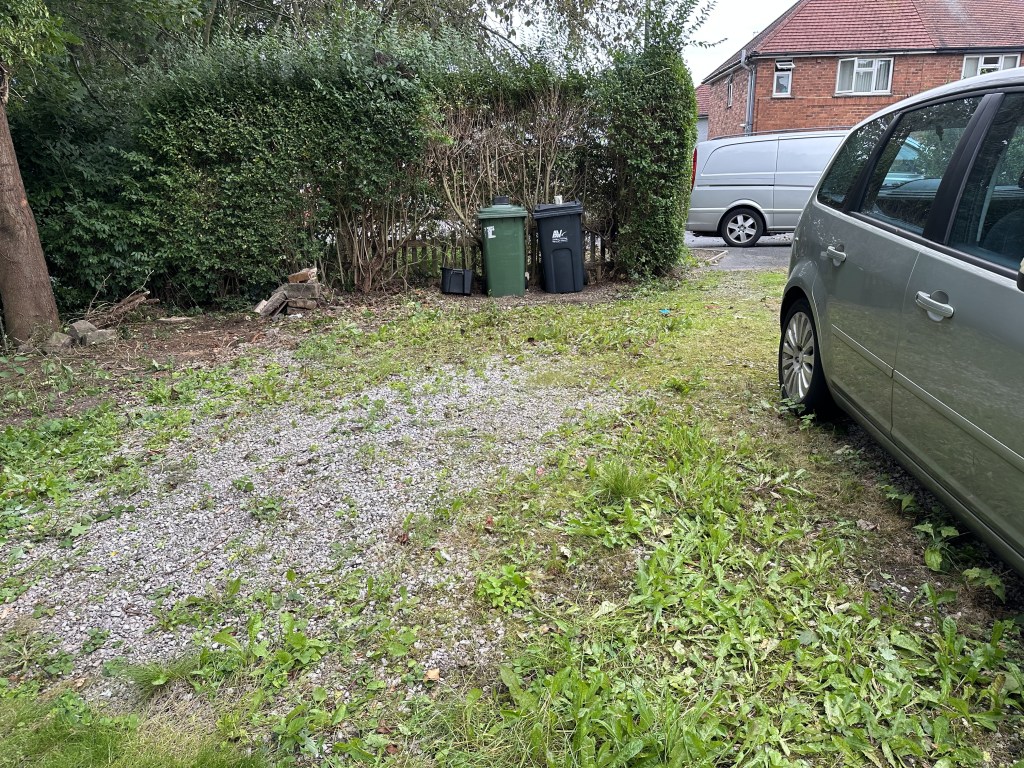
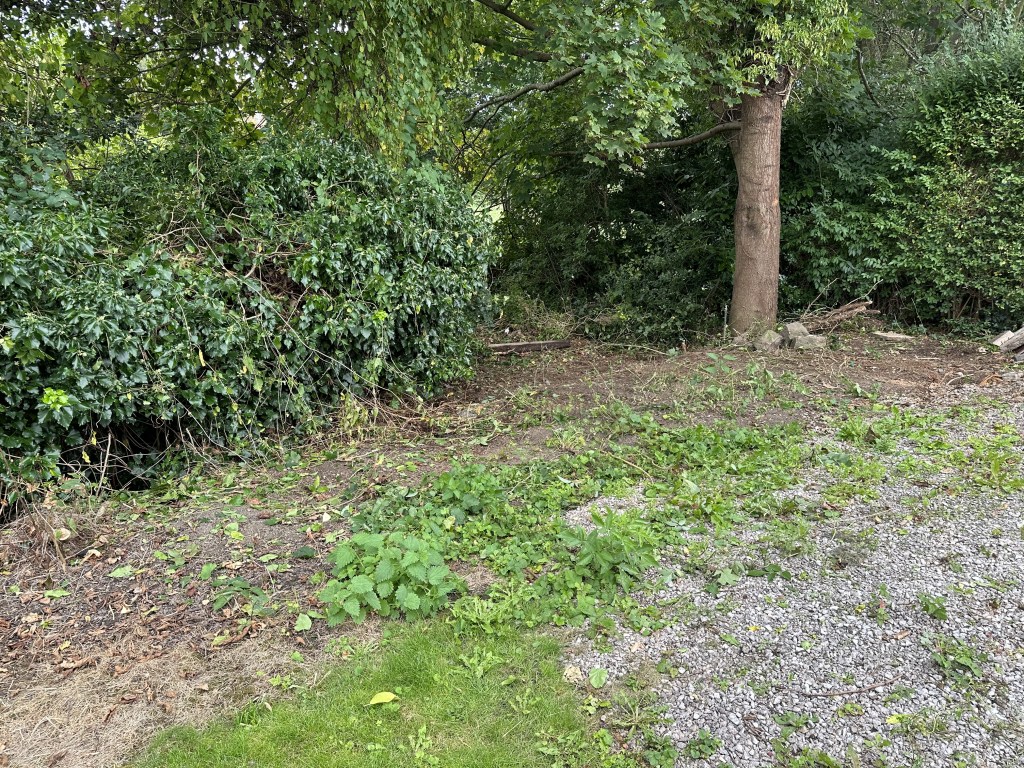
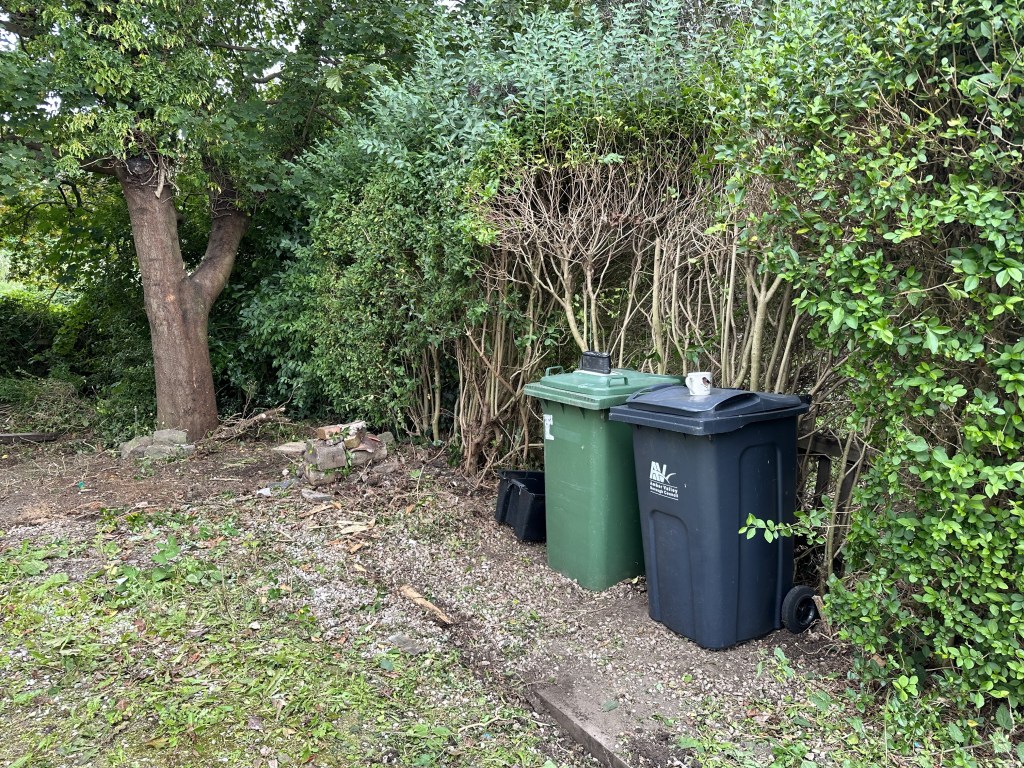
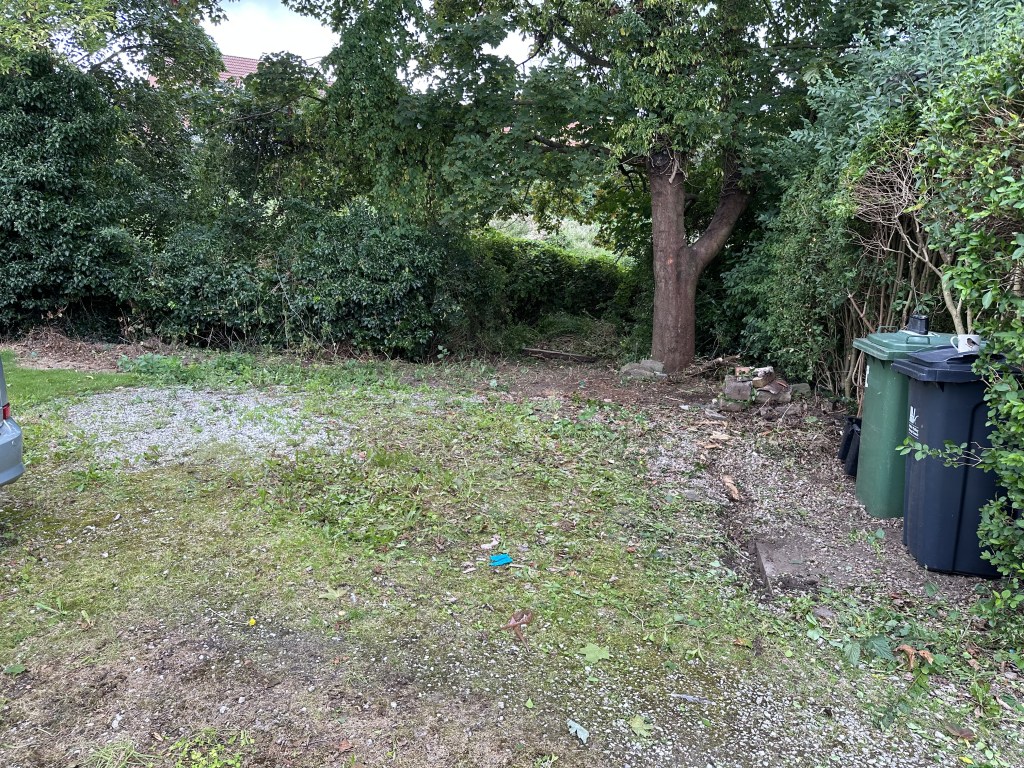
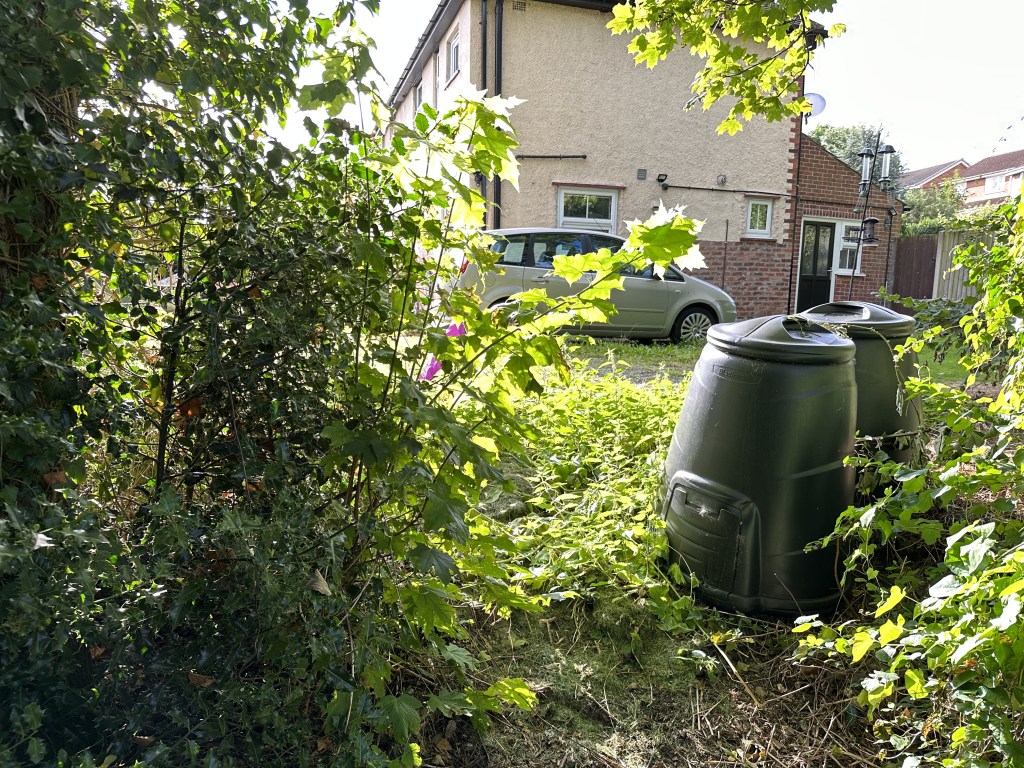
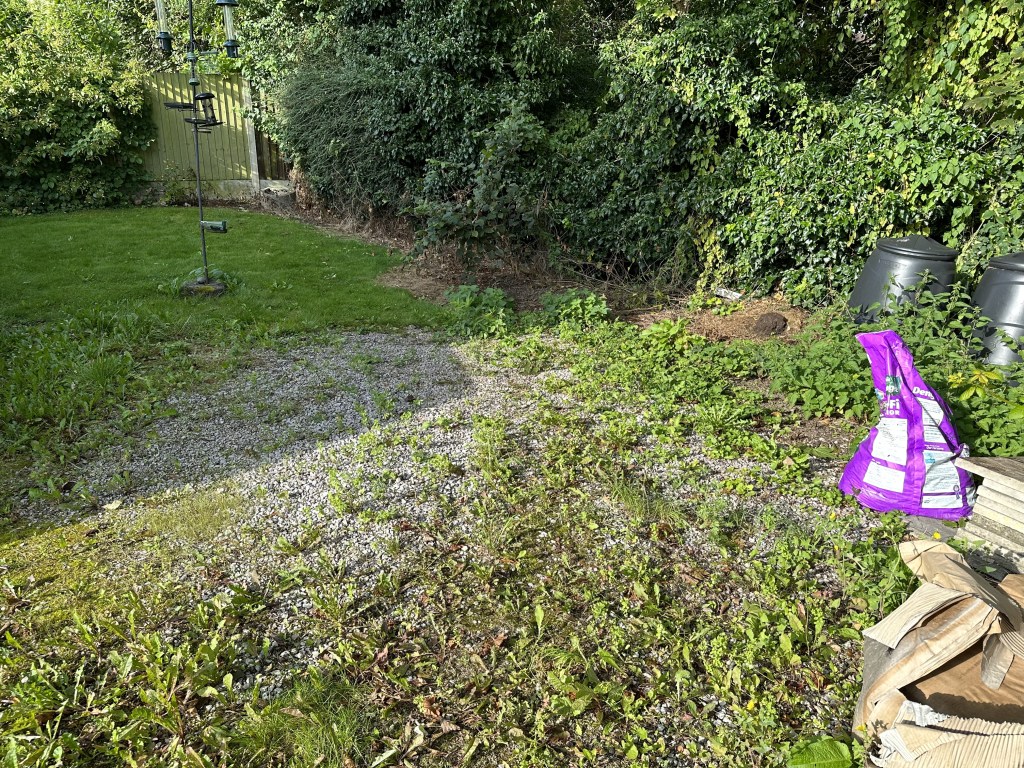
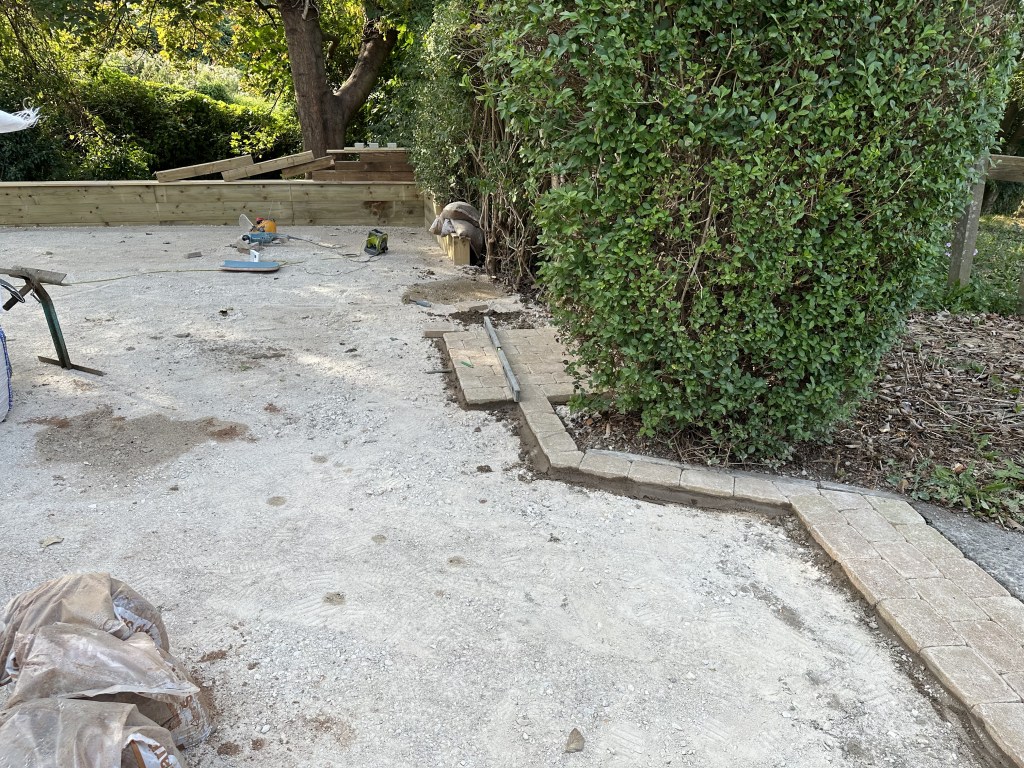
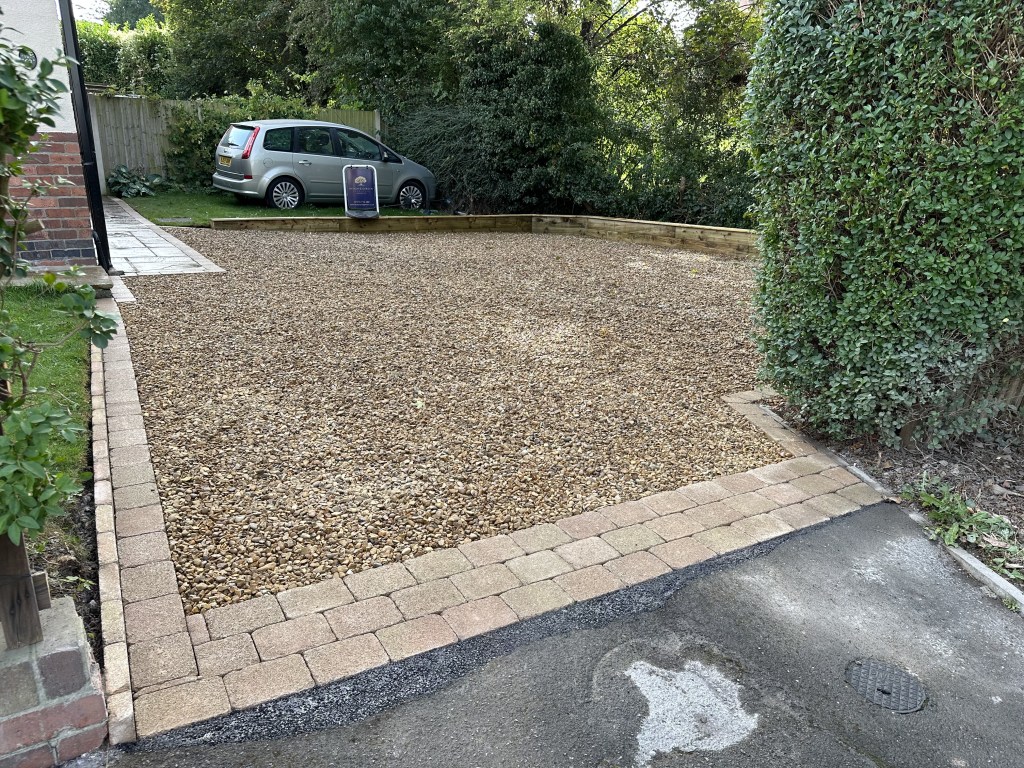
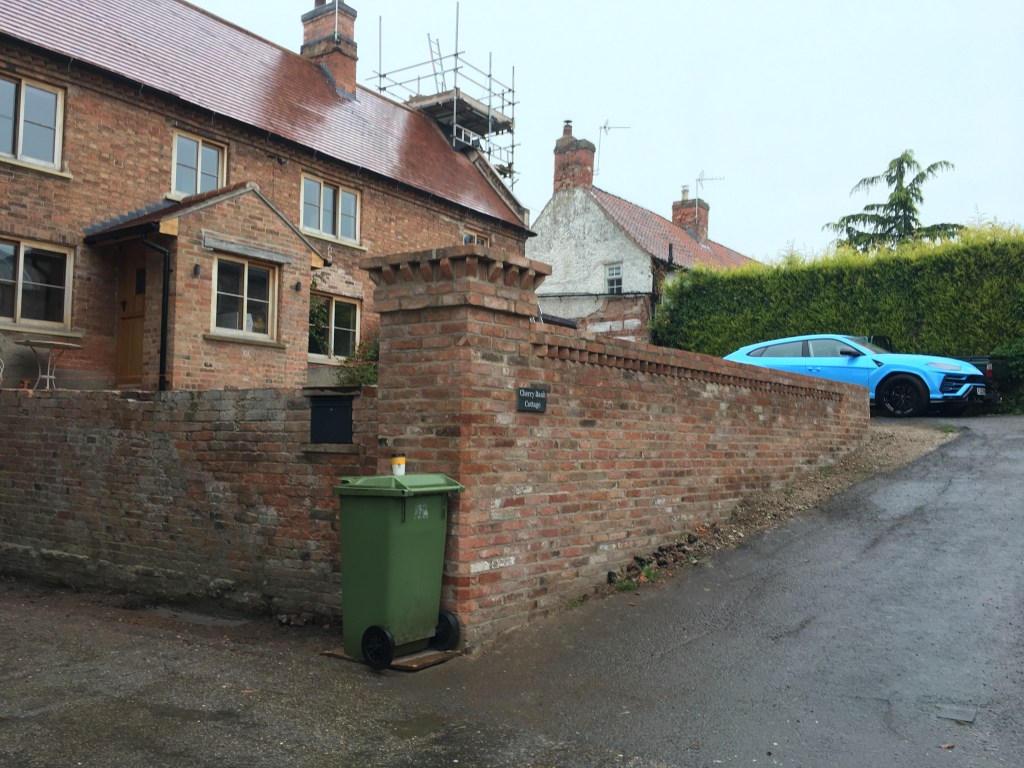
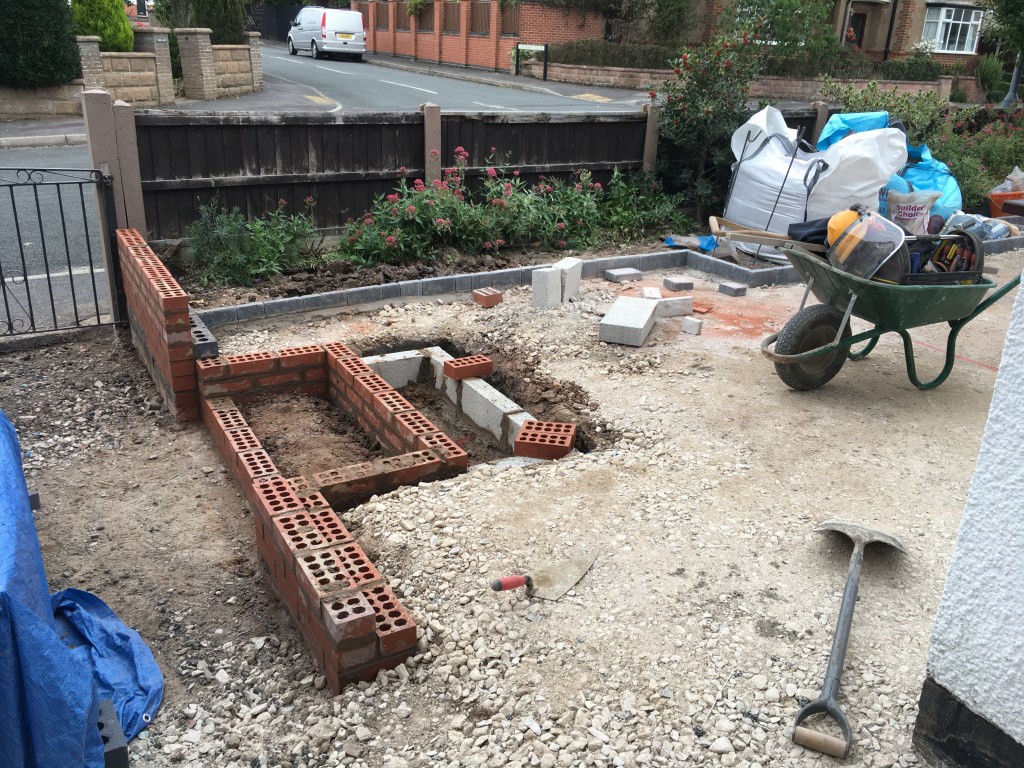
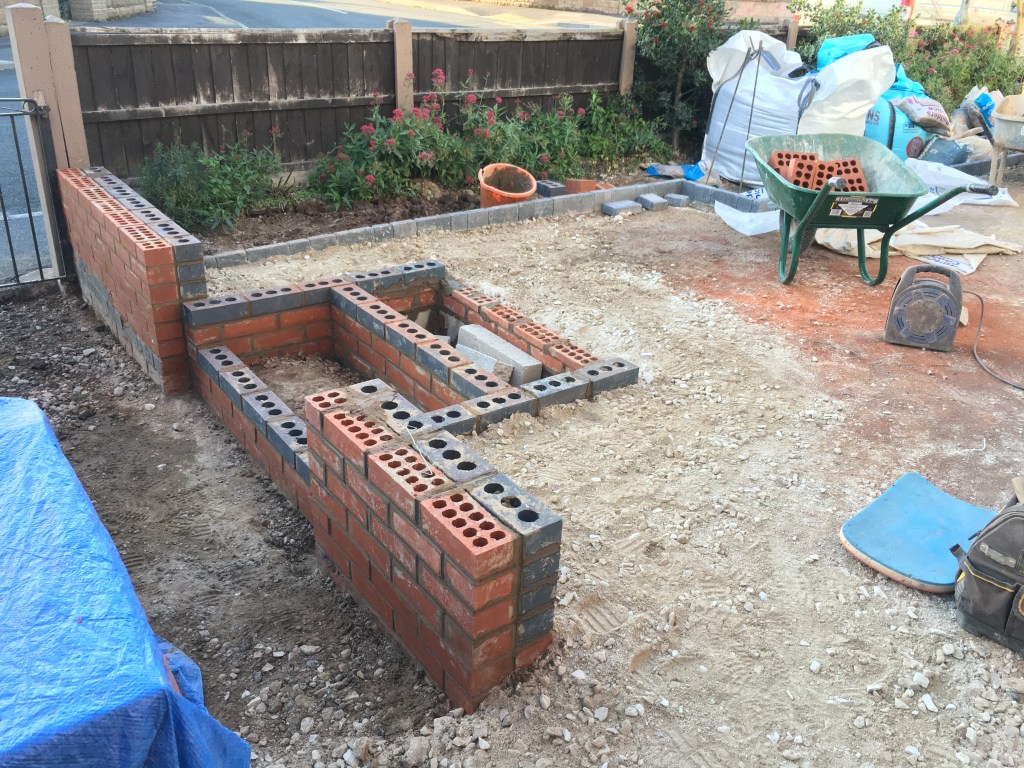
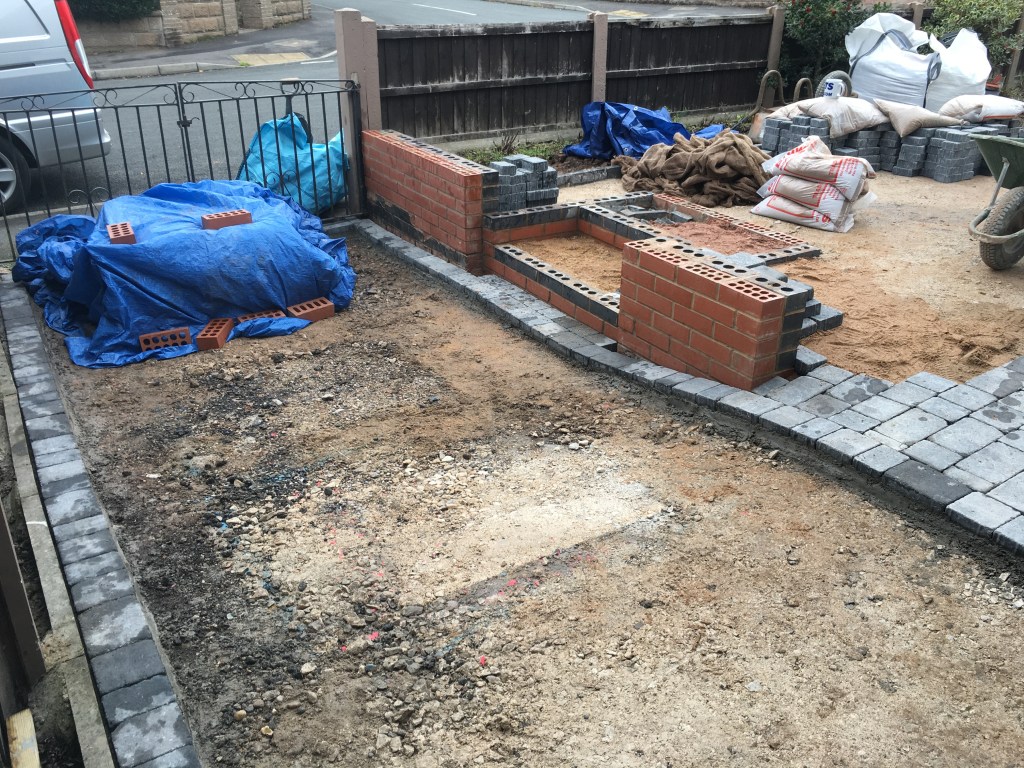
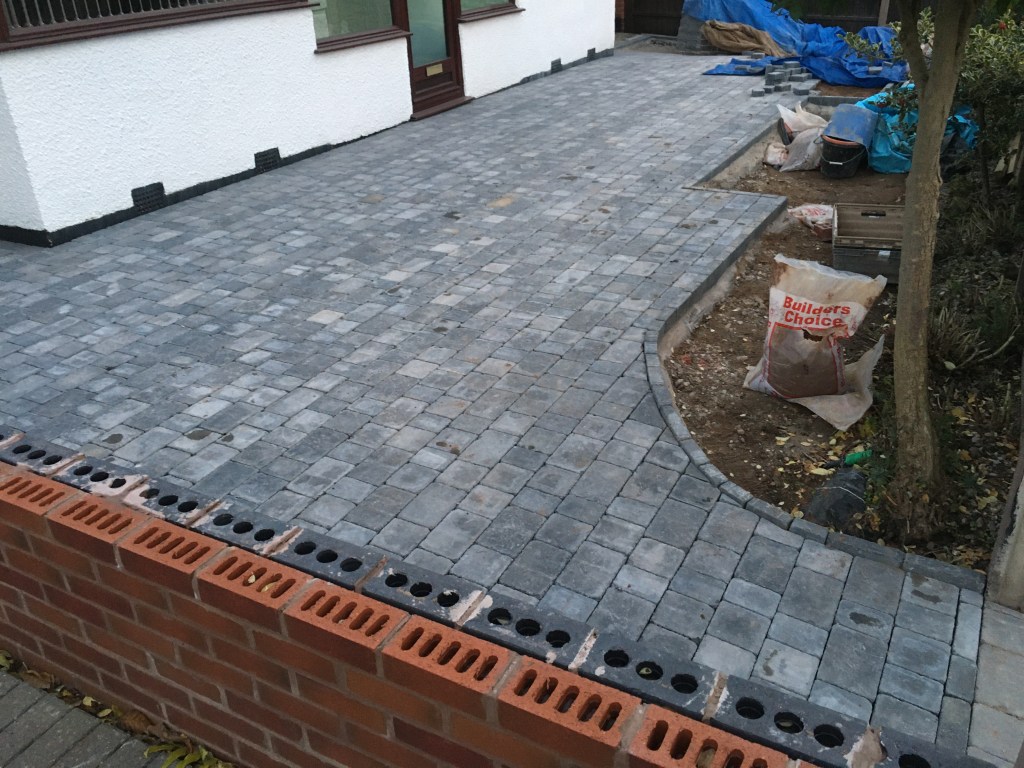
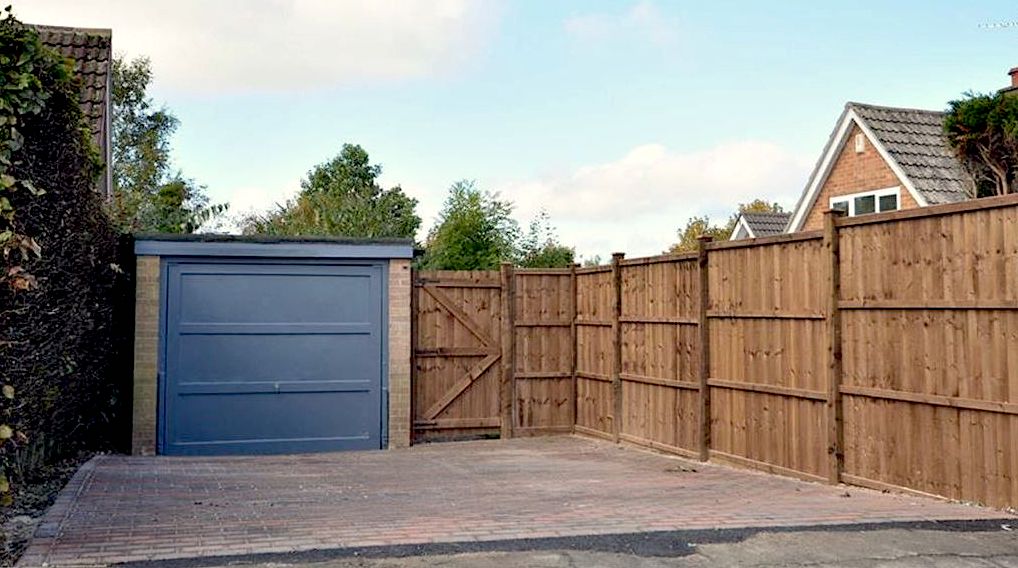
The drive blockwork entrance is added and extended to 3 blocks deep. The flow of blocks then goes around to a new bin store which has been cut into the hedge so they don’t stand out in the driveway at all.
THE NEW BIN STORE… . WHEN THE HEDGE GROWS BACK IT WILL BE CUT TO SHAPE AROUND THE BINS
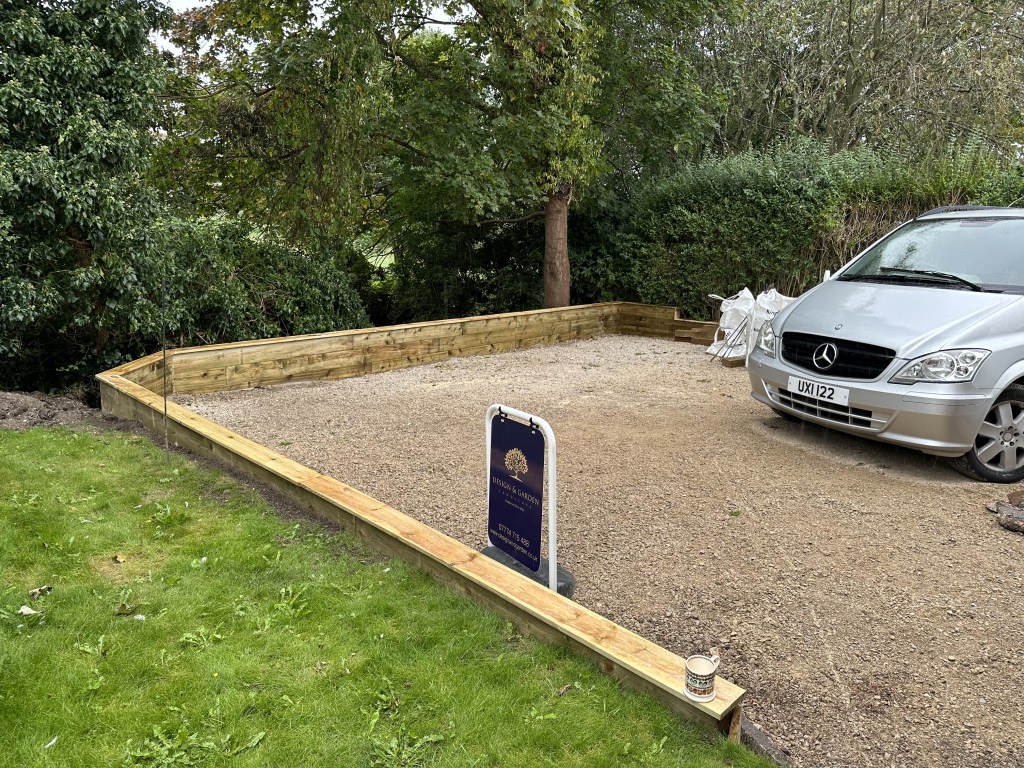
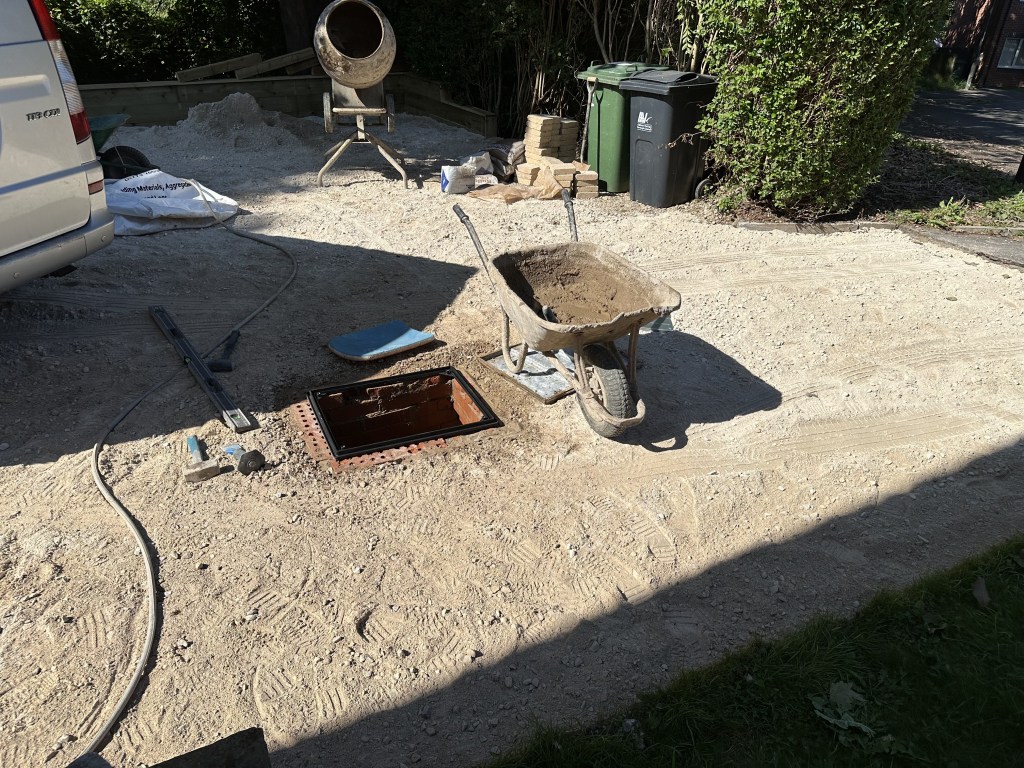
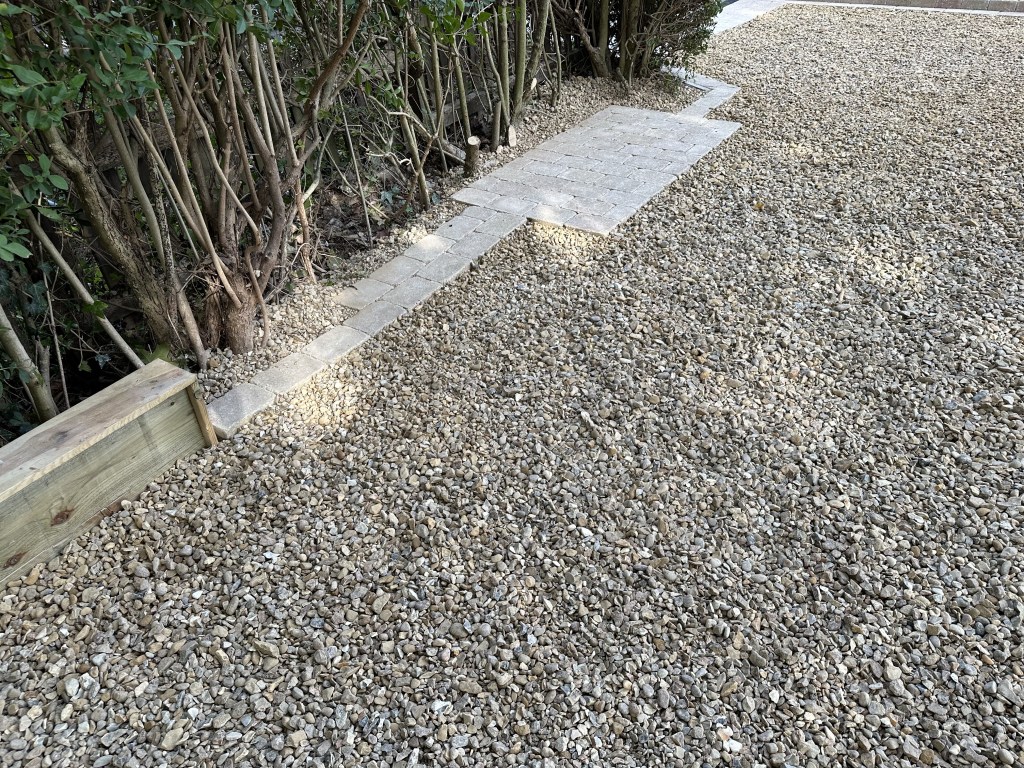
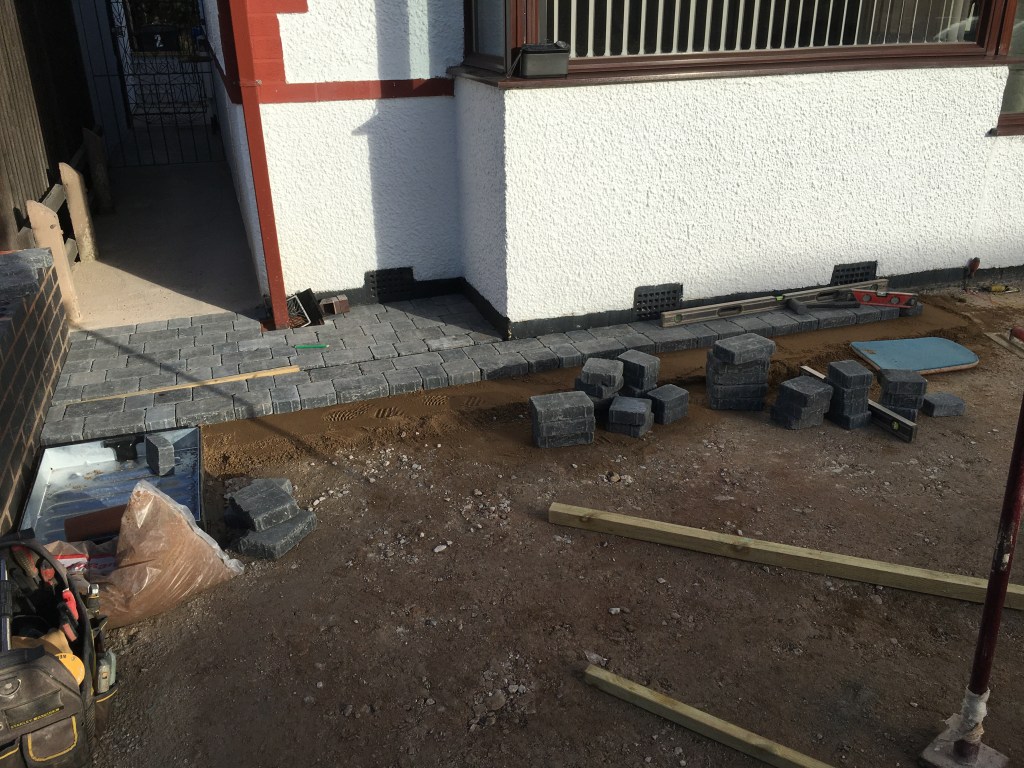
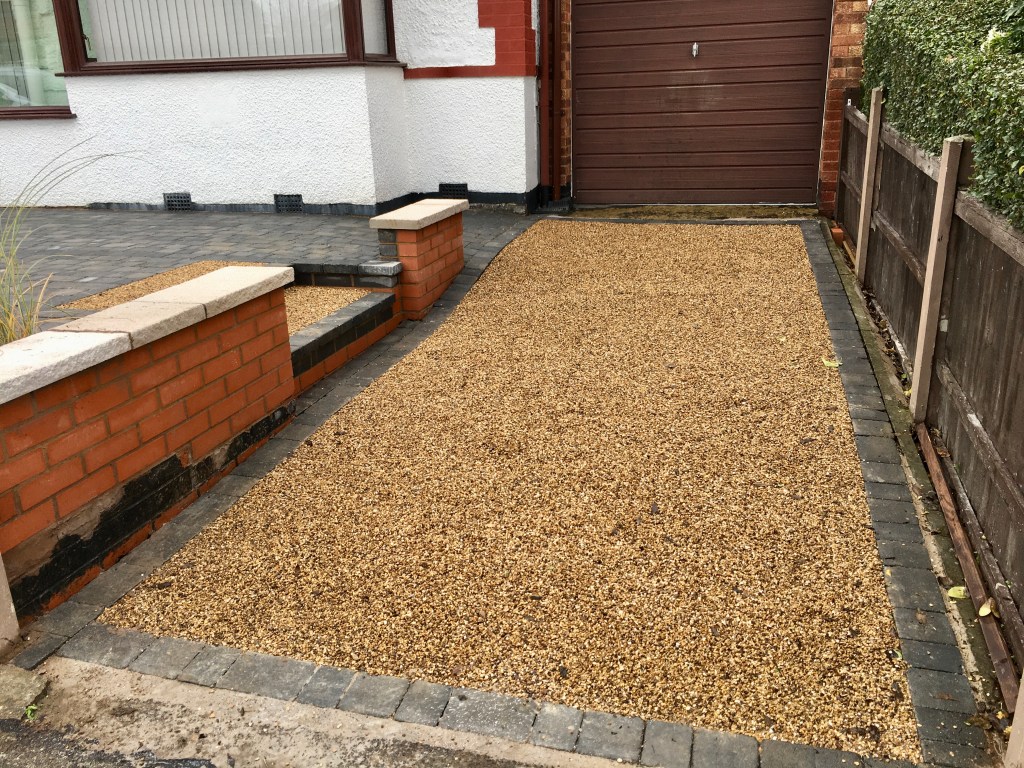
And now the final coating of stone is added. A choice was offered to the client and a suitable one was chosen.
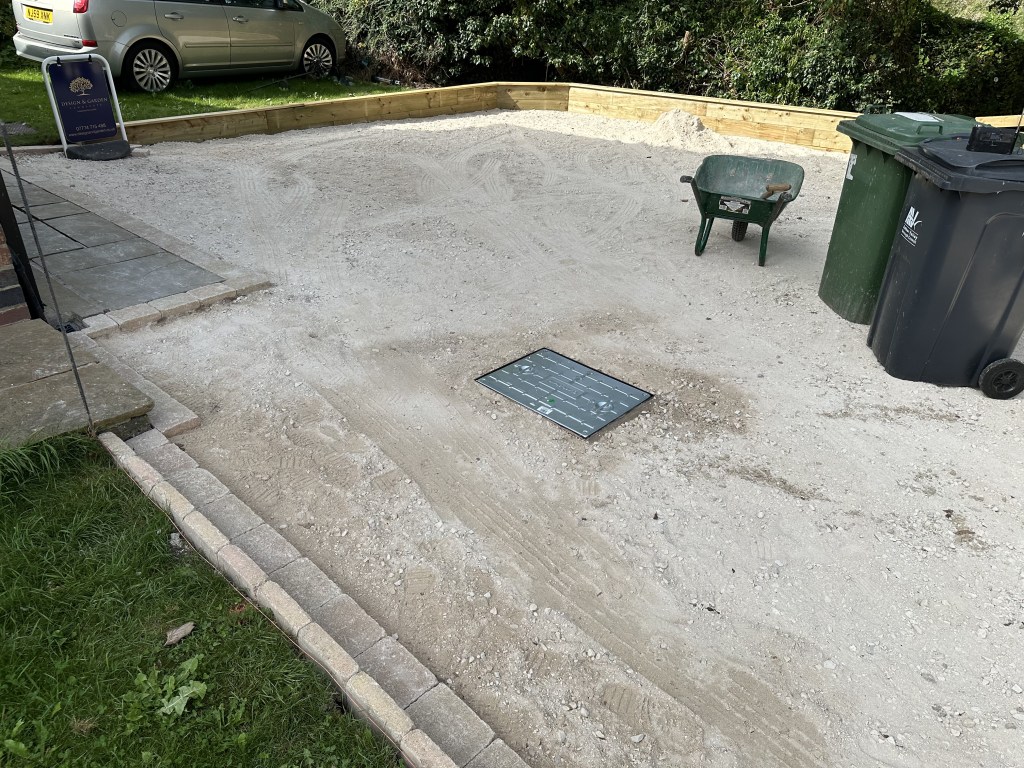
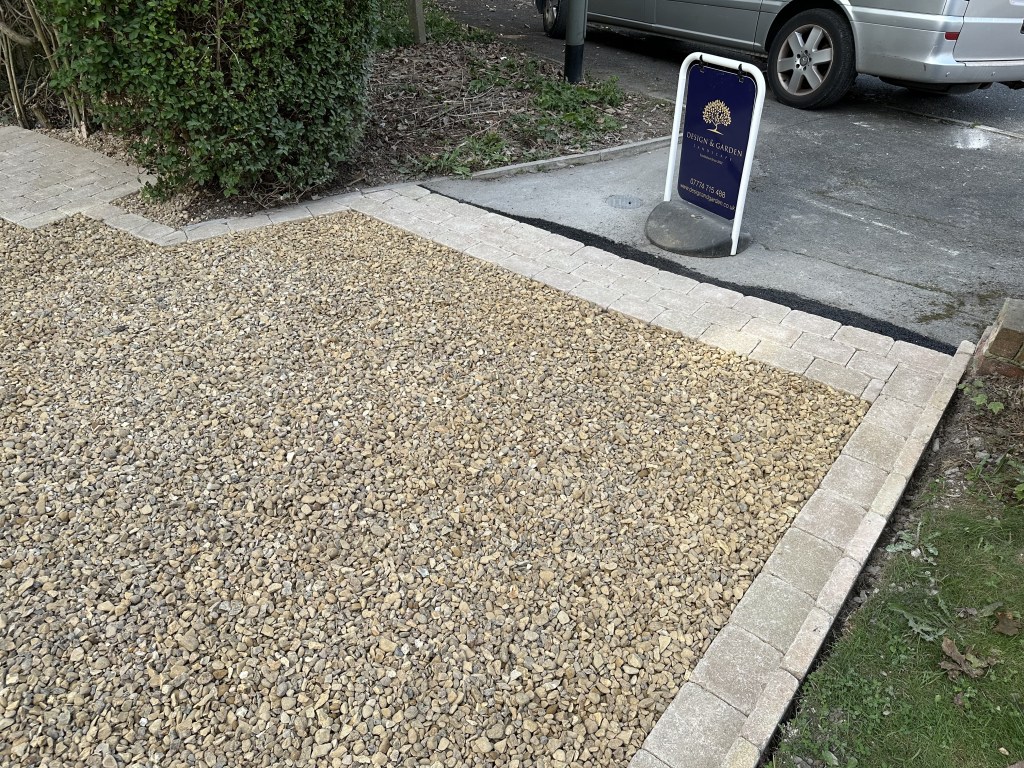
The tarmac is filled into the front edge of the blockwork. The wall on the front edge was cut back a whole brick to give better clearance into the driveway. And don’t worry, the car was removed before the last sleeper was fastened down!
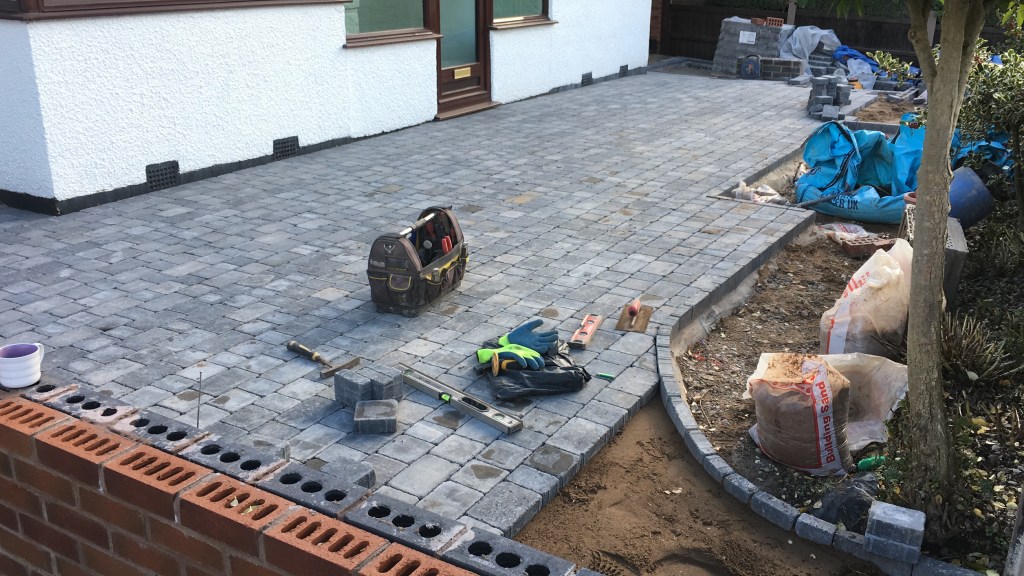
Simple but incredibly effective. Deep undercoat of stone and then 6 tons of top stone. A total transformation with the customer being delighted by the finish.
GET IN TOUCH FOR ANY LANDSCAPE WORK YOU NEED OR WANT
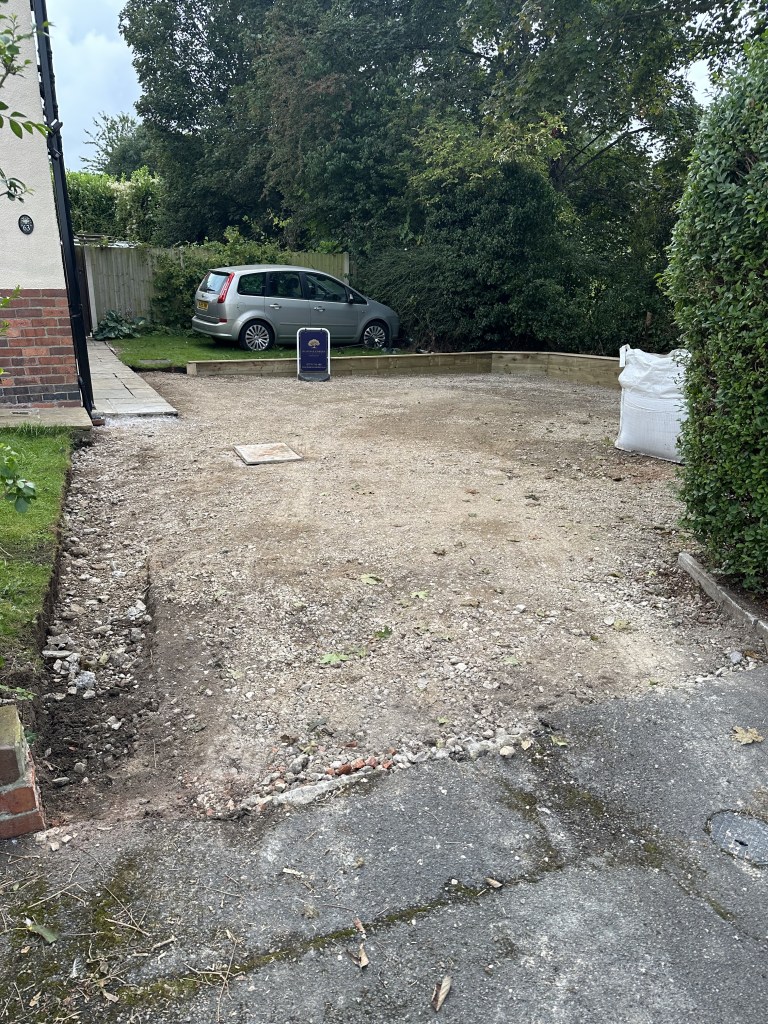
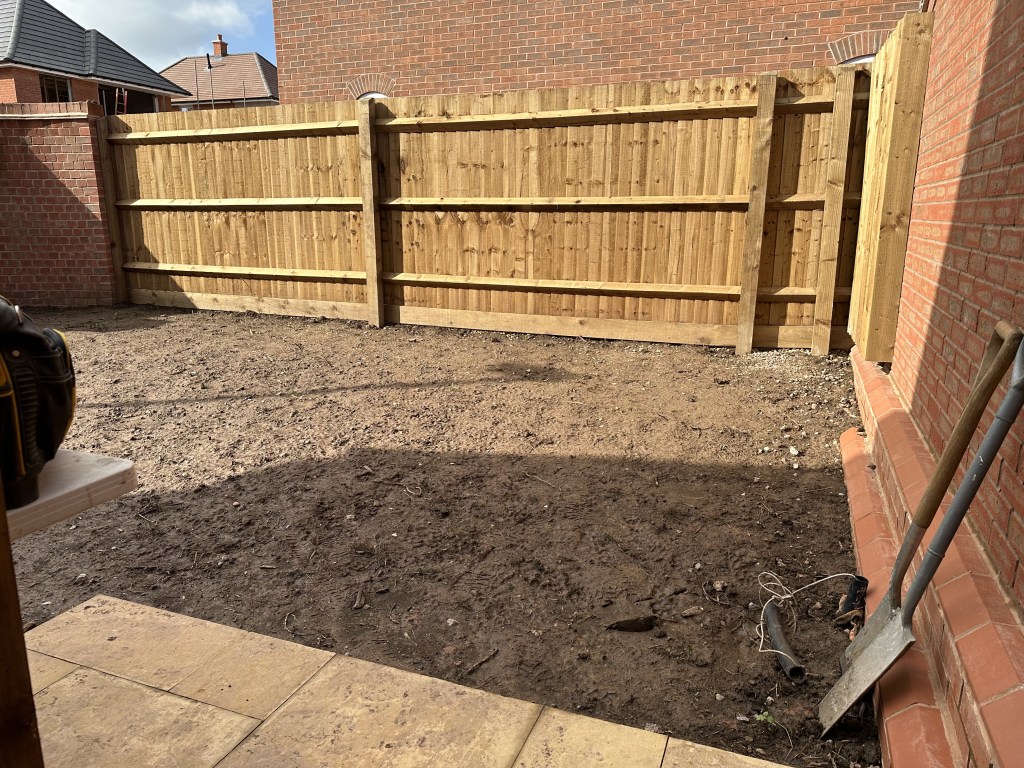
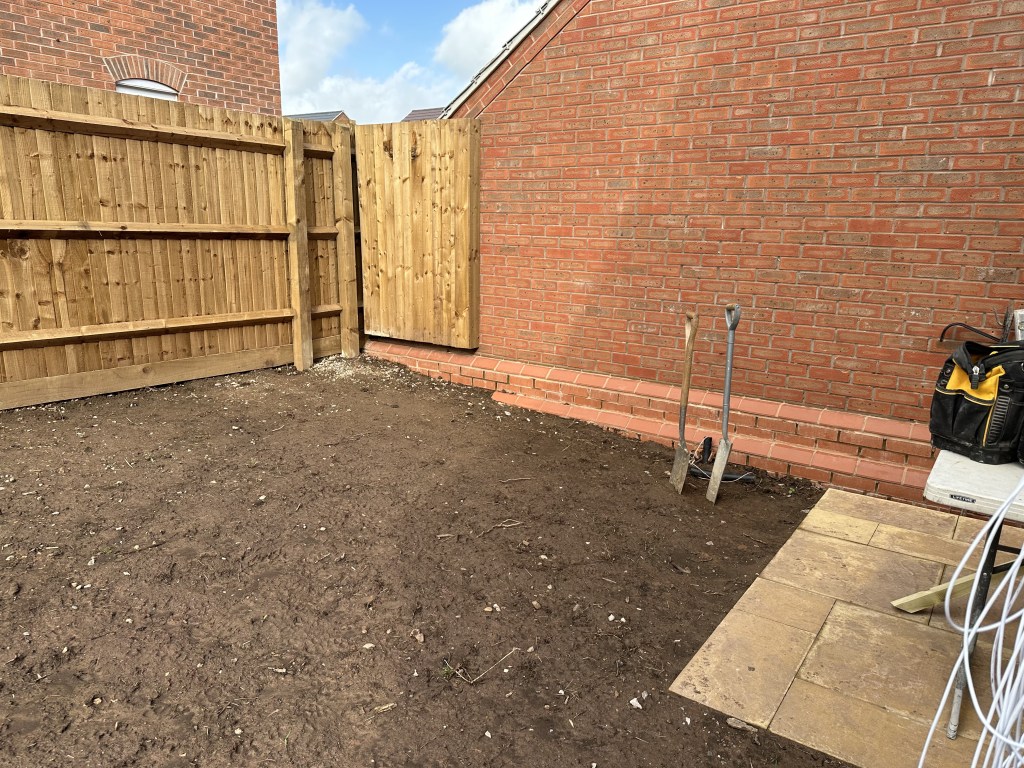
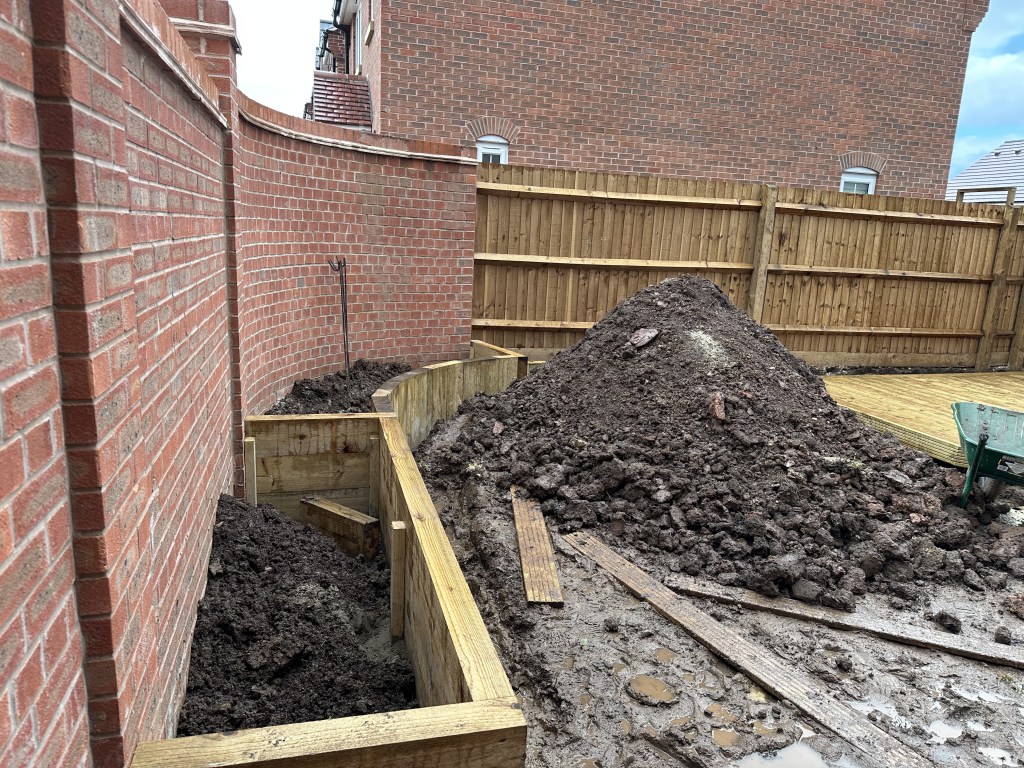
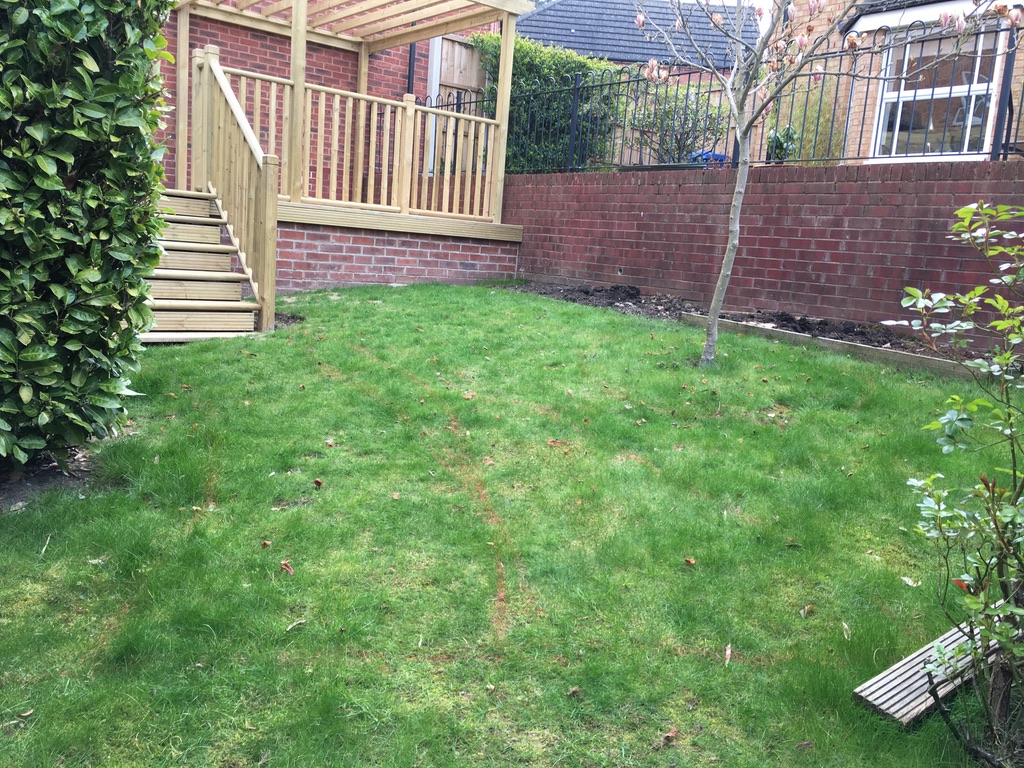
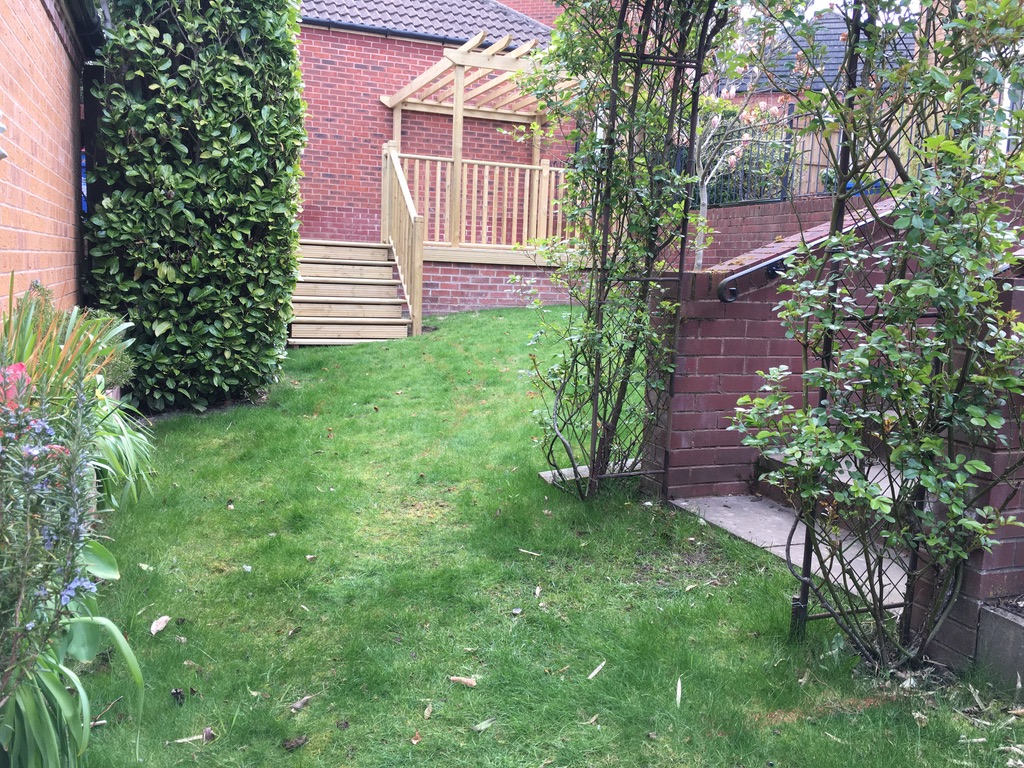
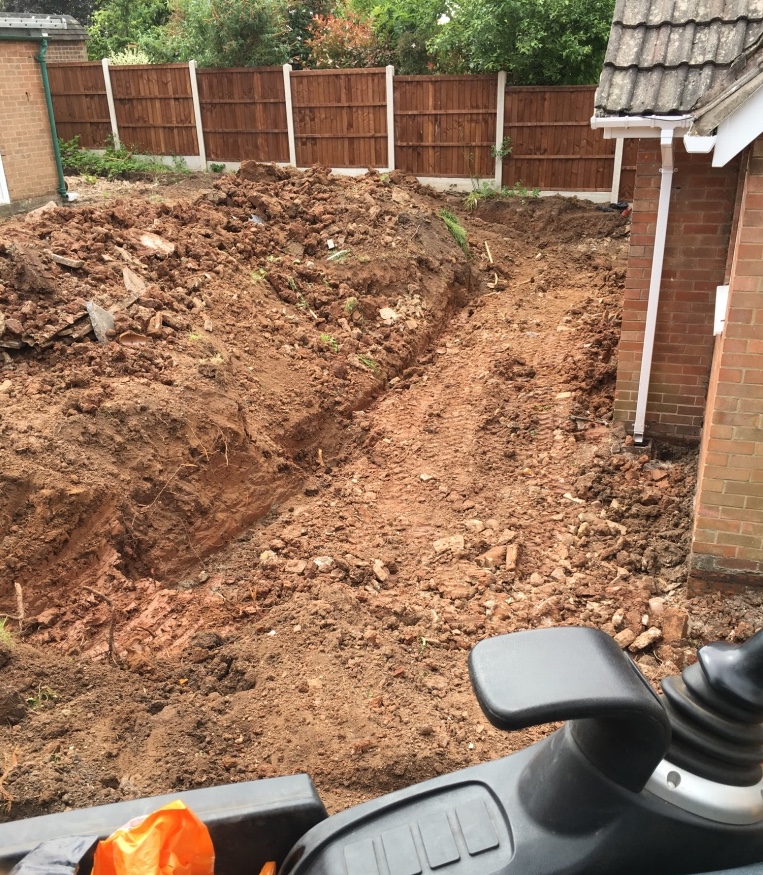
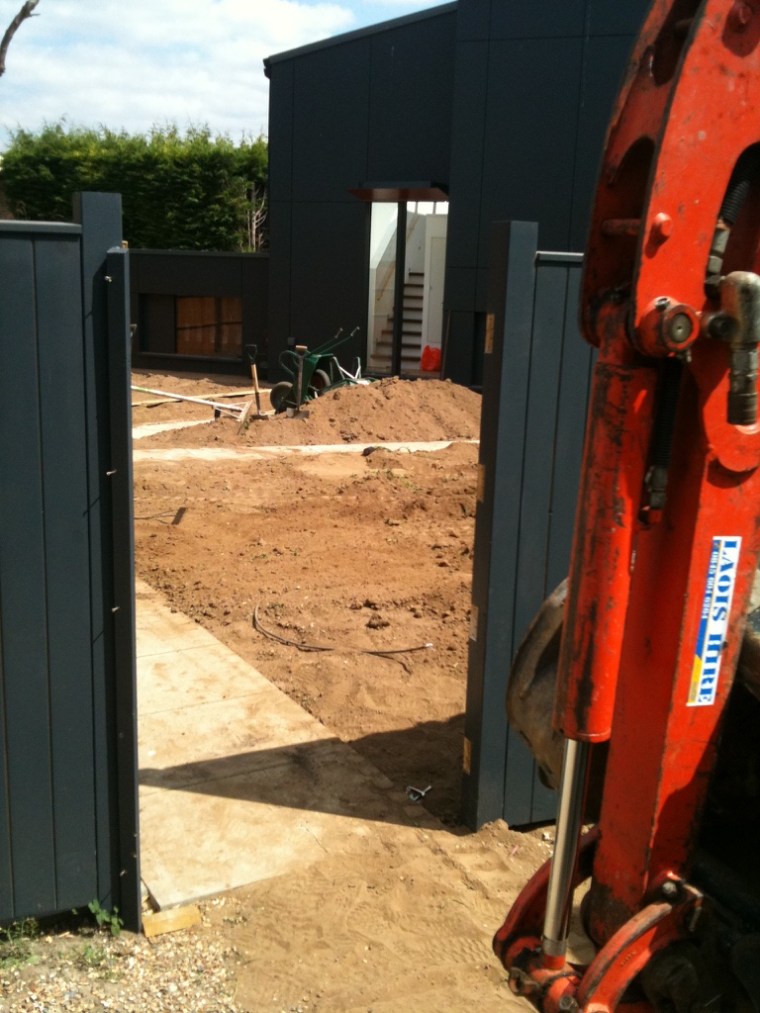
New build homes are usually the same format. You get a plot of free mud at the back of your new house. And this was no difference.
The First day on the job is measuring and leveling out.
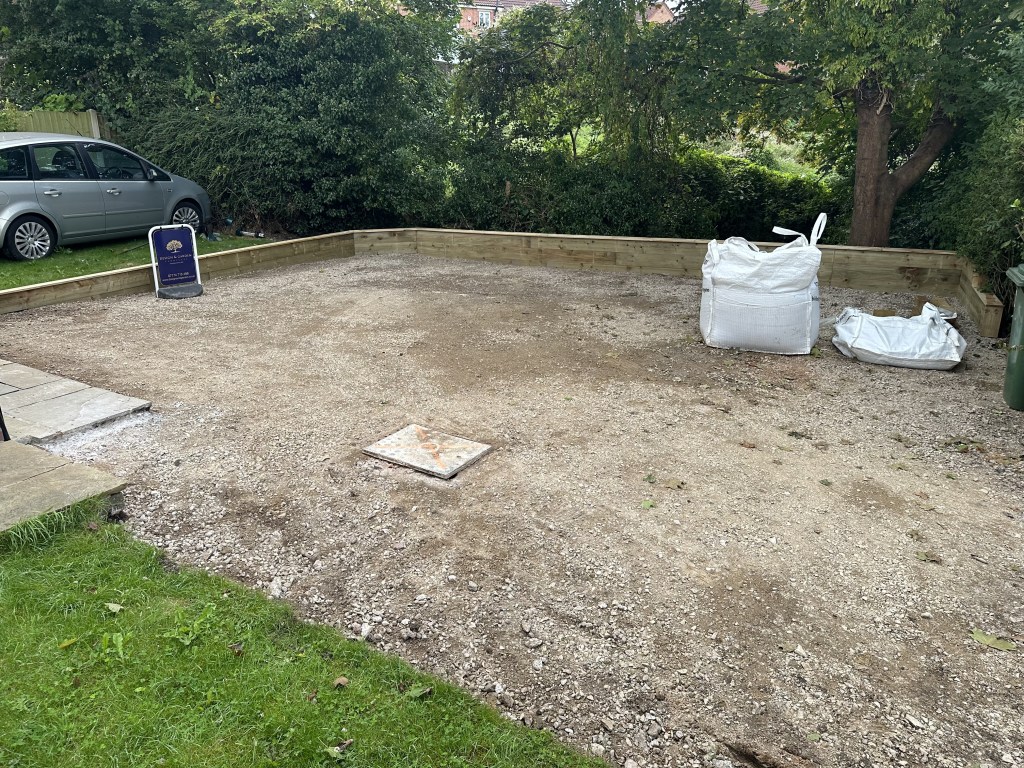
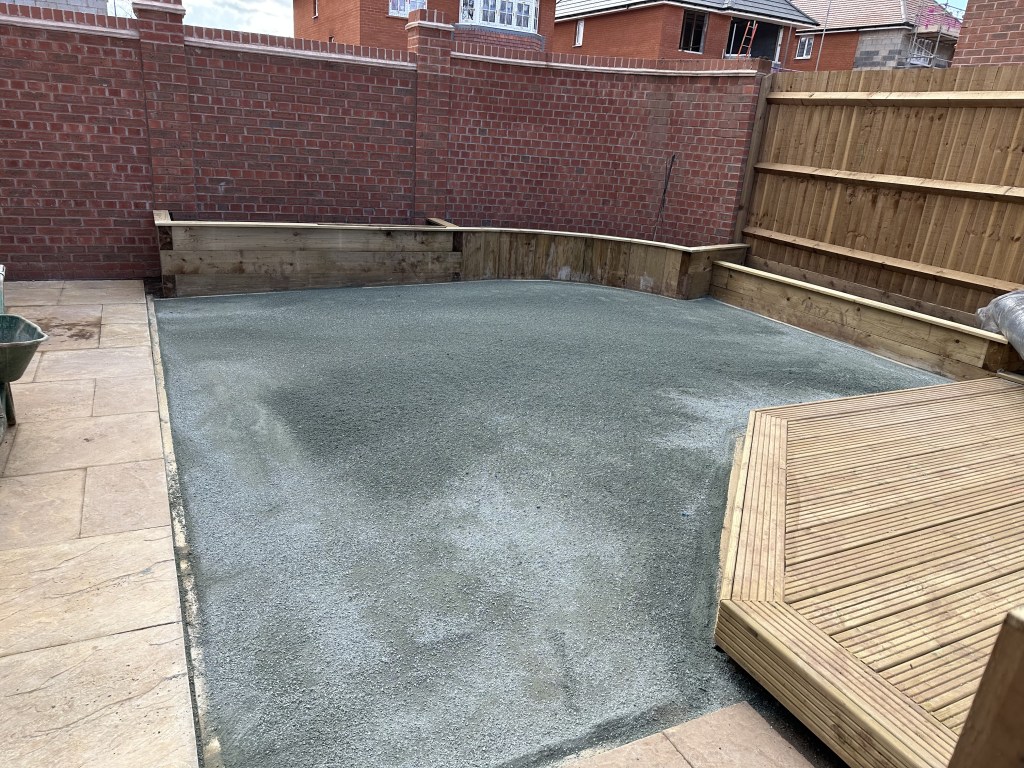
So, the general brief of the job was low maintenance and dog-friendly. Simple area for planting and seating area to catch the later day sun and watch the planes leaving the airport!
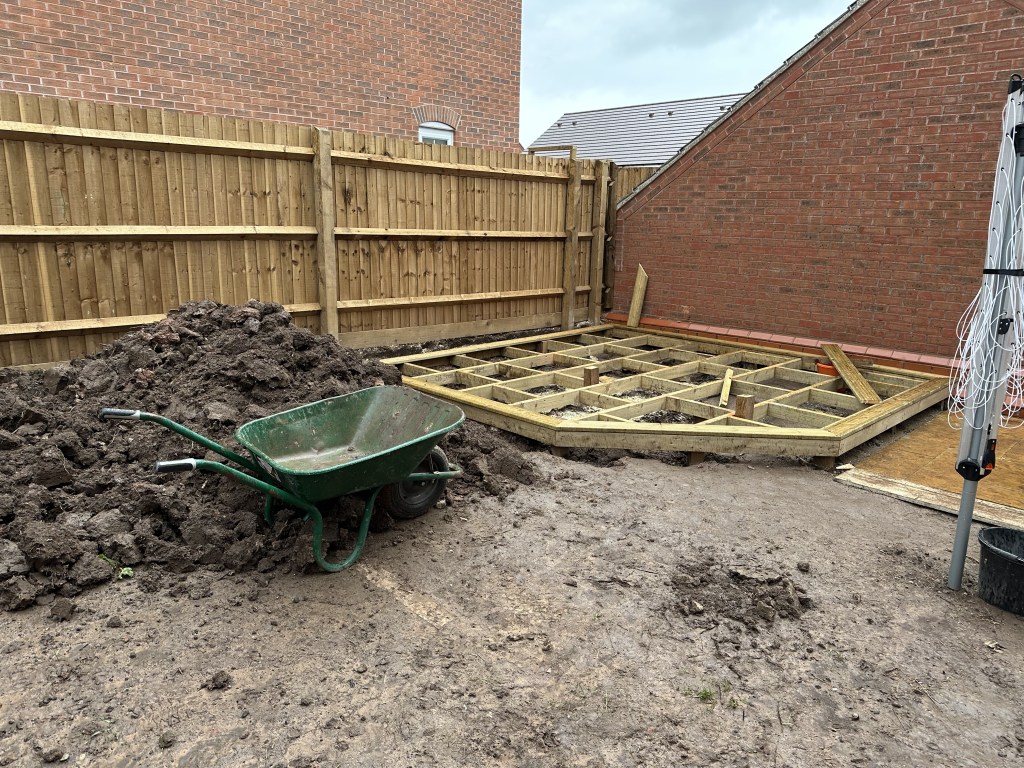
So a decking was decided on in the corner. Large to hold a corner outside sofa-style seat and to entertain but not to encroach too much into the lawn area.
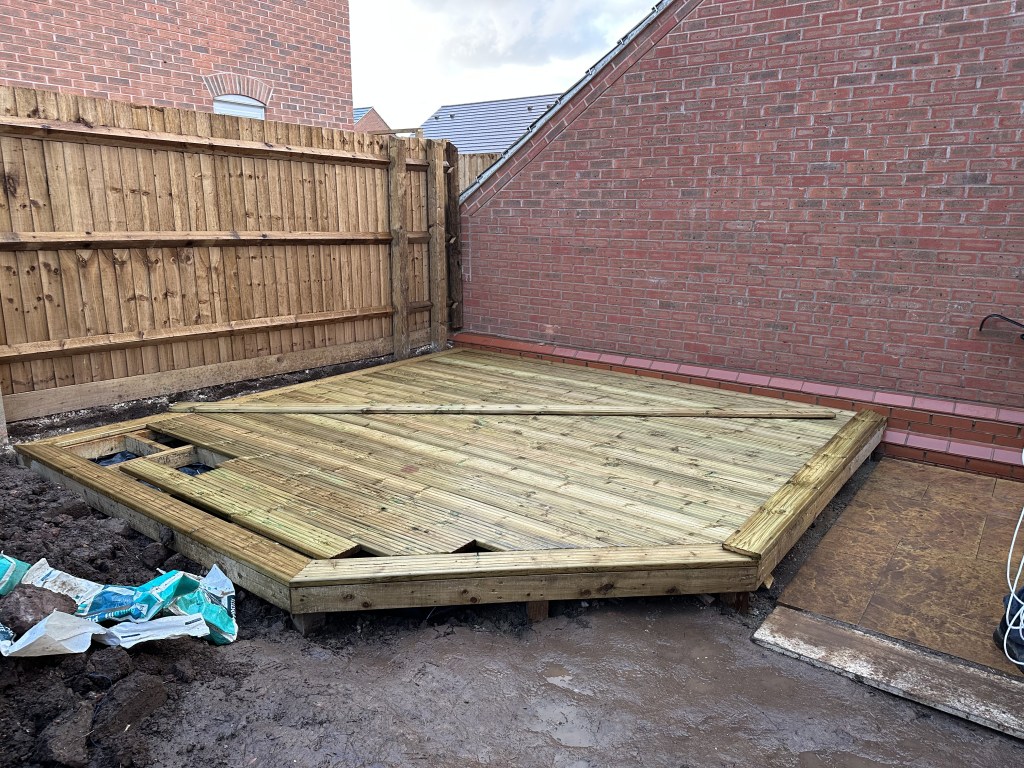
The option to make a picture frame of the decking gives a neater and stylish effect.
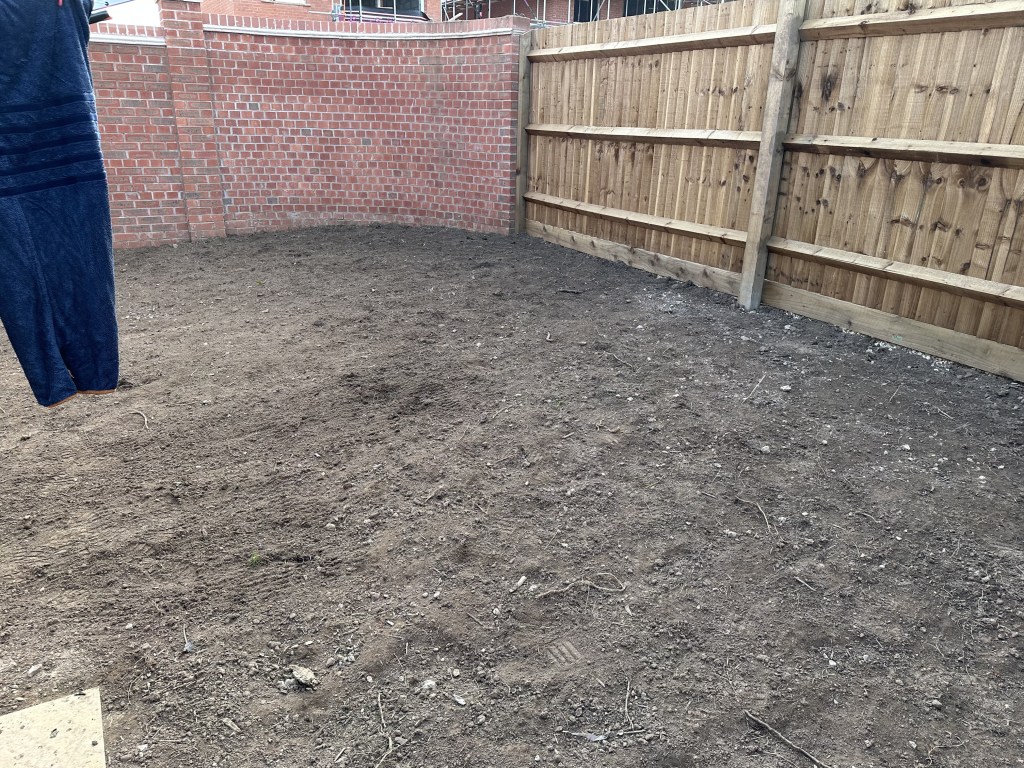
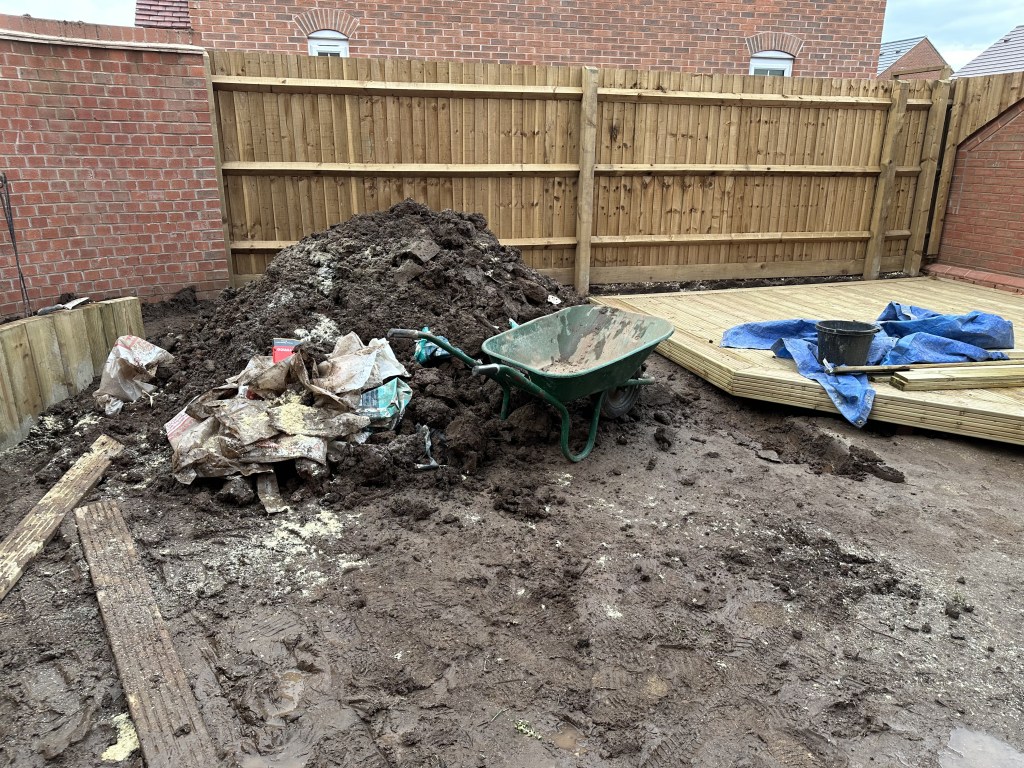
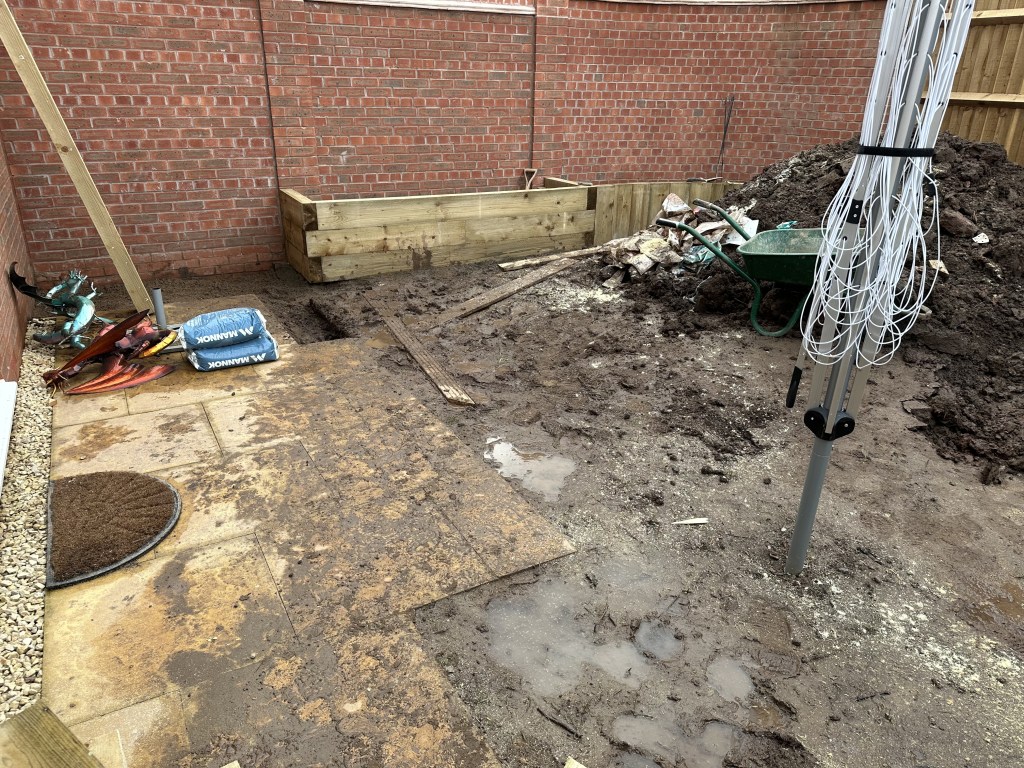
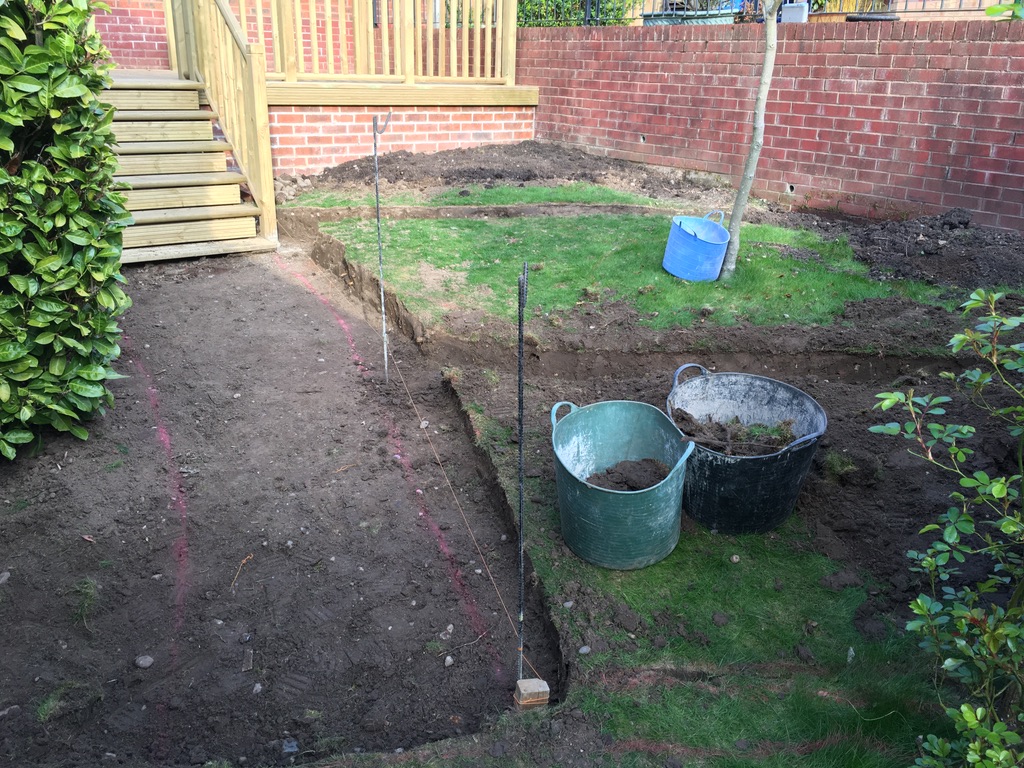
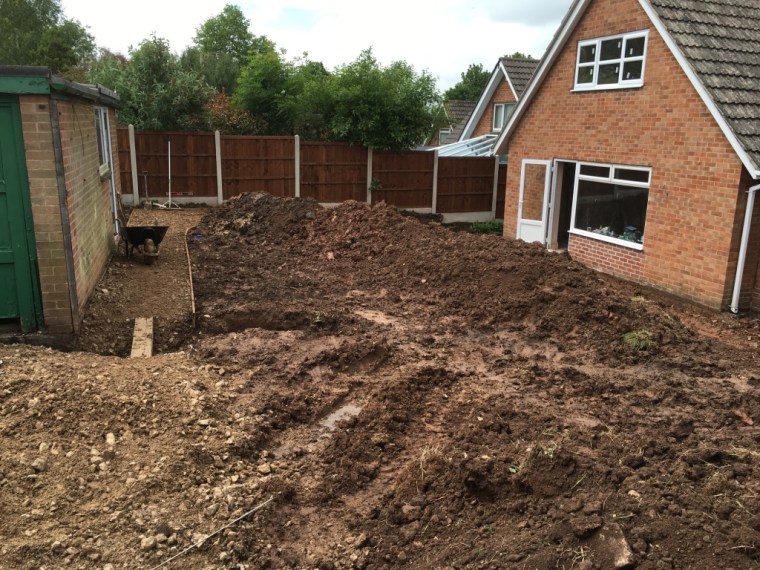
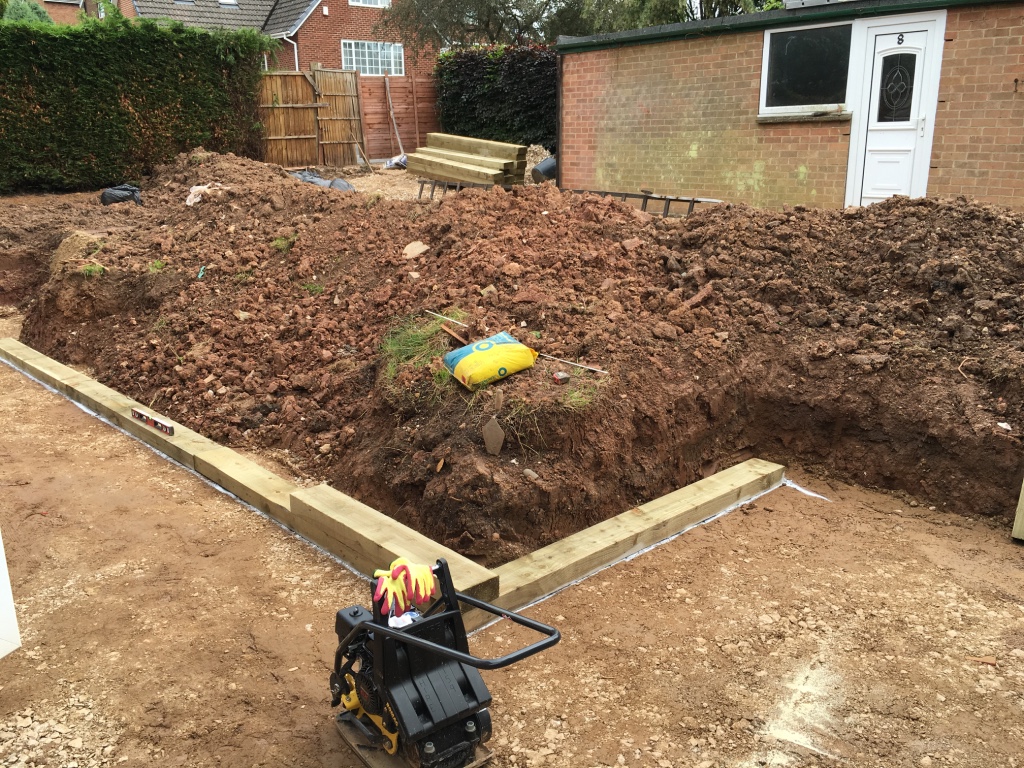
Now is the messy section of the job. A few tons of soil had to be moved to level the area out for the decking. And then digging out the area ready for the sleepers, ready for future planting.
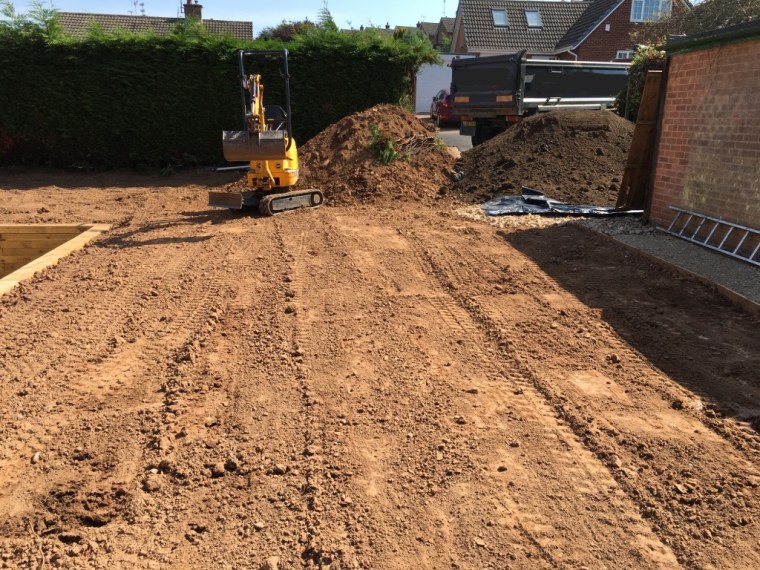
Now is the time to get the grab lorry in and start to get this land leveled off.
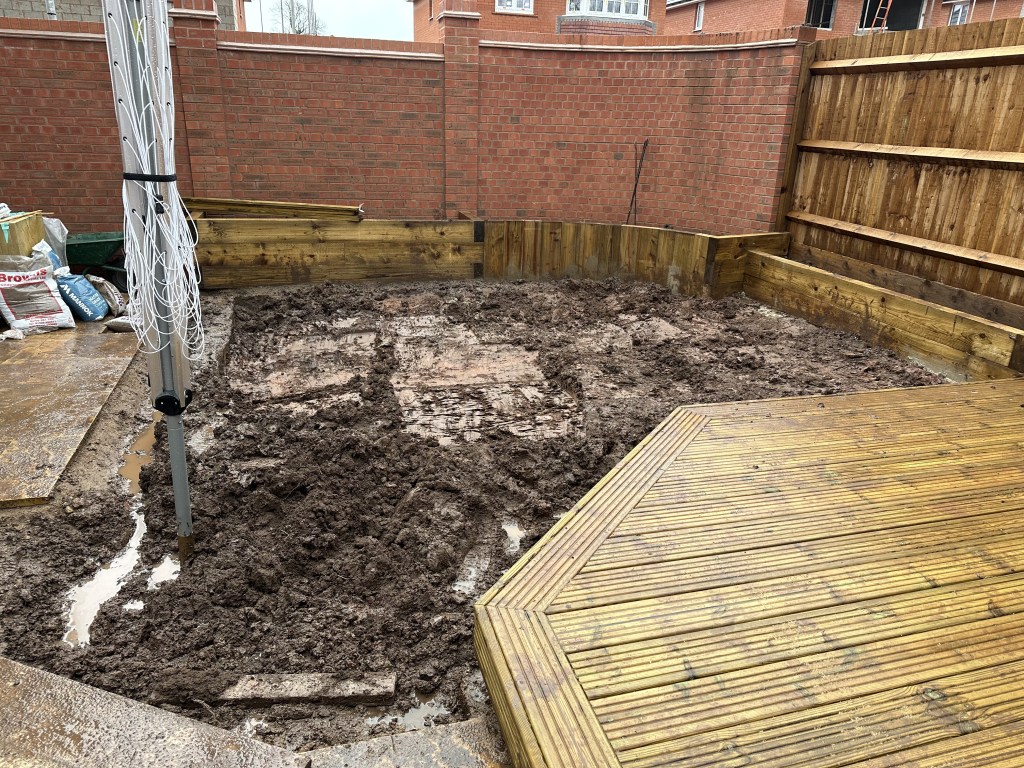
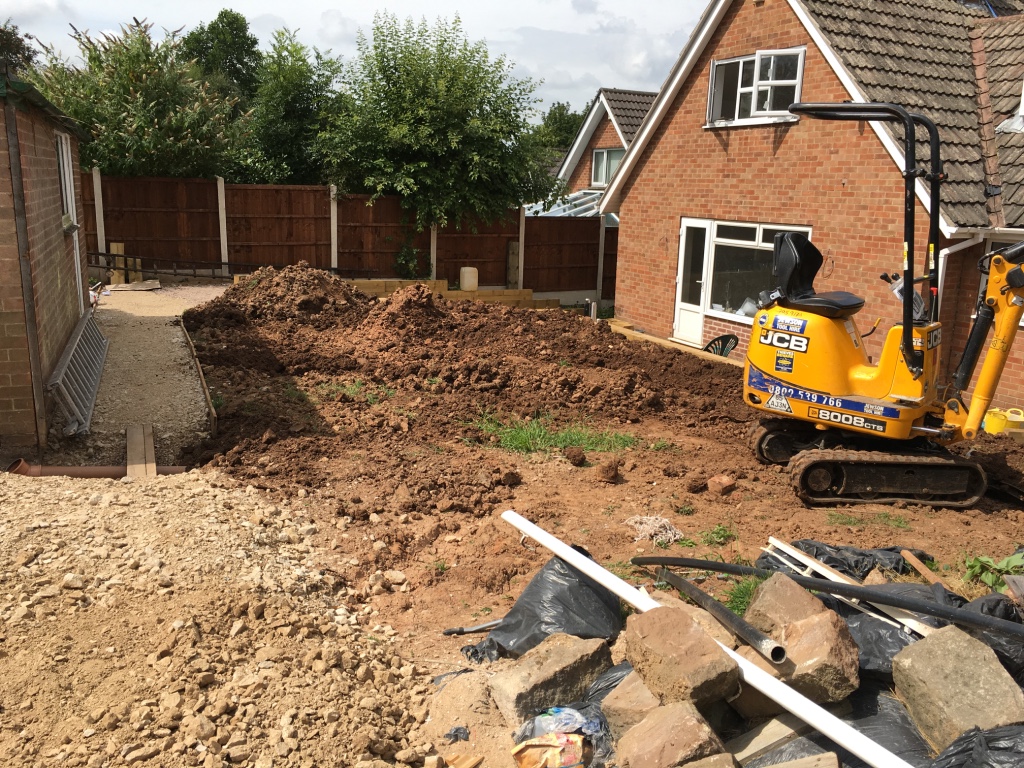
The level is a bit more usable. So much praying for no rain…
I’m not the biggest fan of Artificial lawns and have actually avoided doing them before. However, the client needed this due to messy dogs… so as normal, the correct way to do it was done. Ground sheet, framework, and correct stone to get the base spot on.
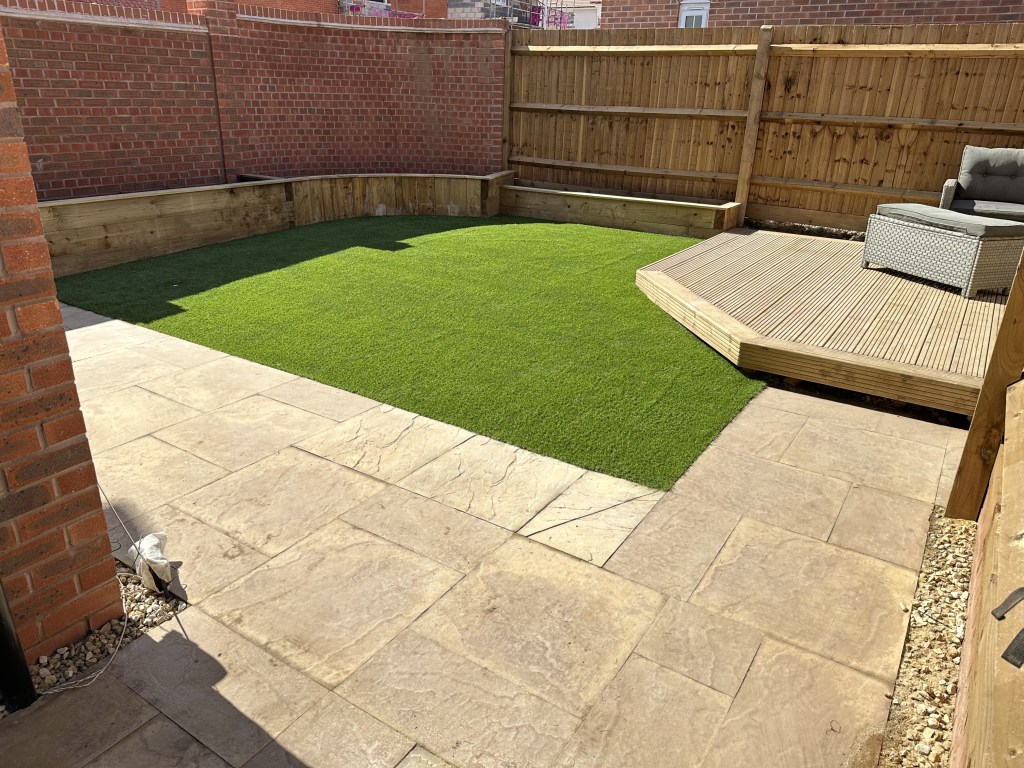
After being flattened, pack-in, and prepared the “lawn” was then rolled and fastened down.
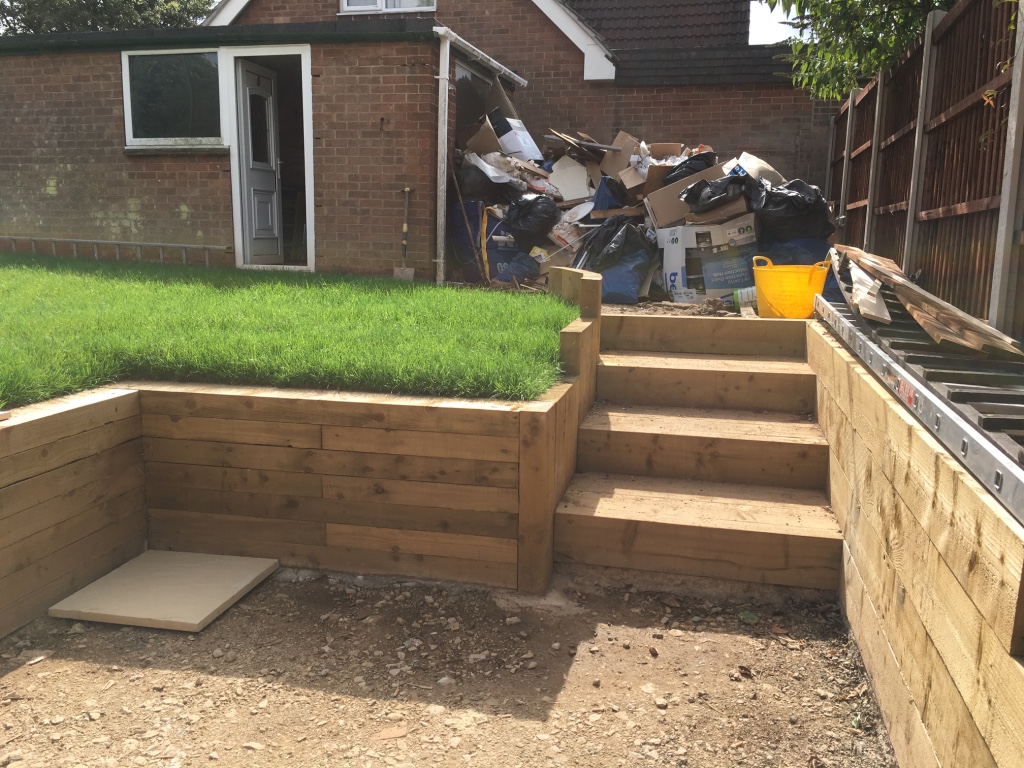
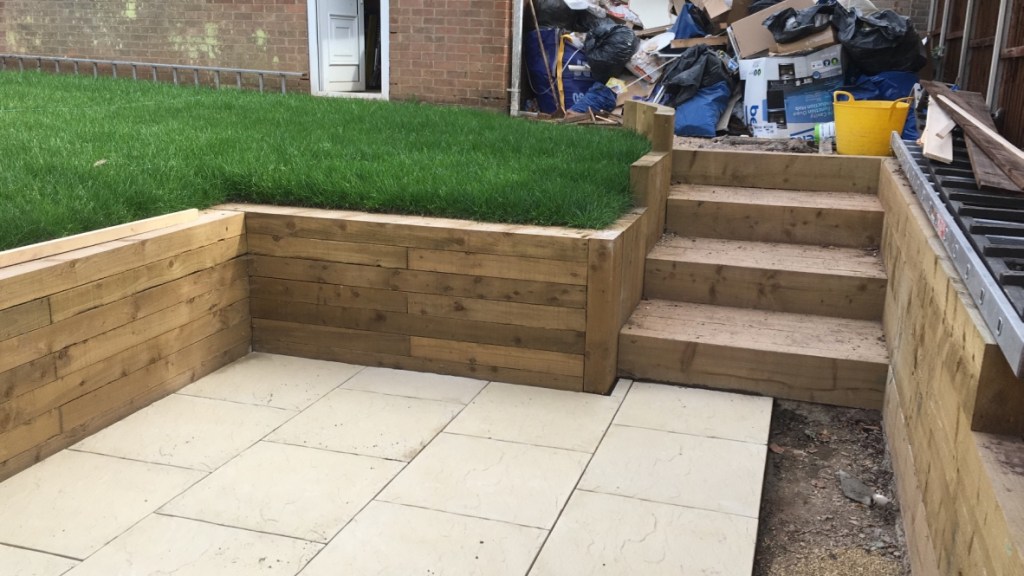
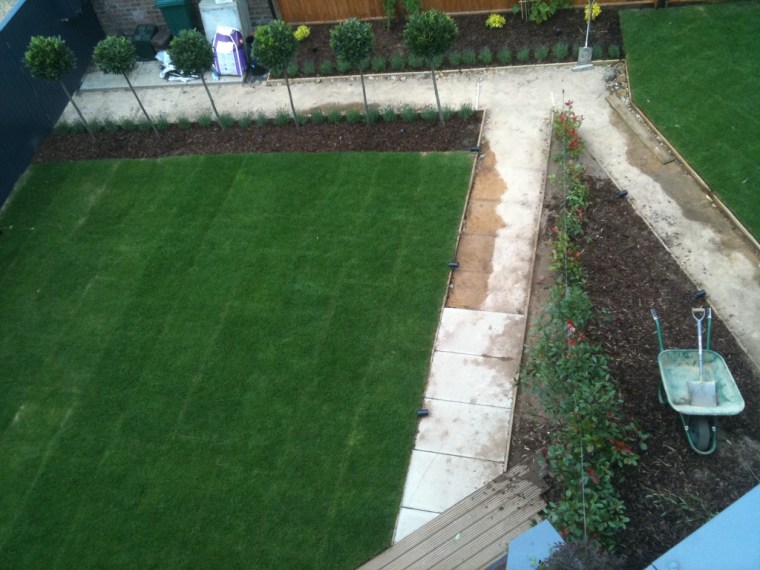
The original patio was extended with slabs to the wall and the lawn was then pinned down before being stretched to fit.
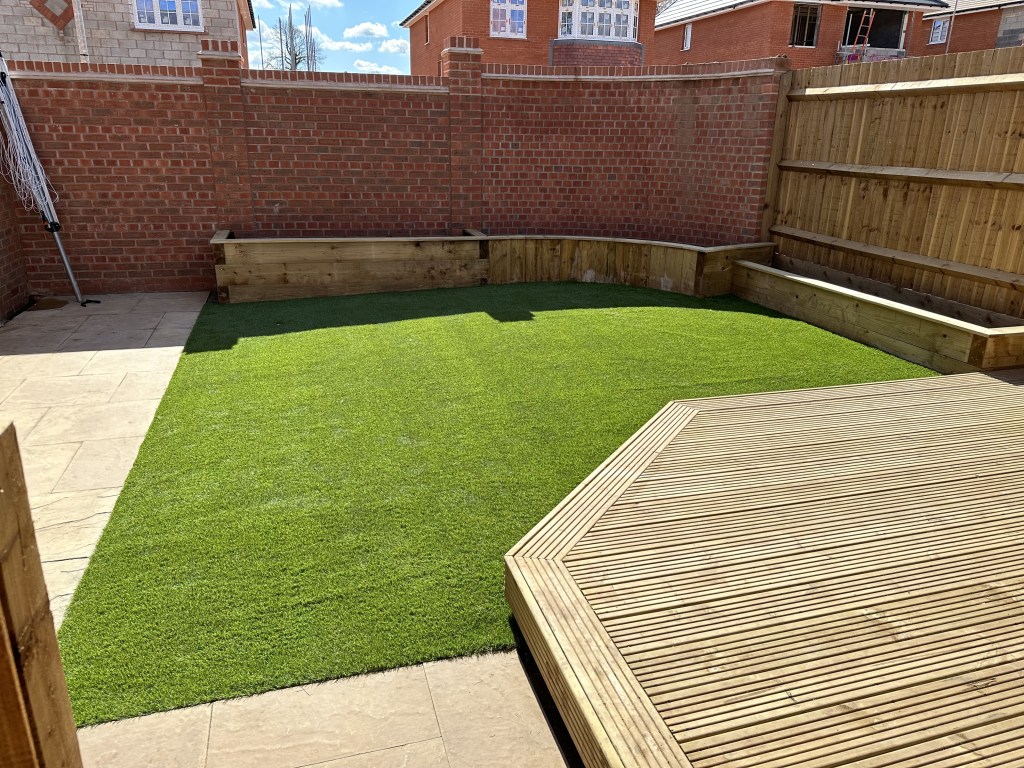
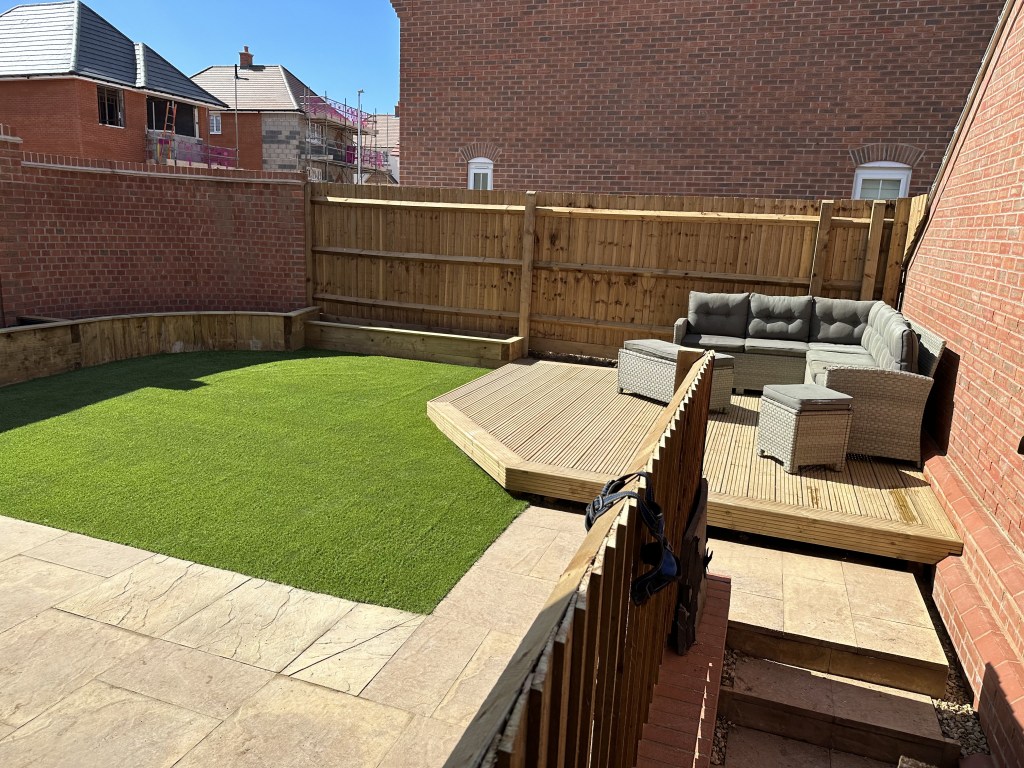
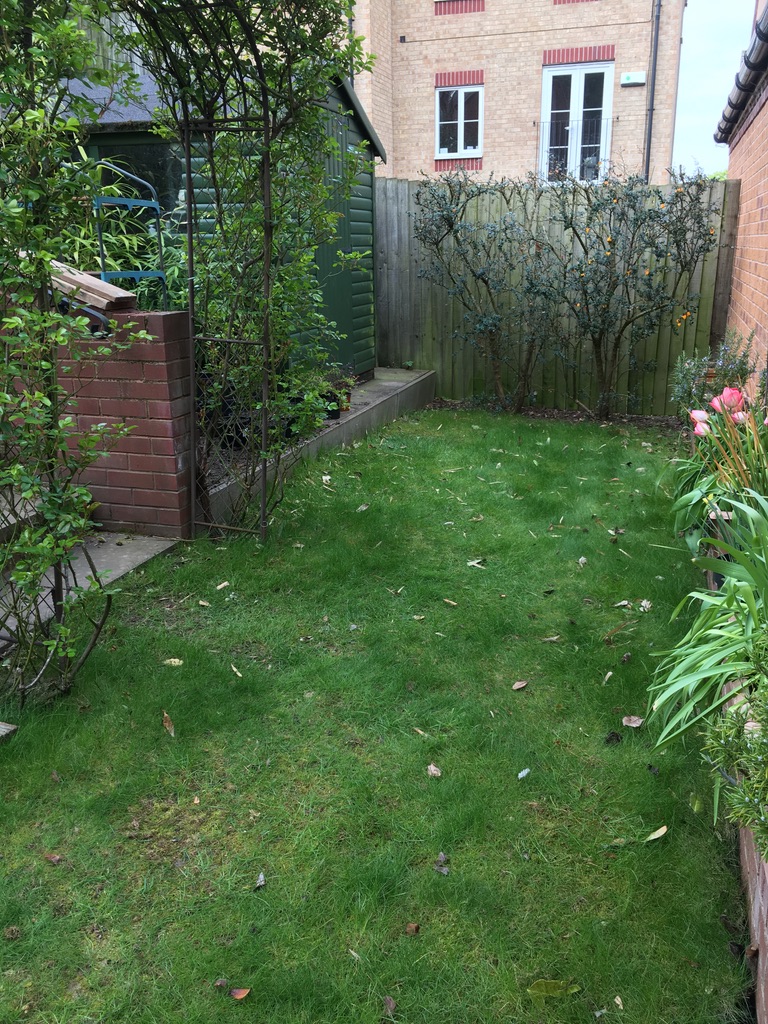
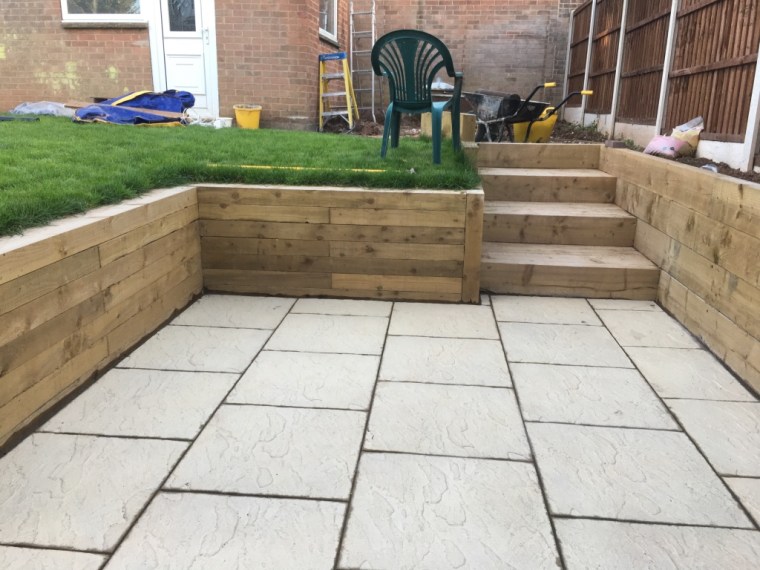
And here go… The final look. Extended Slabbing. Full floating decking area. Planting areas with sleepers and new ‘lawn’.
These Two demanding customers were very impressed with the finish… Garden furniture was added to give that lived-in look.
Very Pleased. Thank You
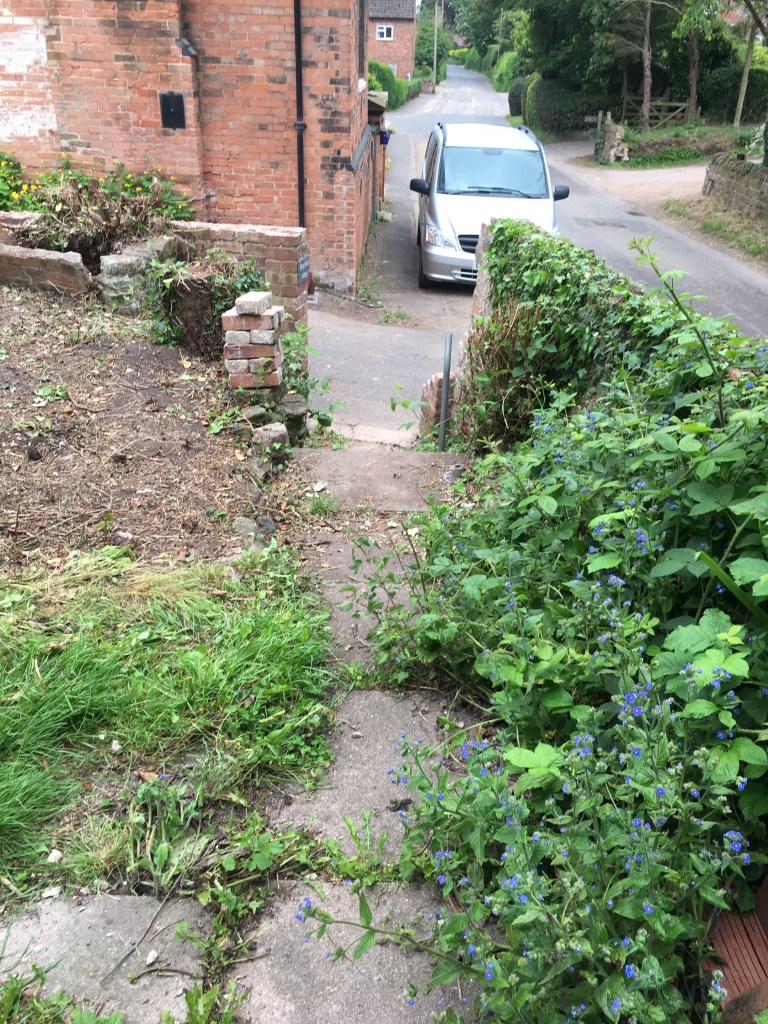
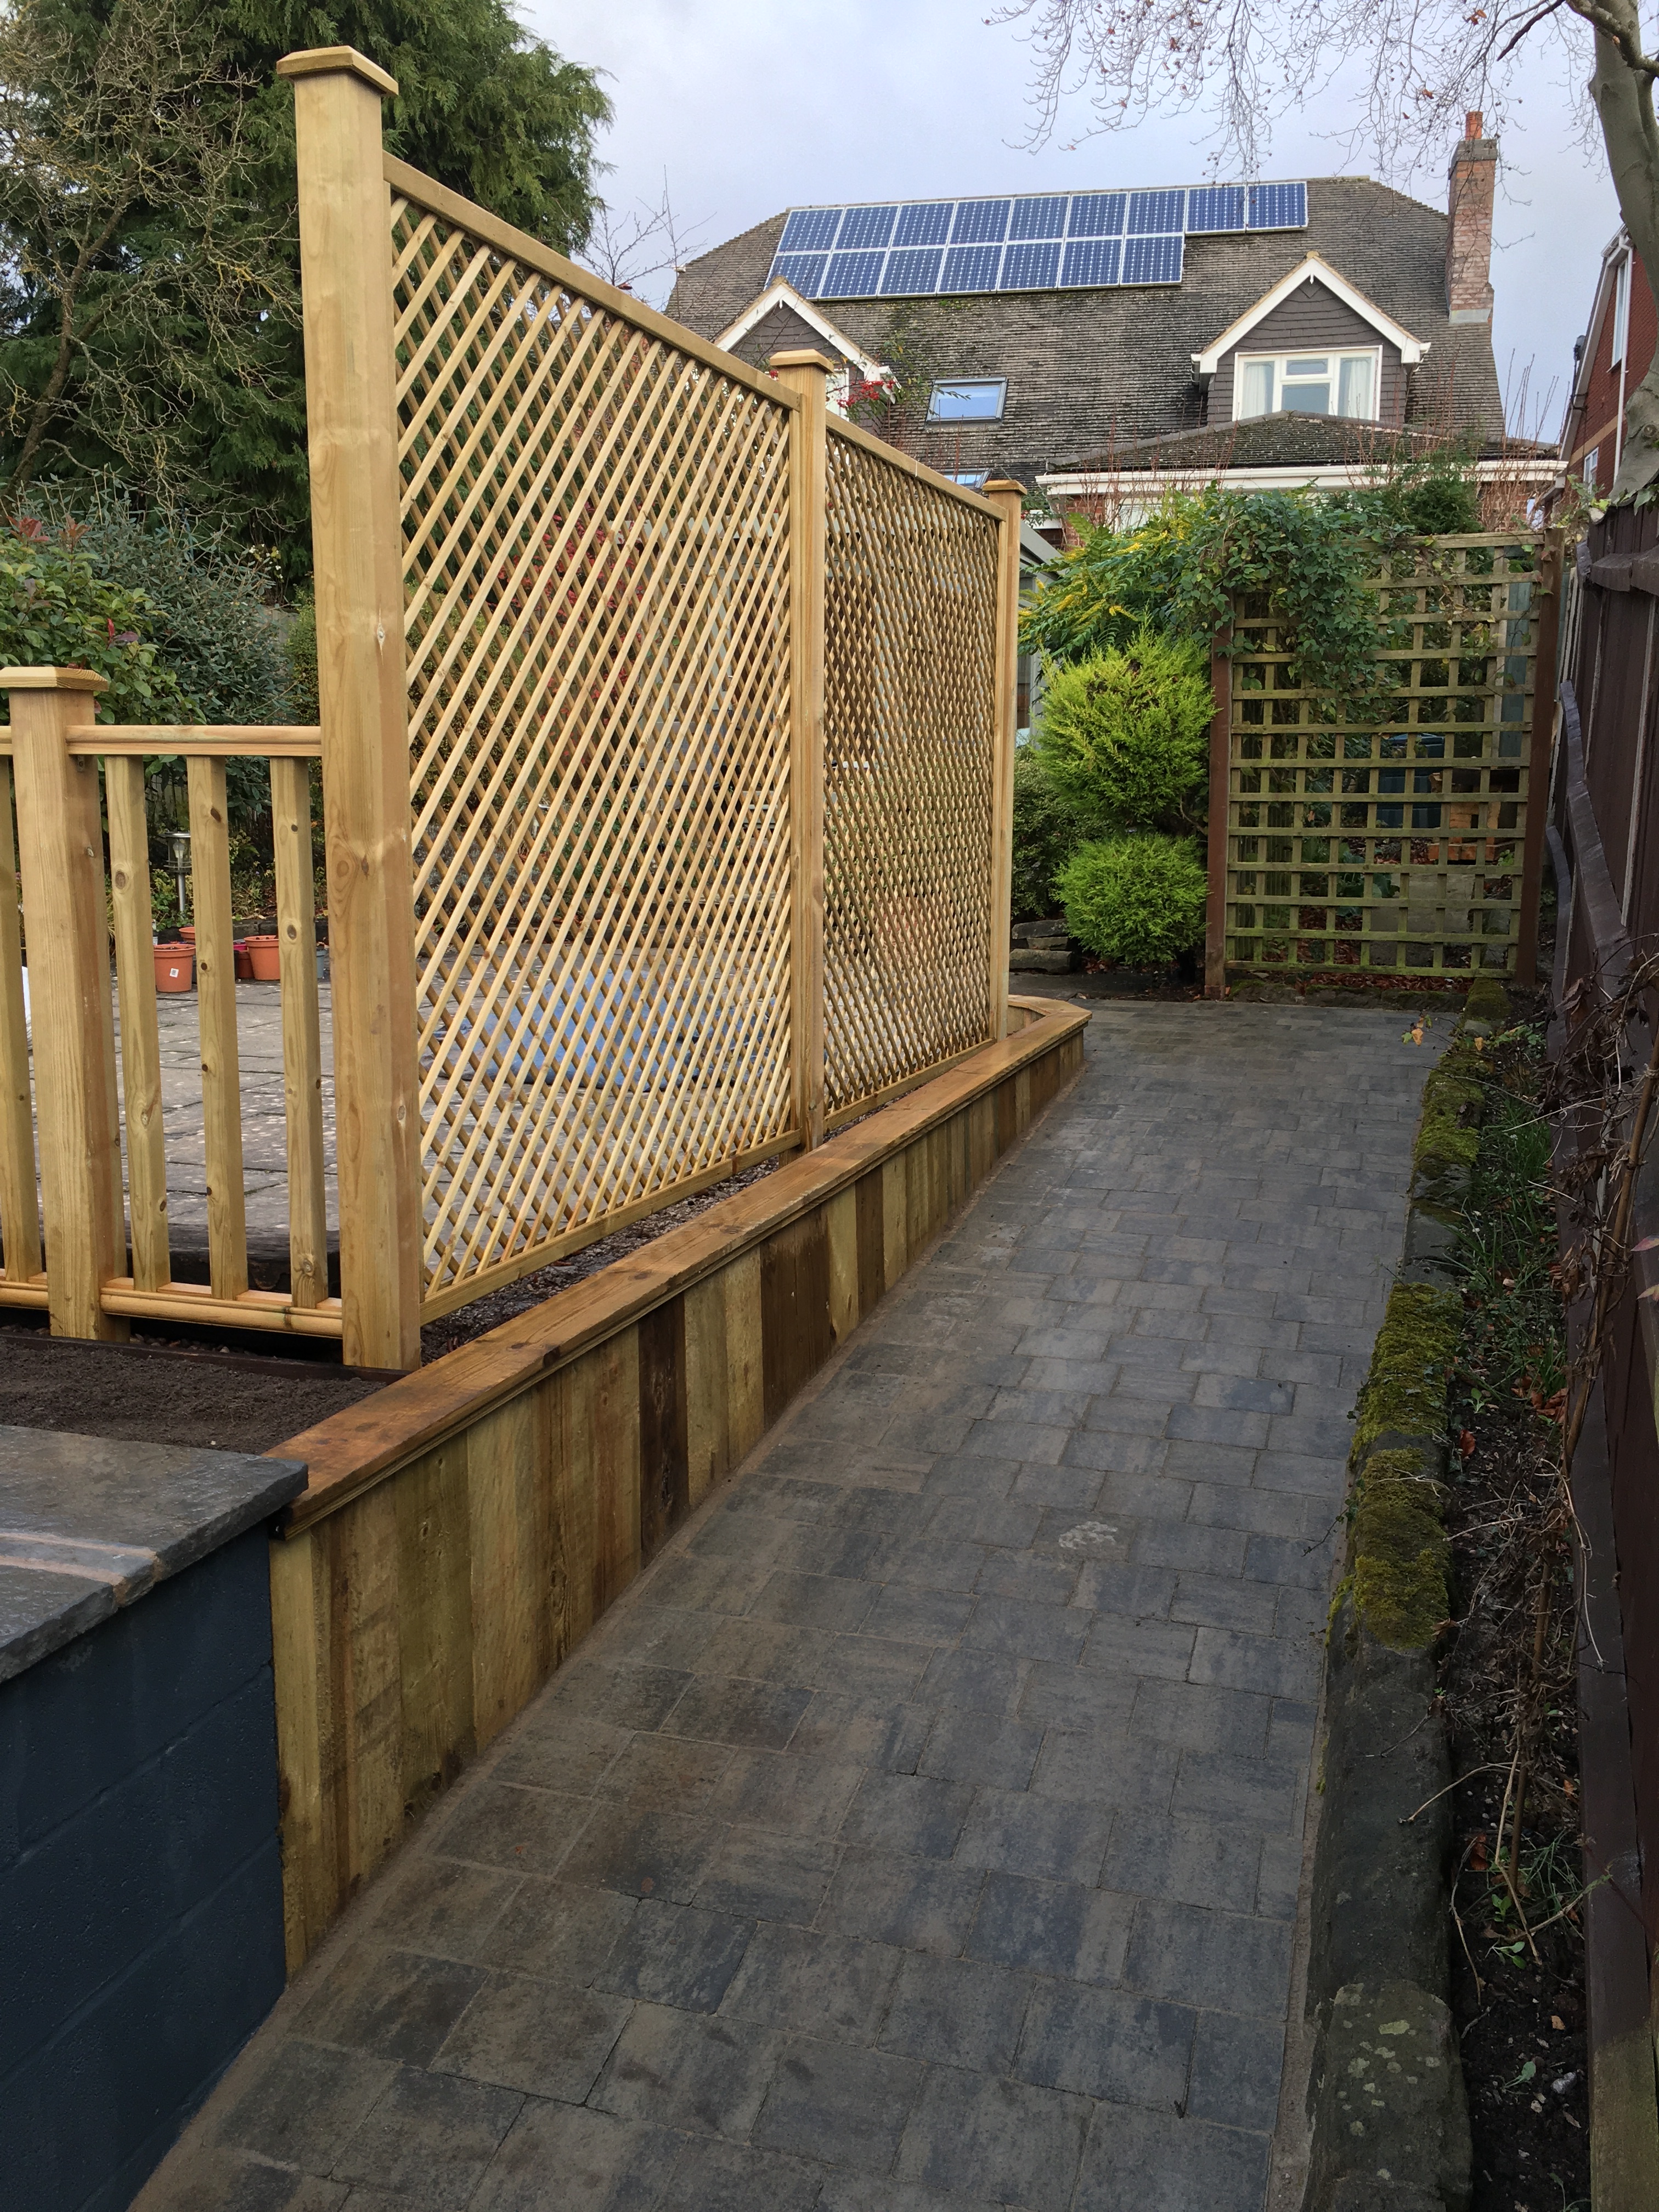
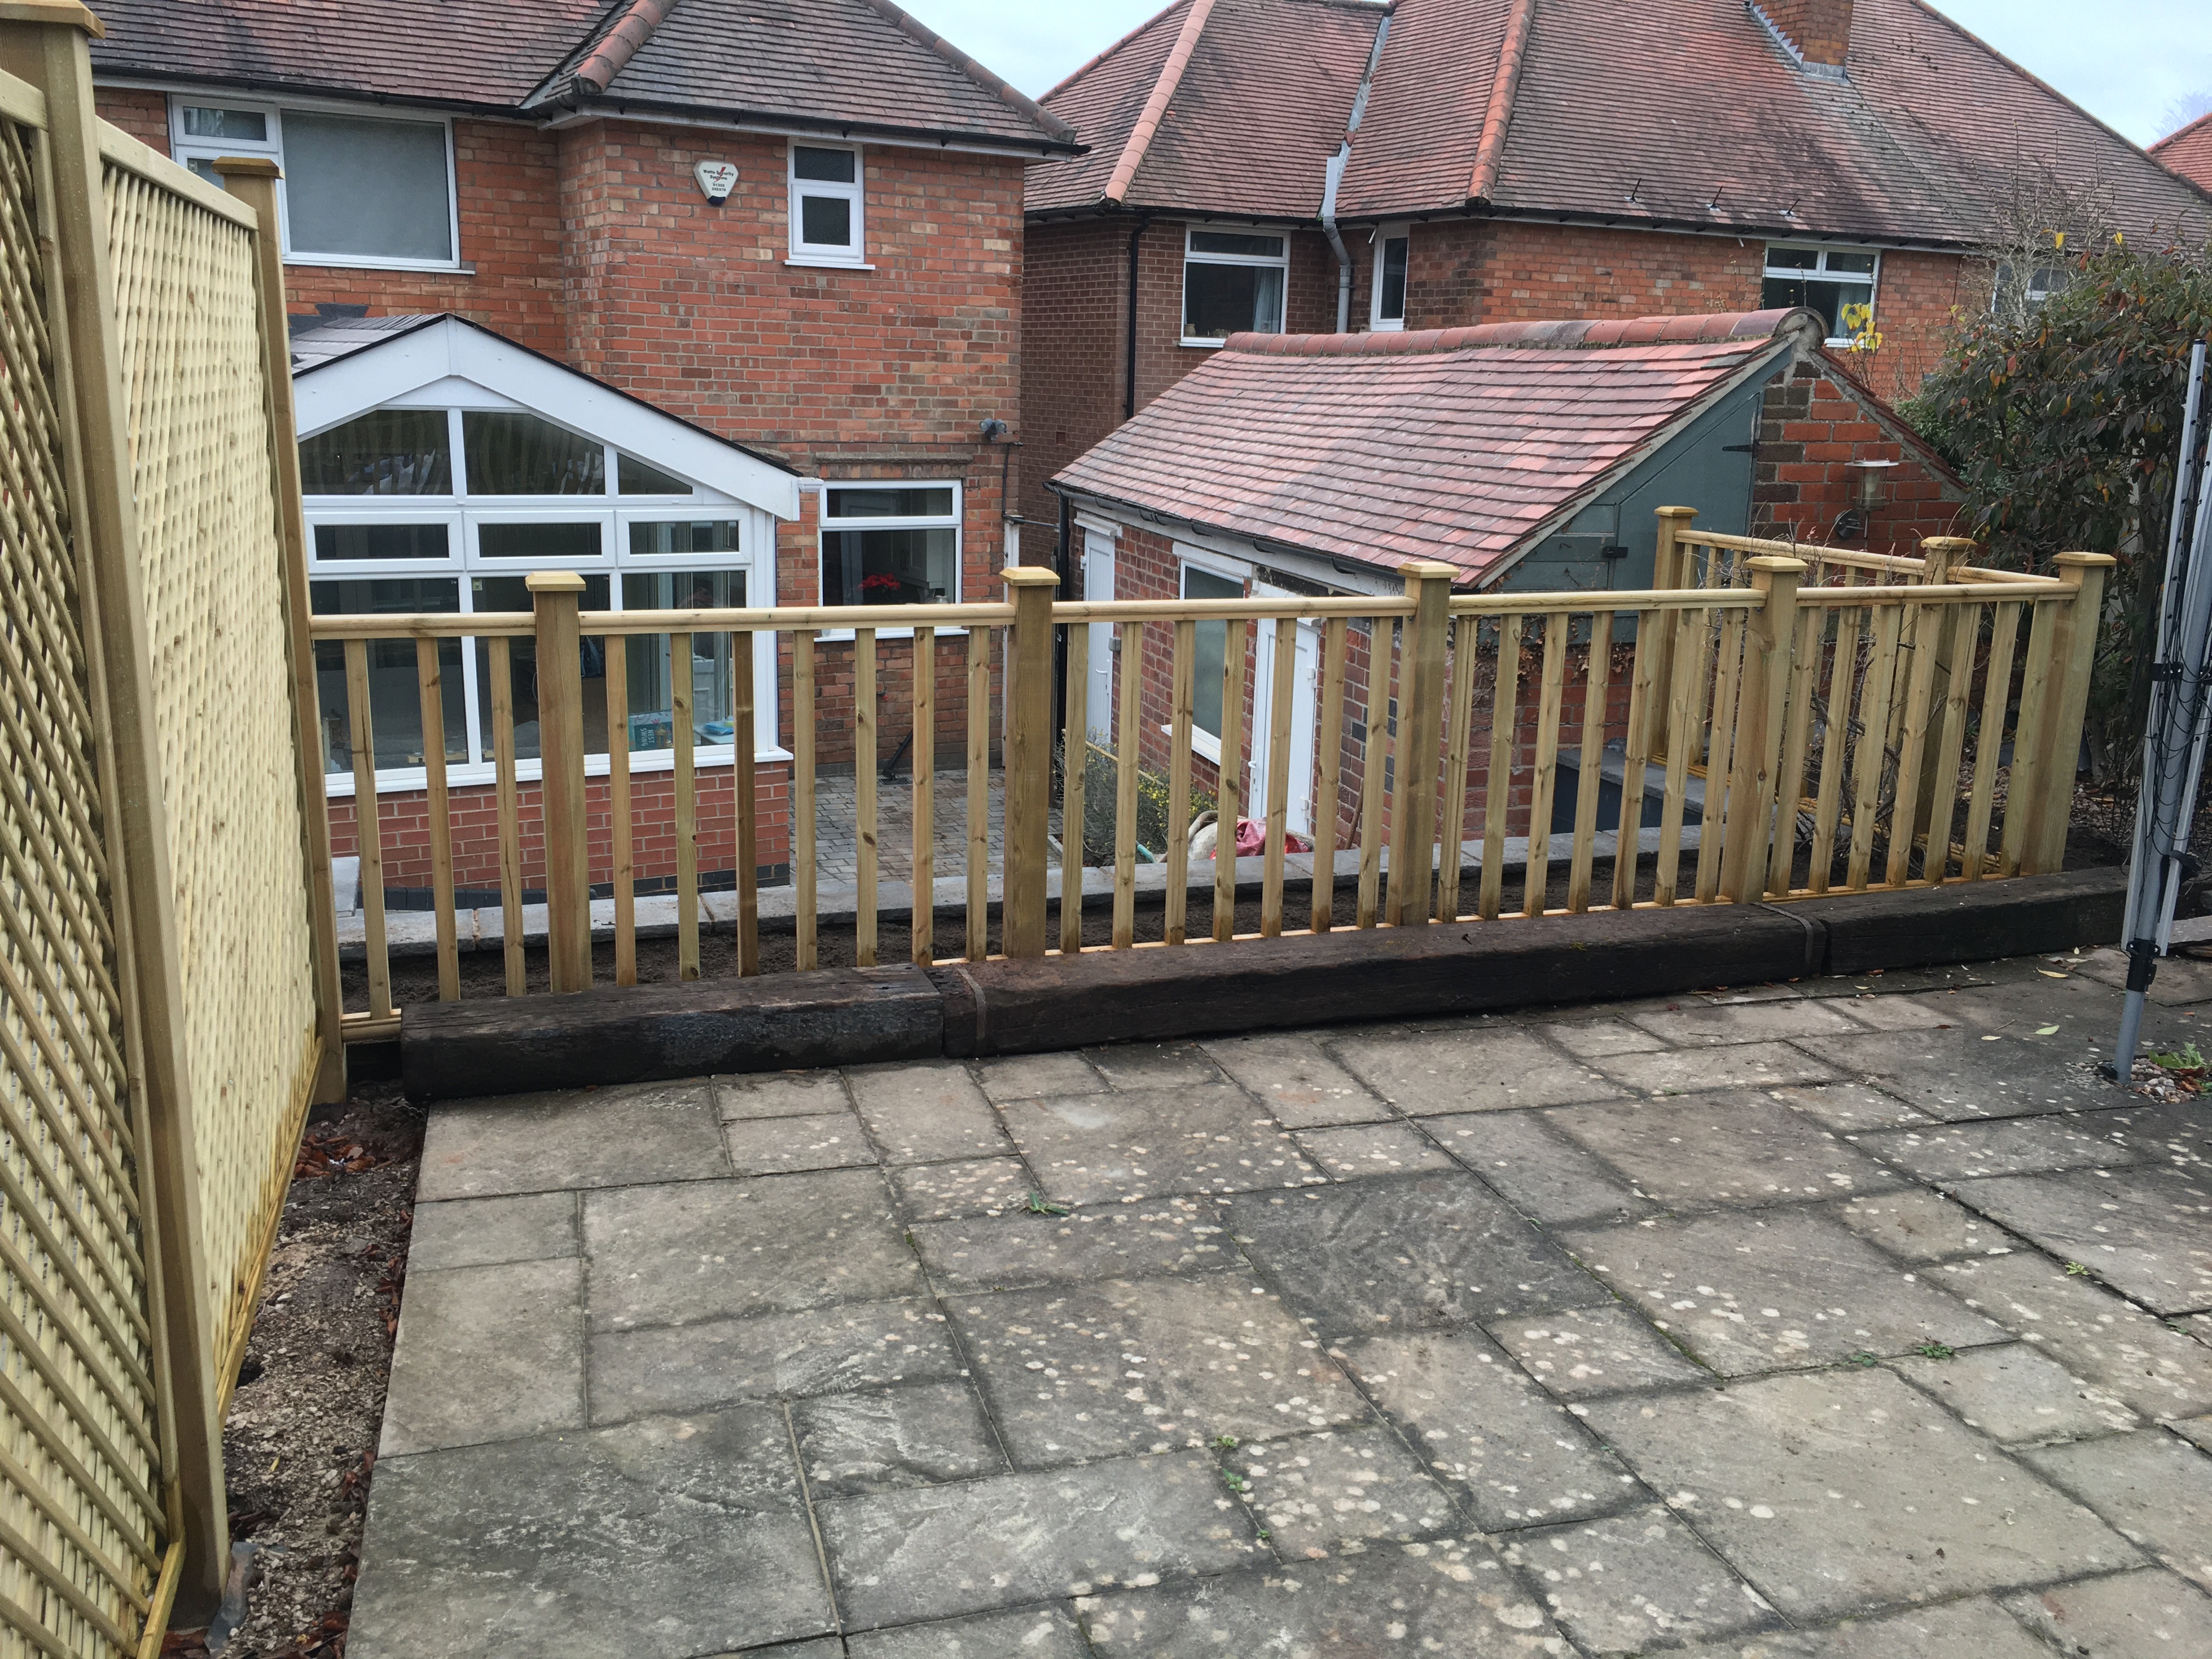
The fence at the end of the garden which covered the stairwell to the drive was also cut to a sensible level. 6 feet of fence was not needed there, and this created more light into the stairwell and back room around the corner.
THE ROTARY WASHING LINE HOLDER WAS PUT BACK INTO THE GROUND – SILVER-LOOKING PLUG.
And that’s it… Simple job with a great finish and above all, it fits the brief, low maintenance, and dog friendly.
GIVE ME A CALL IF YOU NEED OR WANT ANY LANDSCAPE WORK
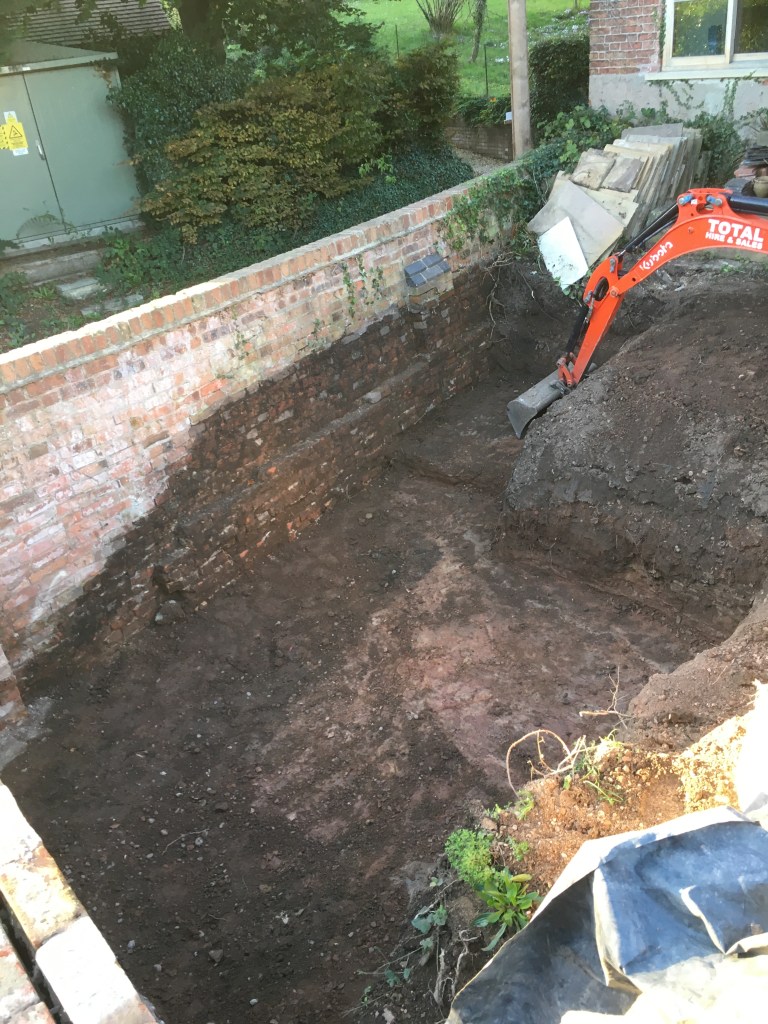
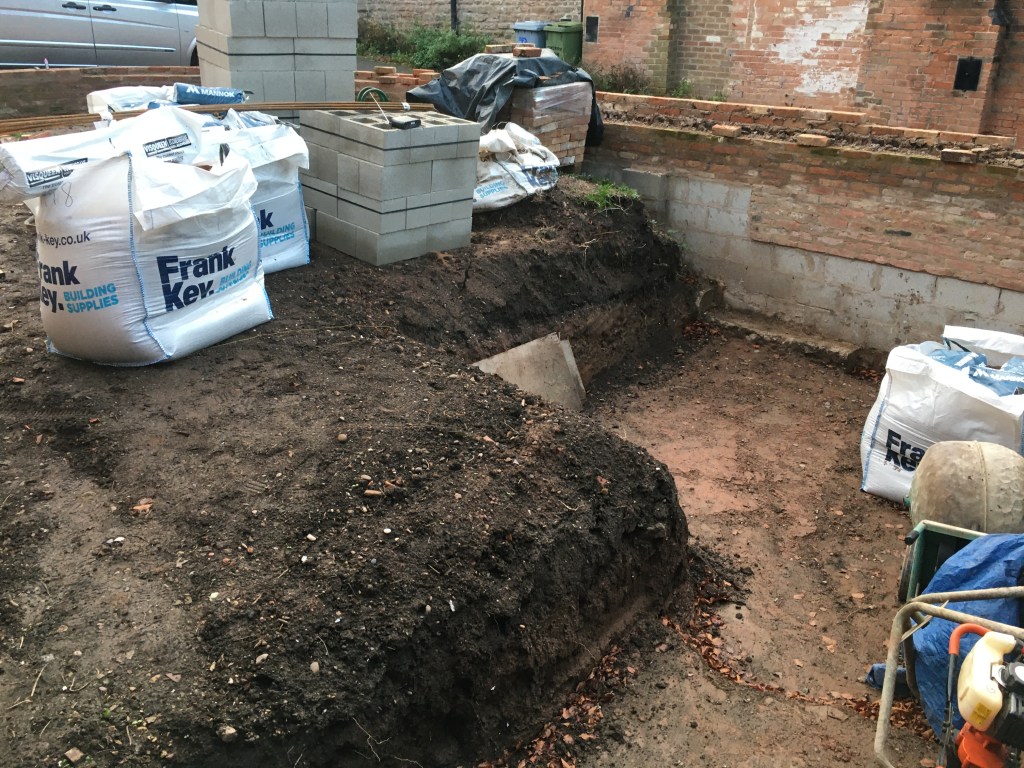
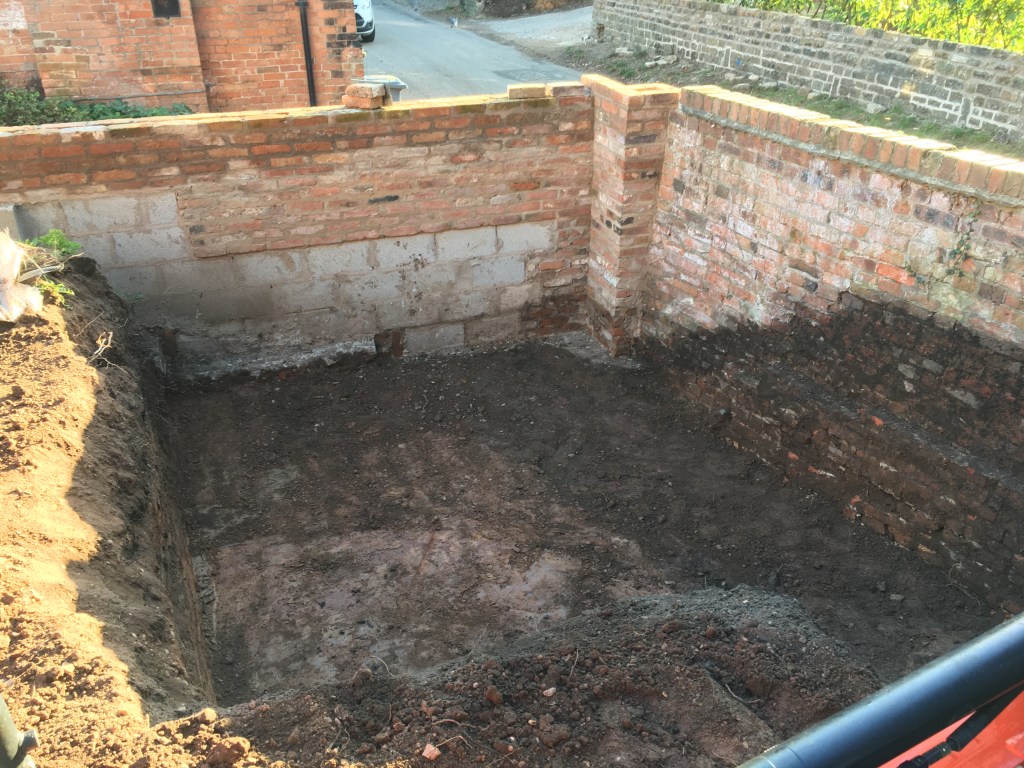
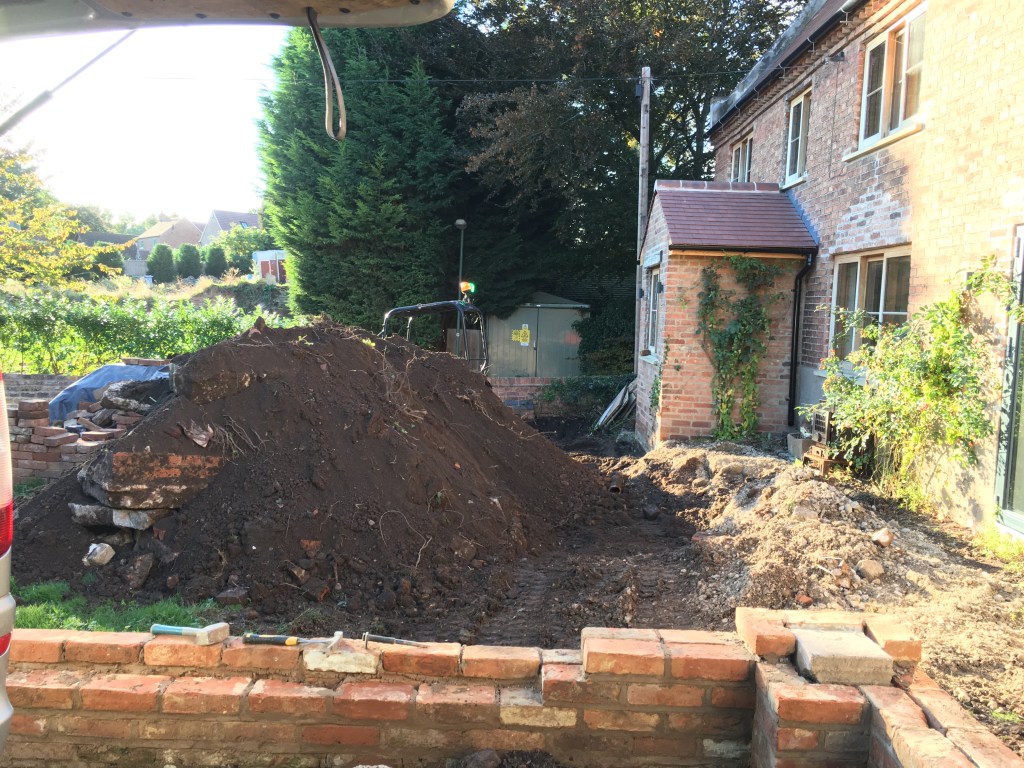
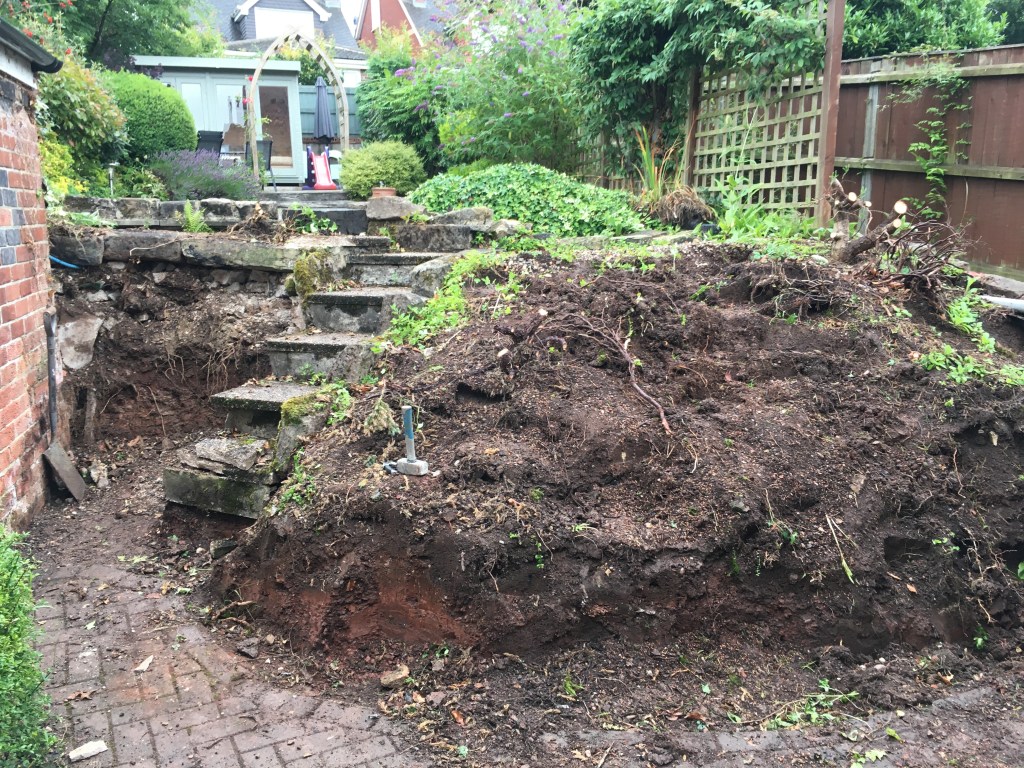
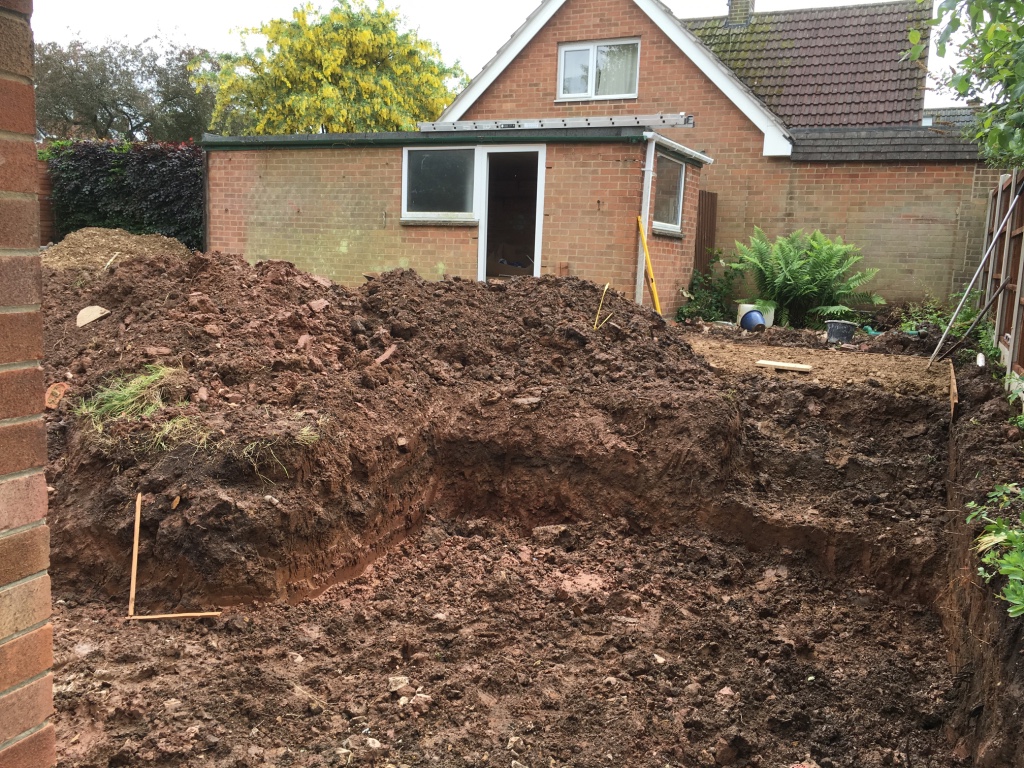
This was an interesting job. The first viewing must of been five years before any ground was even touched. The priority was given to restoring the house initially.
When the first talks started, it was of course about the design and how to go about creating a garden which was only at the front of the house. This didn’t have a rear garden, so everything was on the front and on show. We discussed that the owner, who was a good diy’er himself, started to clear the worst of the garden out, removing old trees and large scrubs ready for a digger to do a proper clearout job.
After a design and plan were in place, It was arranged that I’d do the majority of the groundwork and then get others in to do other jobs, due to time constraints and the daily distance.
ALL THE TREES AND OLD SHRUBS REMOVED
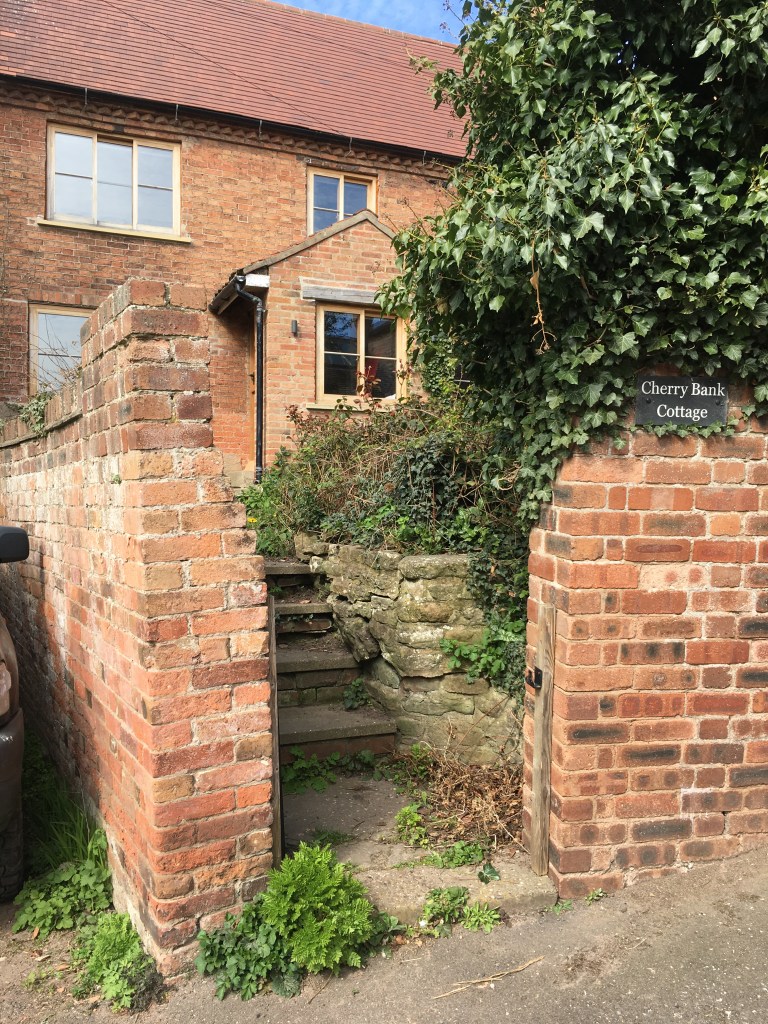
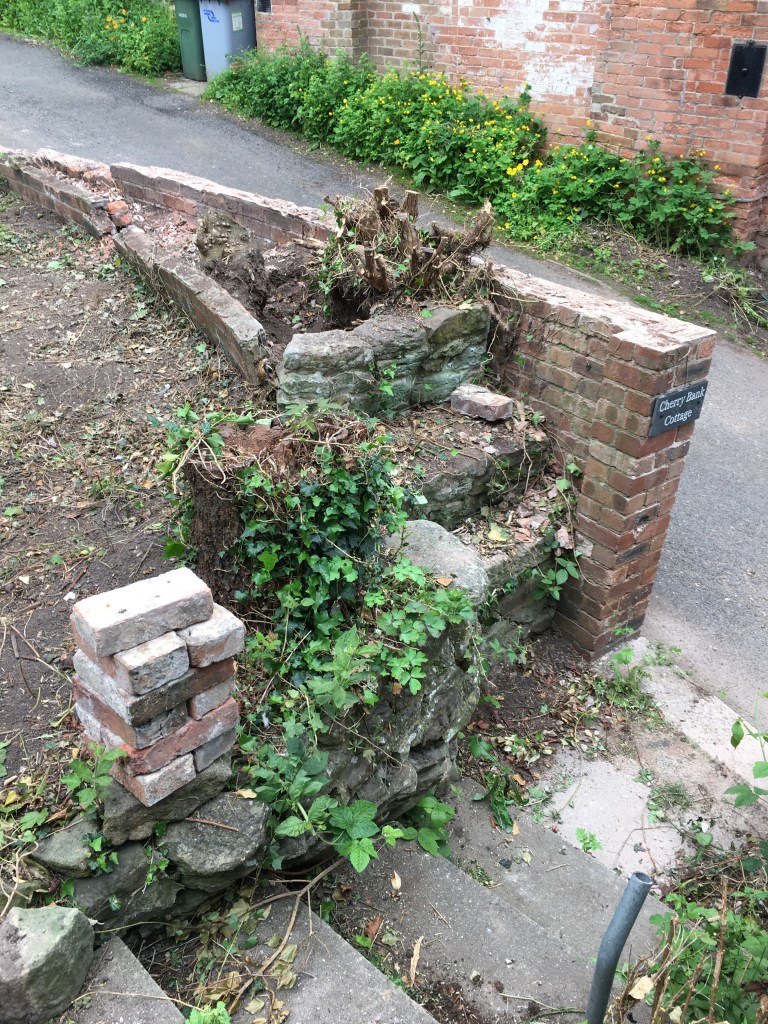
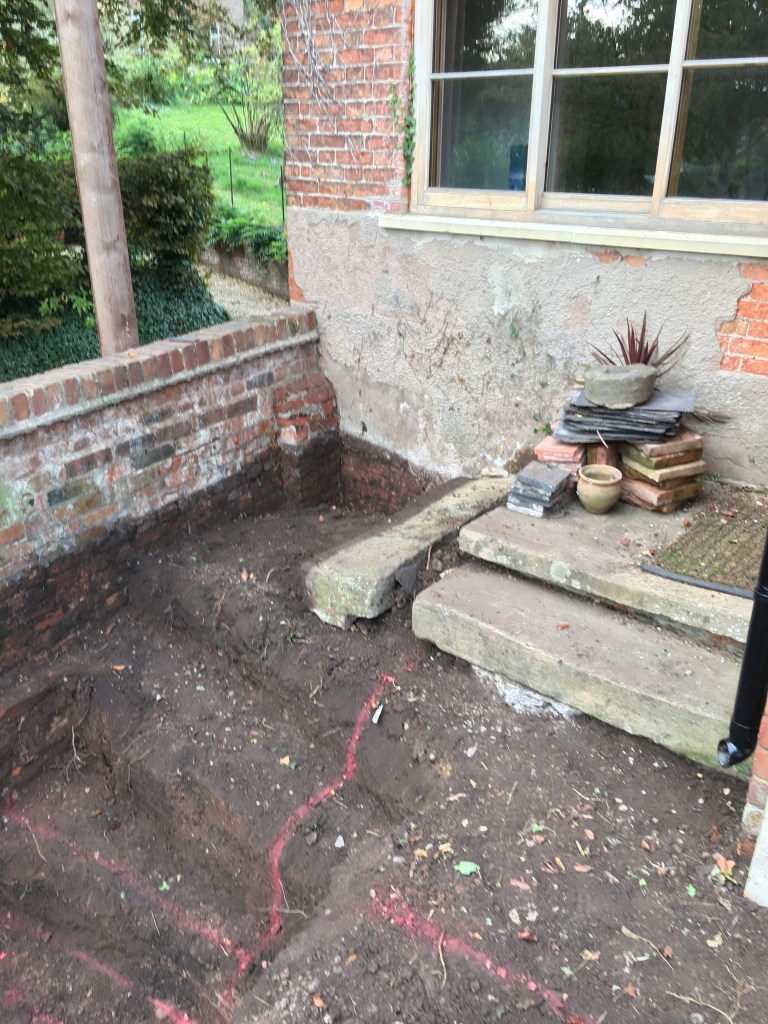
One thing I was keen to remove was the side steps in the front door. Blocking this off then creating a more private garden space. This was also because the ‘front door’ was being moved to the top of the house.
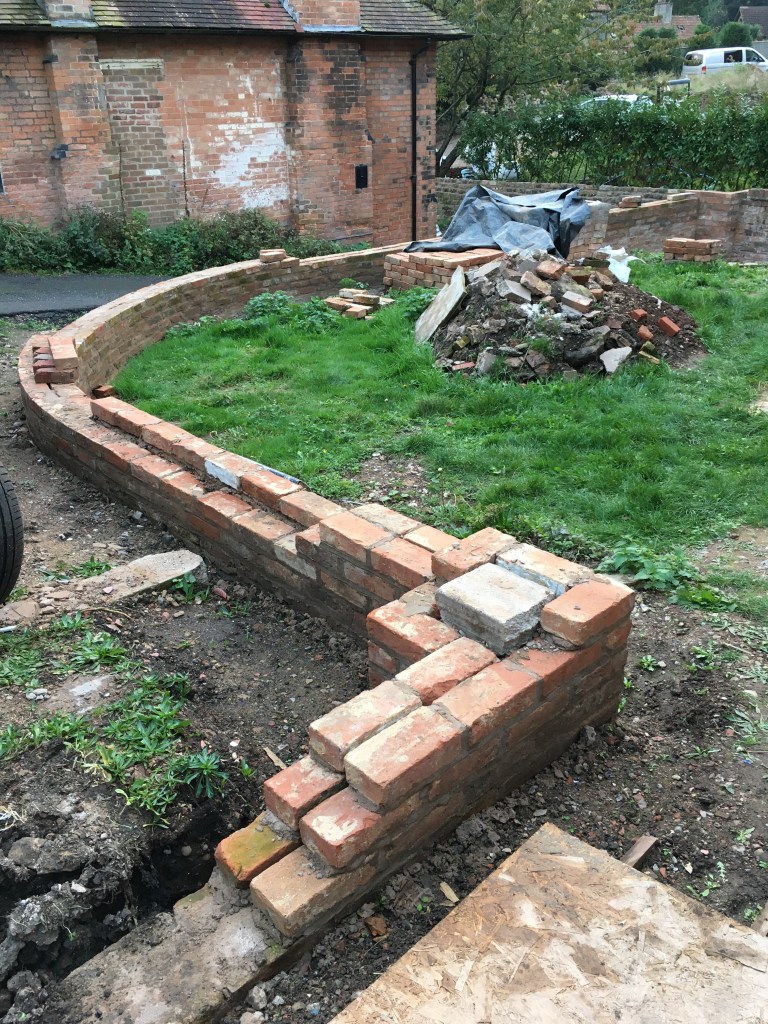
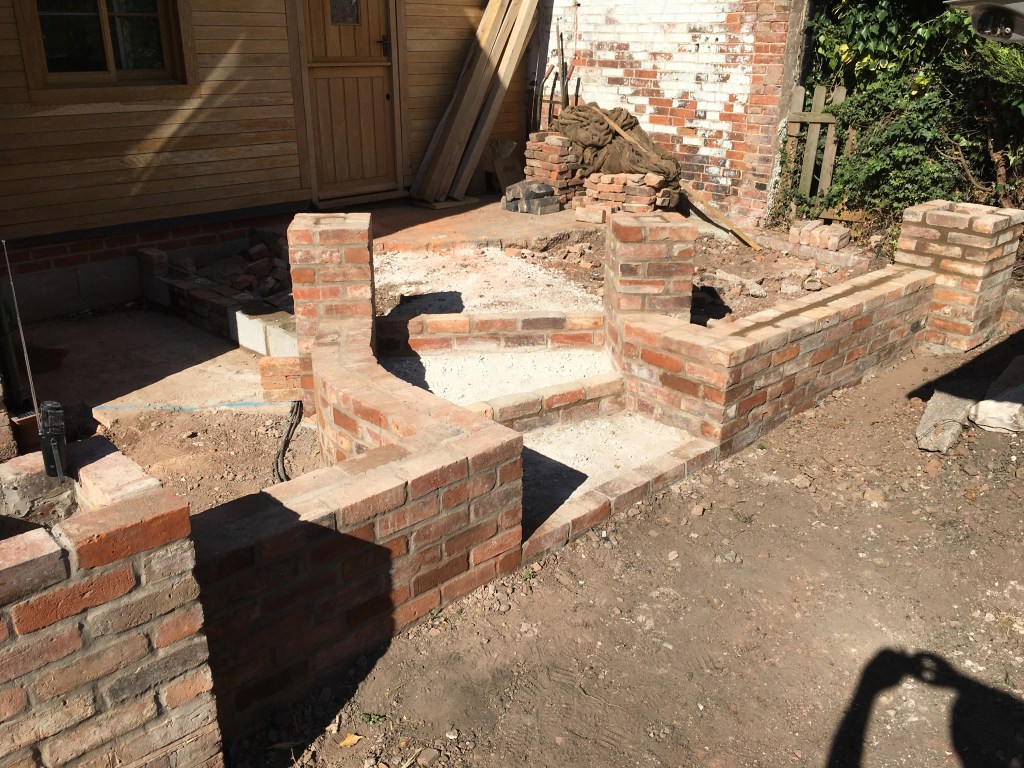
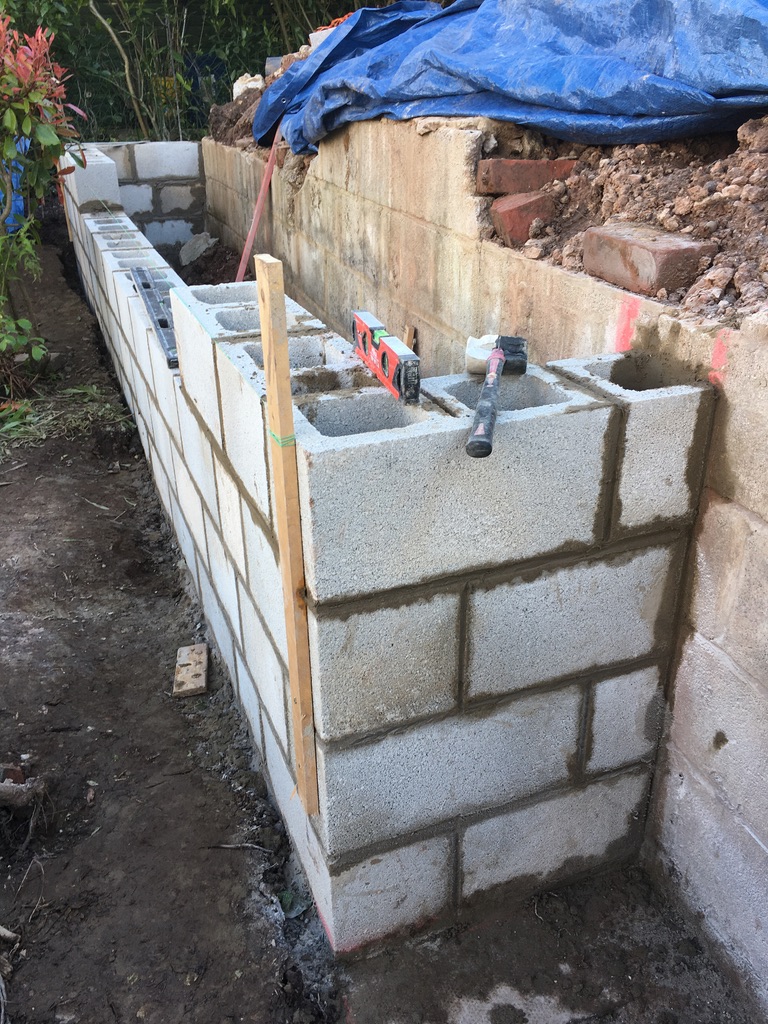
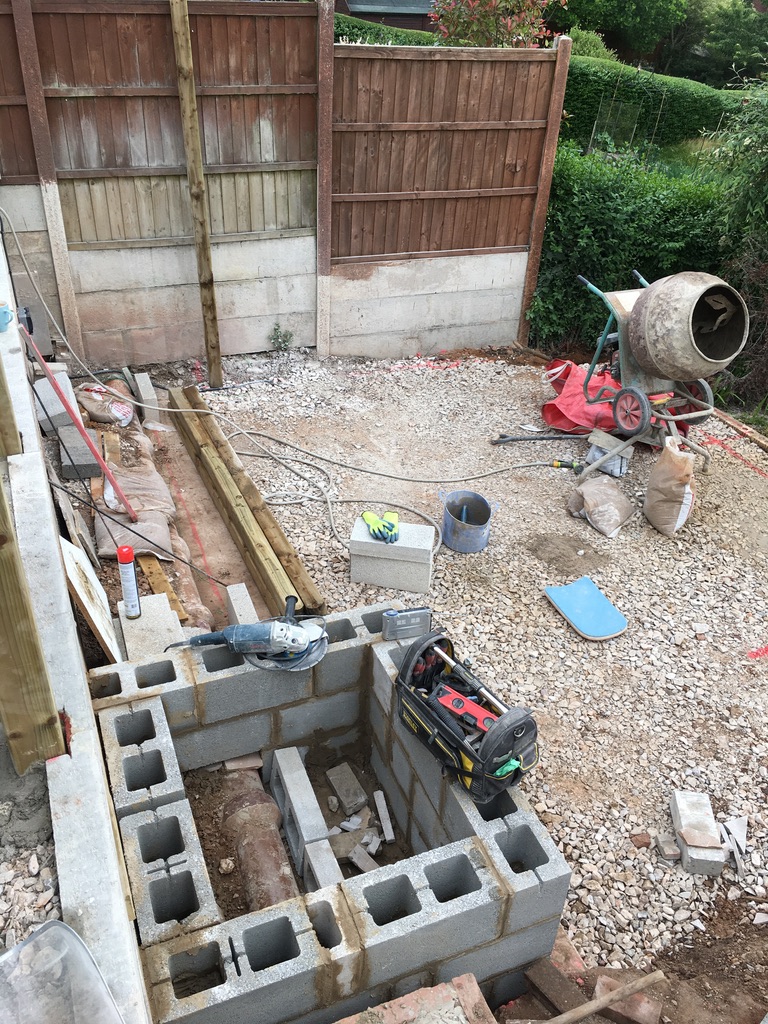
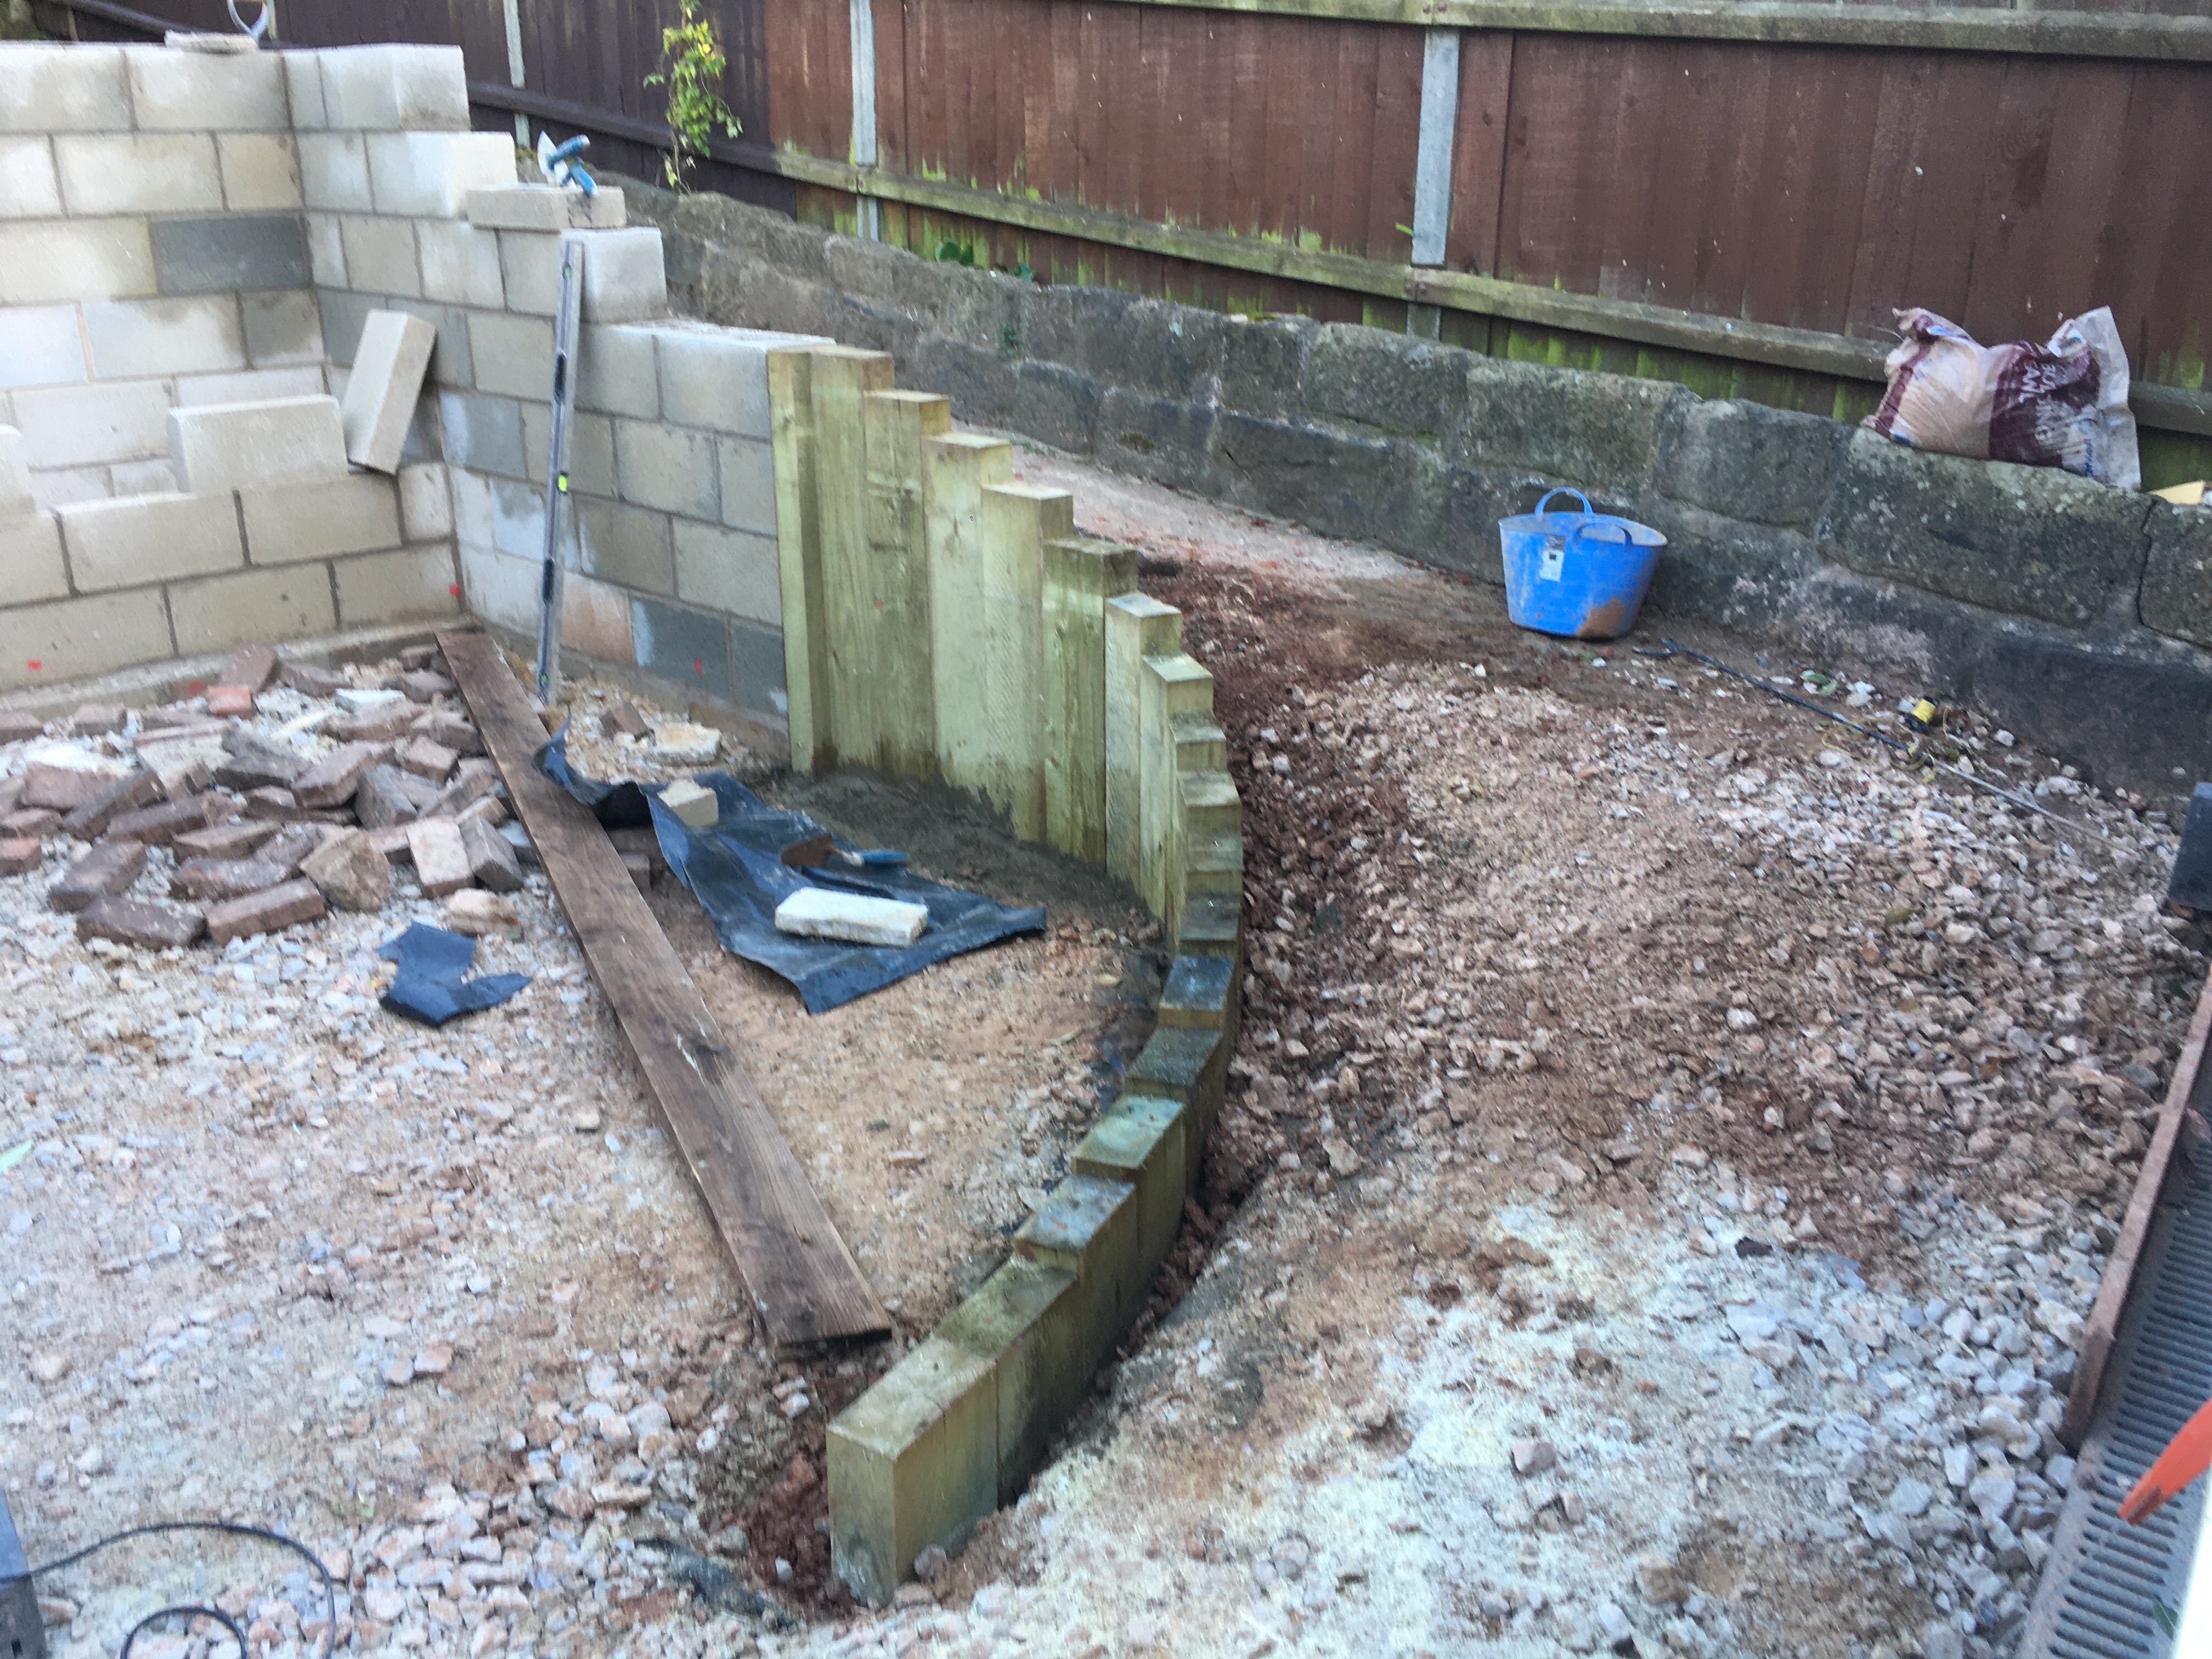
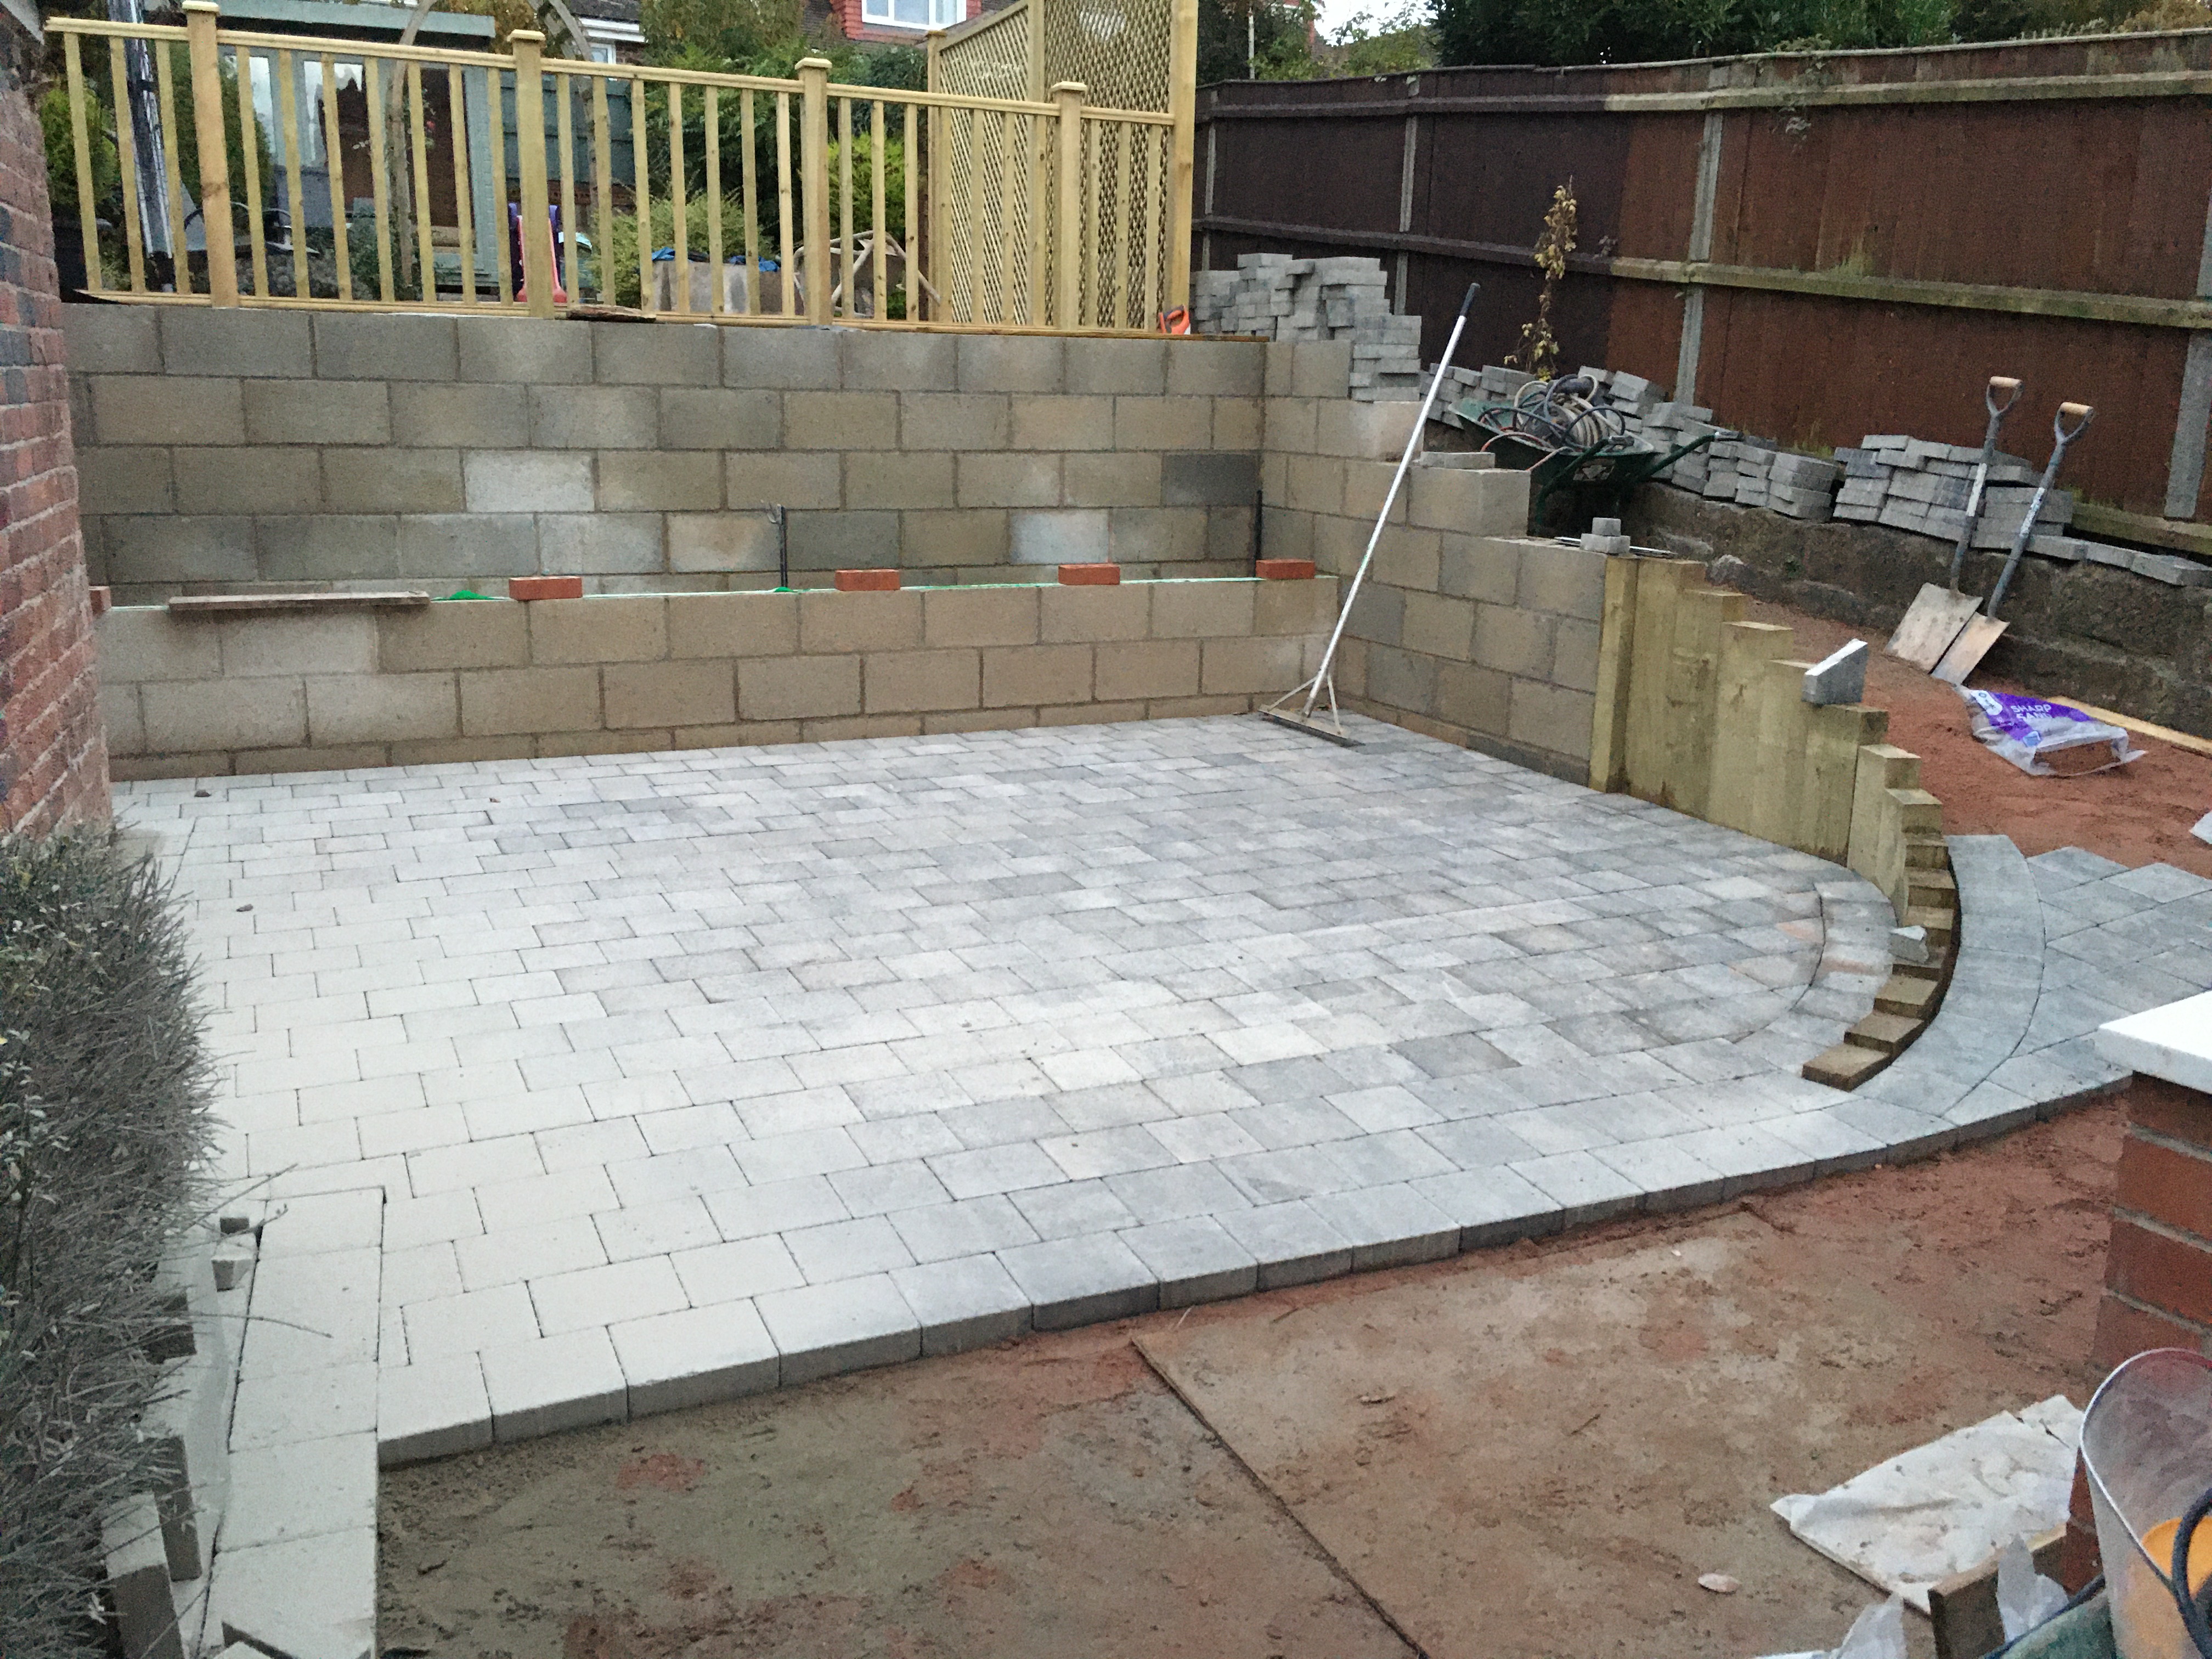
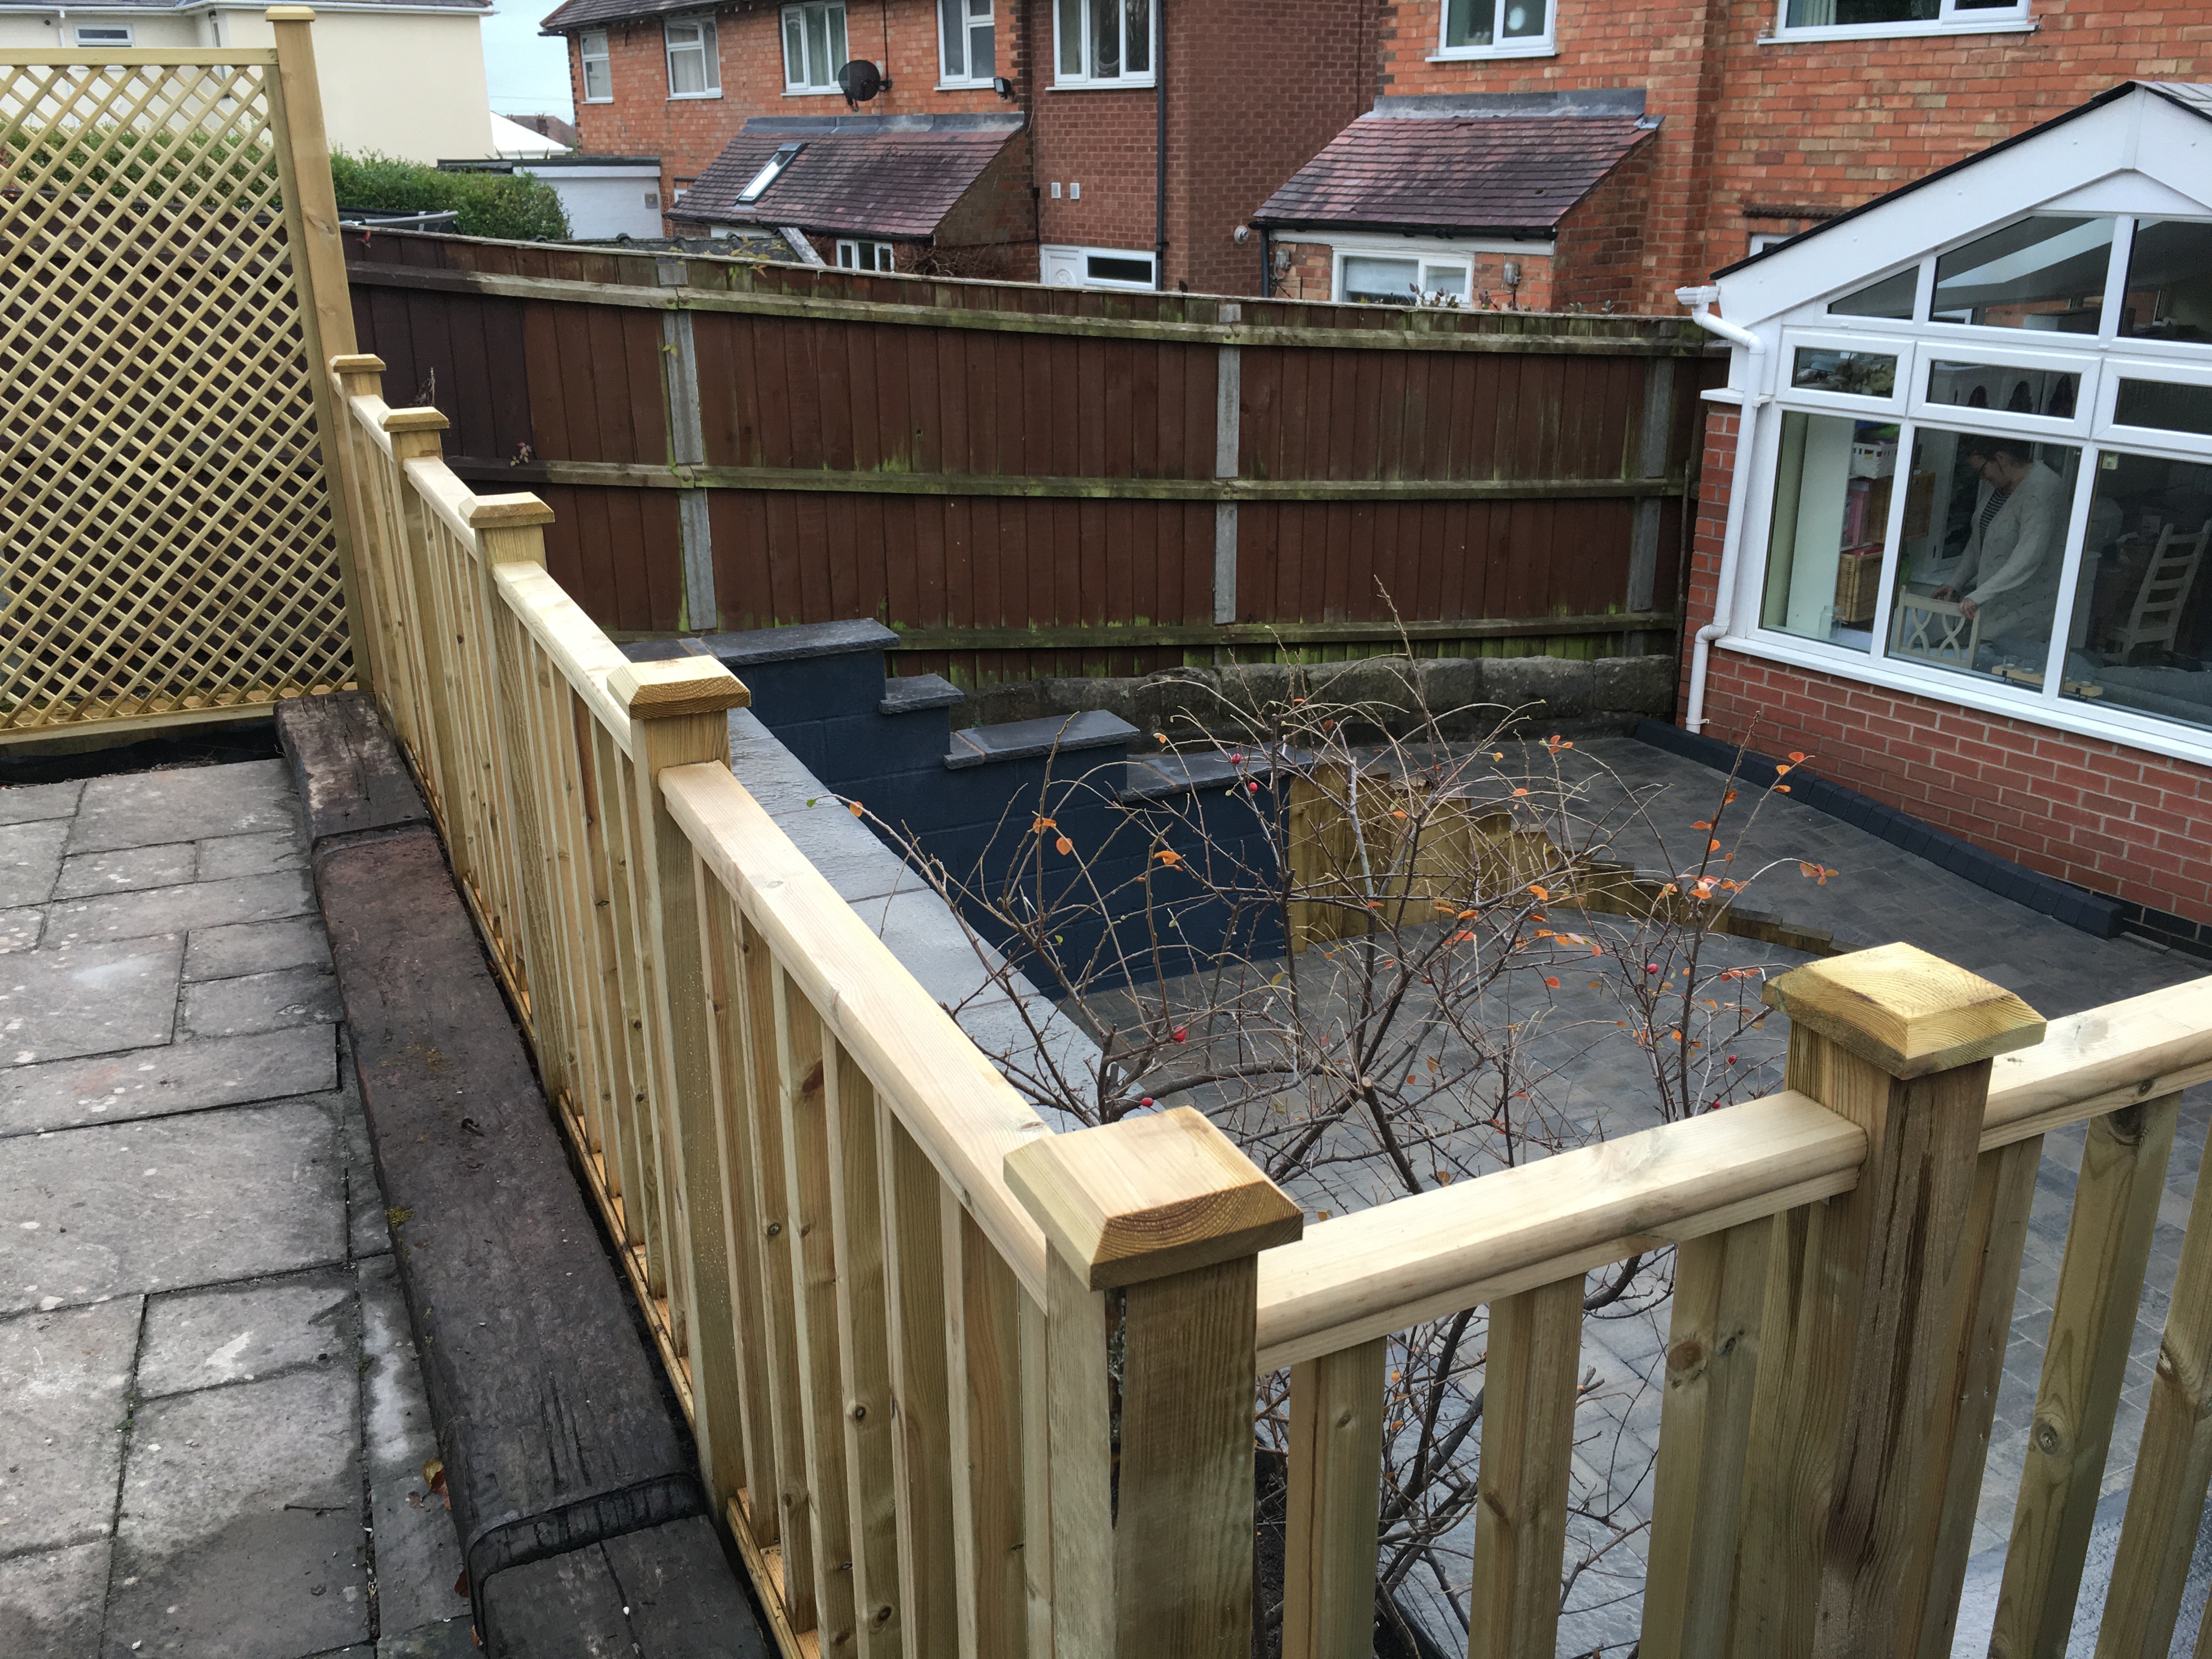
A few weeks before the official start, I came up with the, maybe crazy idea of creating a sunken garden. Doing this would then give total privacy and an area that could be used without onlookers. So, in 2021 the first dig was started.
The owner got some guys in to sort the wall out in a design we had discussed. Well, this didn’t quite happen as quickly (3 months) or quite as planned as I wanted. So, I stepped in and completed the wall as it needed to be finished so I could start the inner section, and a lot of repairing was done.
THE FIRST SECTION OF WALL IS BUILT
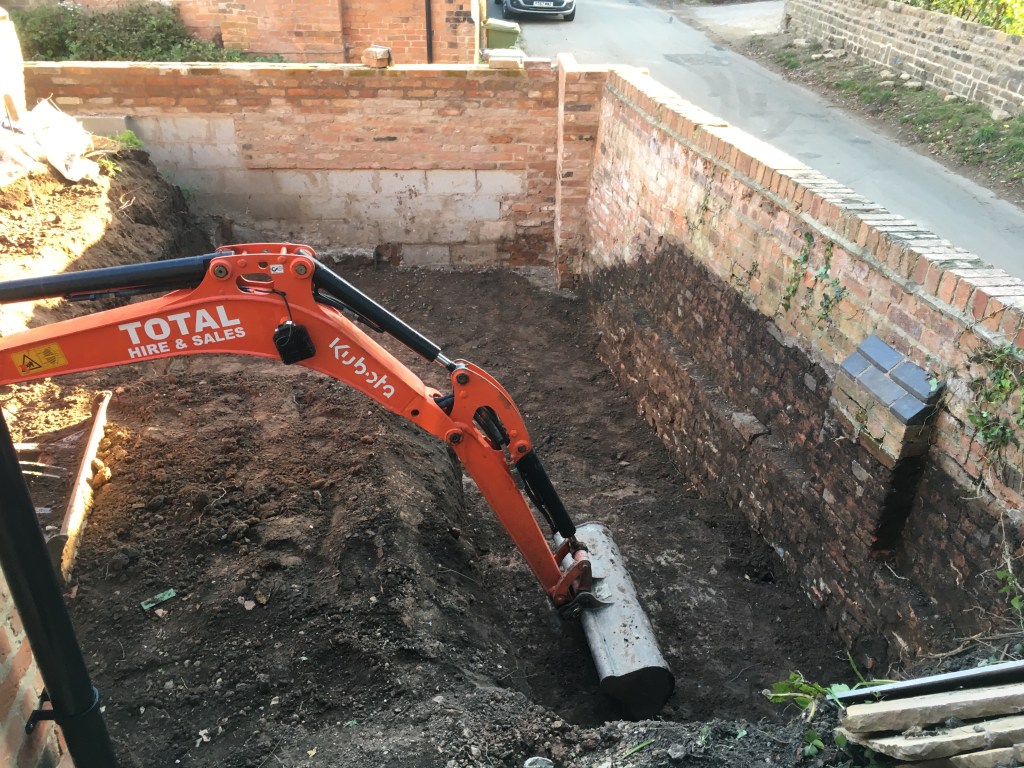
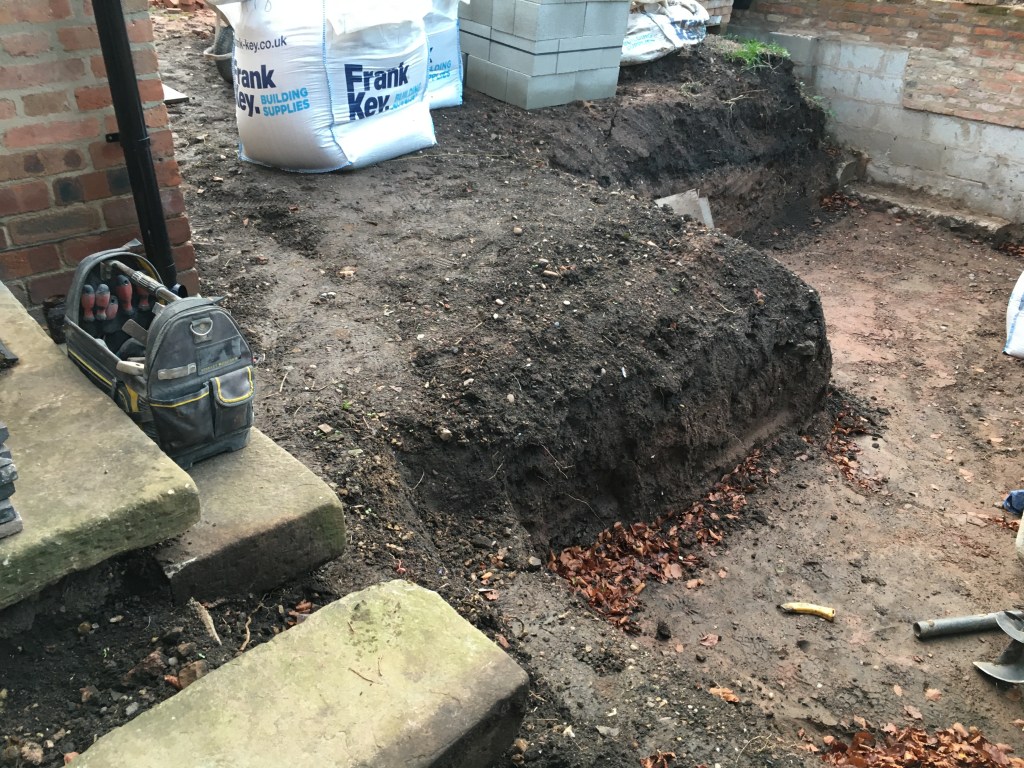
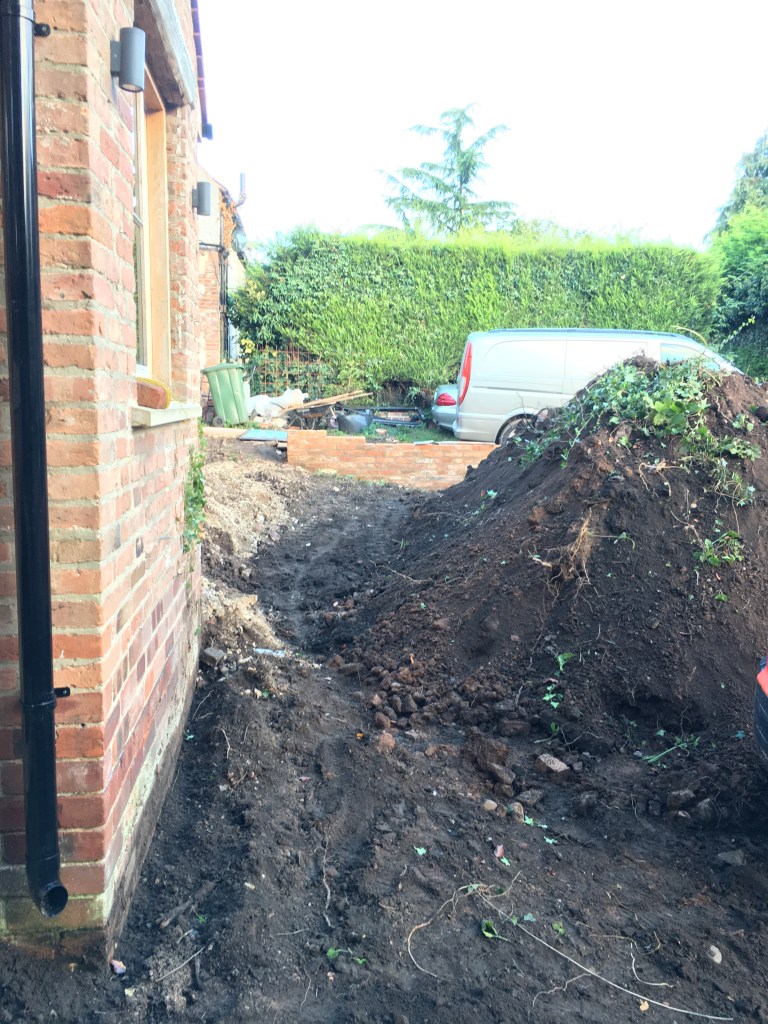
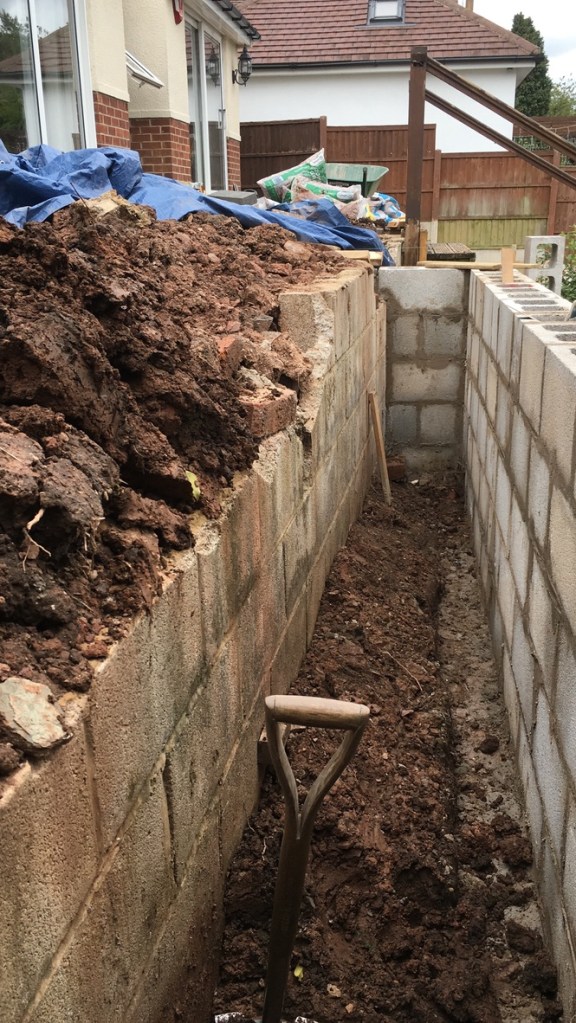
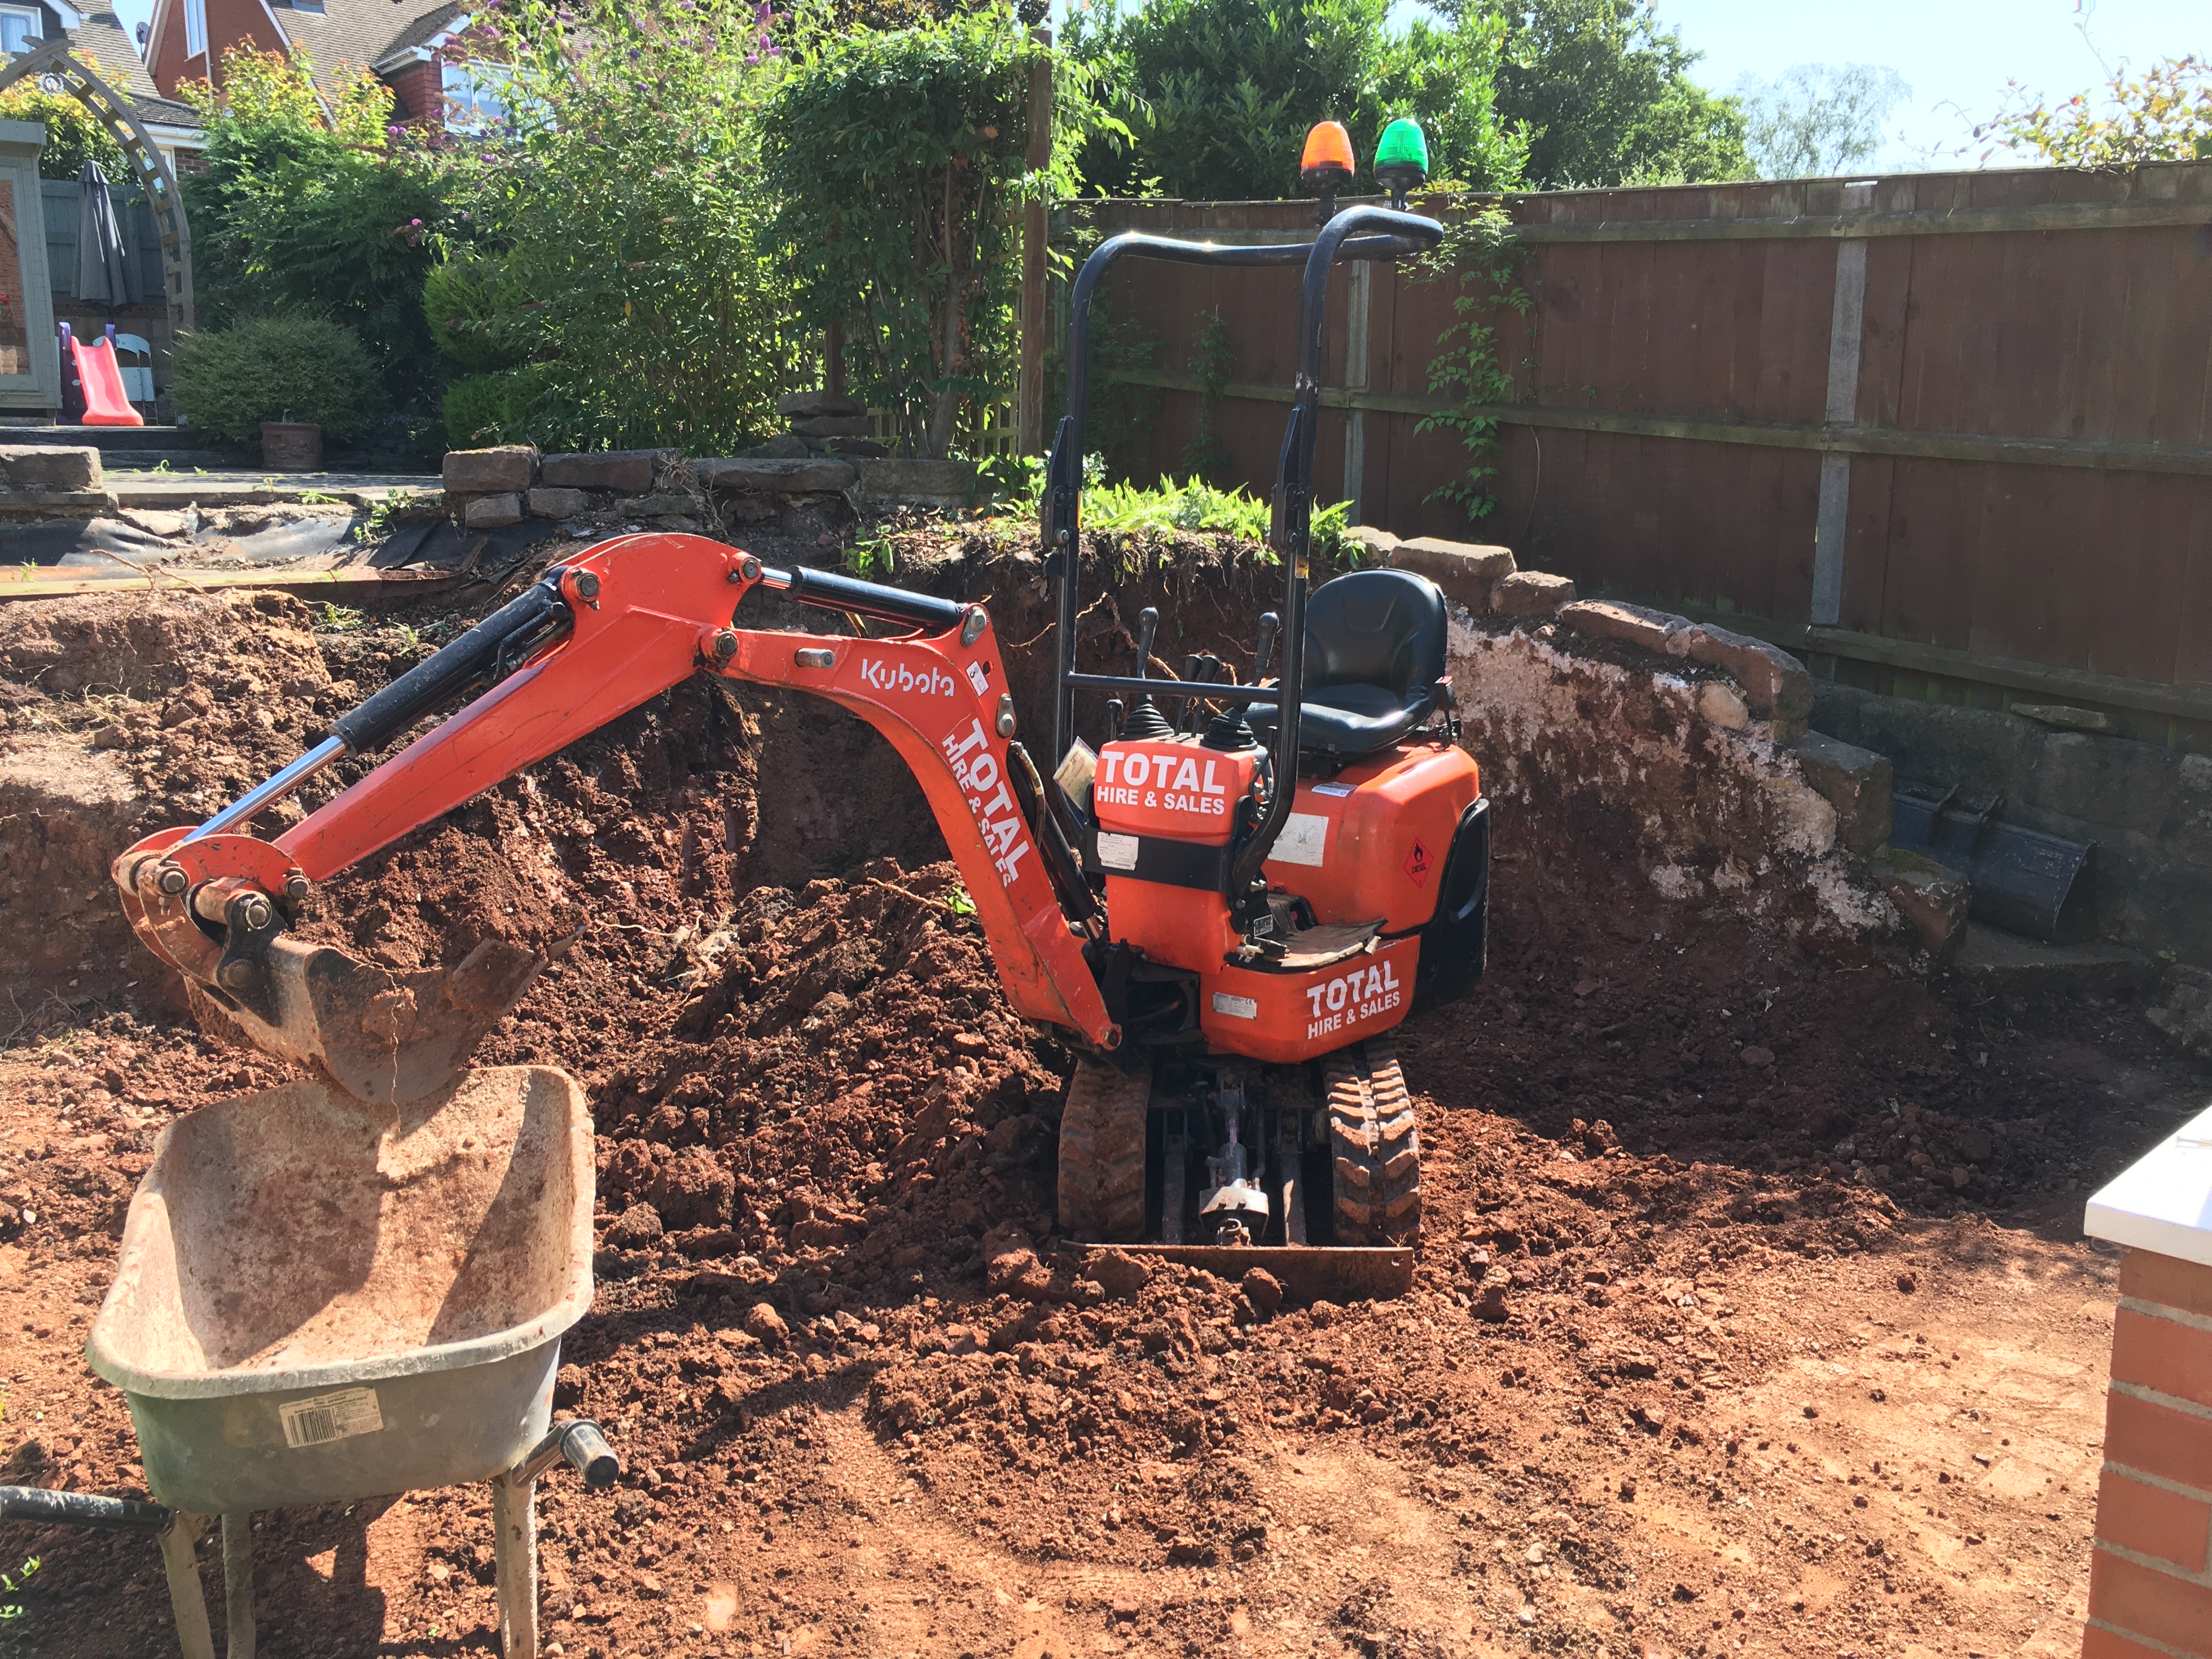
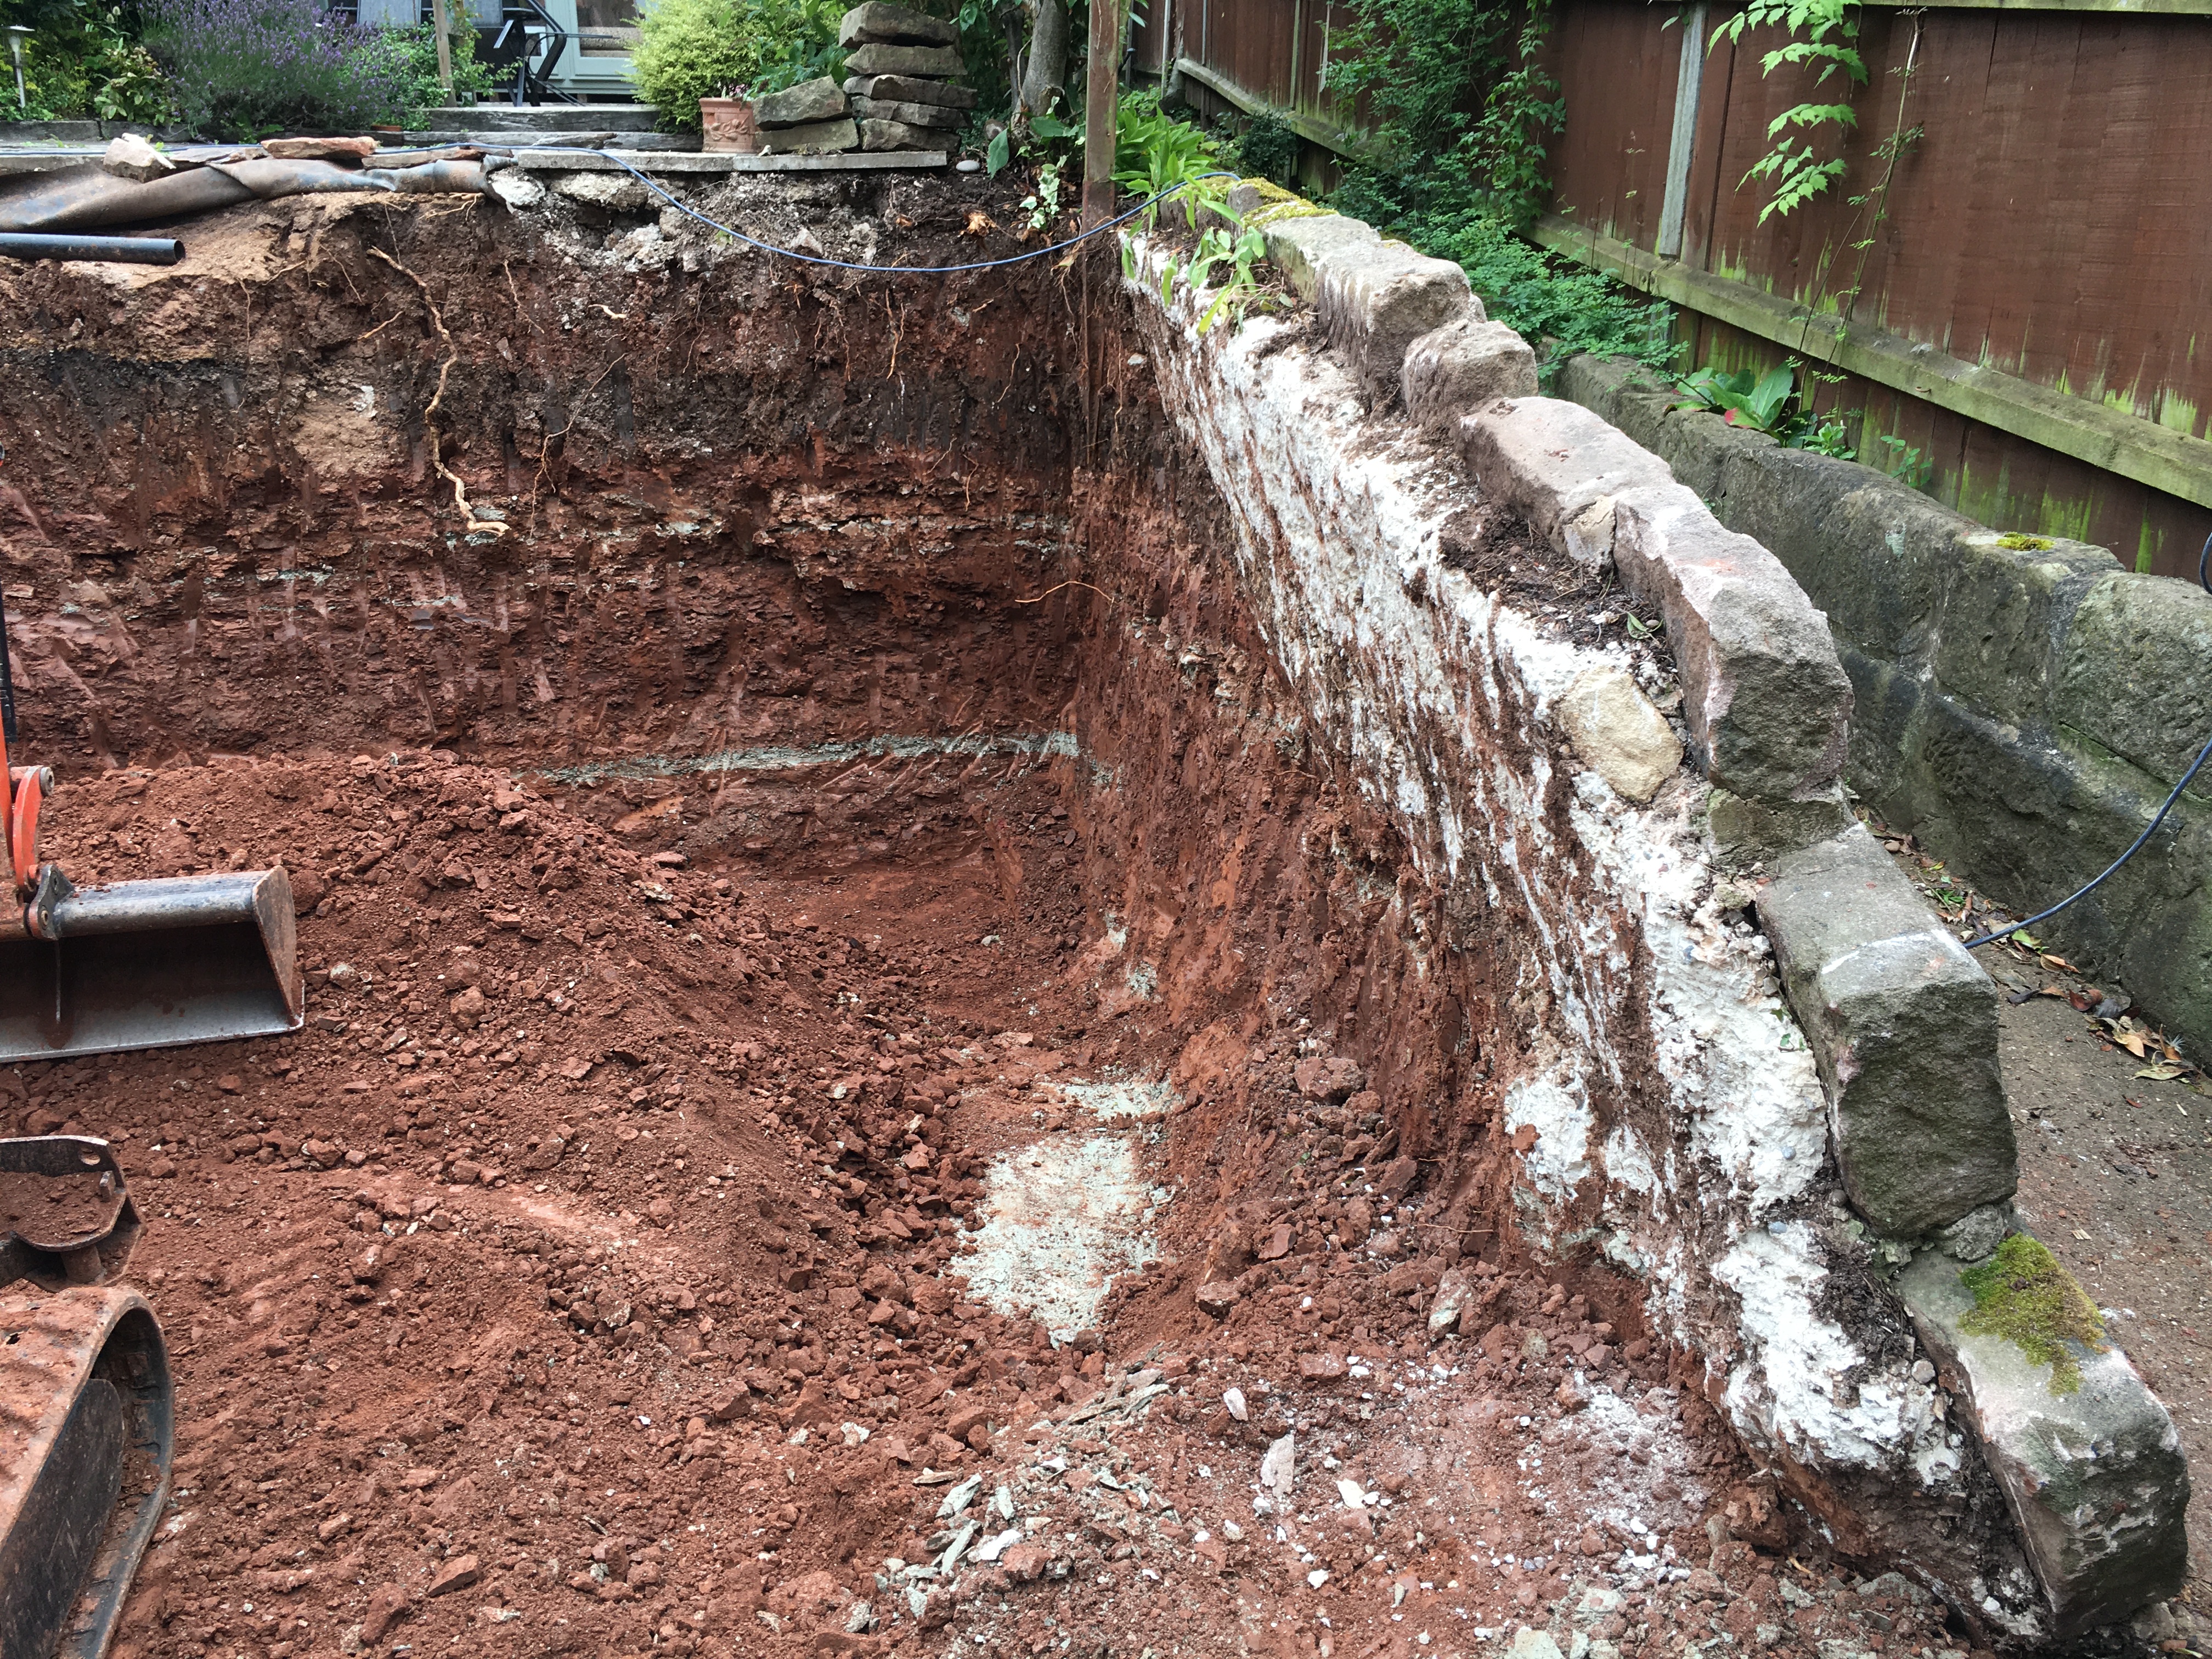
With the main area now cleared, I got the digger in and got to work on leveling and digging out the lower seating area.
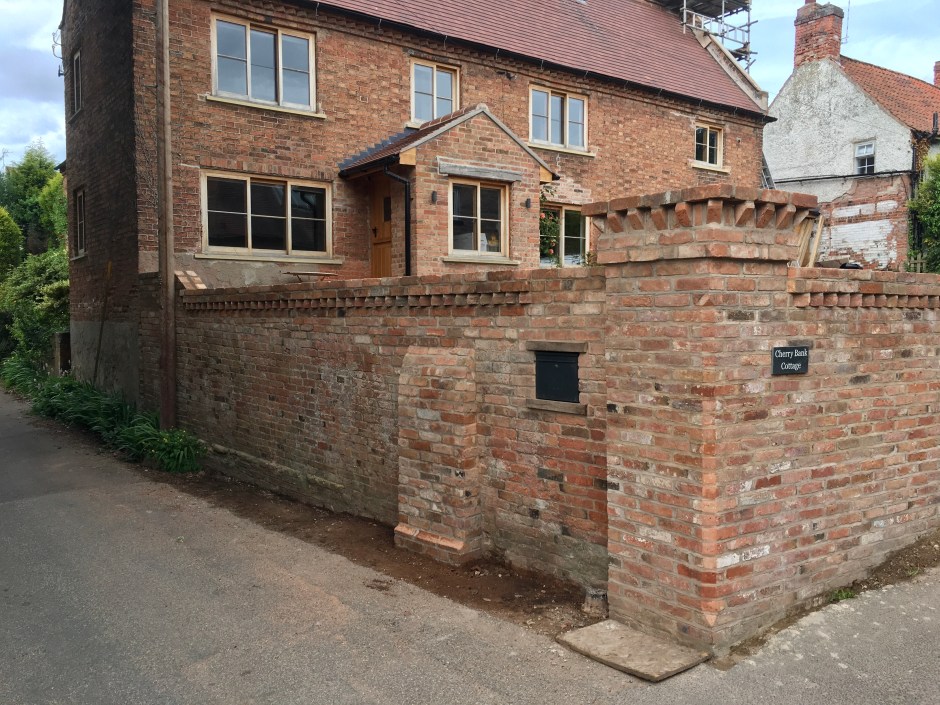
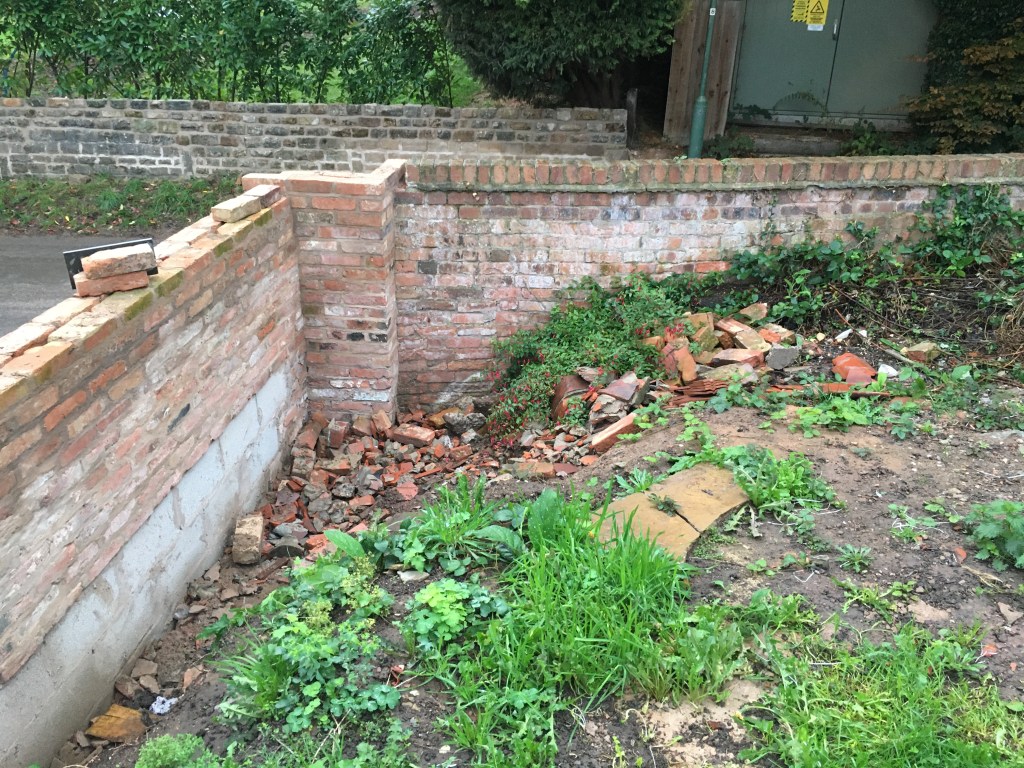
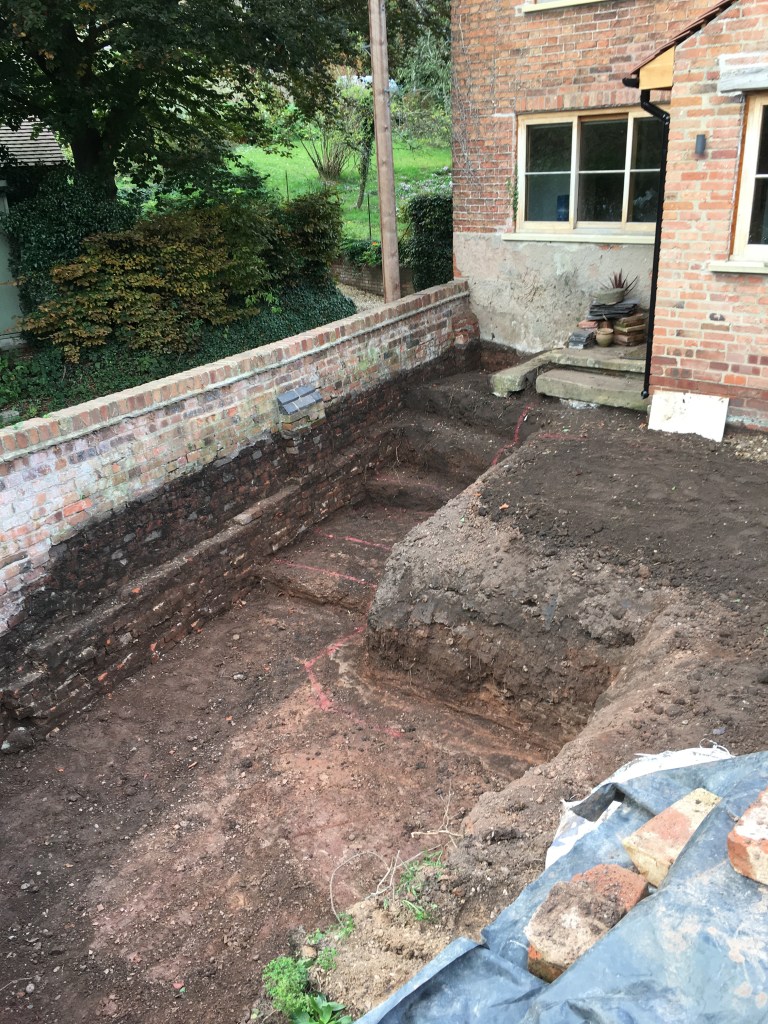
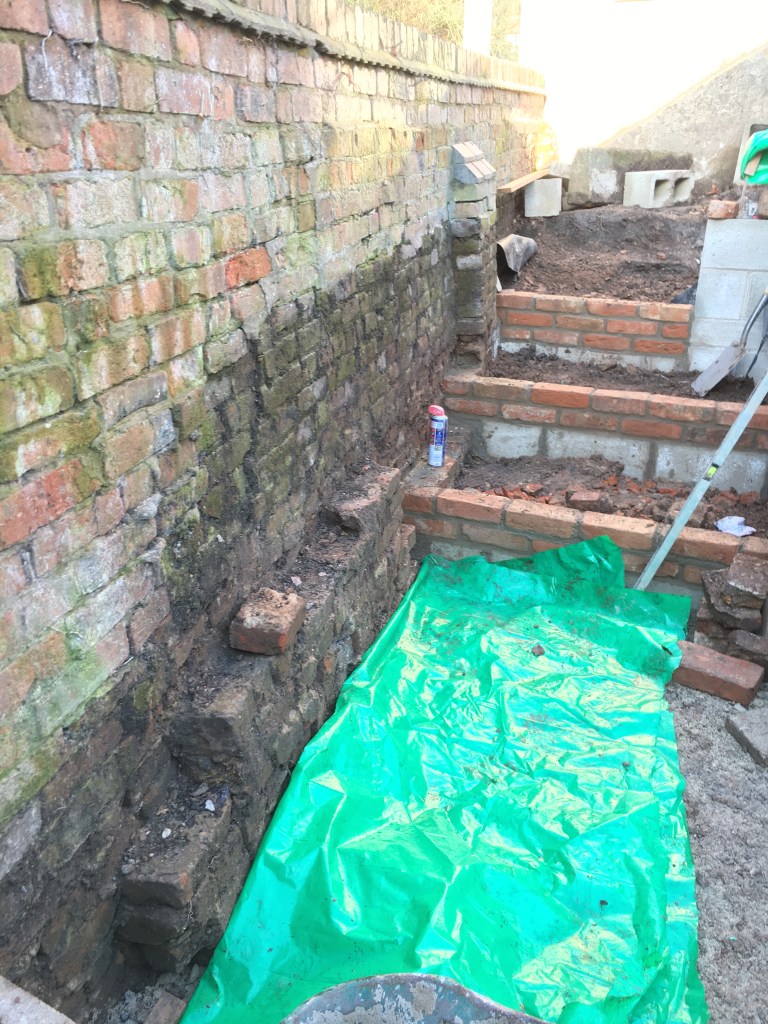
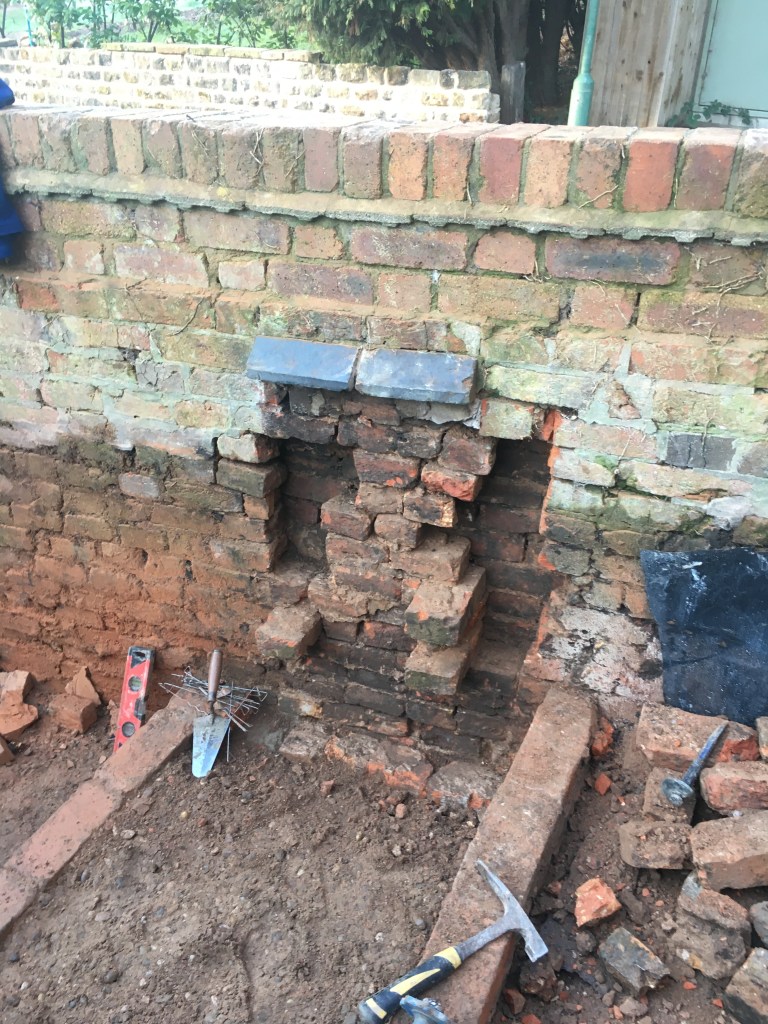
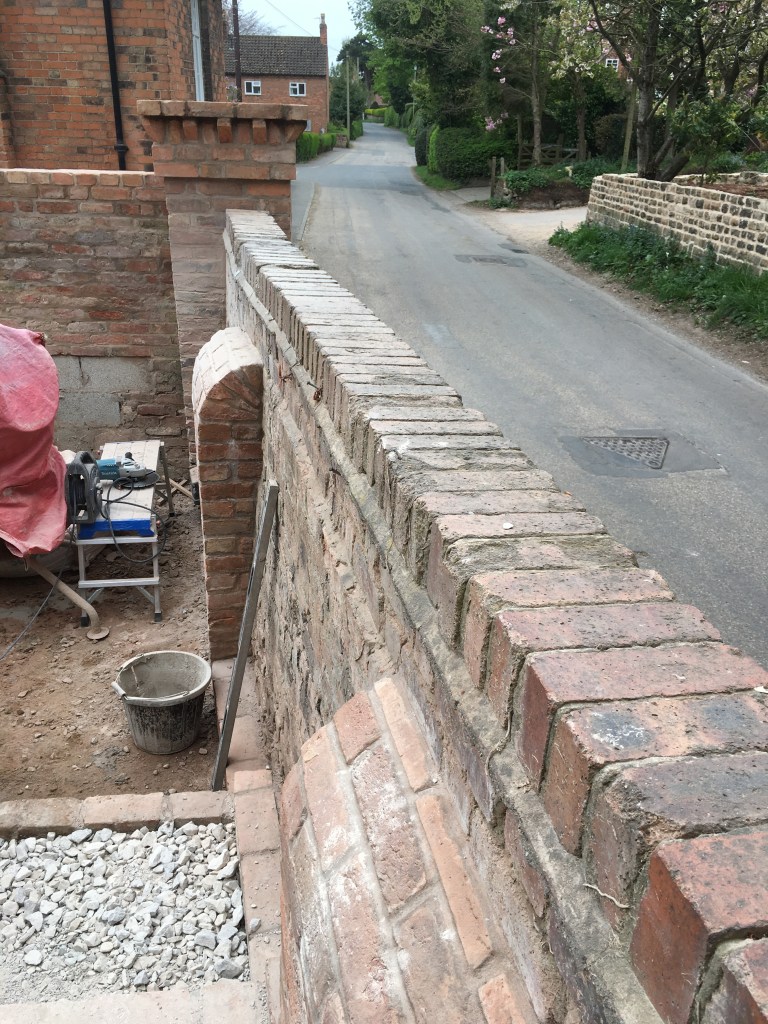
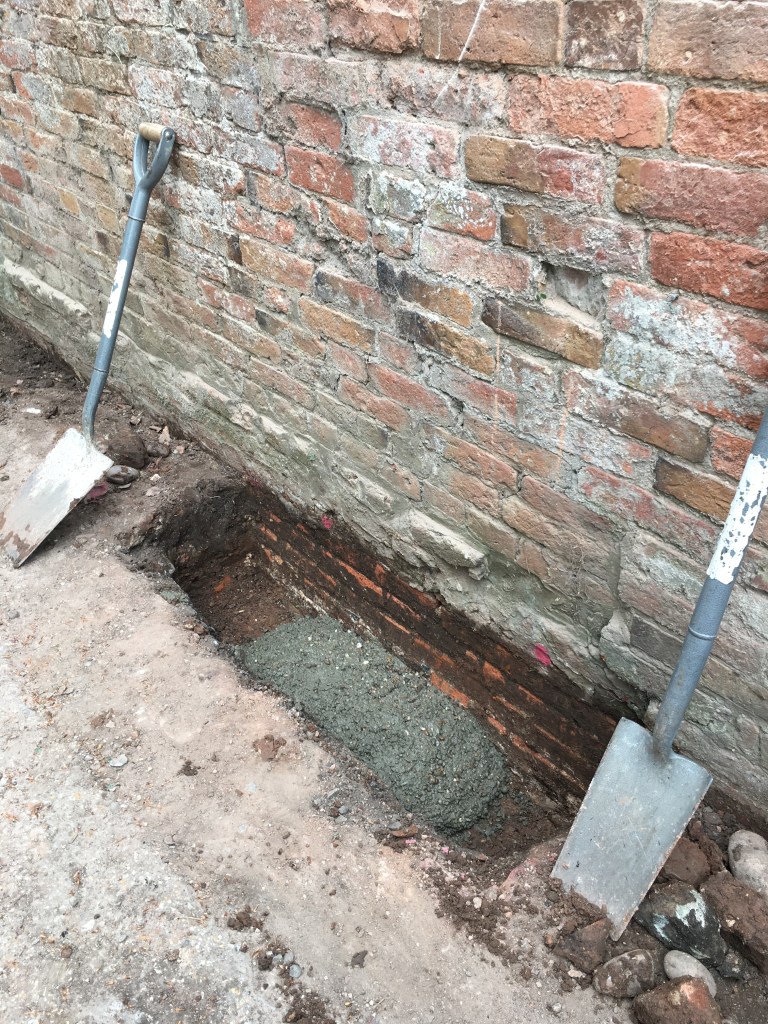
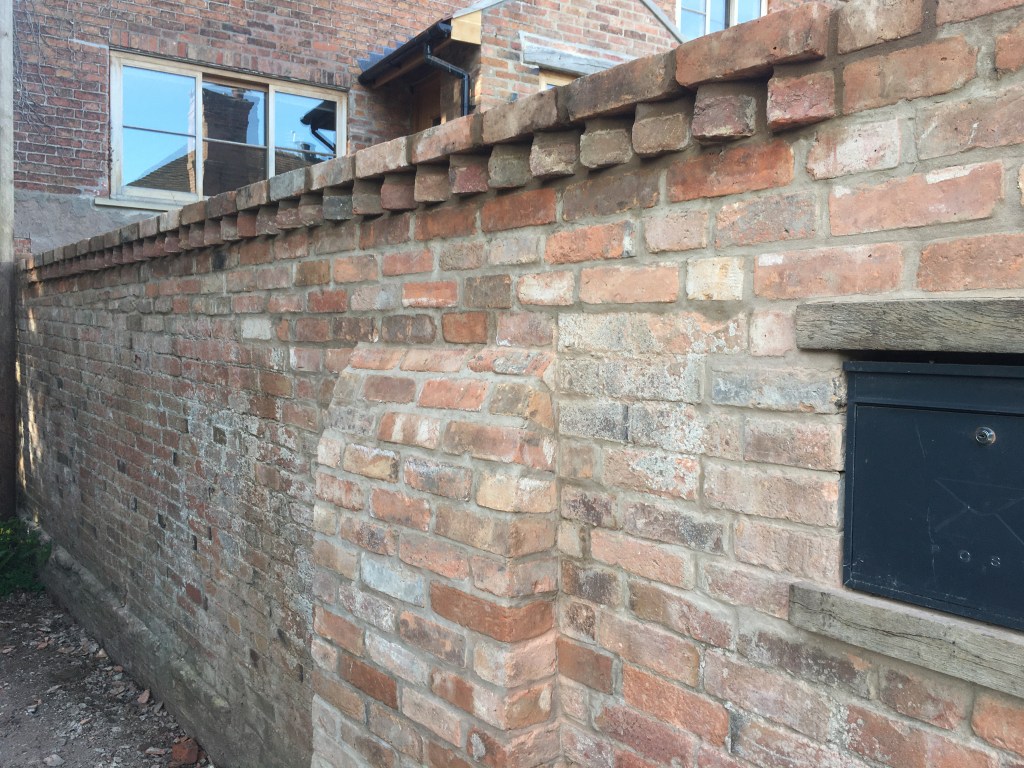
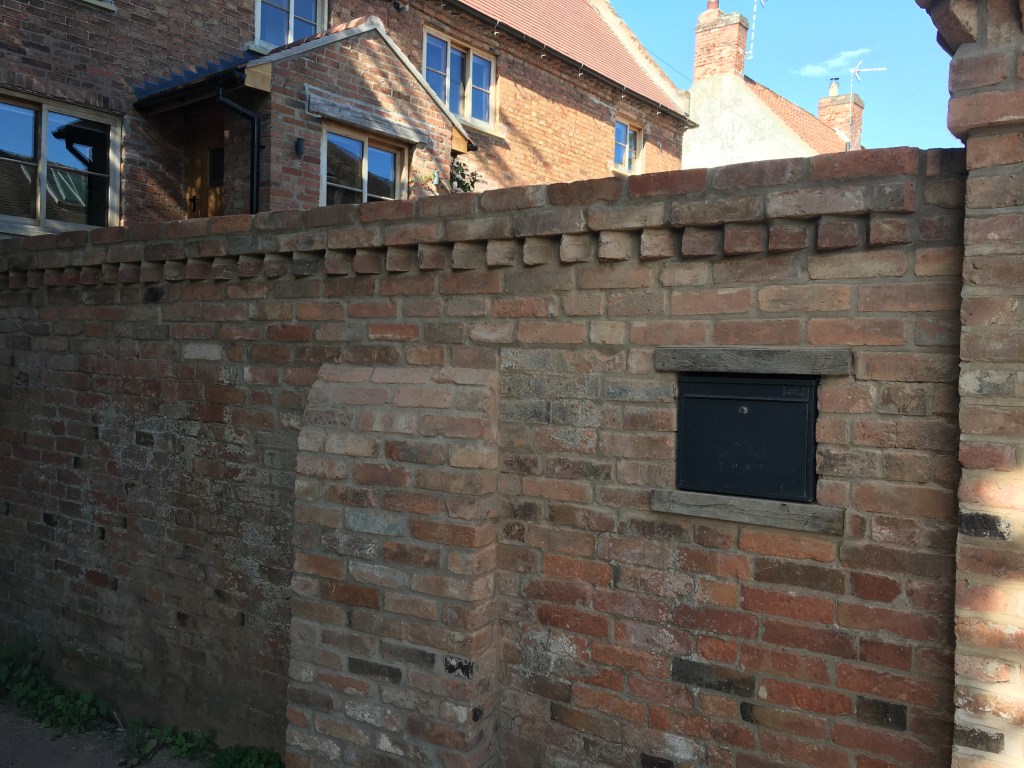
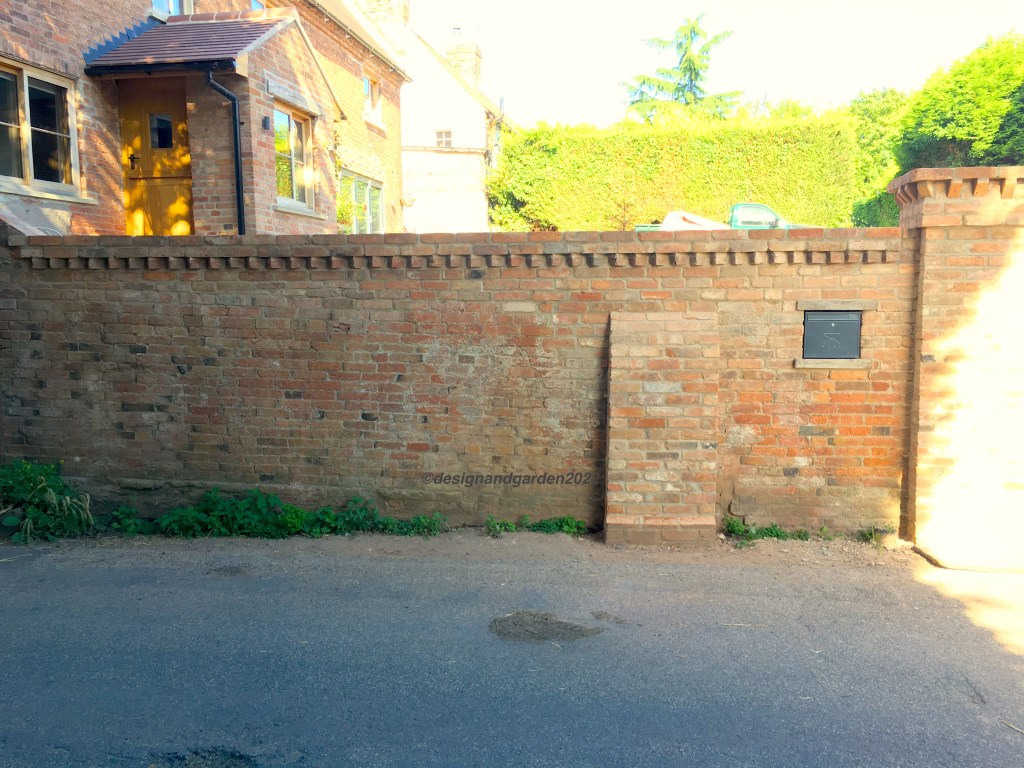
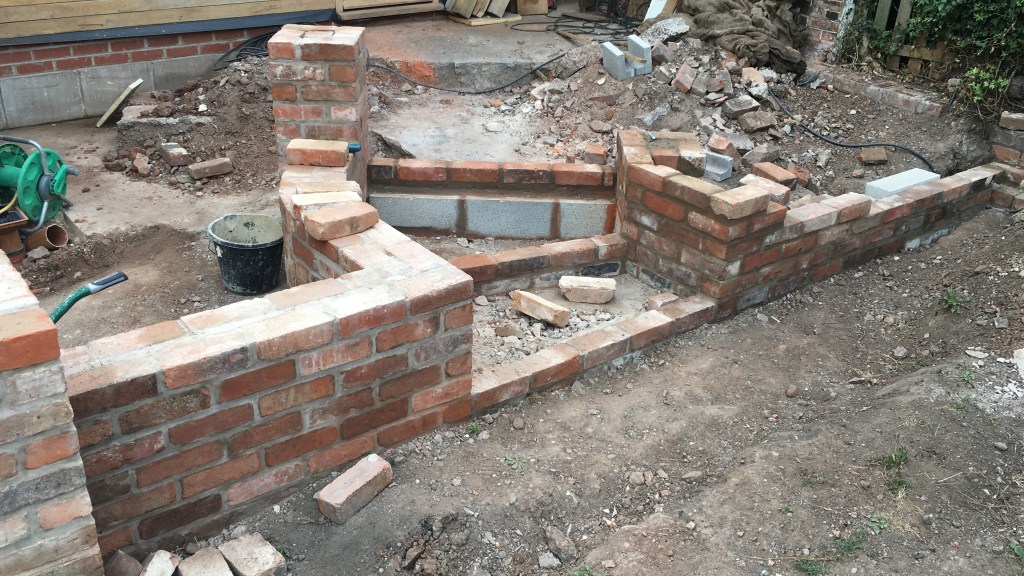
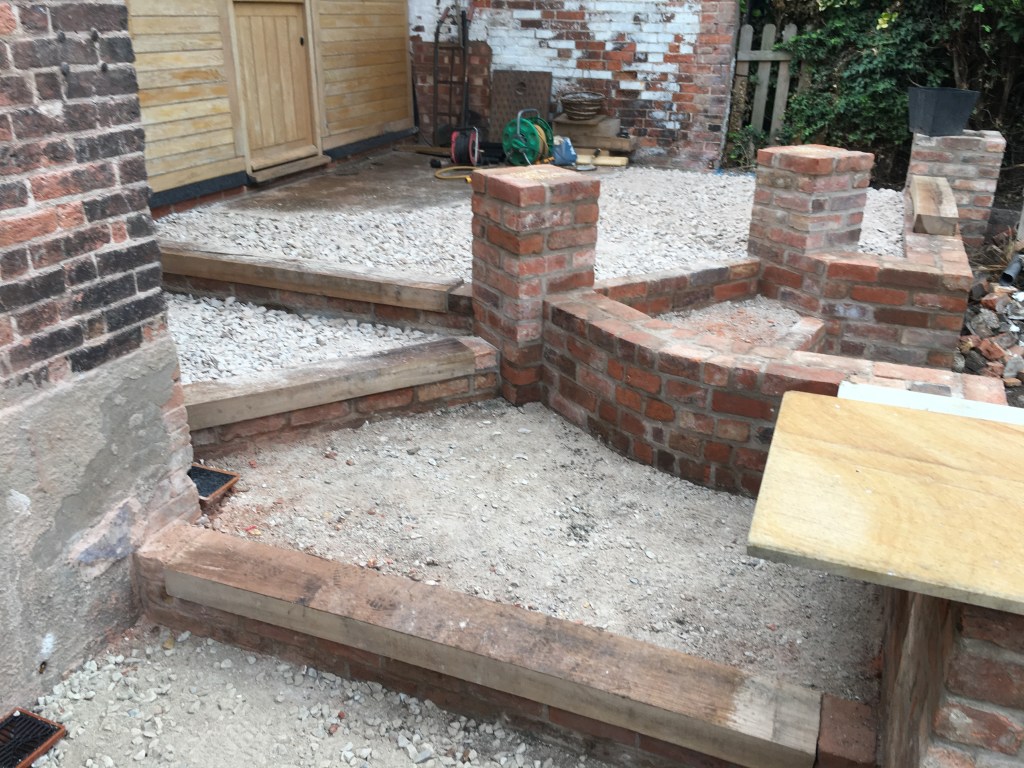
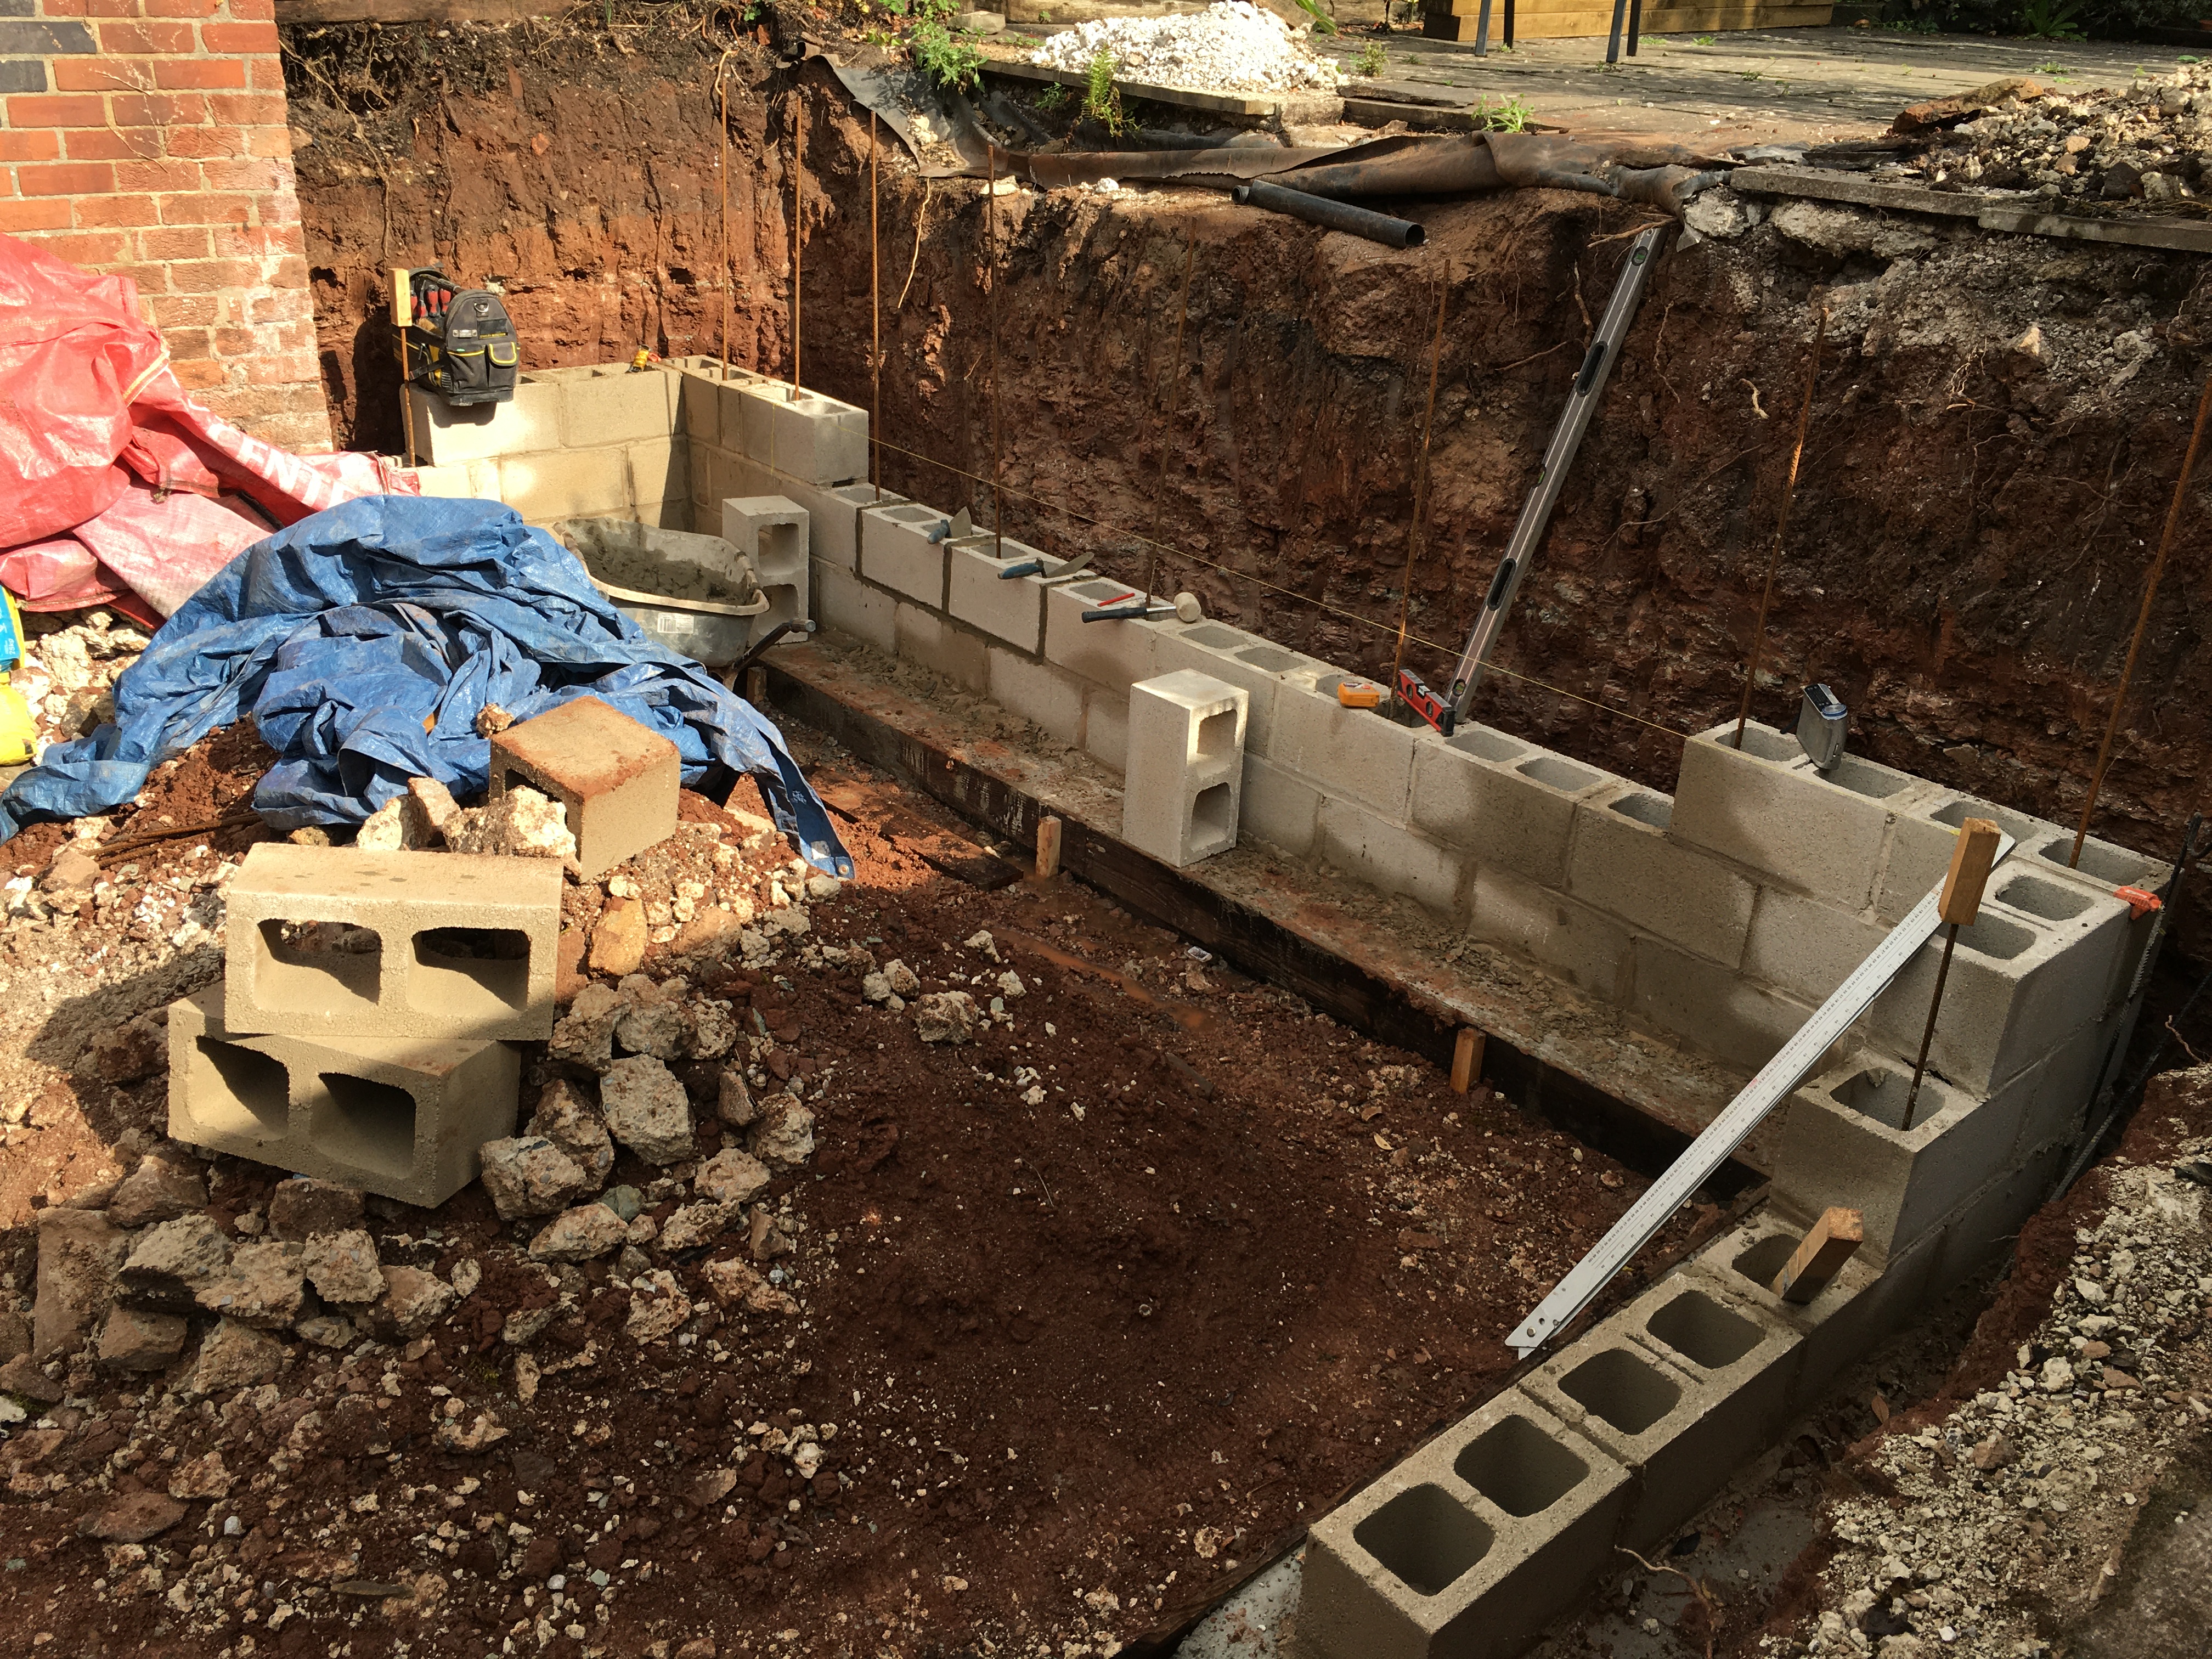
There was one major issue with this job. The Wall. It must not be knocked down! Very old, not listed but full of character, and a repair was needed not a replacement.
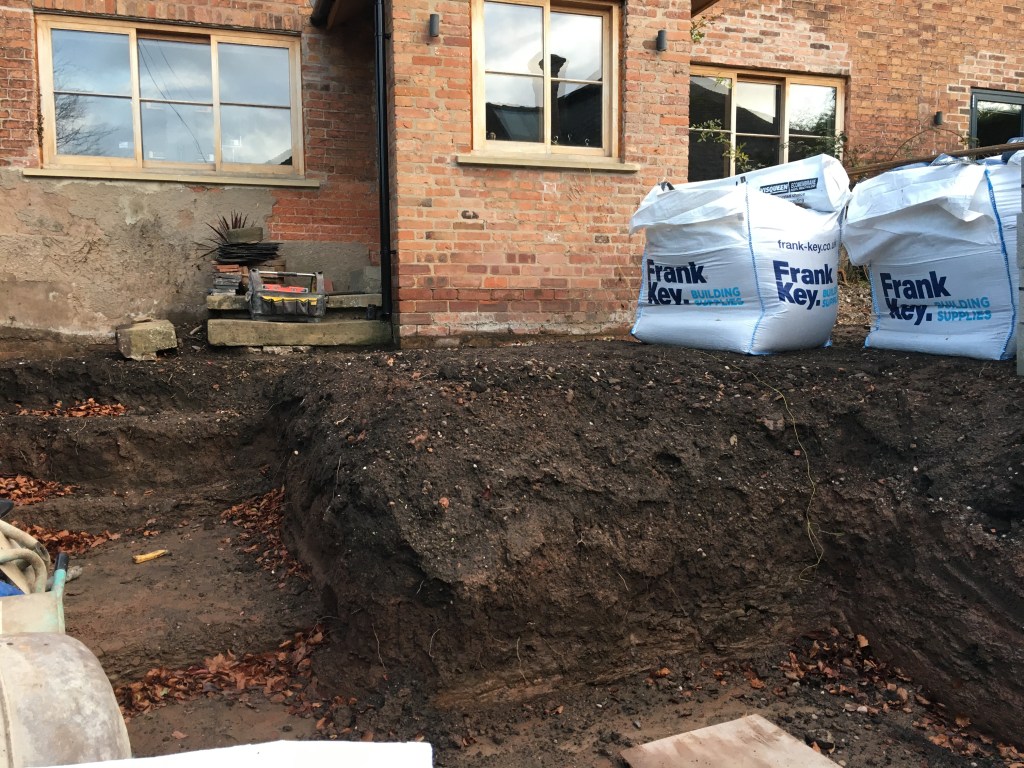
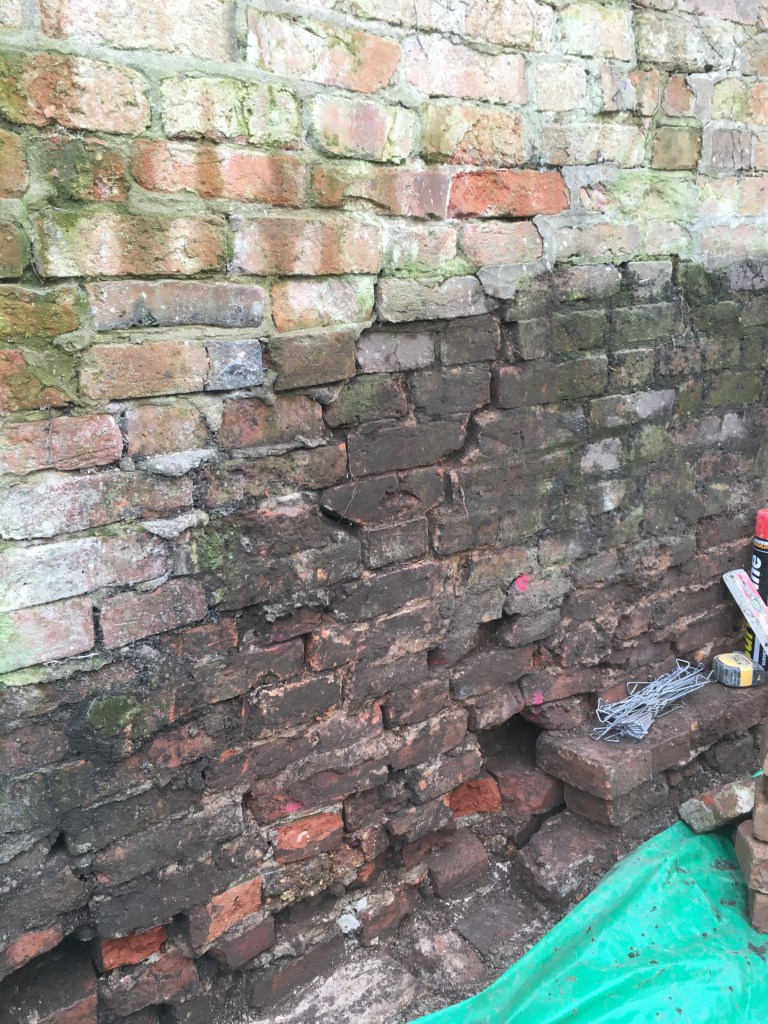
I made a decision for the old wall that a series of supports were required to strengthen it. These included removing old damaged areas and building buttresses to help correct the severe lean that the wall had developed towards the road. Because soil had been against the wall for decades, it had worked its way into the old bricks via the damaged pointing.
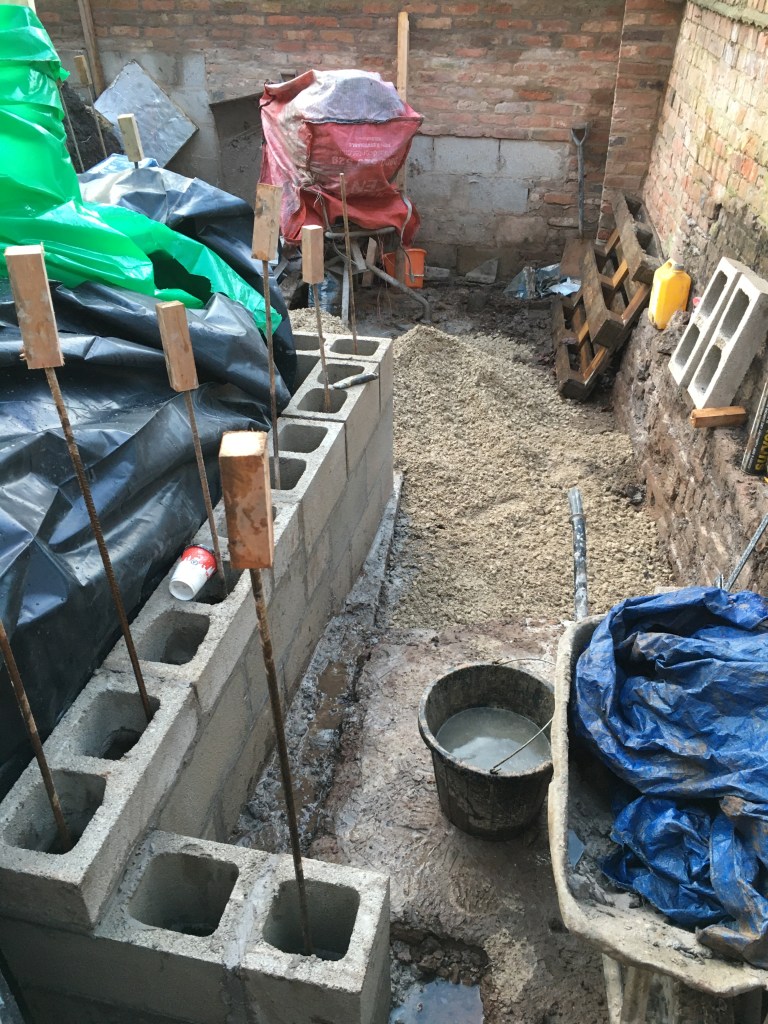
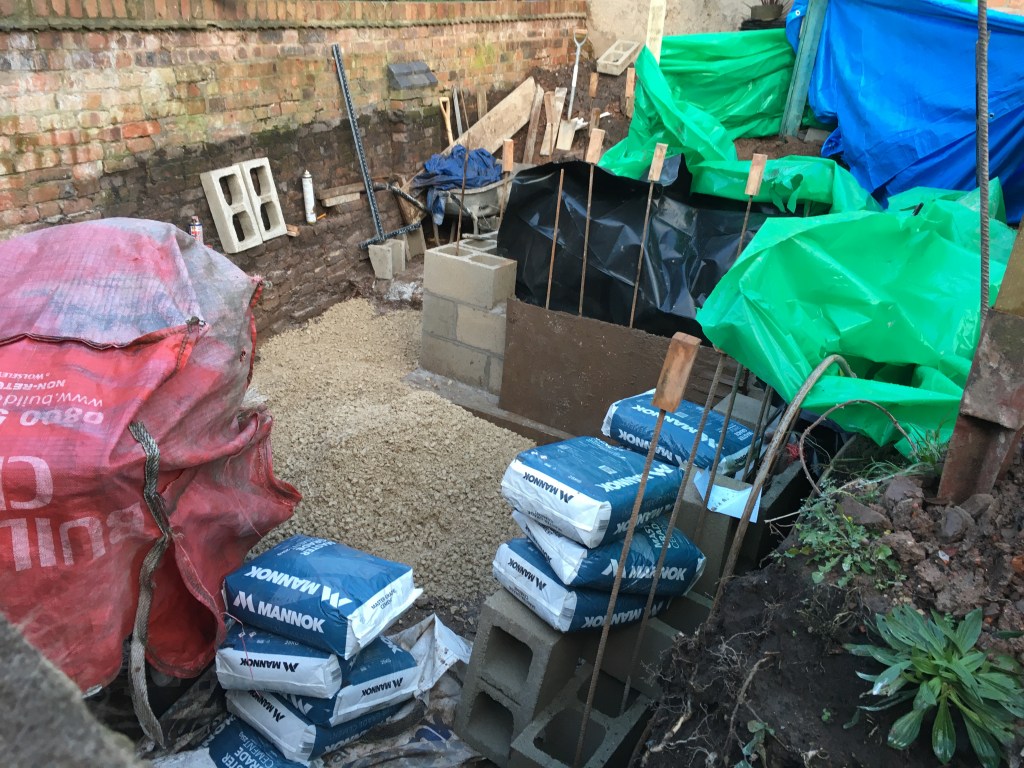
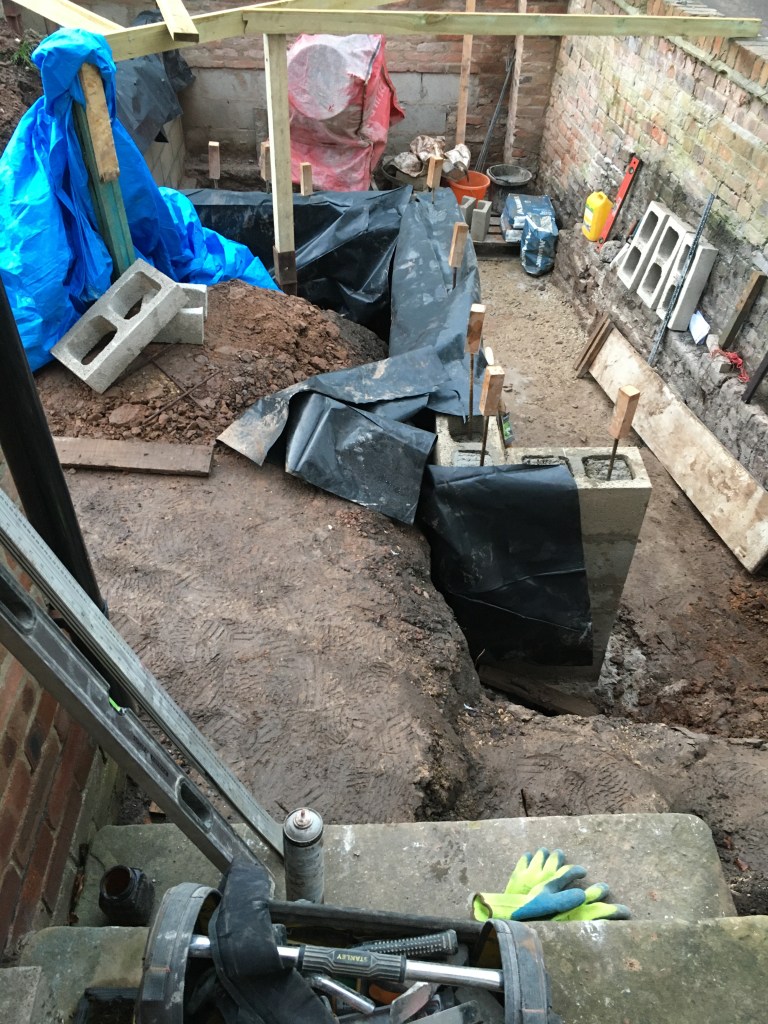
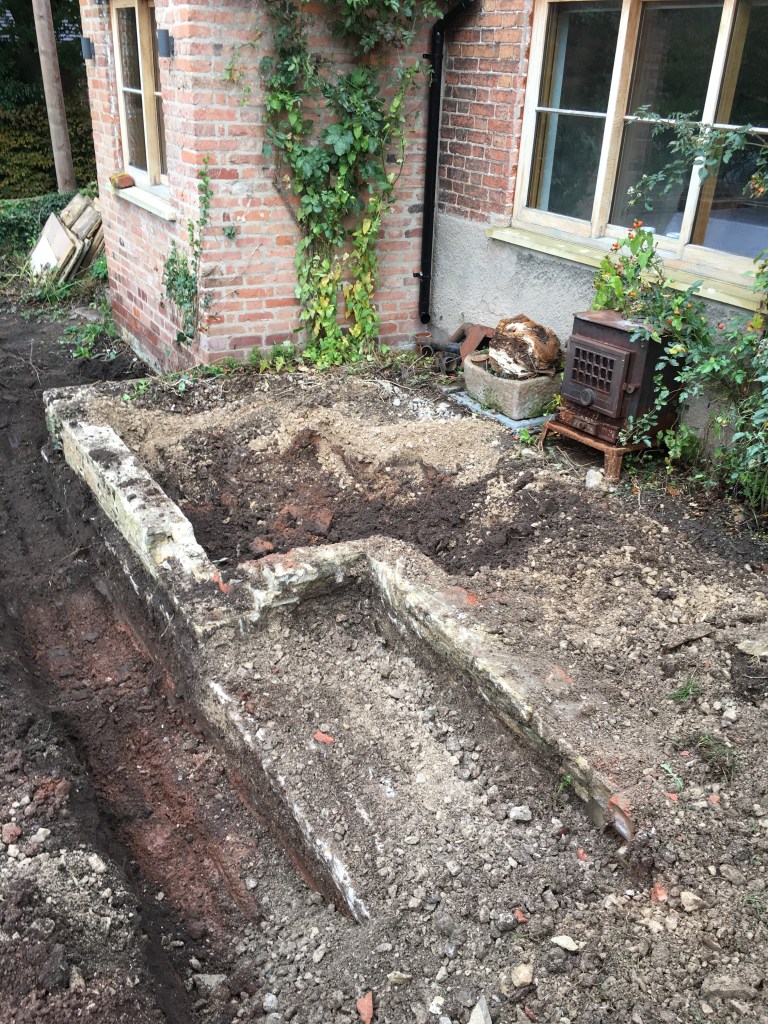
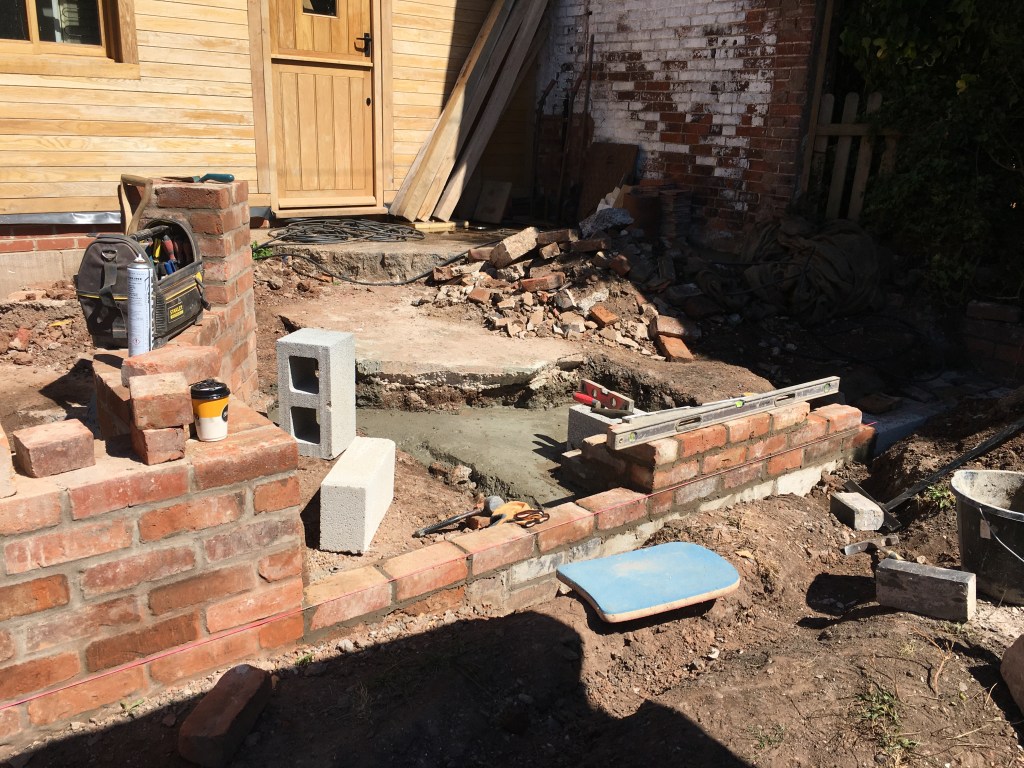
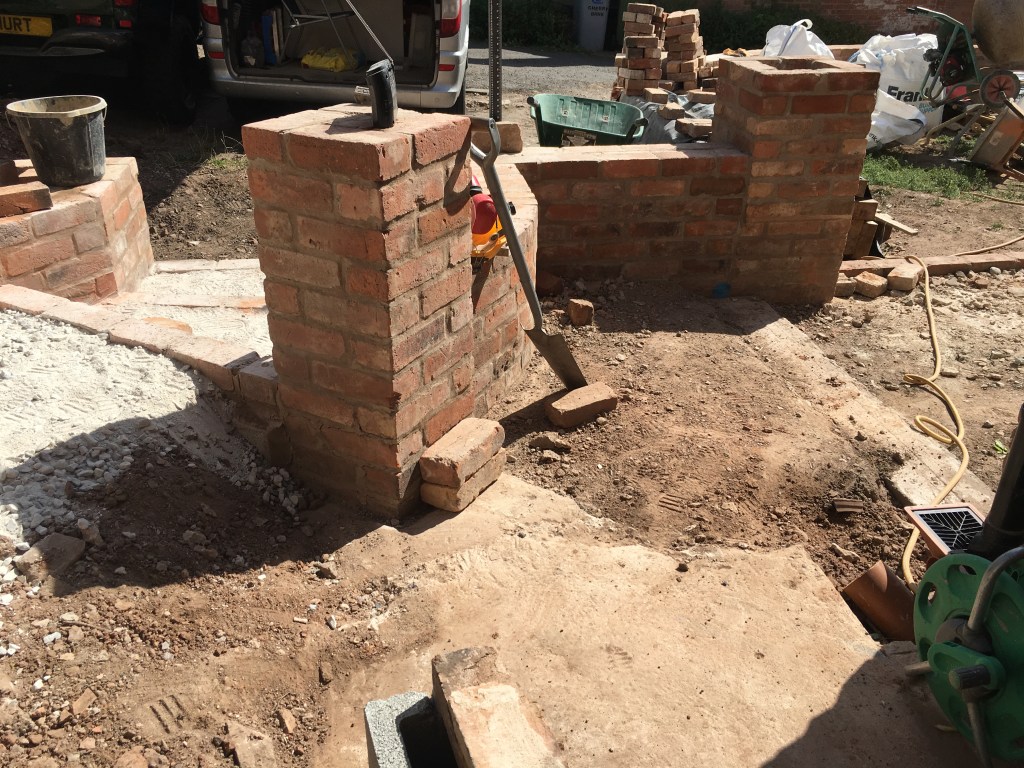
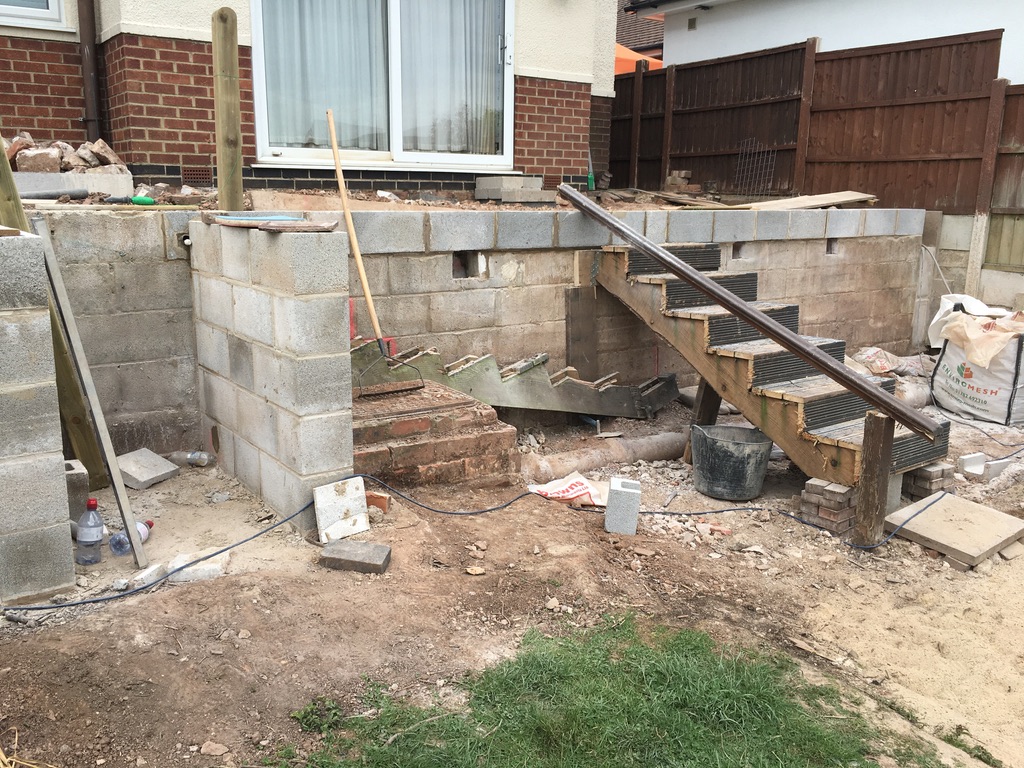
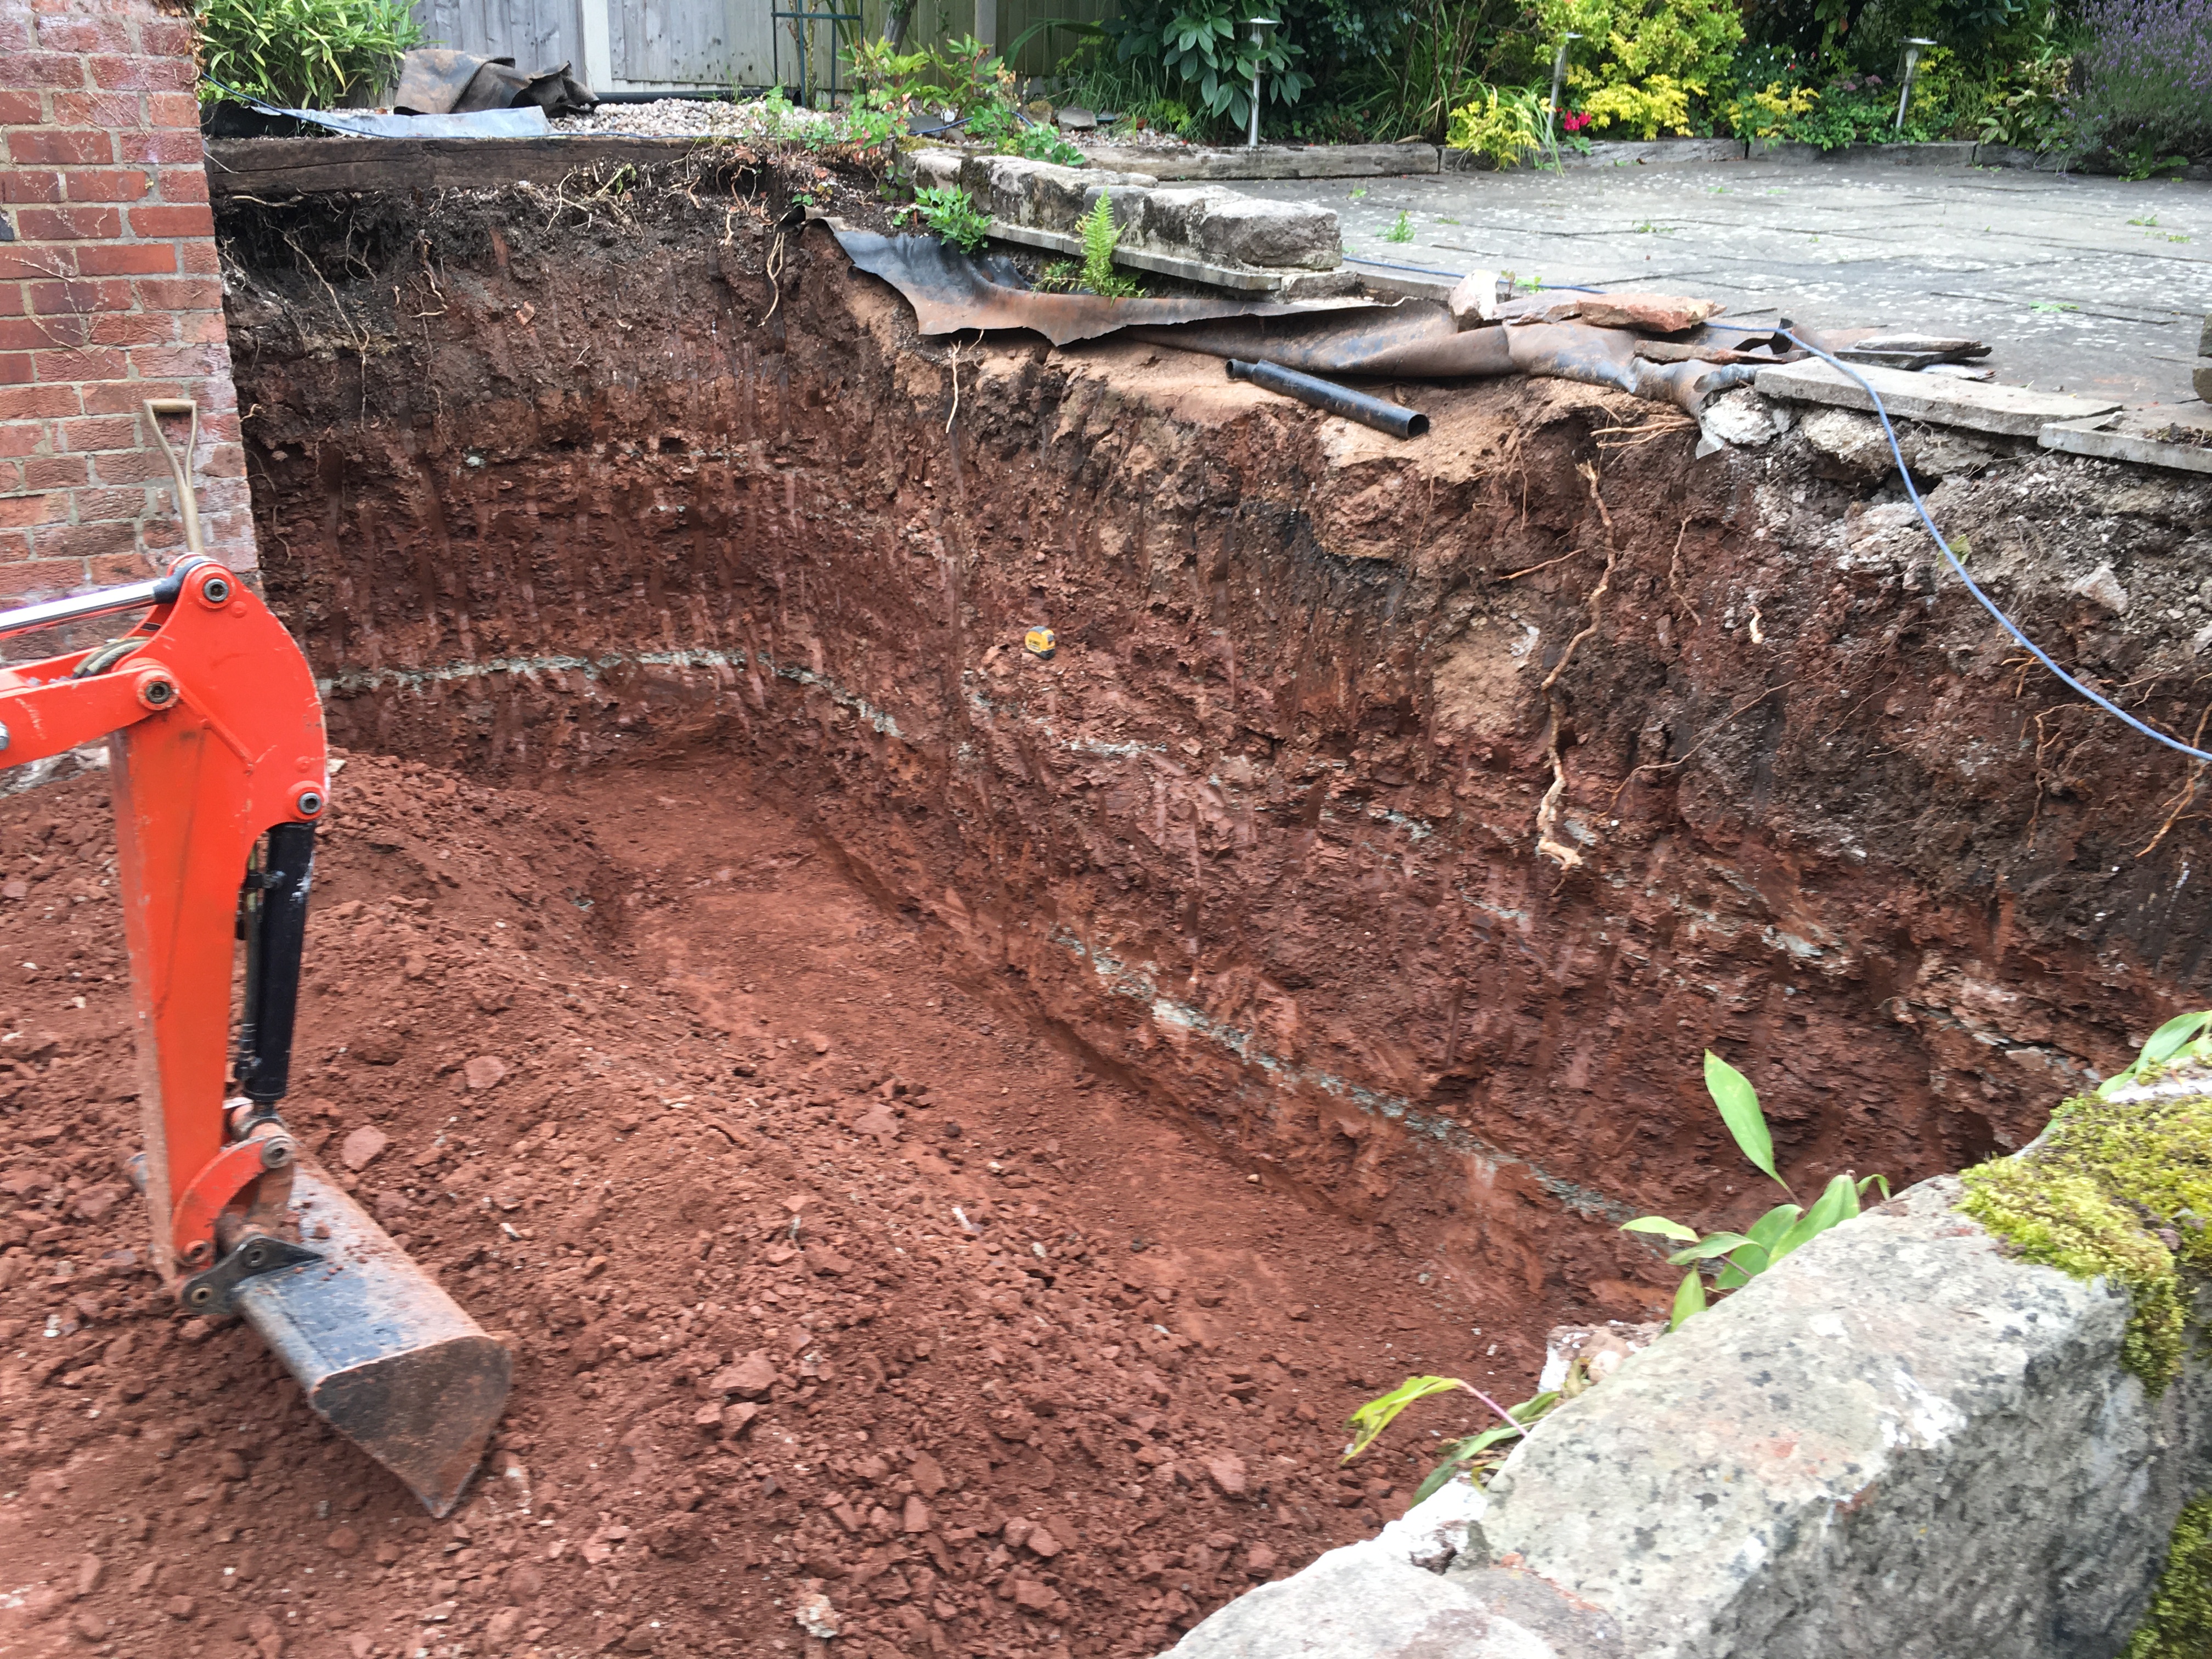
The hole is now dug out. Measuring is done to make it look as square as possible to the eye, as it was nowhere near equal, and then to outline the step area.
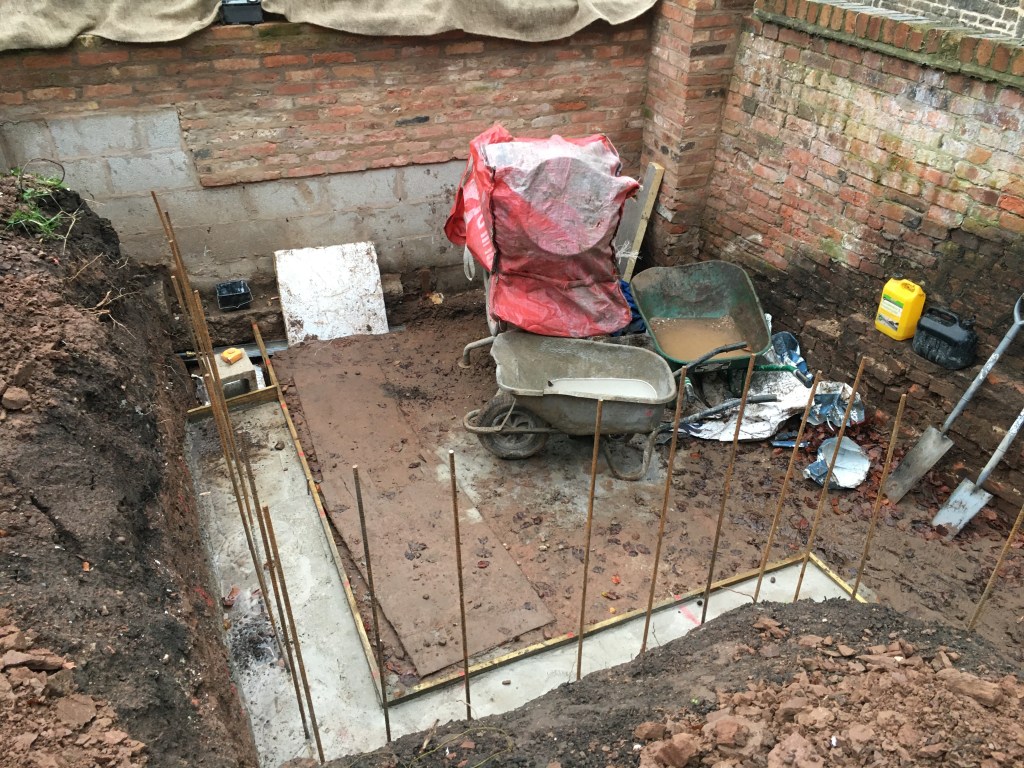
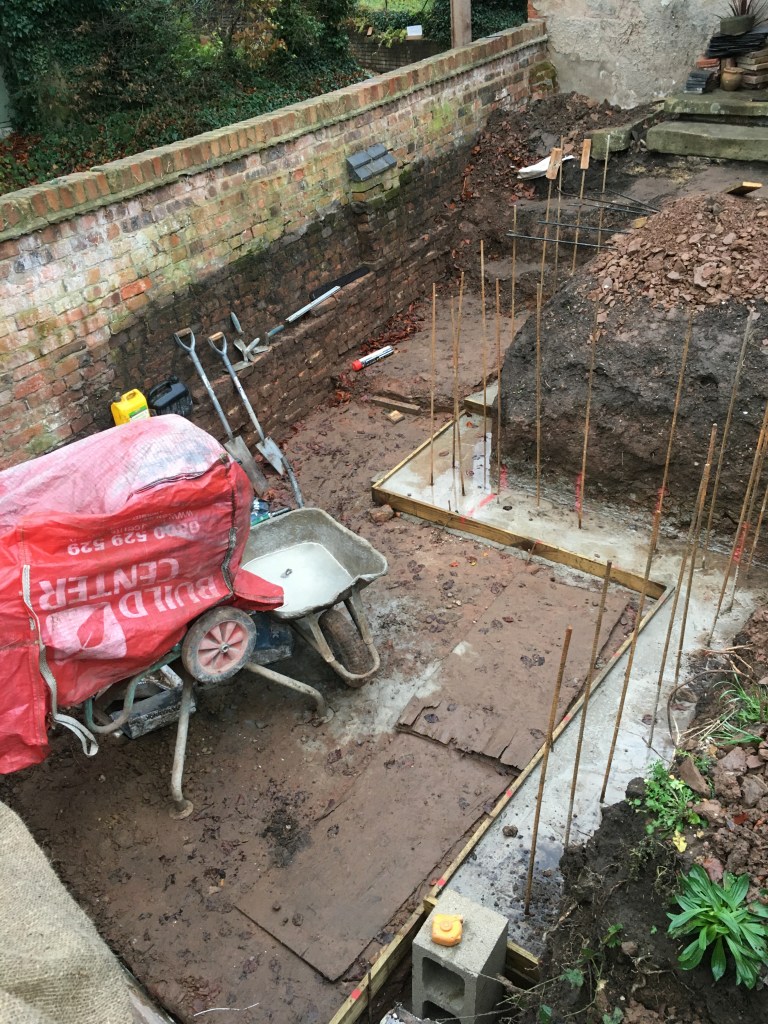
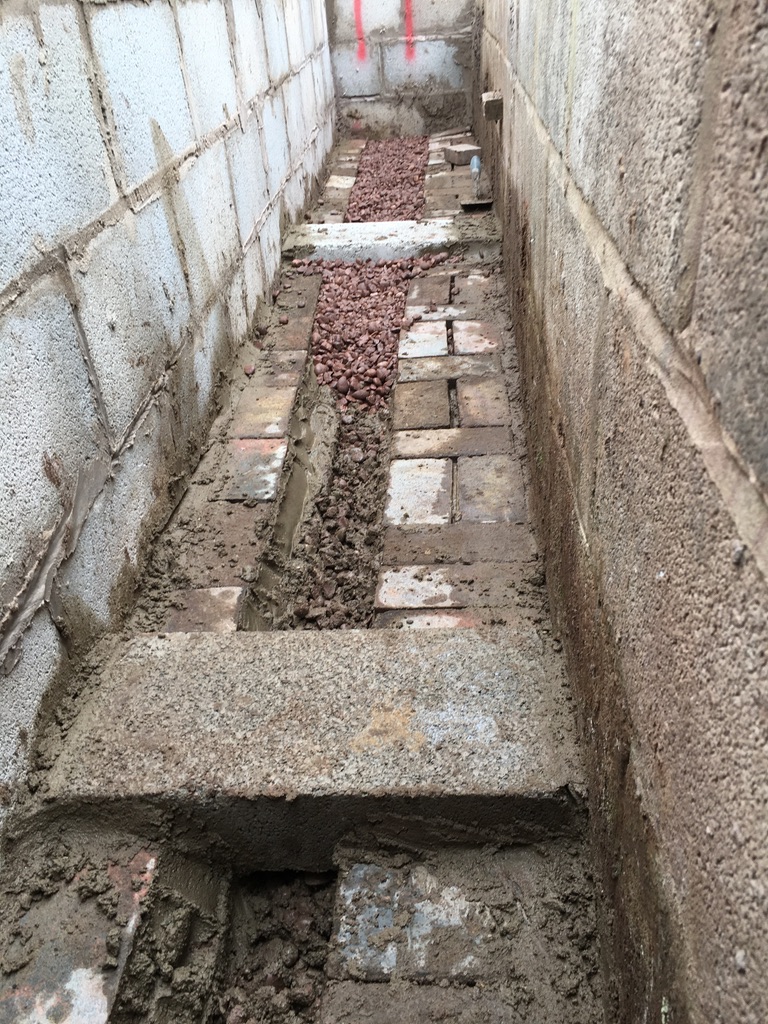
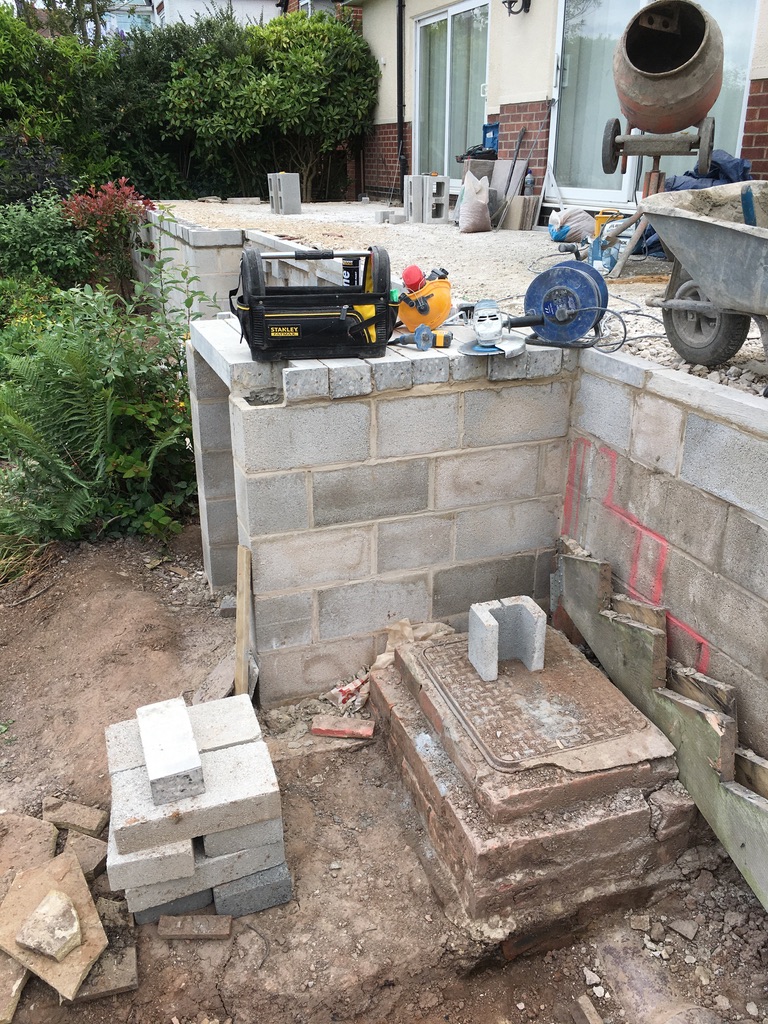
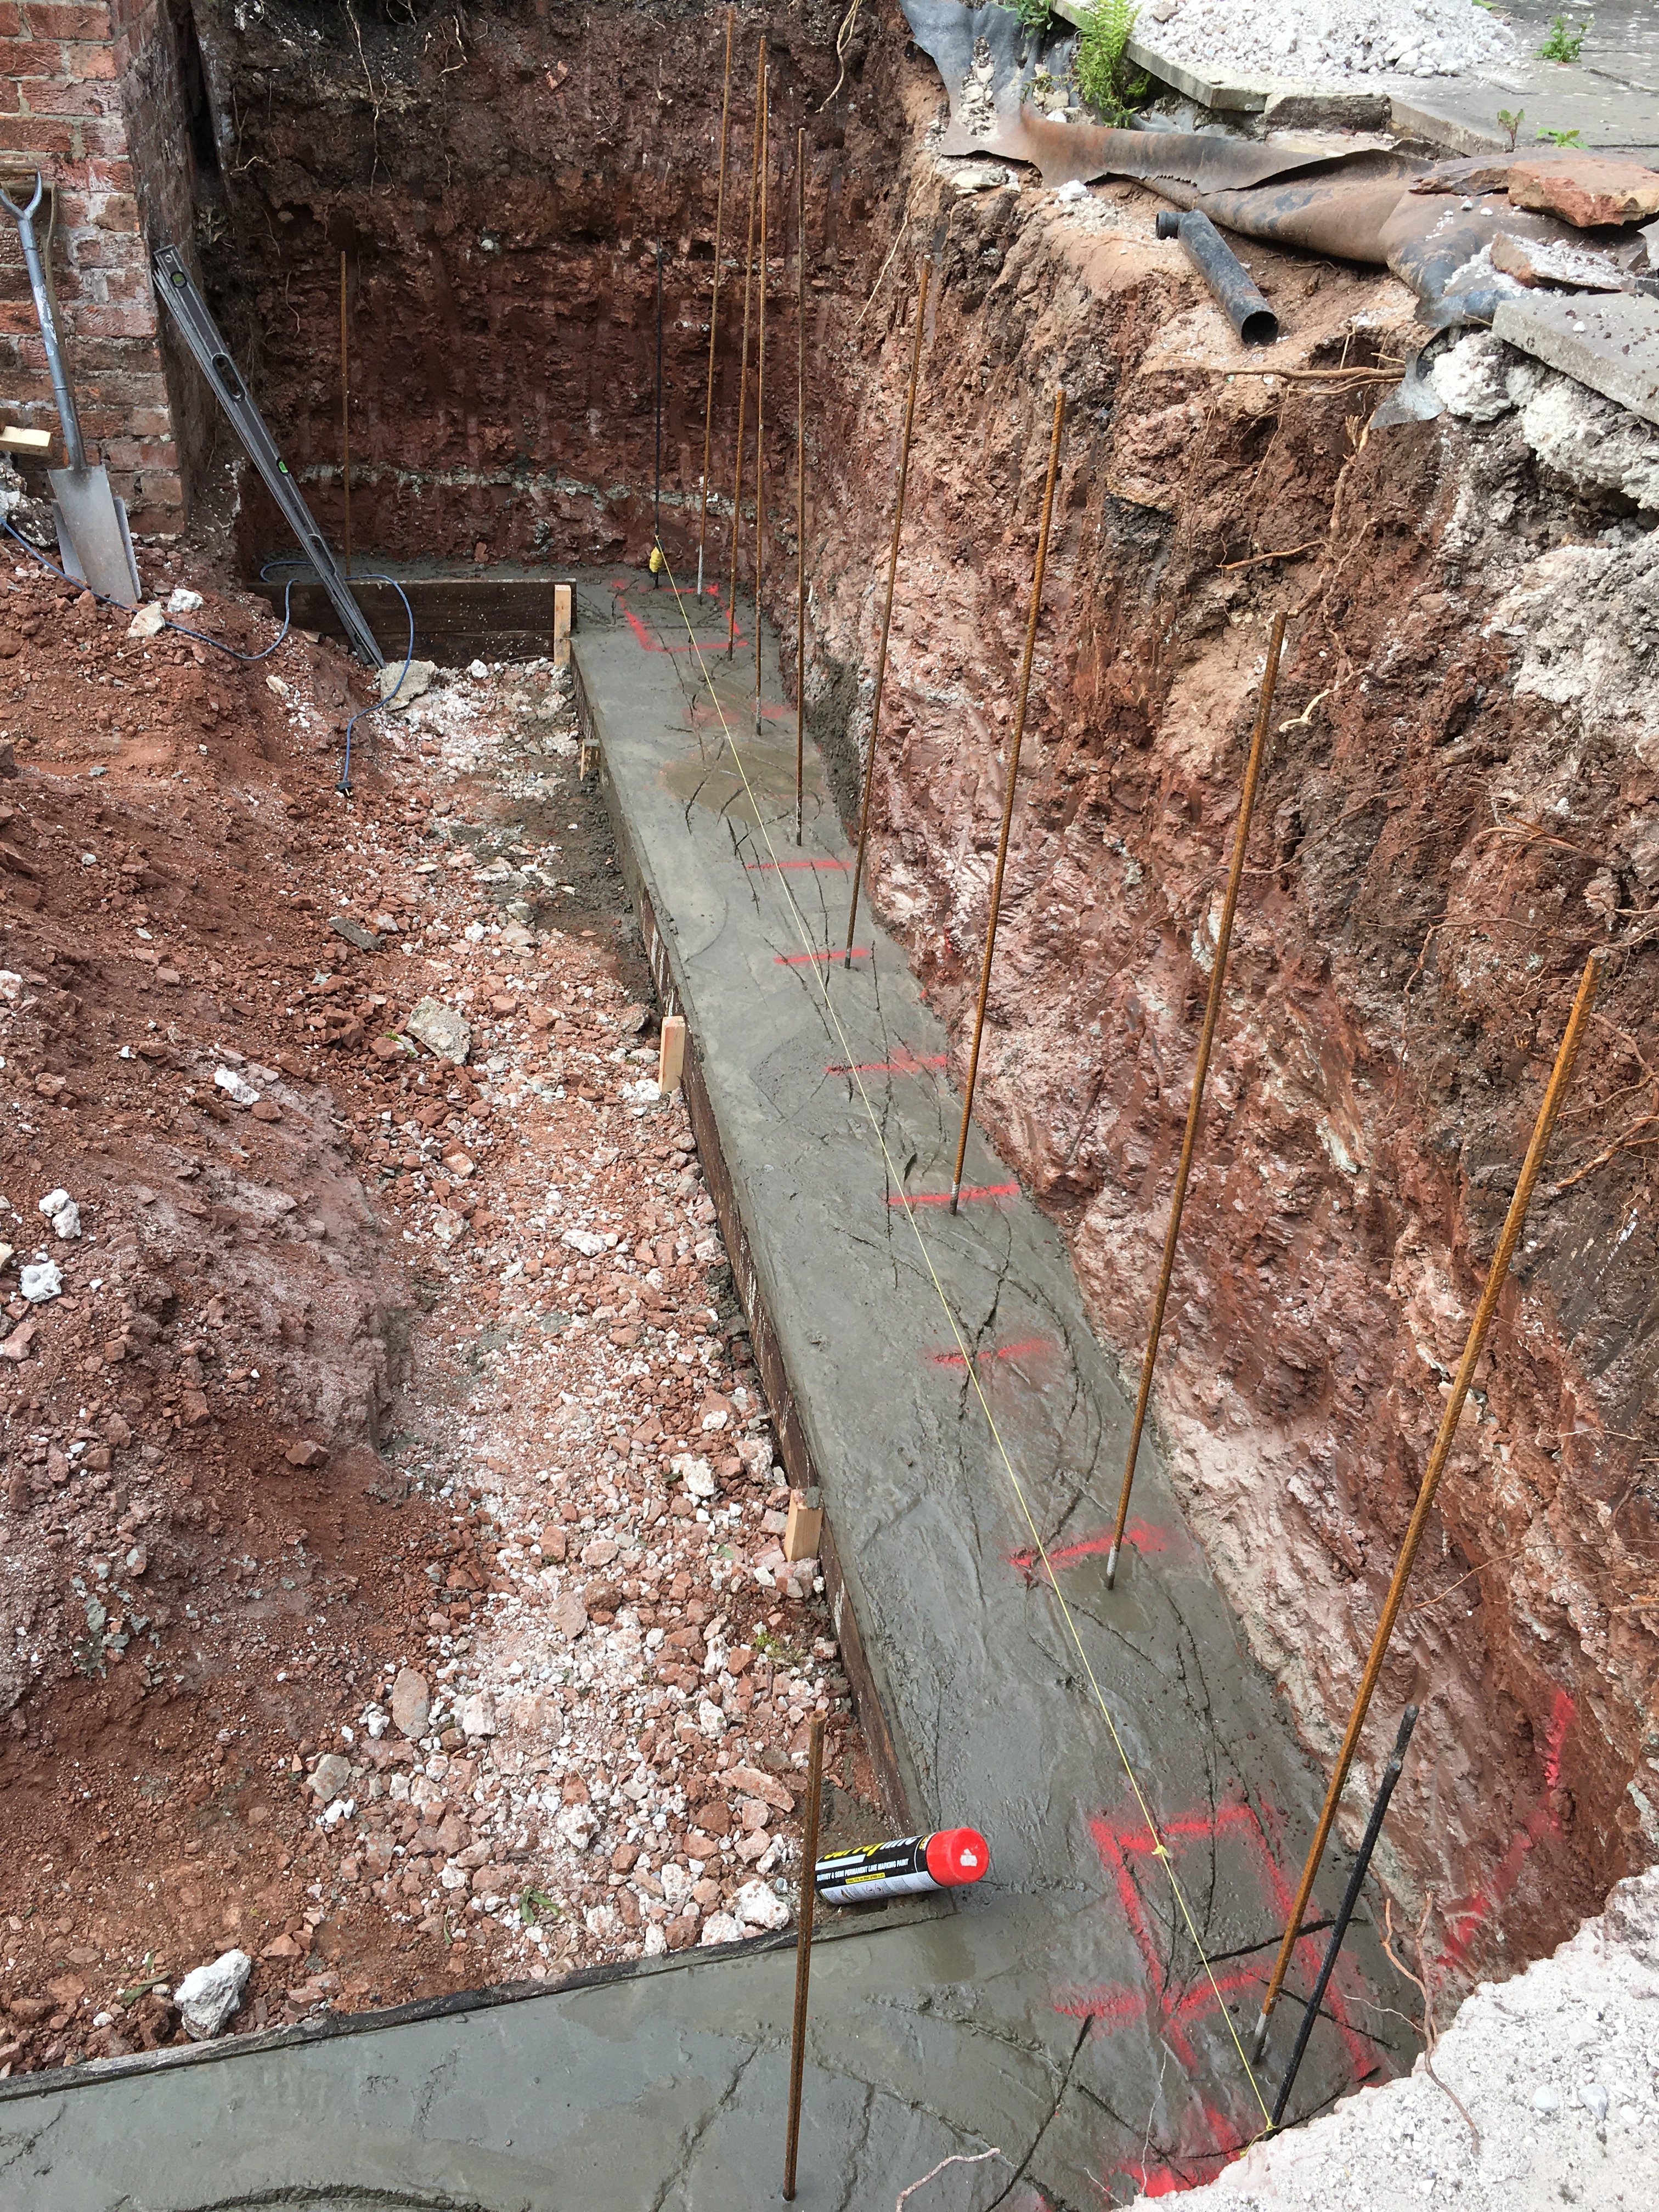
Wall footings are created with a row of re-bar inserted.
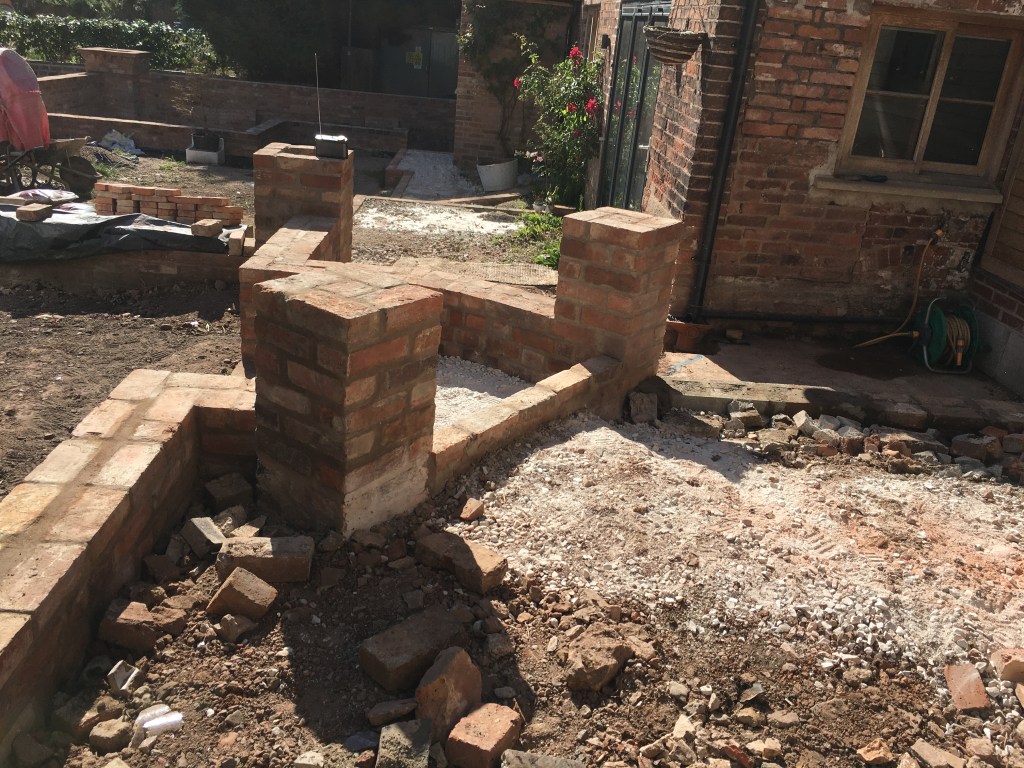
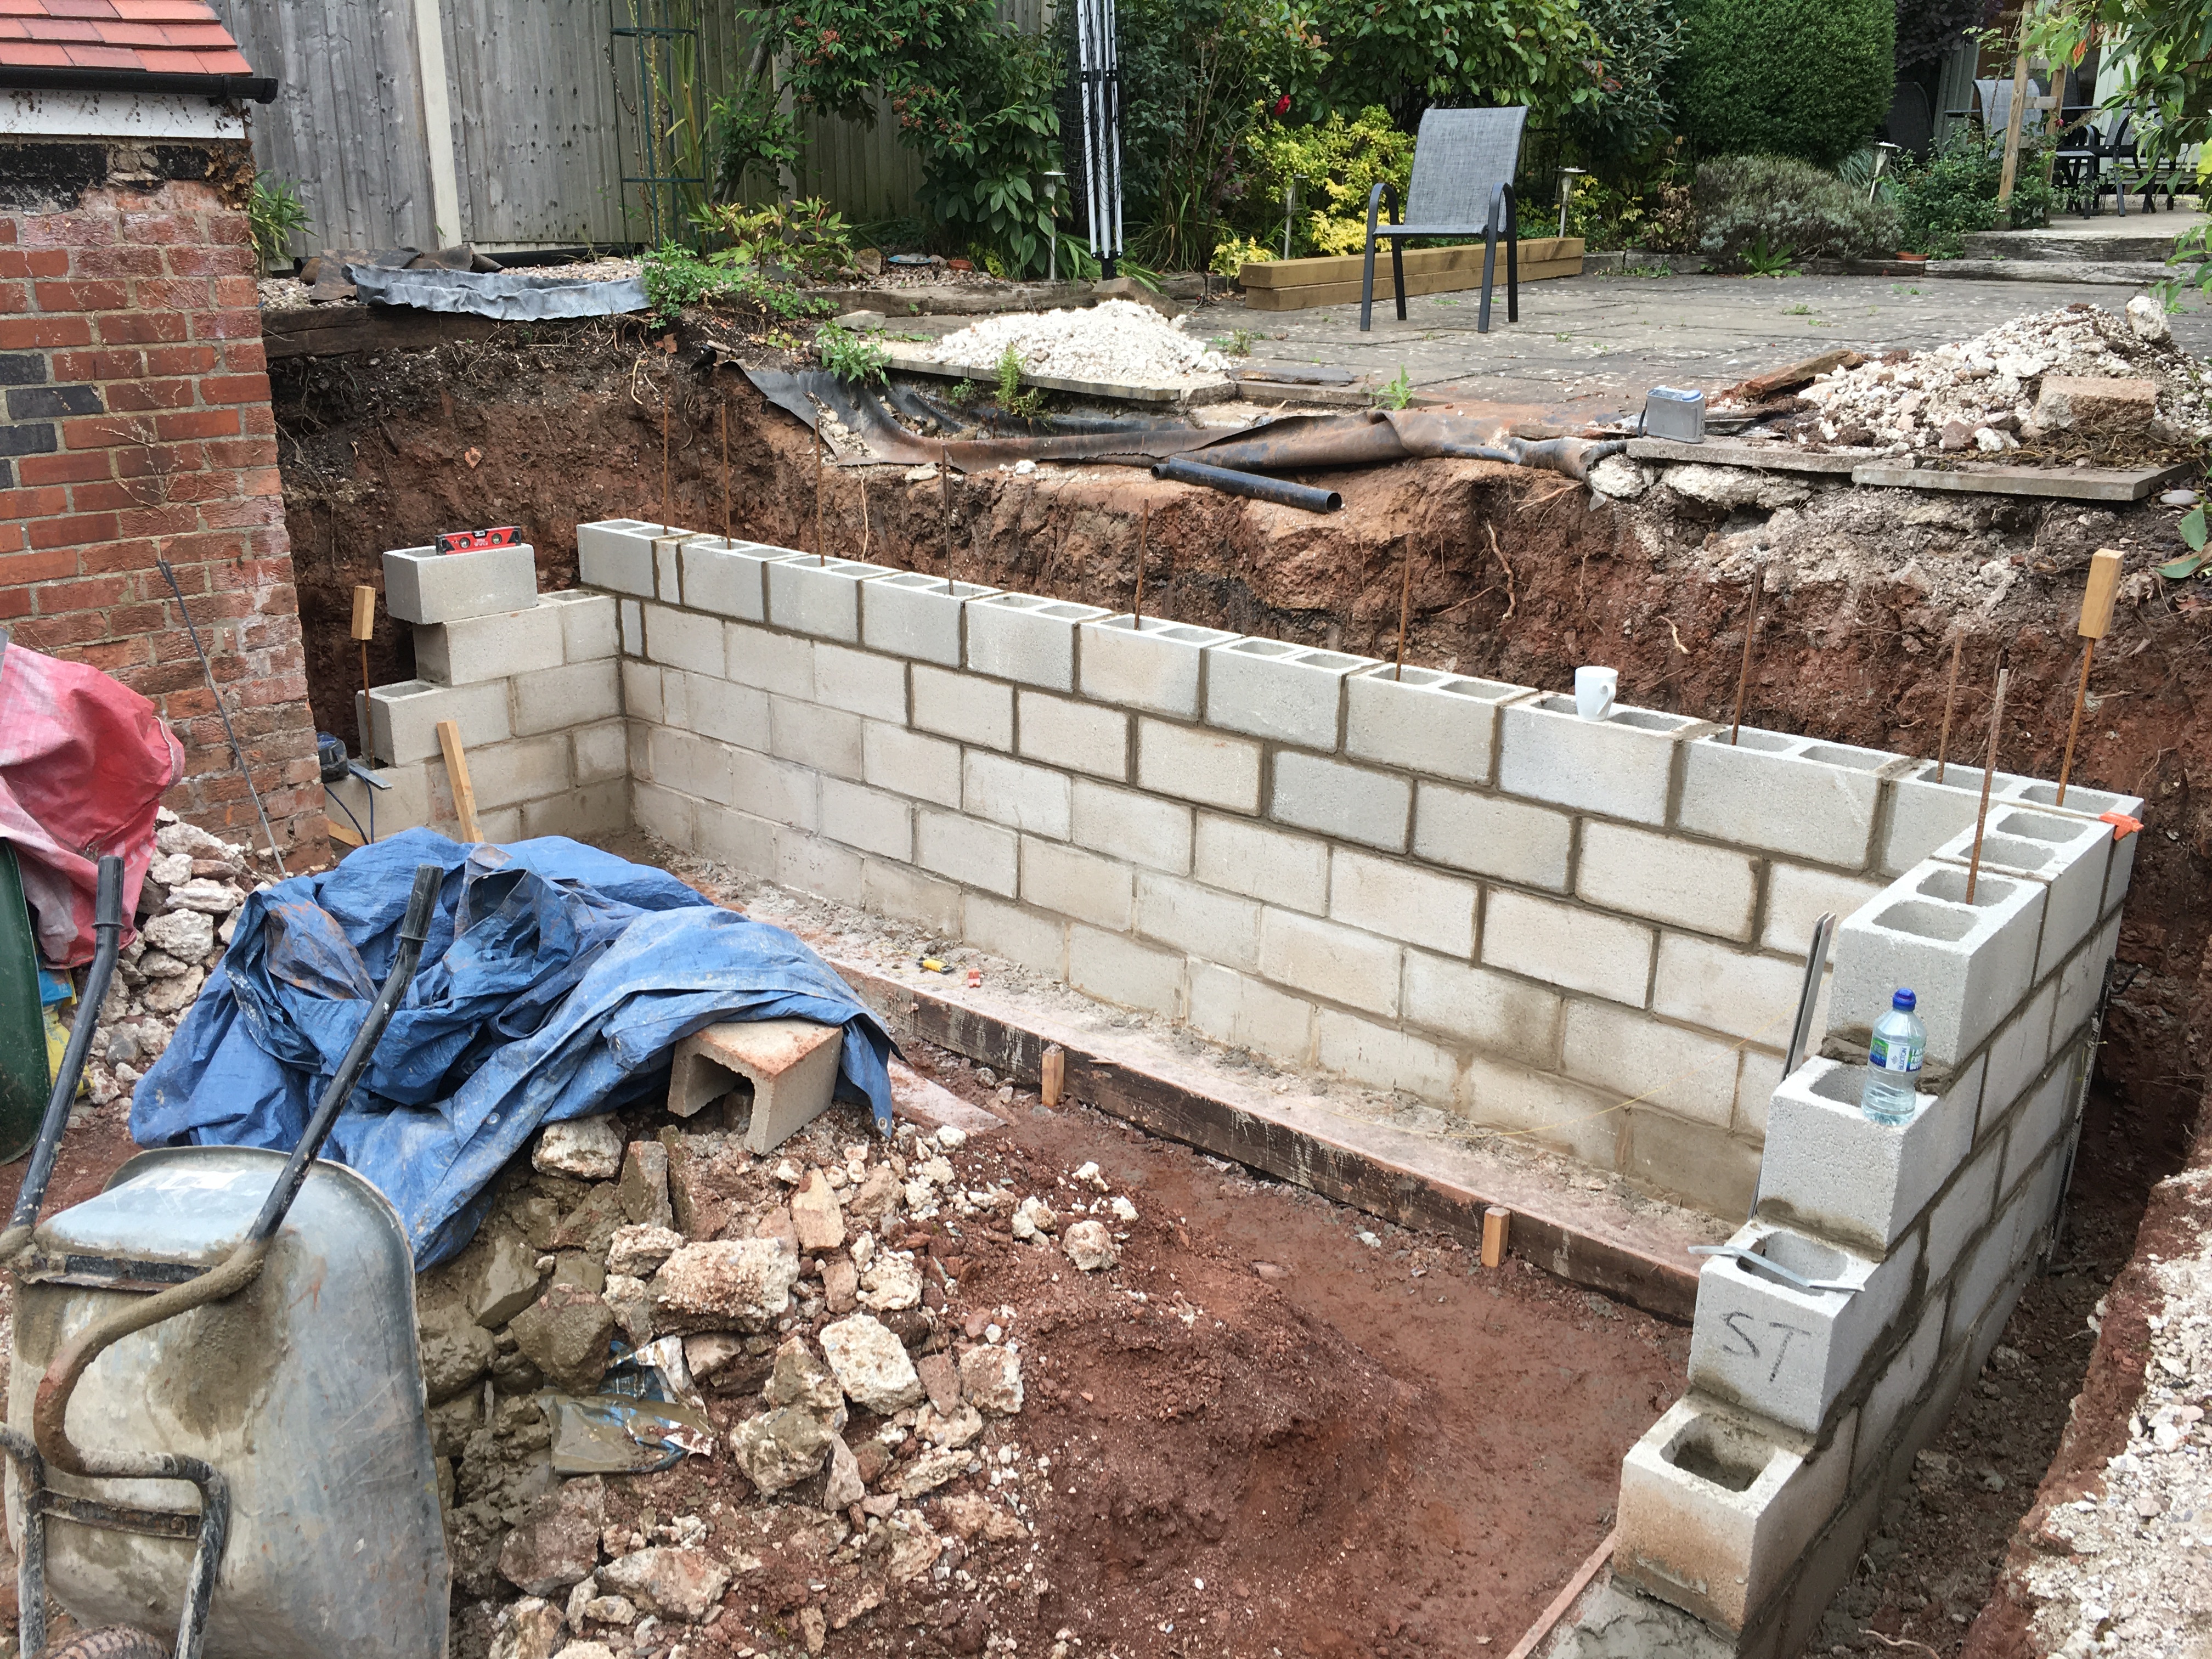
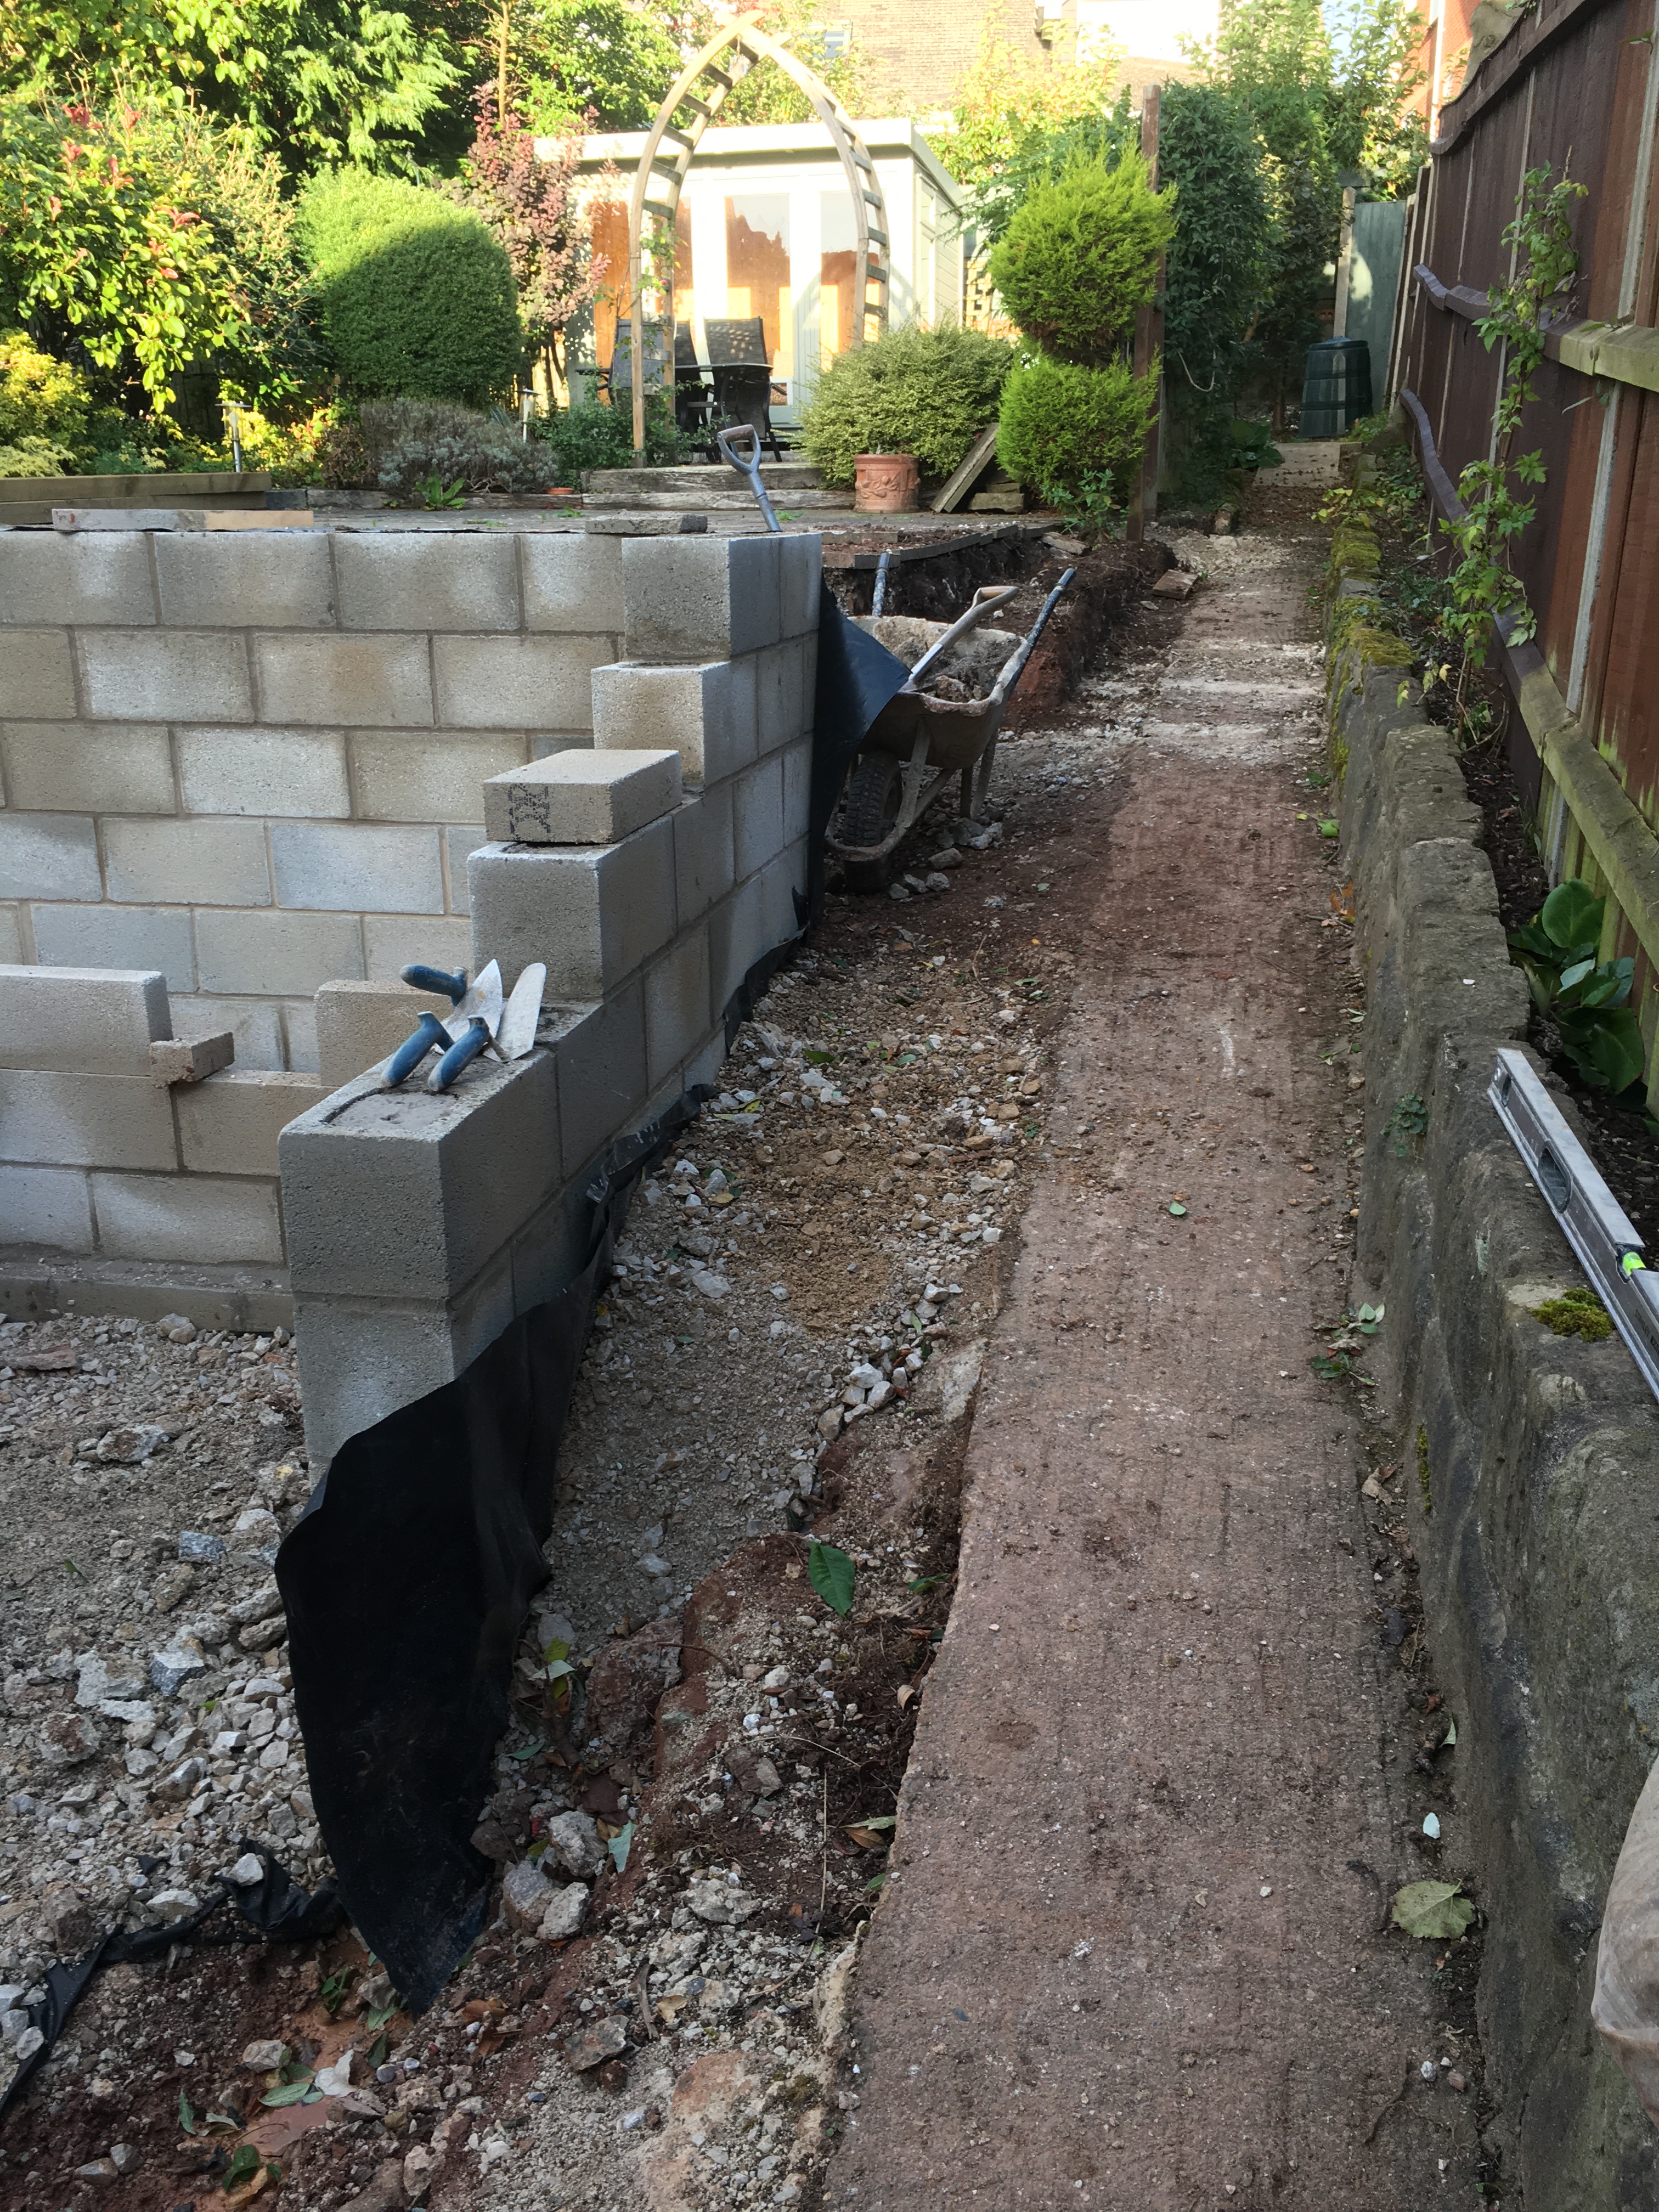
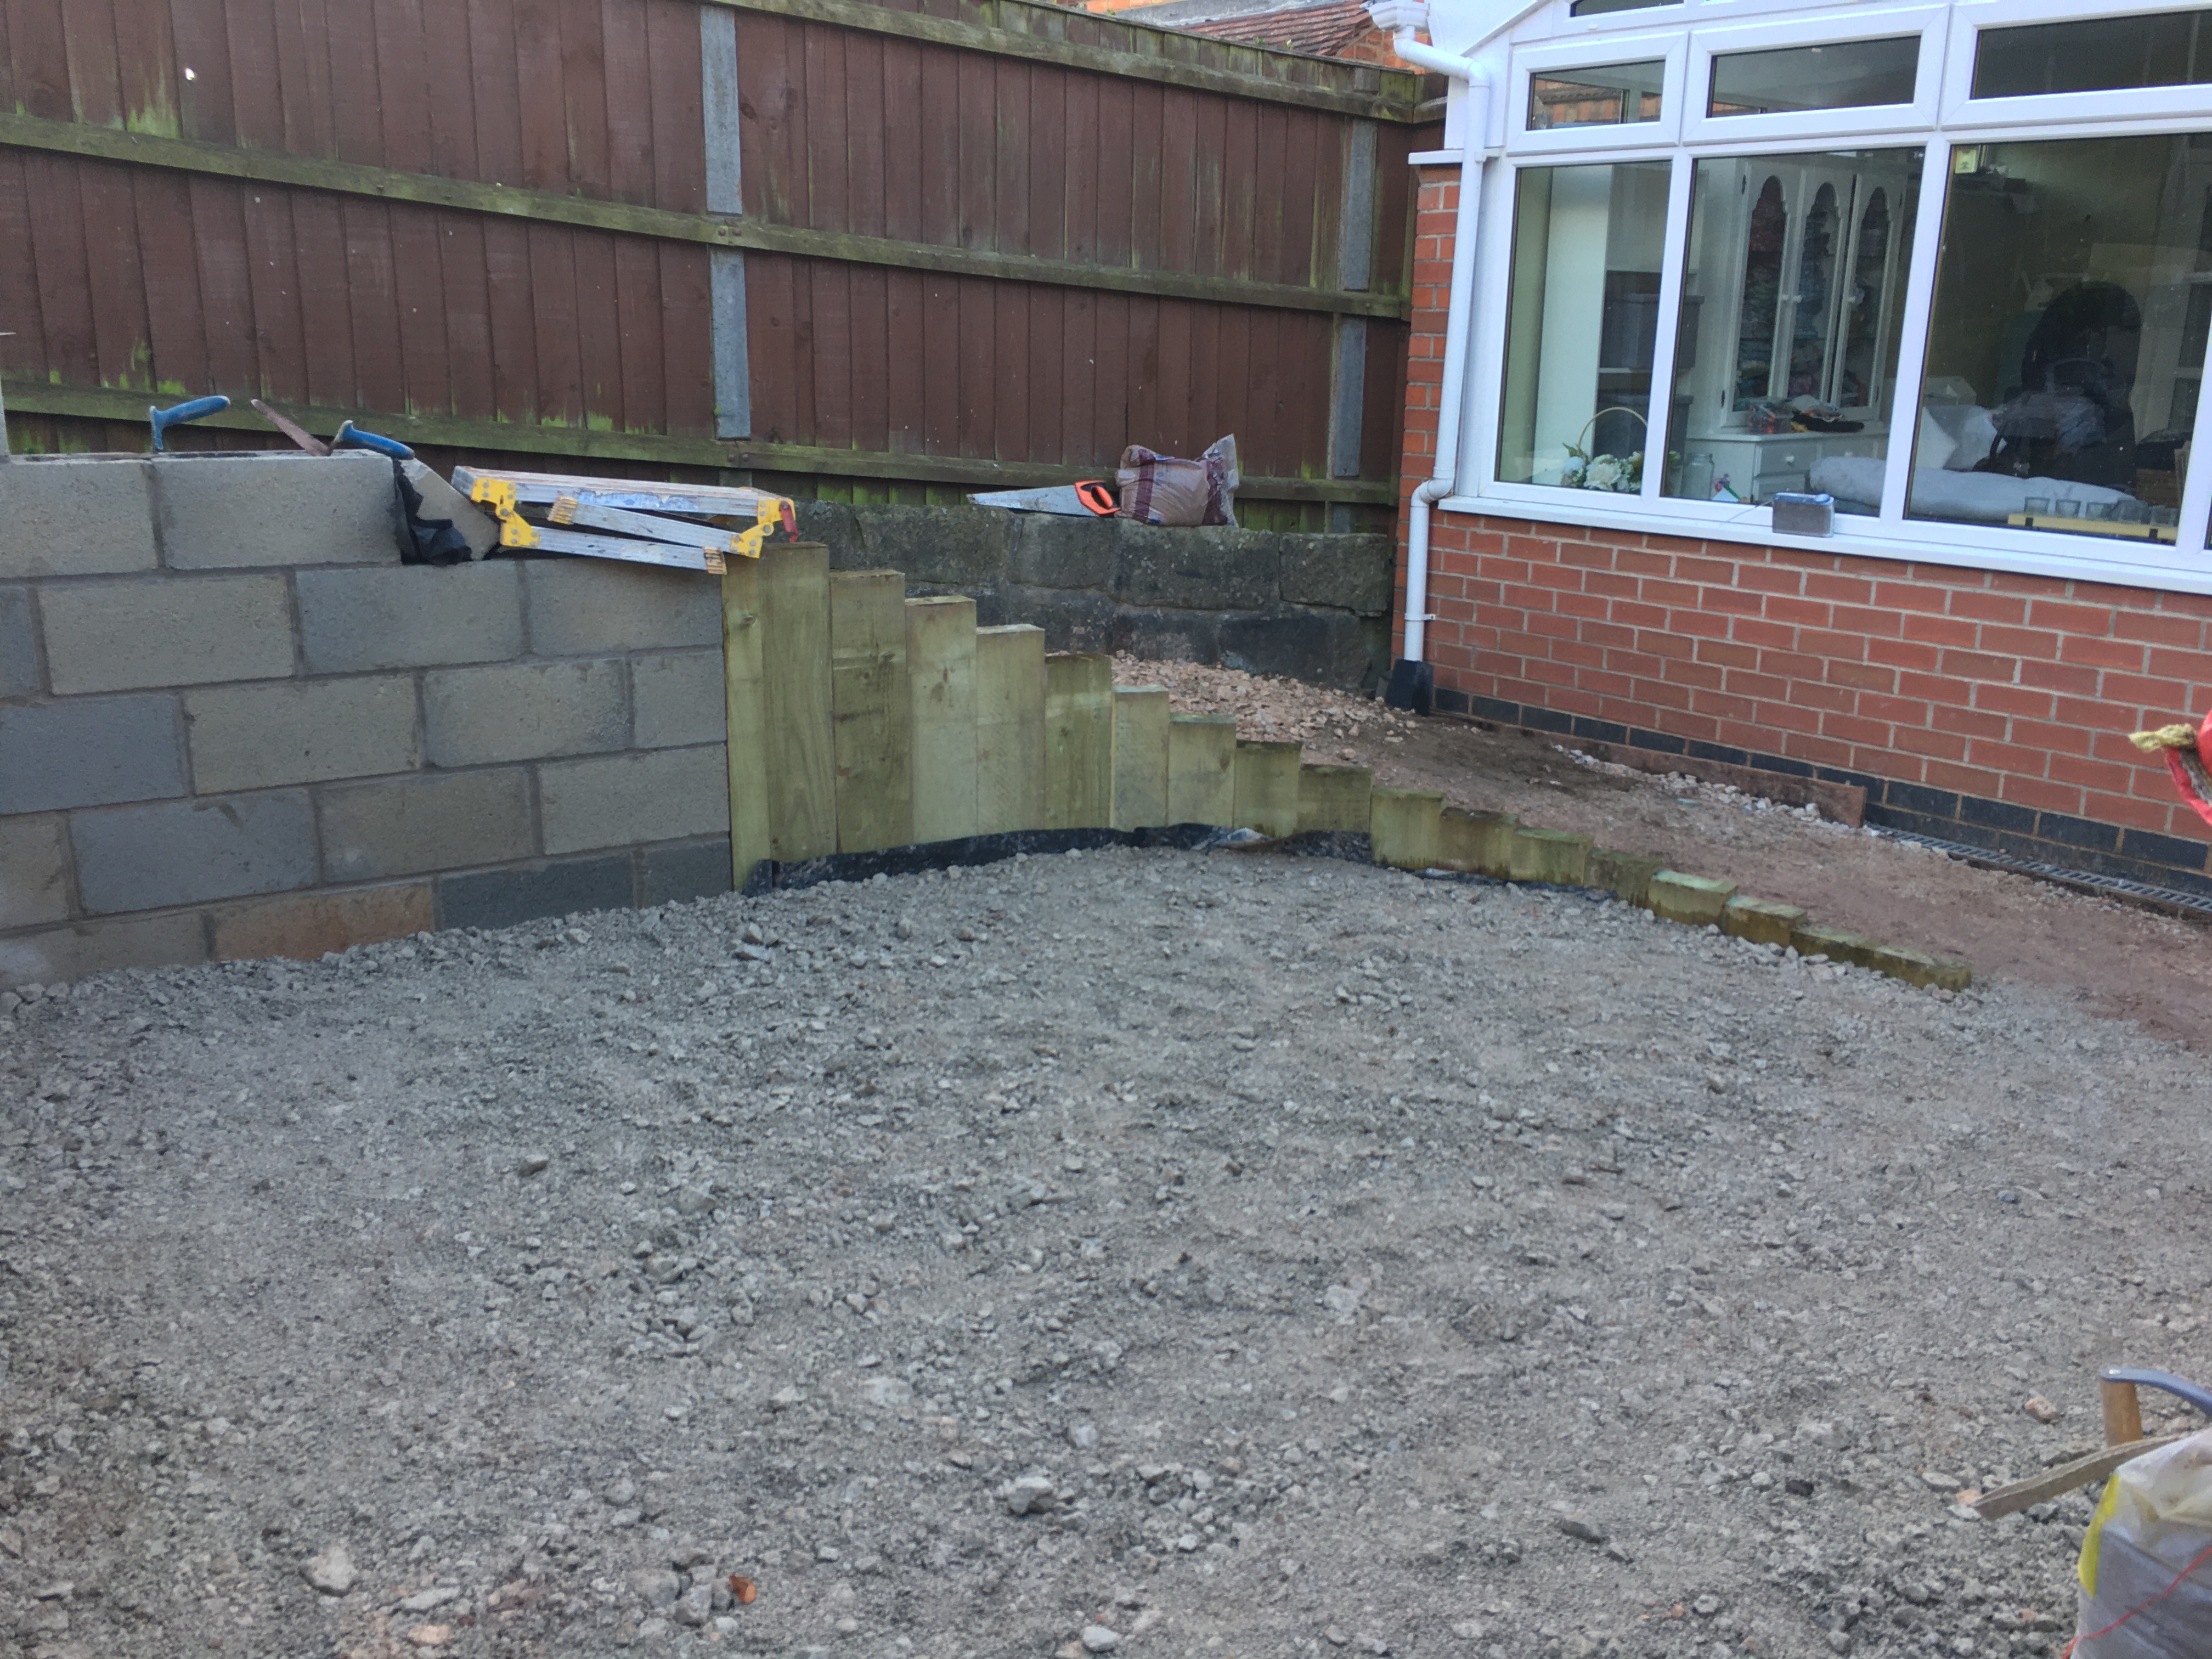
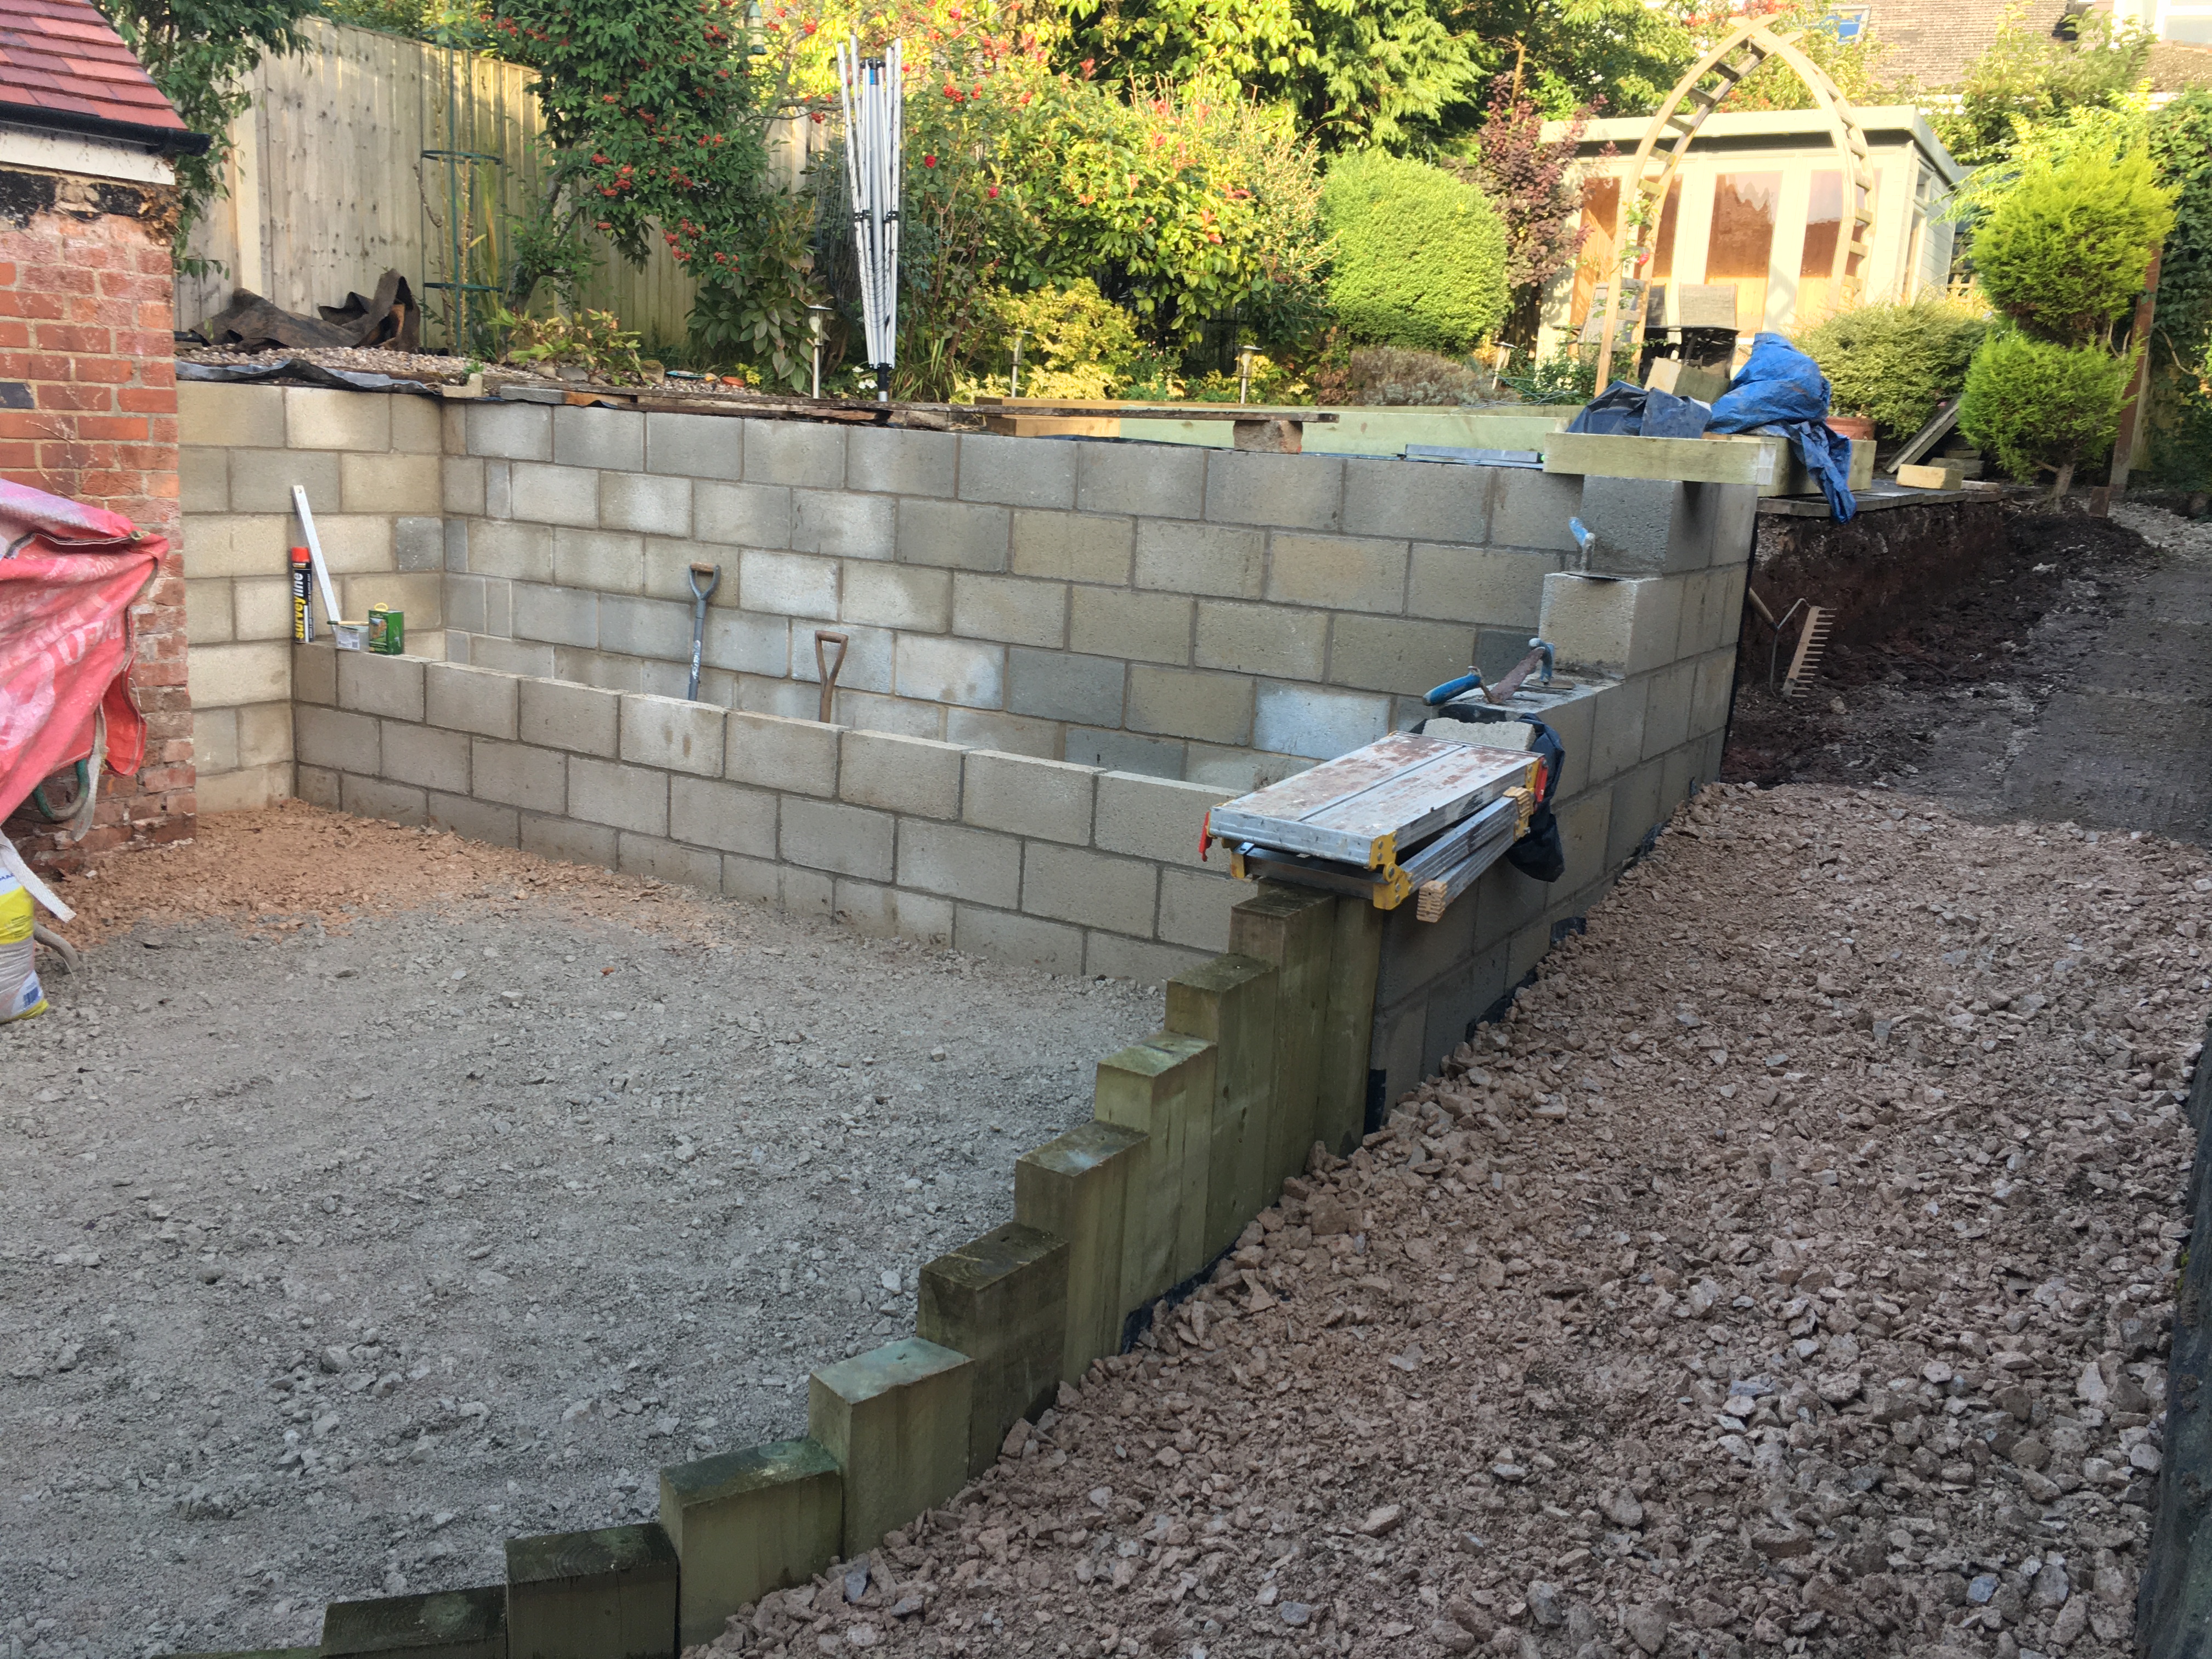
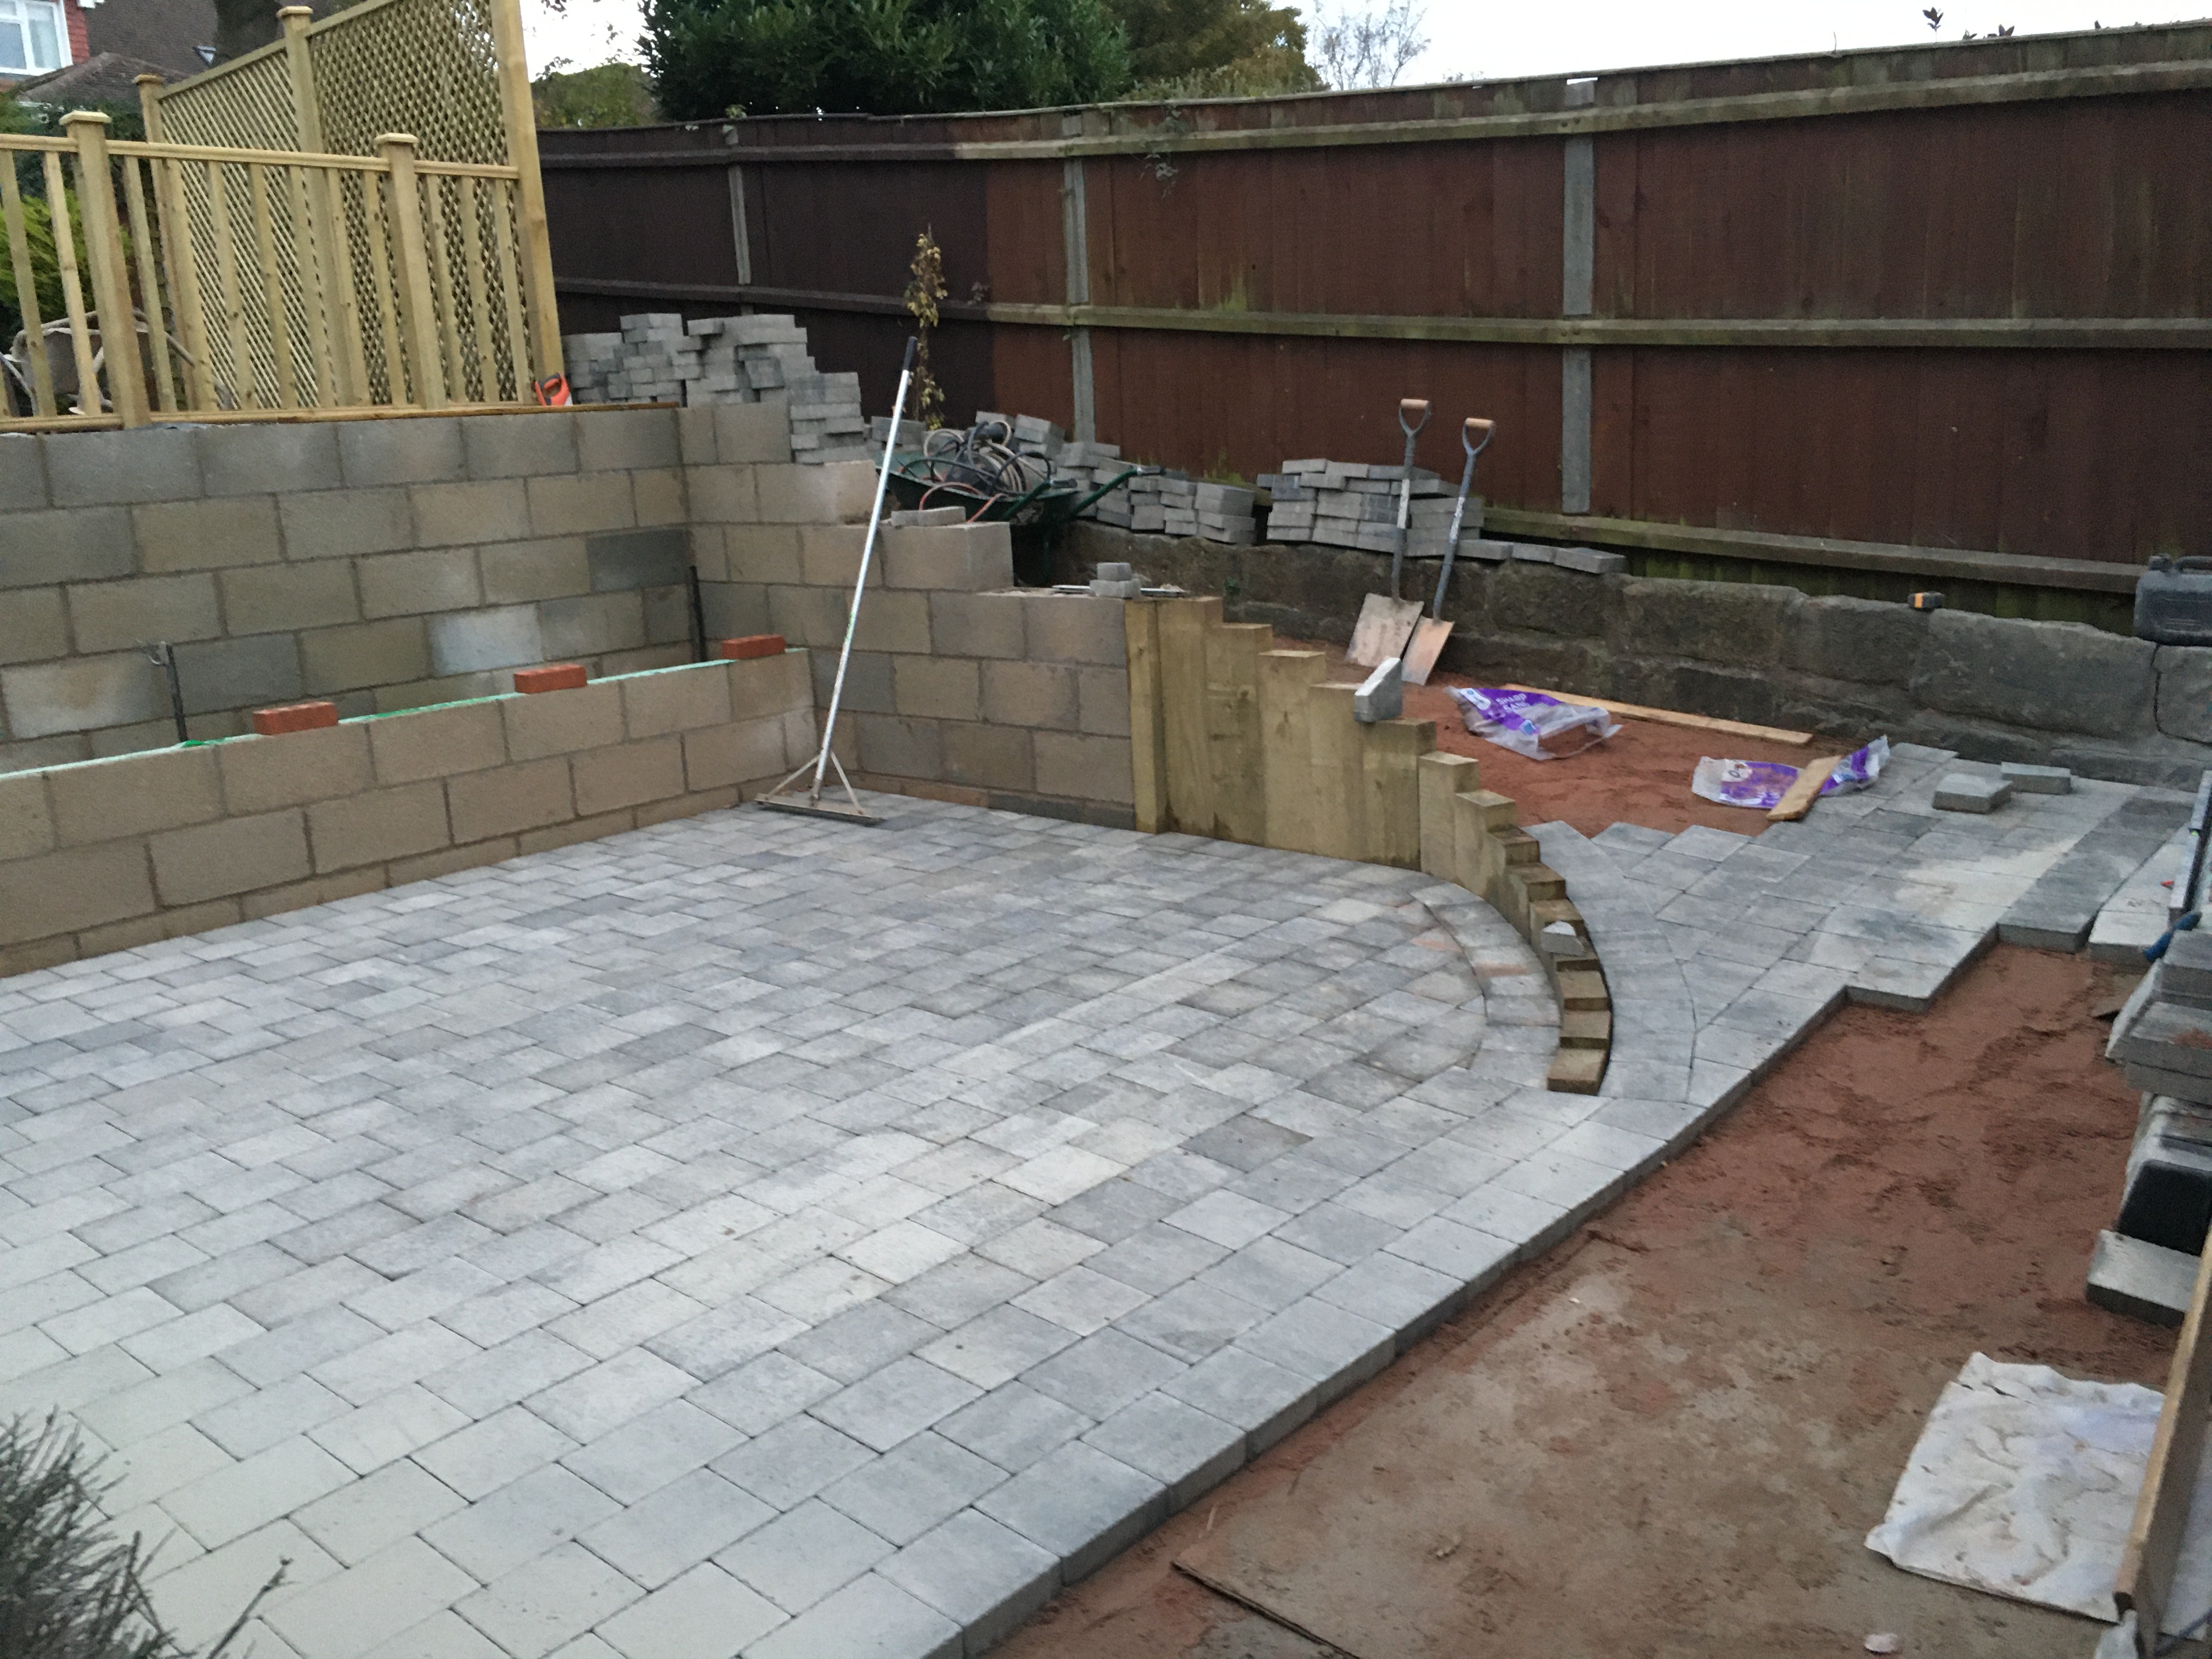
The inner retaining wall has now begun.
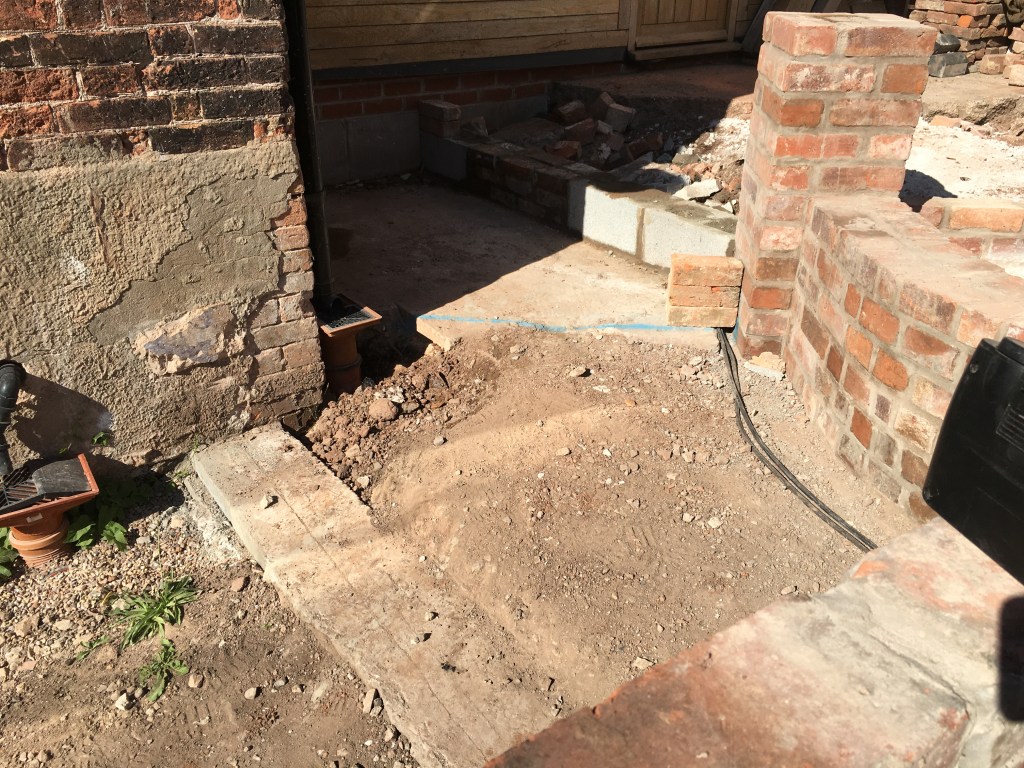
The upper steps are planned out and the area to the old front door will become the back door to the lower garden eventually. But, the importance of the old wall is now utmost. The weather is getting colder and any serious frost could pop the wall open.
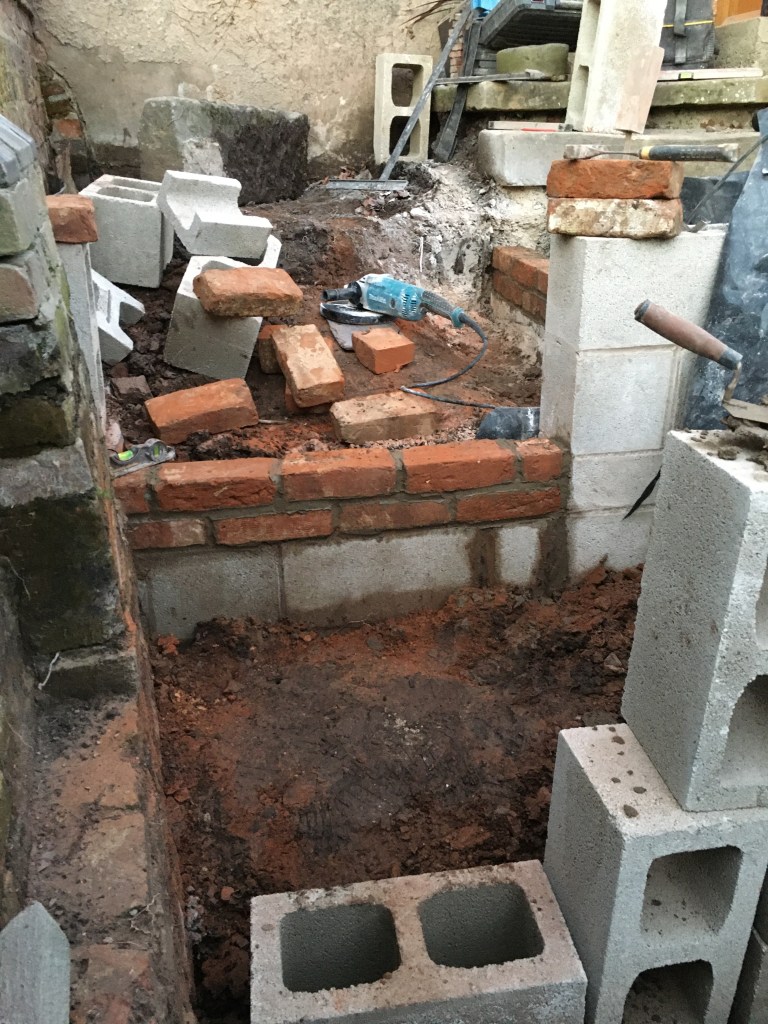
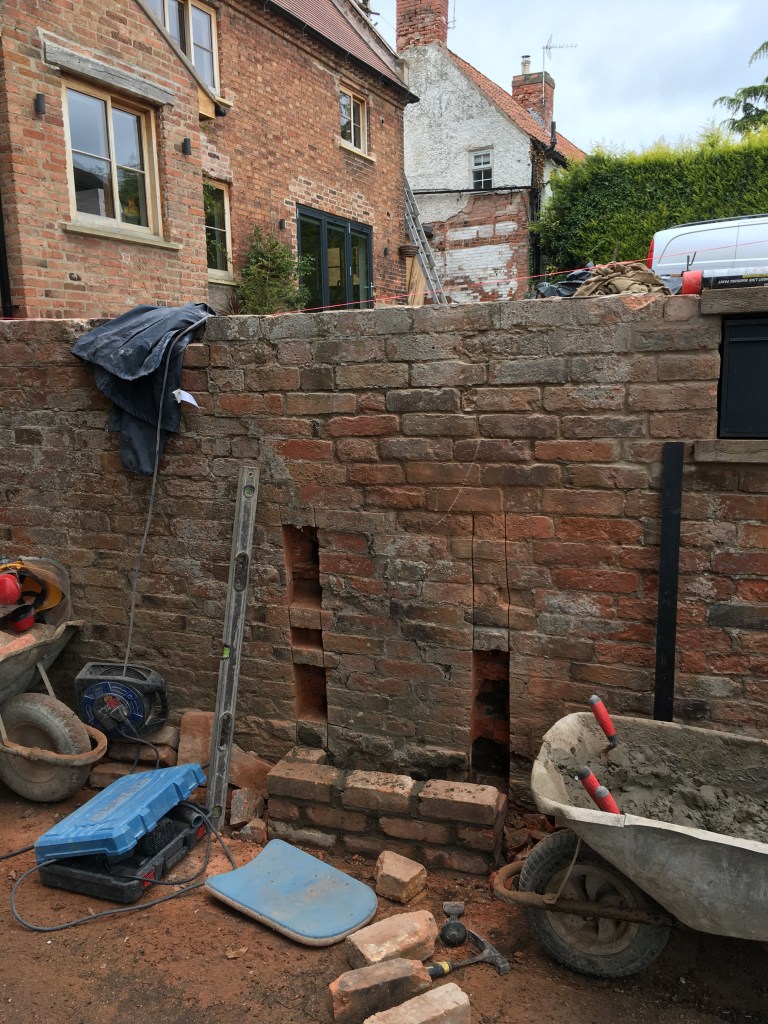
The old wall buttresses are taken down, and all the soil and dirt are removed from the wall and inside the wall cavity. Concrete and new ‘reclaimed’ bricks are used to repair the wall.
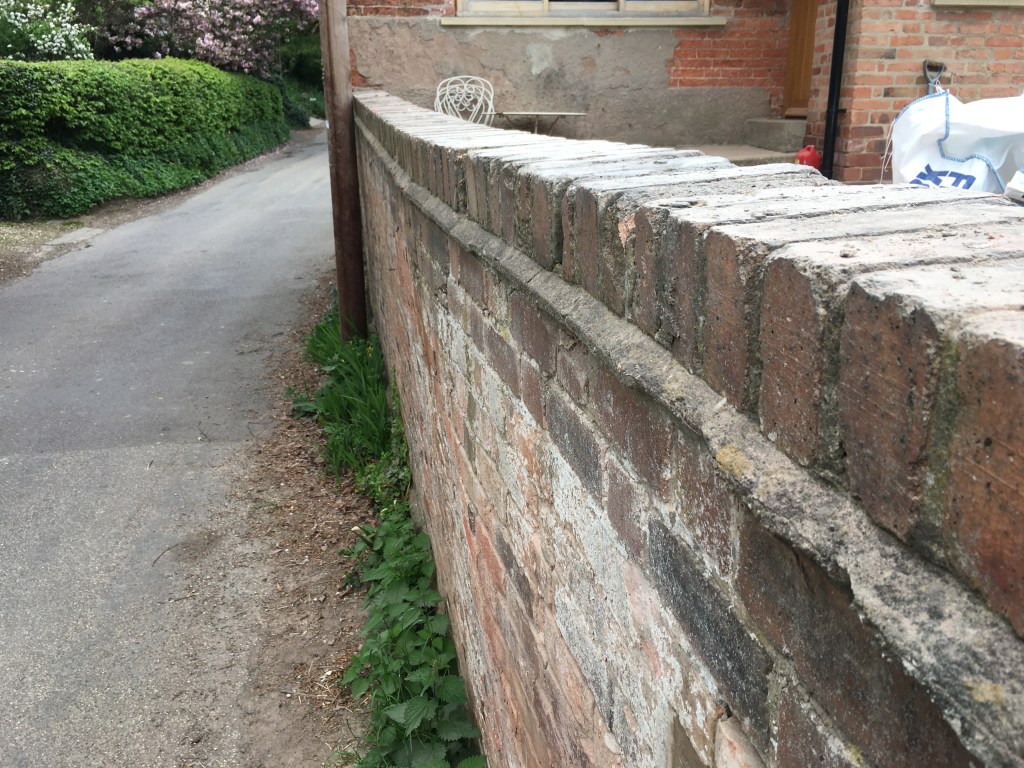
You can see the lean of the wall on the newly replaced buttress here.
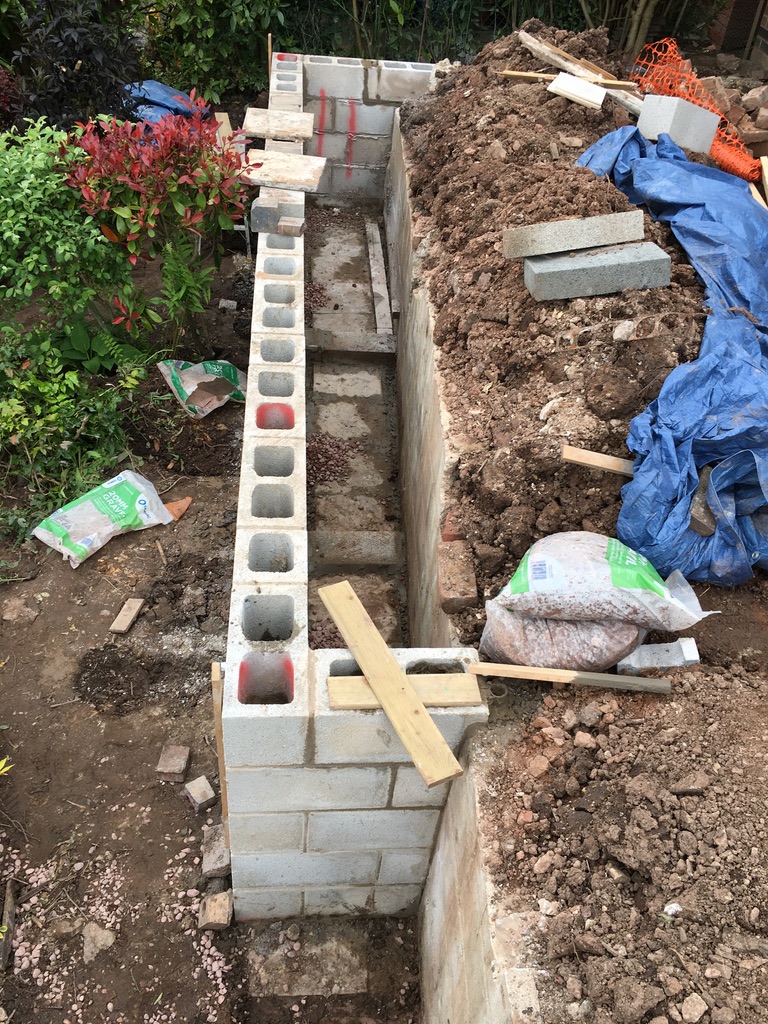
So the buttresses on the wall are getting replaced. Old bricks get replaced where needed. The level is being sorted and steps are now added to the ground.
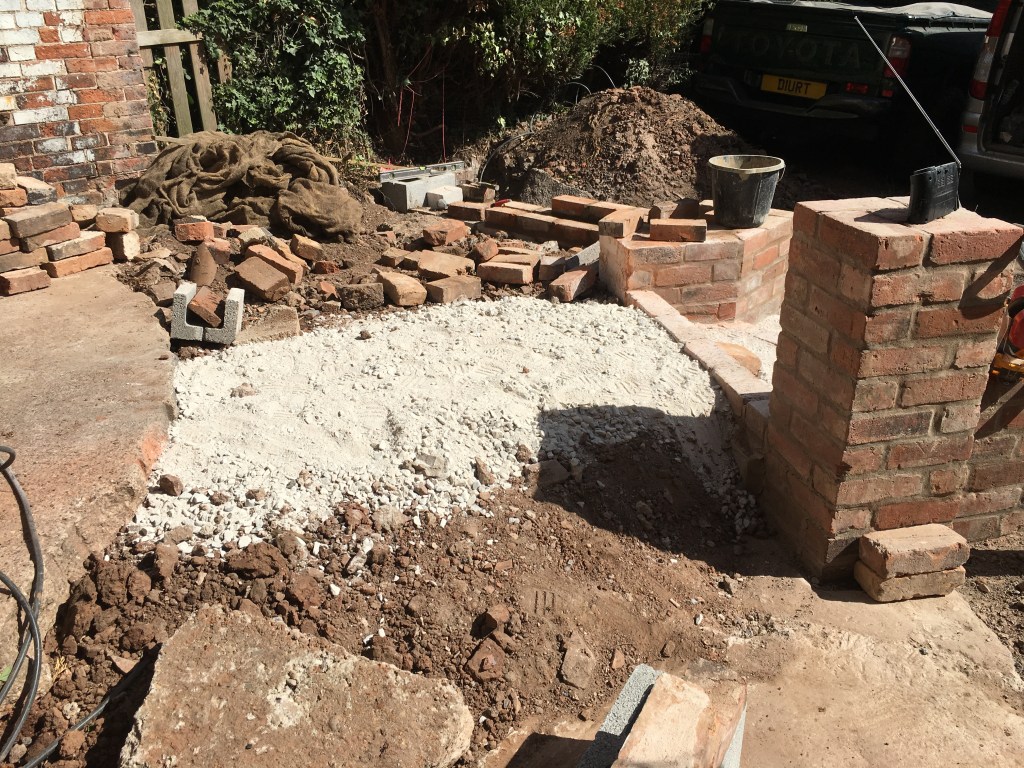
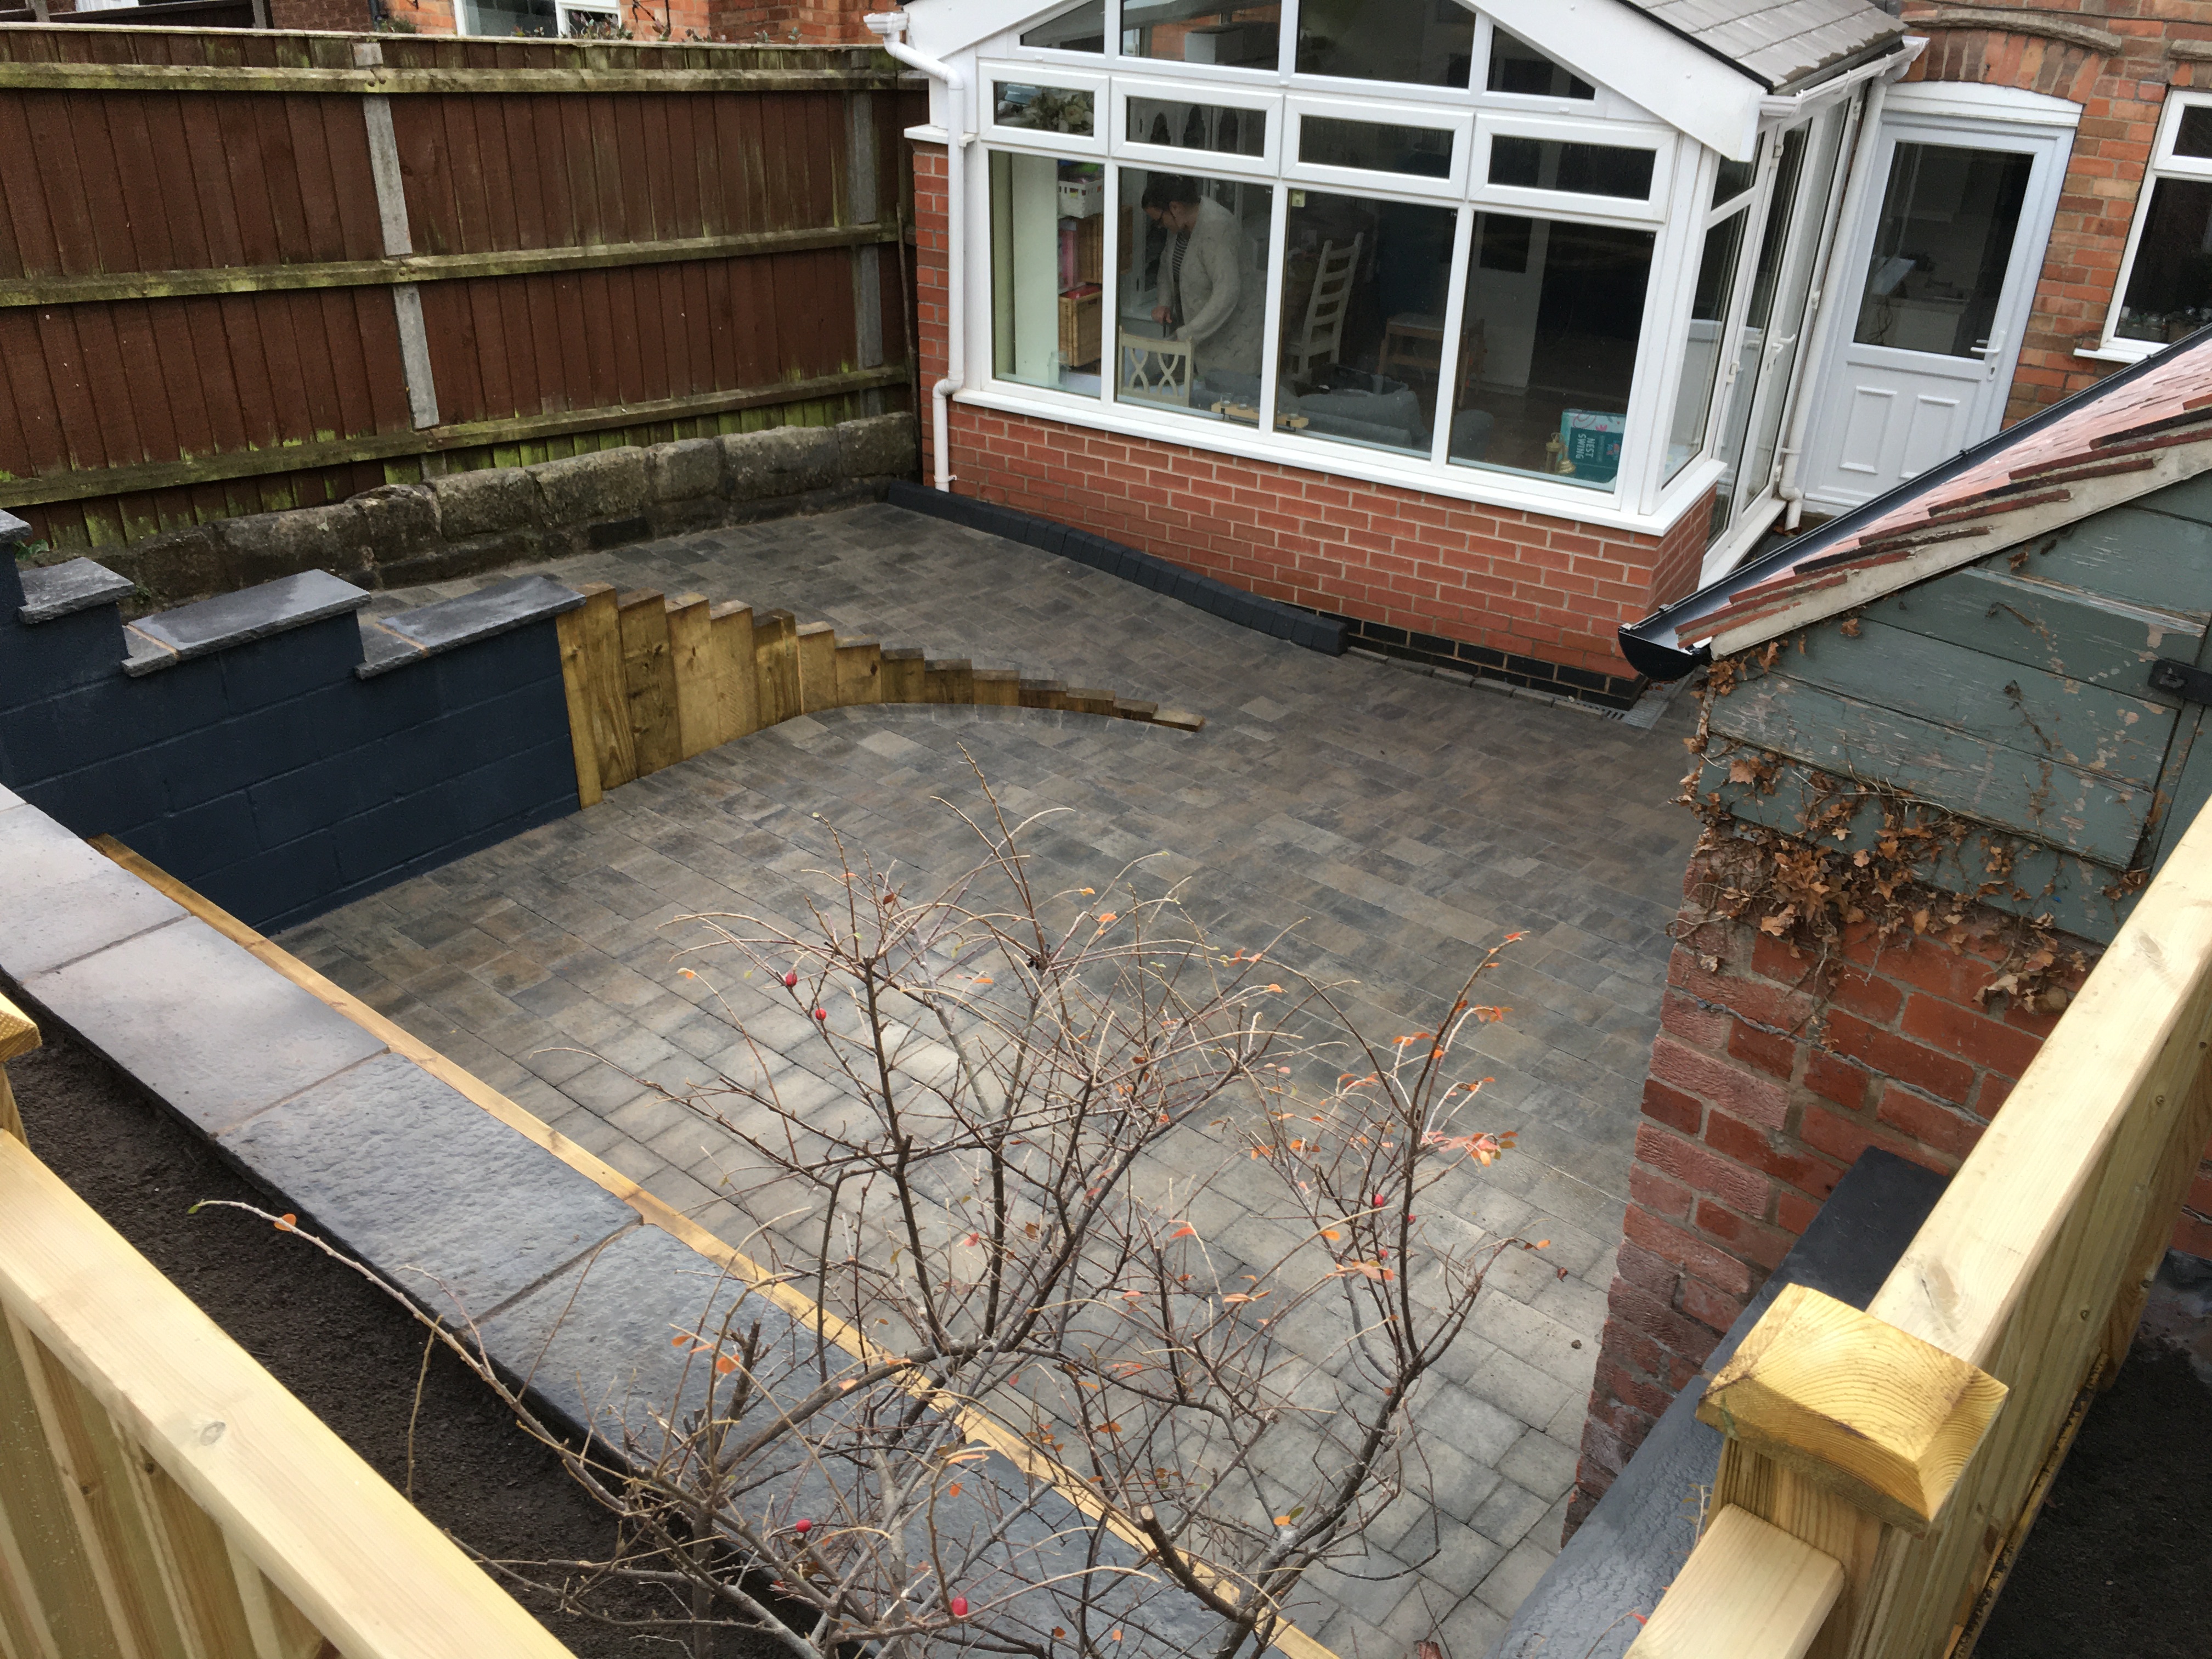
The inner buttresses are in. Steps are in. Six tons of MOT stone are eventually added to the ground. All that is required for the wall is replacing the poor later addition on the top. This needed chopping off carefully and taking down 2/3 courses. I couldn’t hammer it off due to the chance of the old wall falling down. It also needed removing to straighten the top and correct the heavy lean on the outer side towards the road.
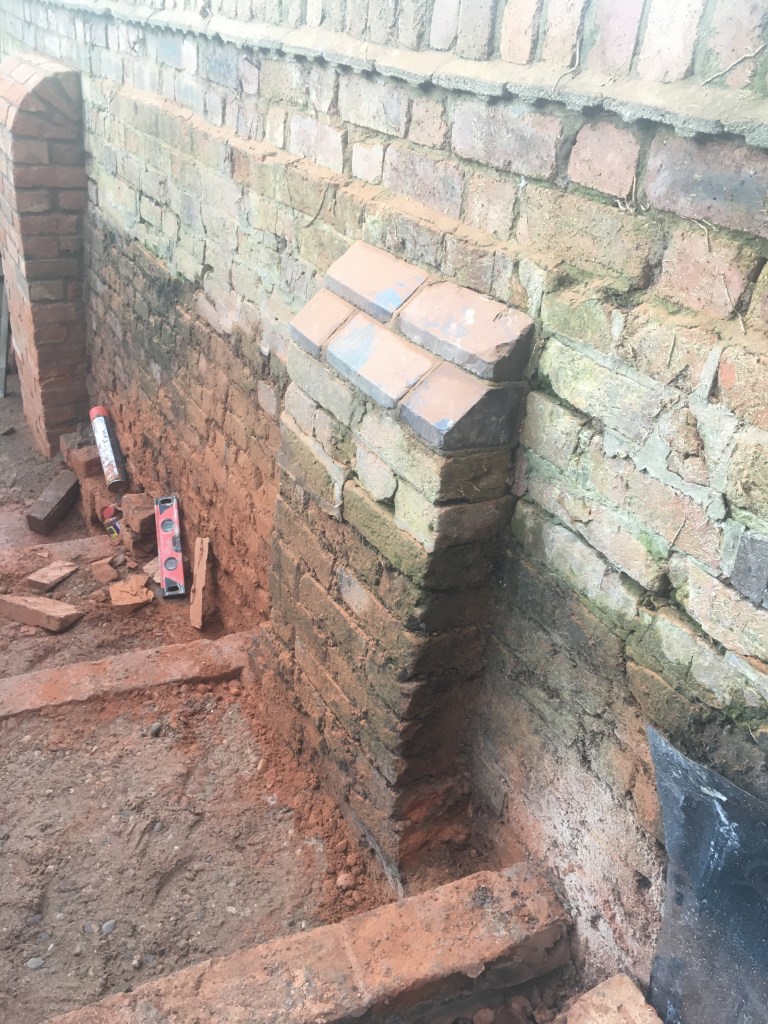
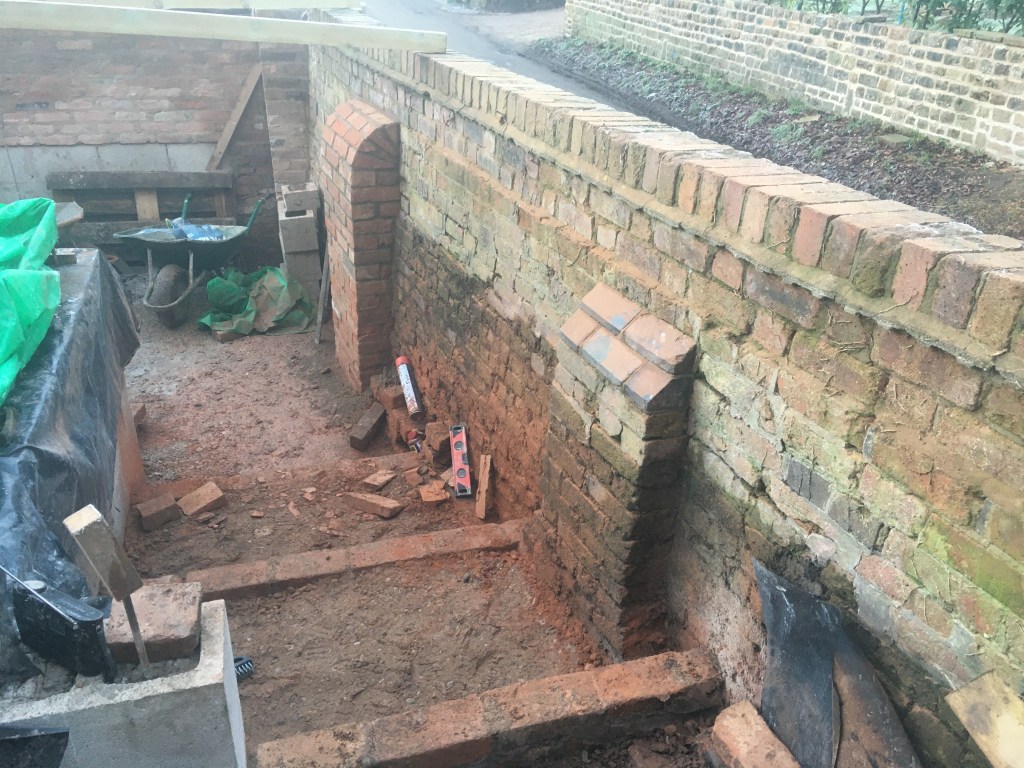
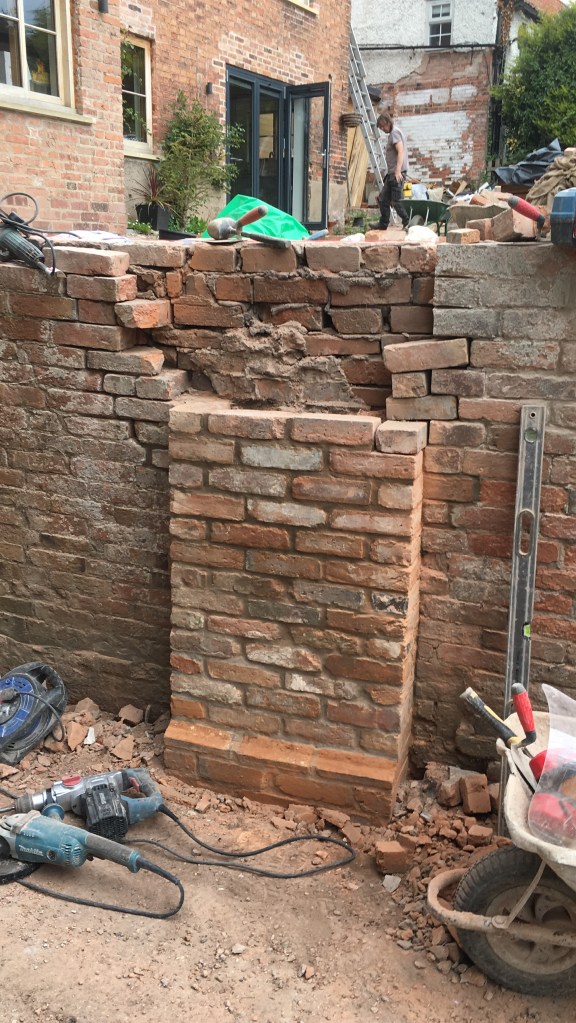
The outer wall on the drive-side had a few more courses added. Also, the dogtooth brickwork was added to match the design of the roofline on the house. The ‘chimney’ section was copied from the house next door which had that design.
NOTE THE LEAN FROM THE TOP TO THE BOTTOM NOTE THE CHIMNEY OF THE HOUSE NEXT DOOR MATCHES THE DESIGN ON THE NEW CORNER OF THE WALL
Let’s get that top off…
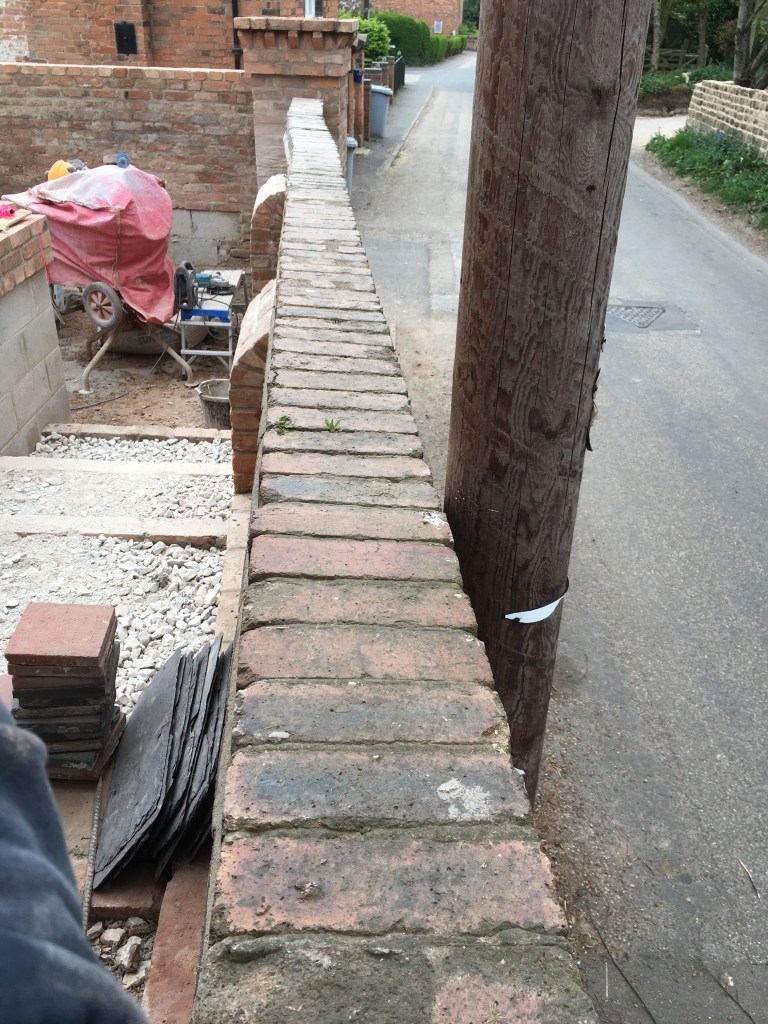
And the top is finally off on the roadside. The outer Drive wall is finished.
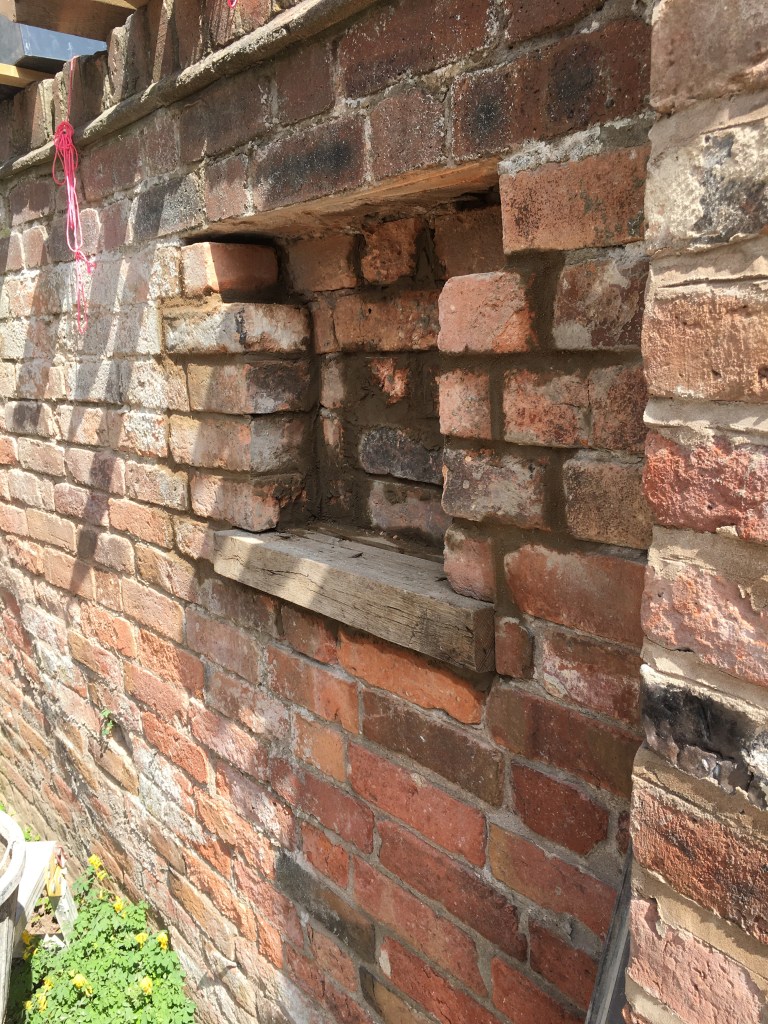
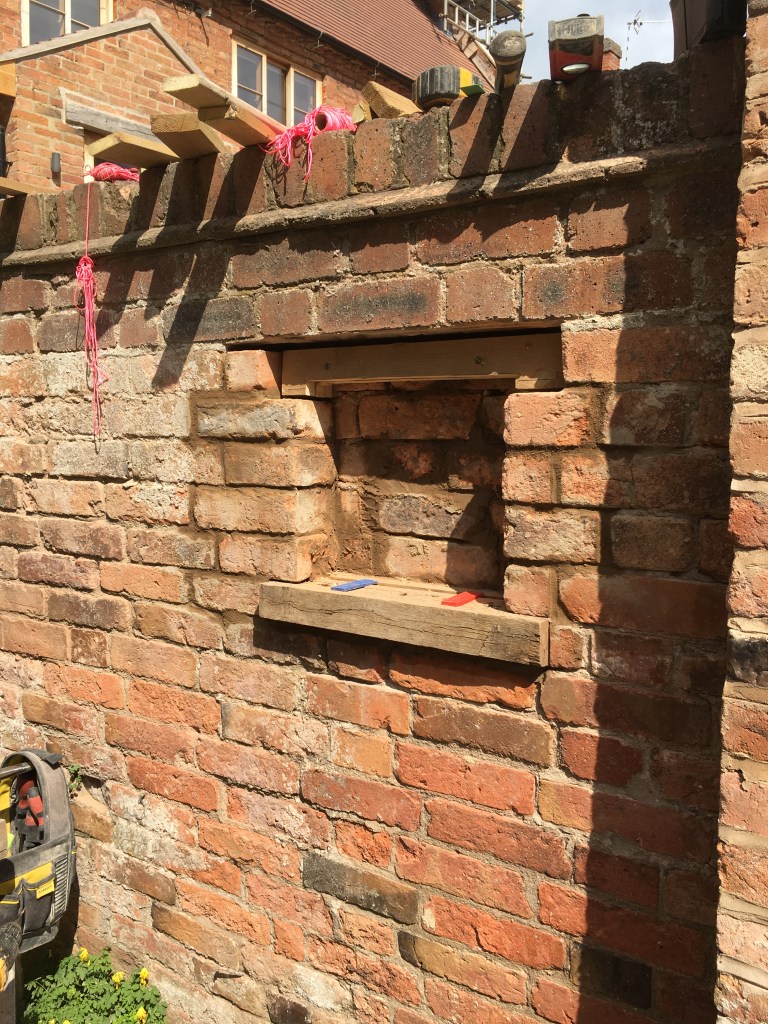
Whilst I was at it, I had the thought… I’ll build the letterbox into the wall. Two pieces of oak left over from the restoration inside the house were used to give it some nice character. The top of the wall is still needing to be removed in these pictures.
The top of the wall is now removed and an outer bolster is being built to distract the view of the heavy lean on the wall and also to give it new strength and support.
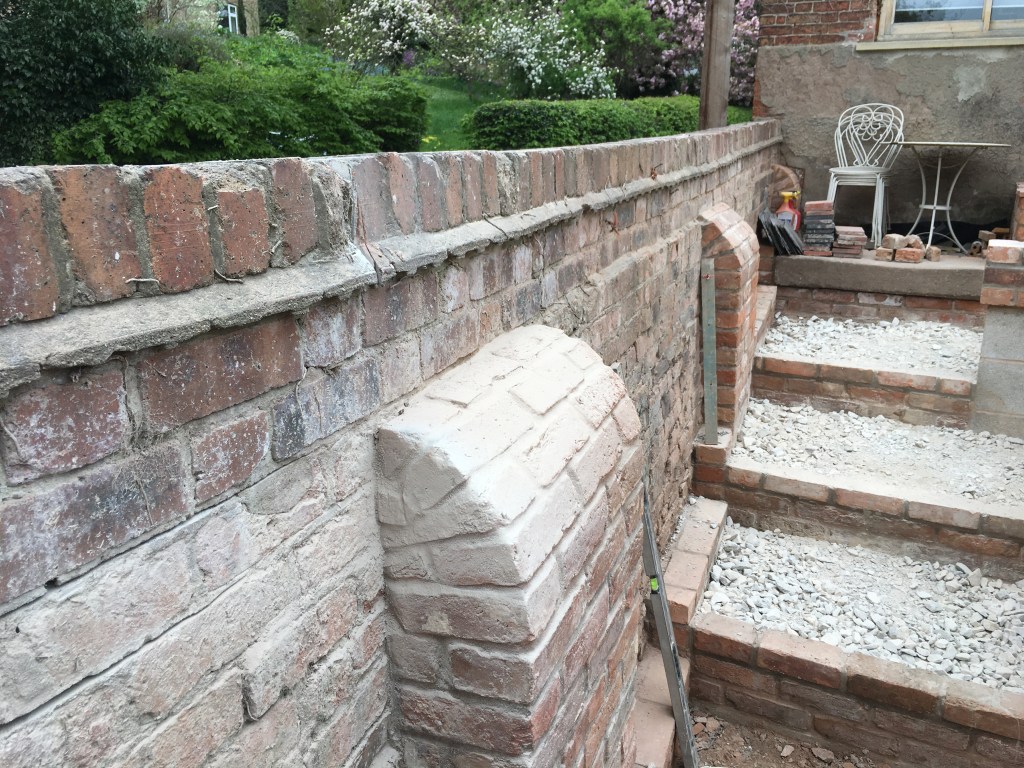
That’s the roadside buttress finished and the top course of bricks is finished, including the dogtooth to match the house. A design feature I added early on, knowing the size that the wall was going to be, so this gave it a connection to the house.
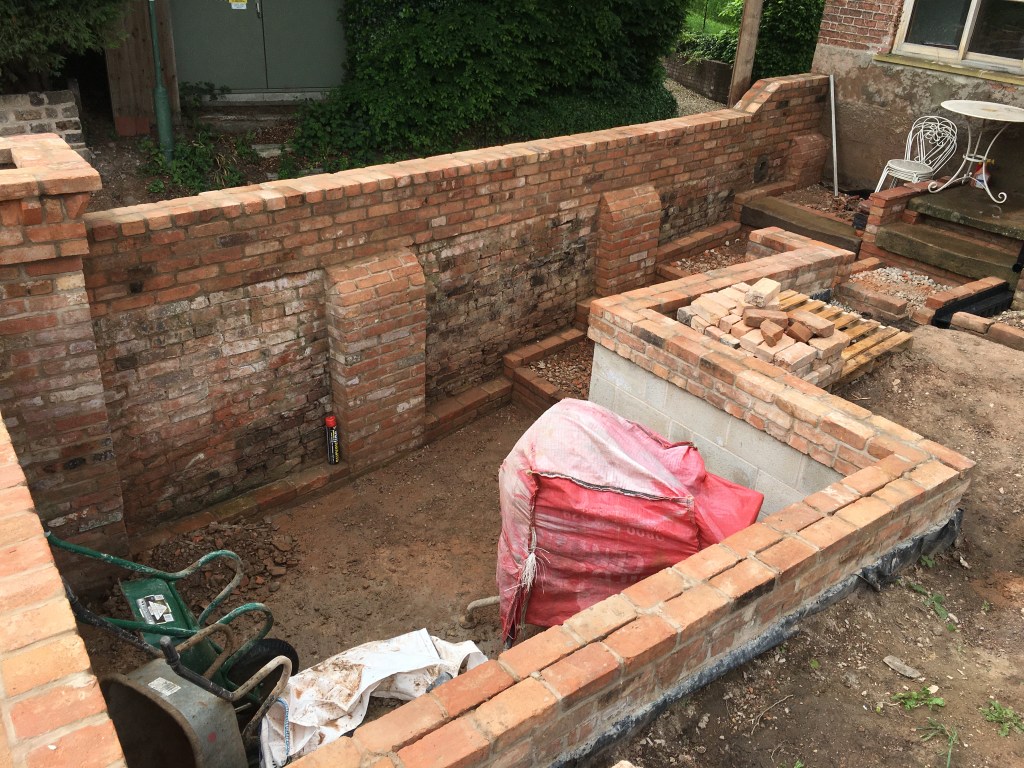
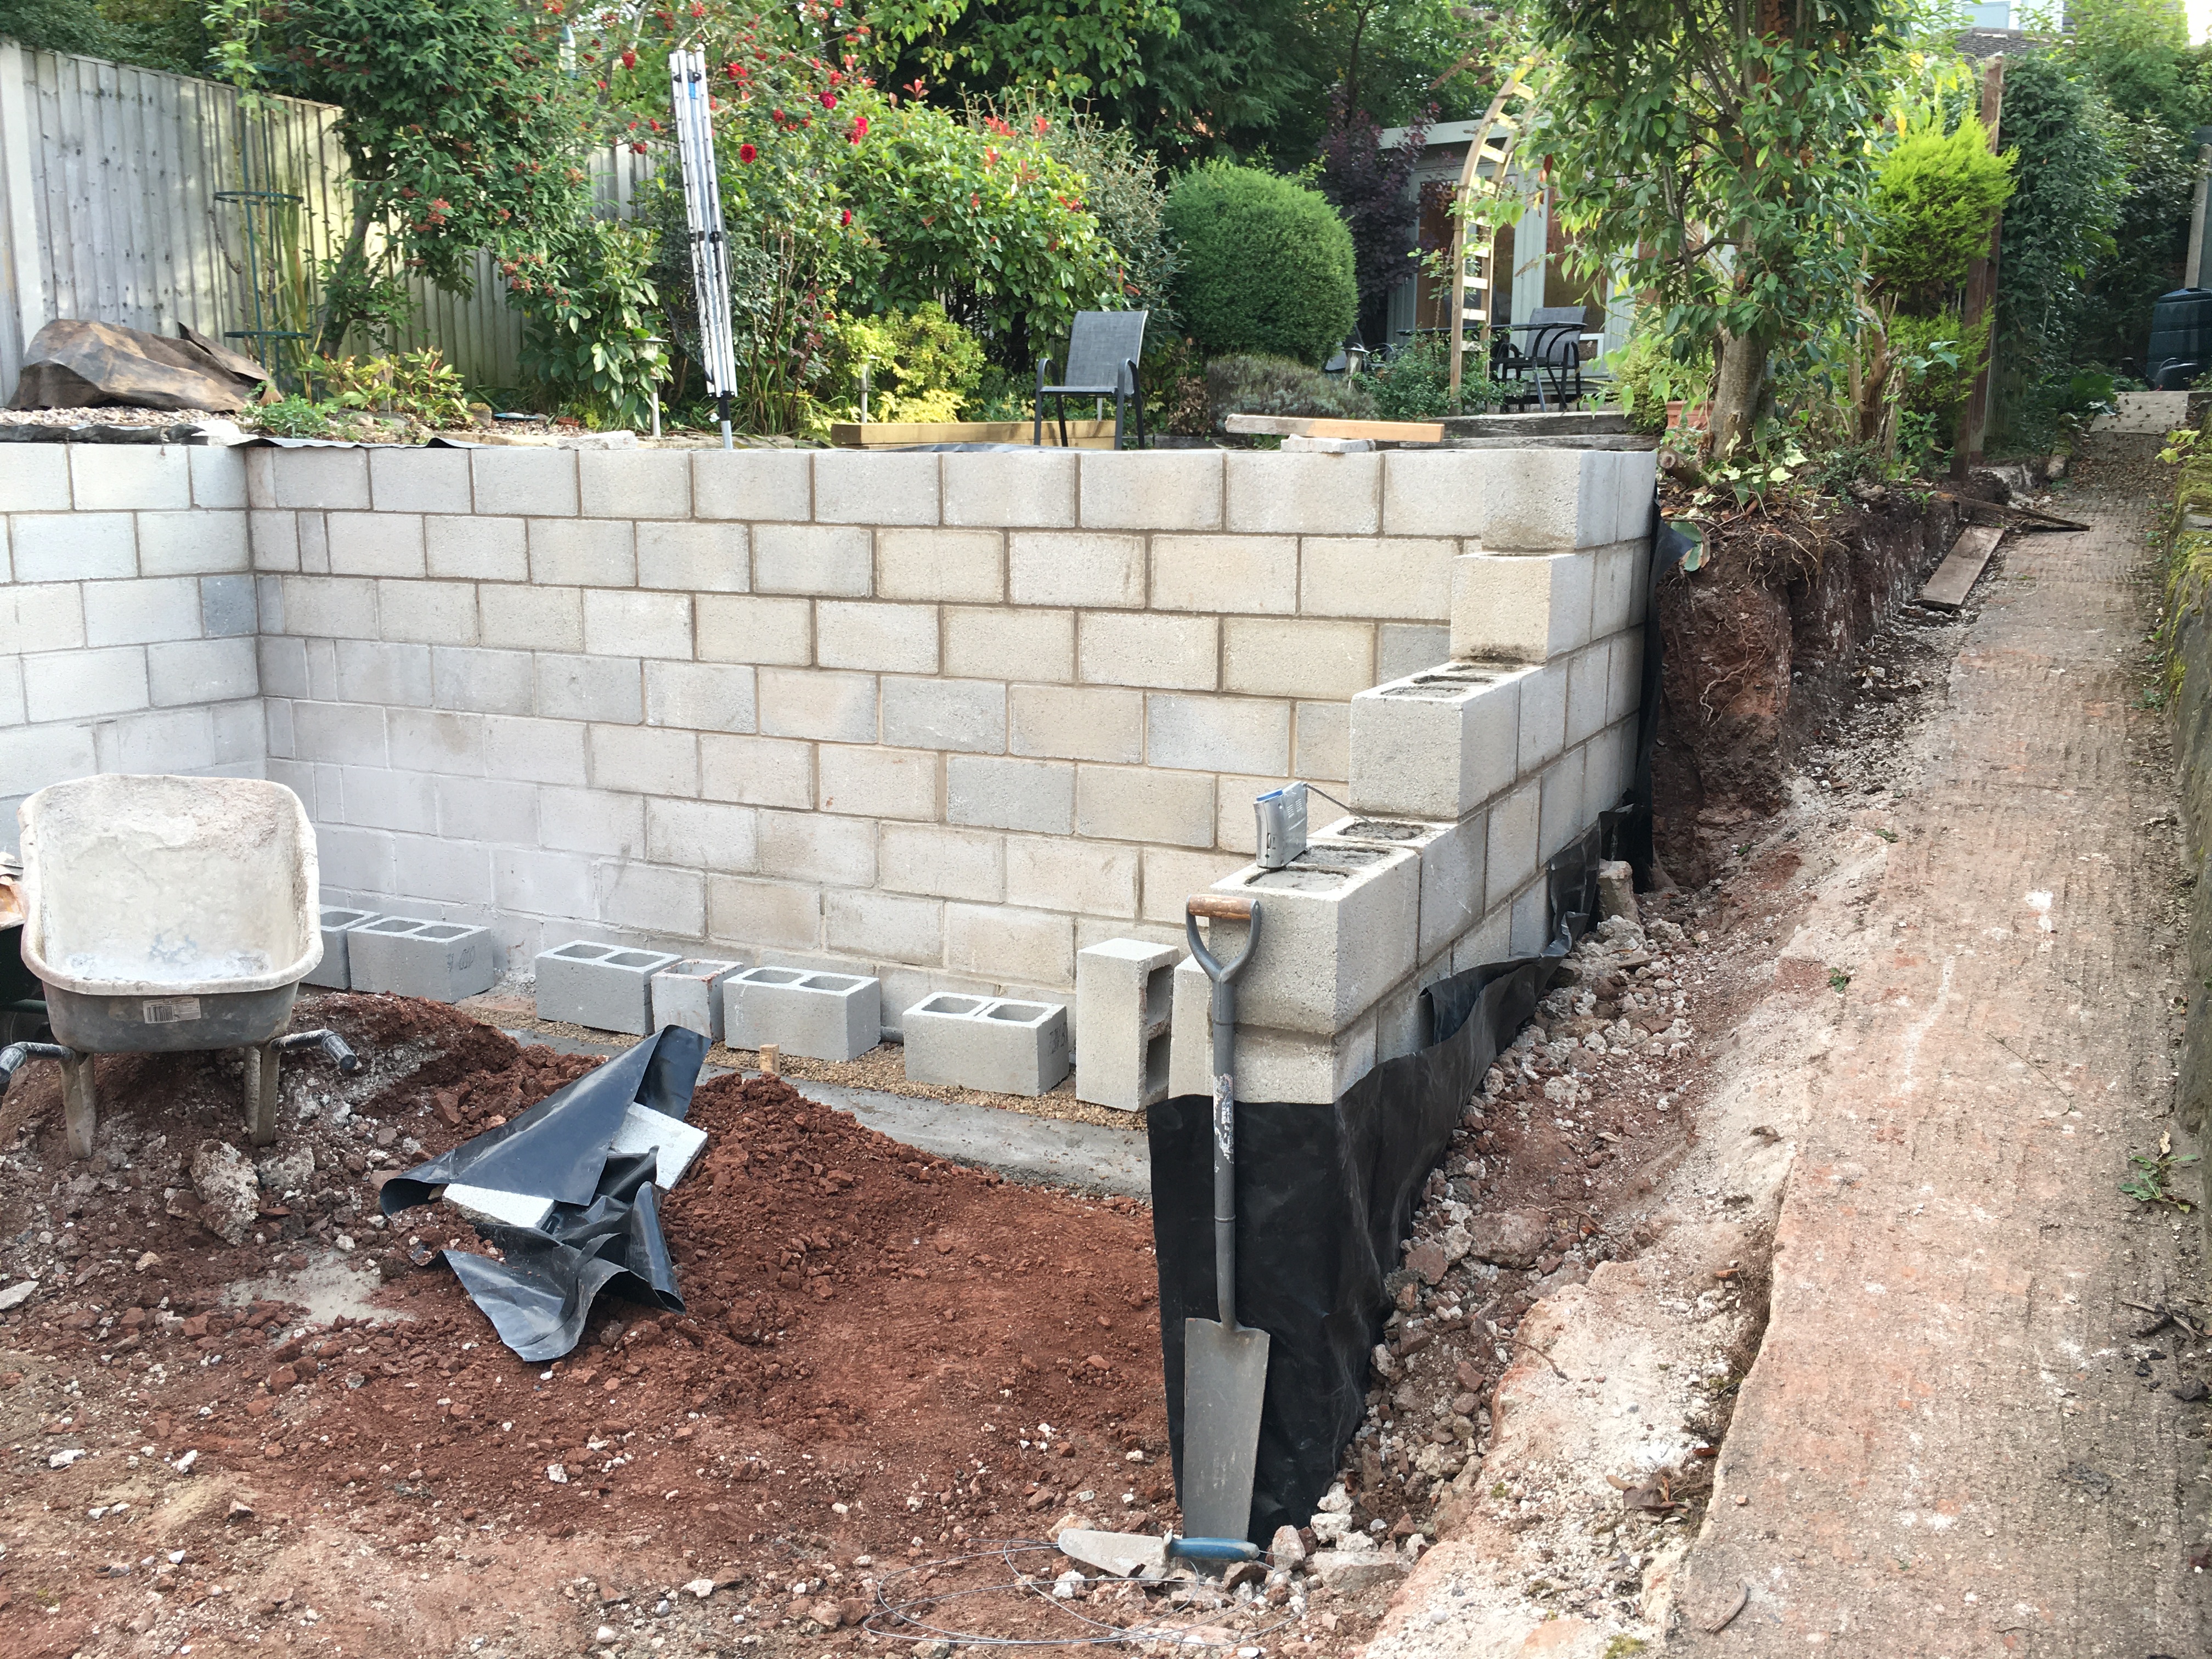
The inner block wall is now up to the right height and the top courses of reclaimed bricks are being added. The outer wall still needs more work.
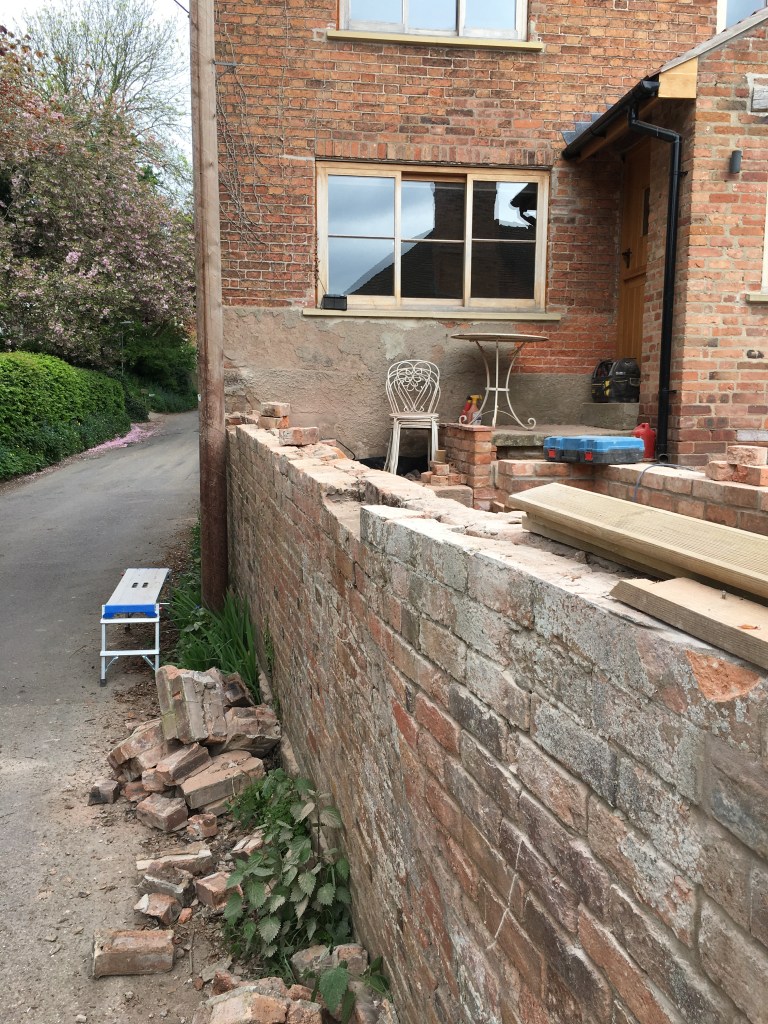
NOTE THE RAISED BRICKWORK TOWARDS THE WINDOW…. THIS WAS TO ADD A BIT OF PRIVACY WHEN ON SAT THE TOP STEP SEATING AREA
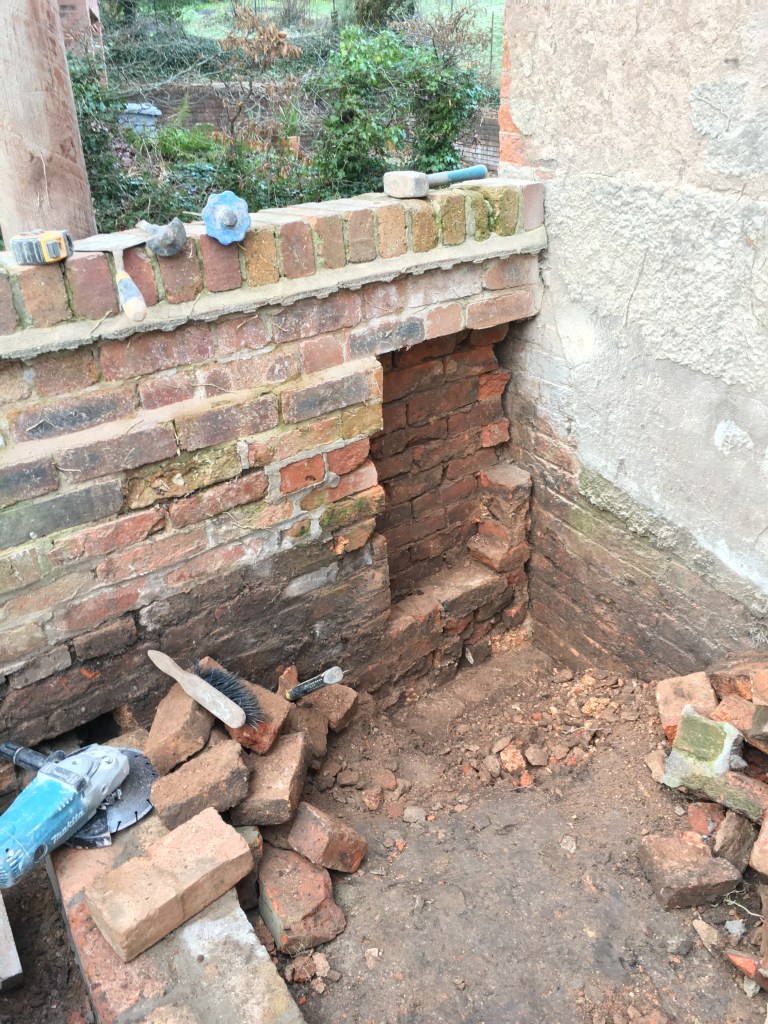
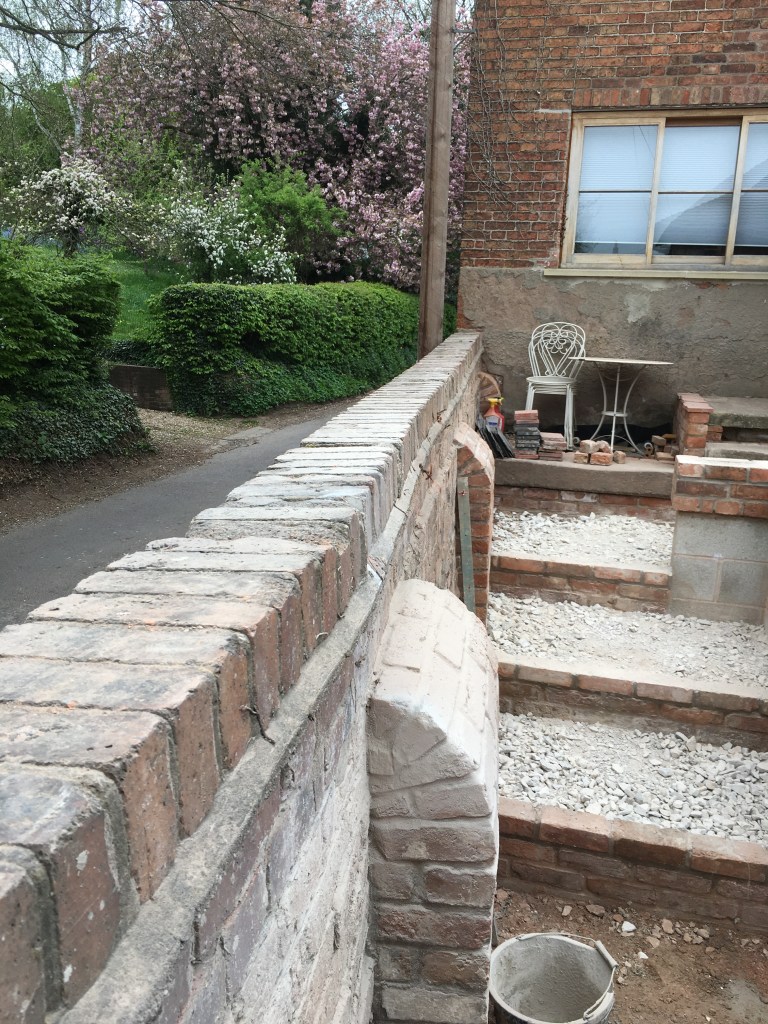
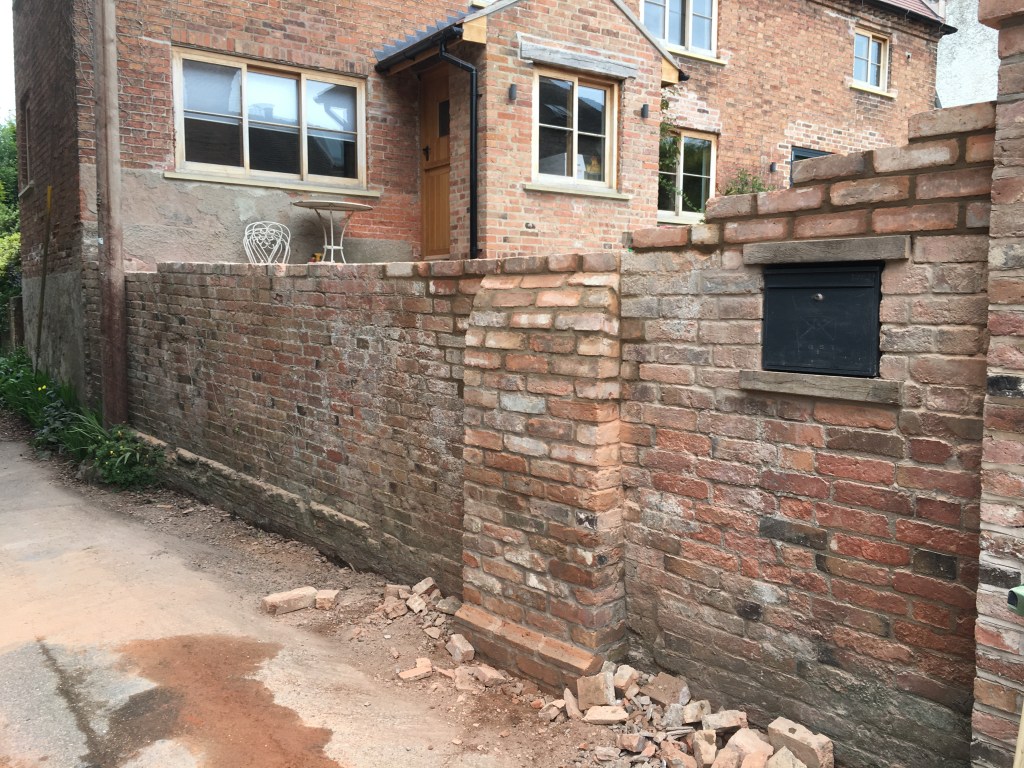
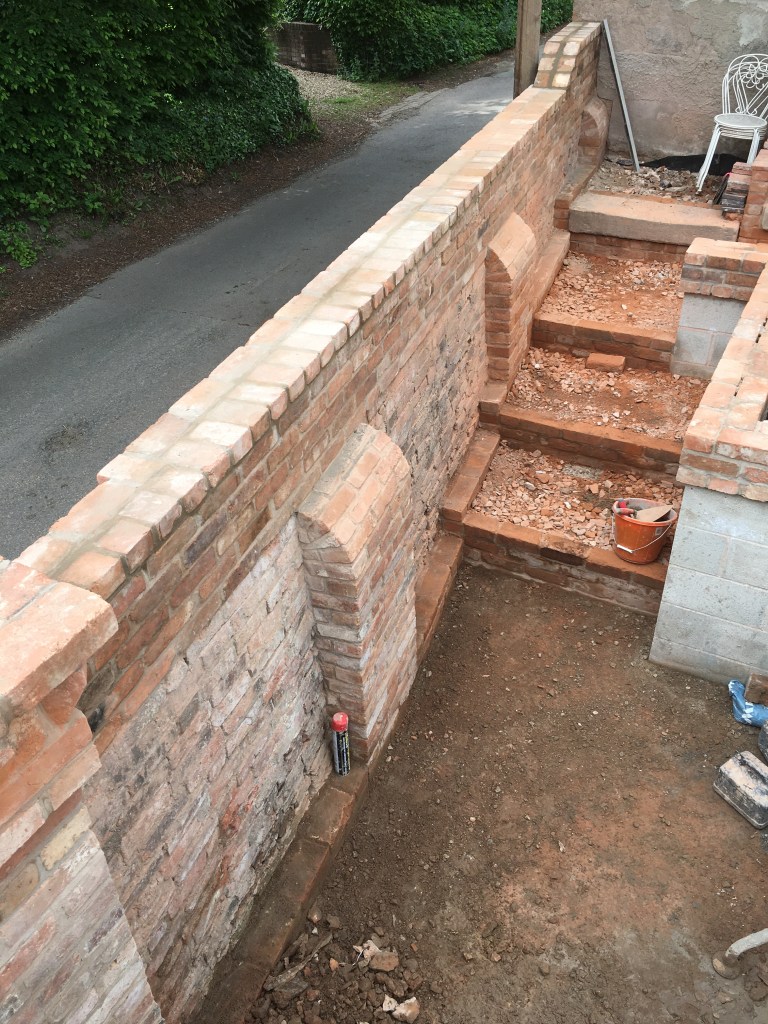
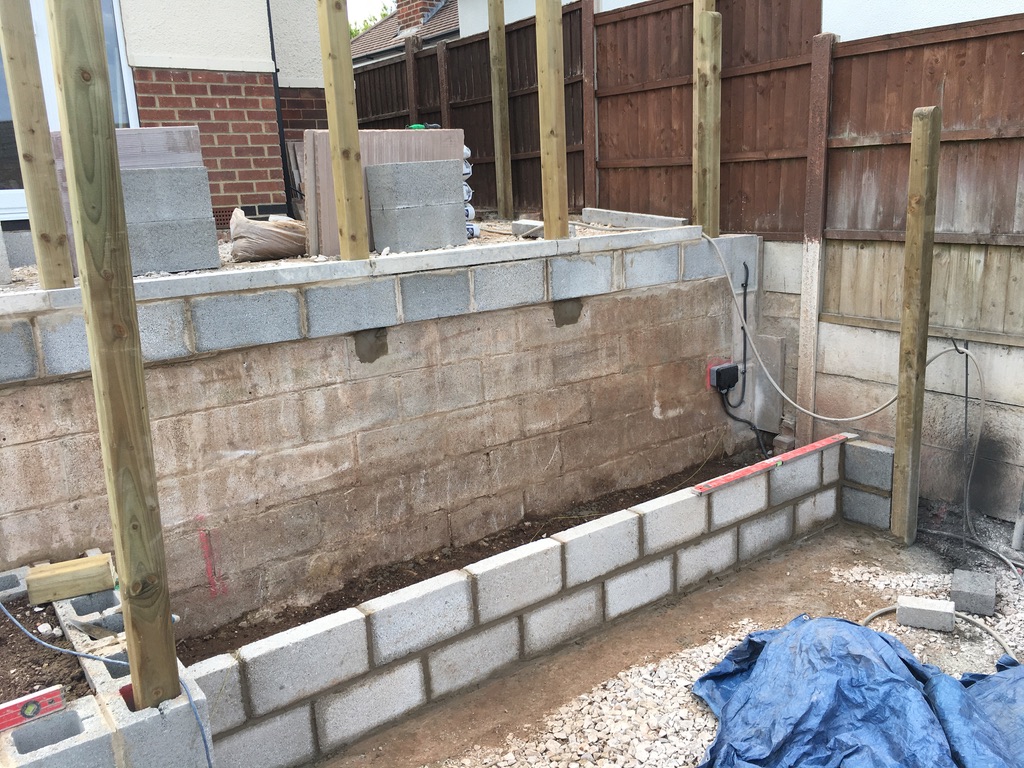
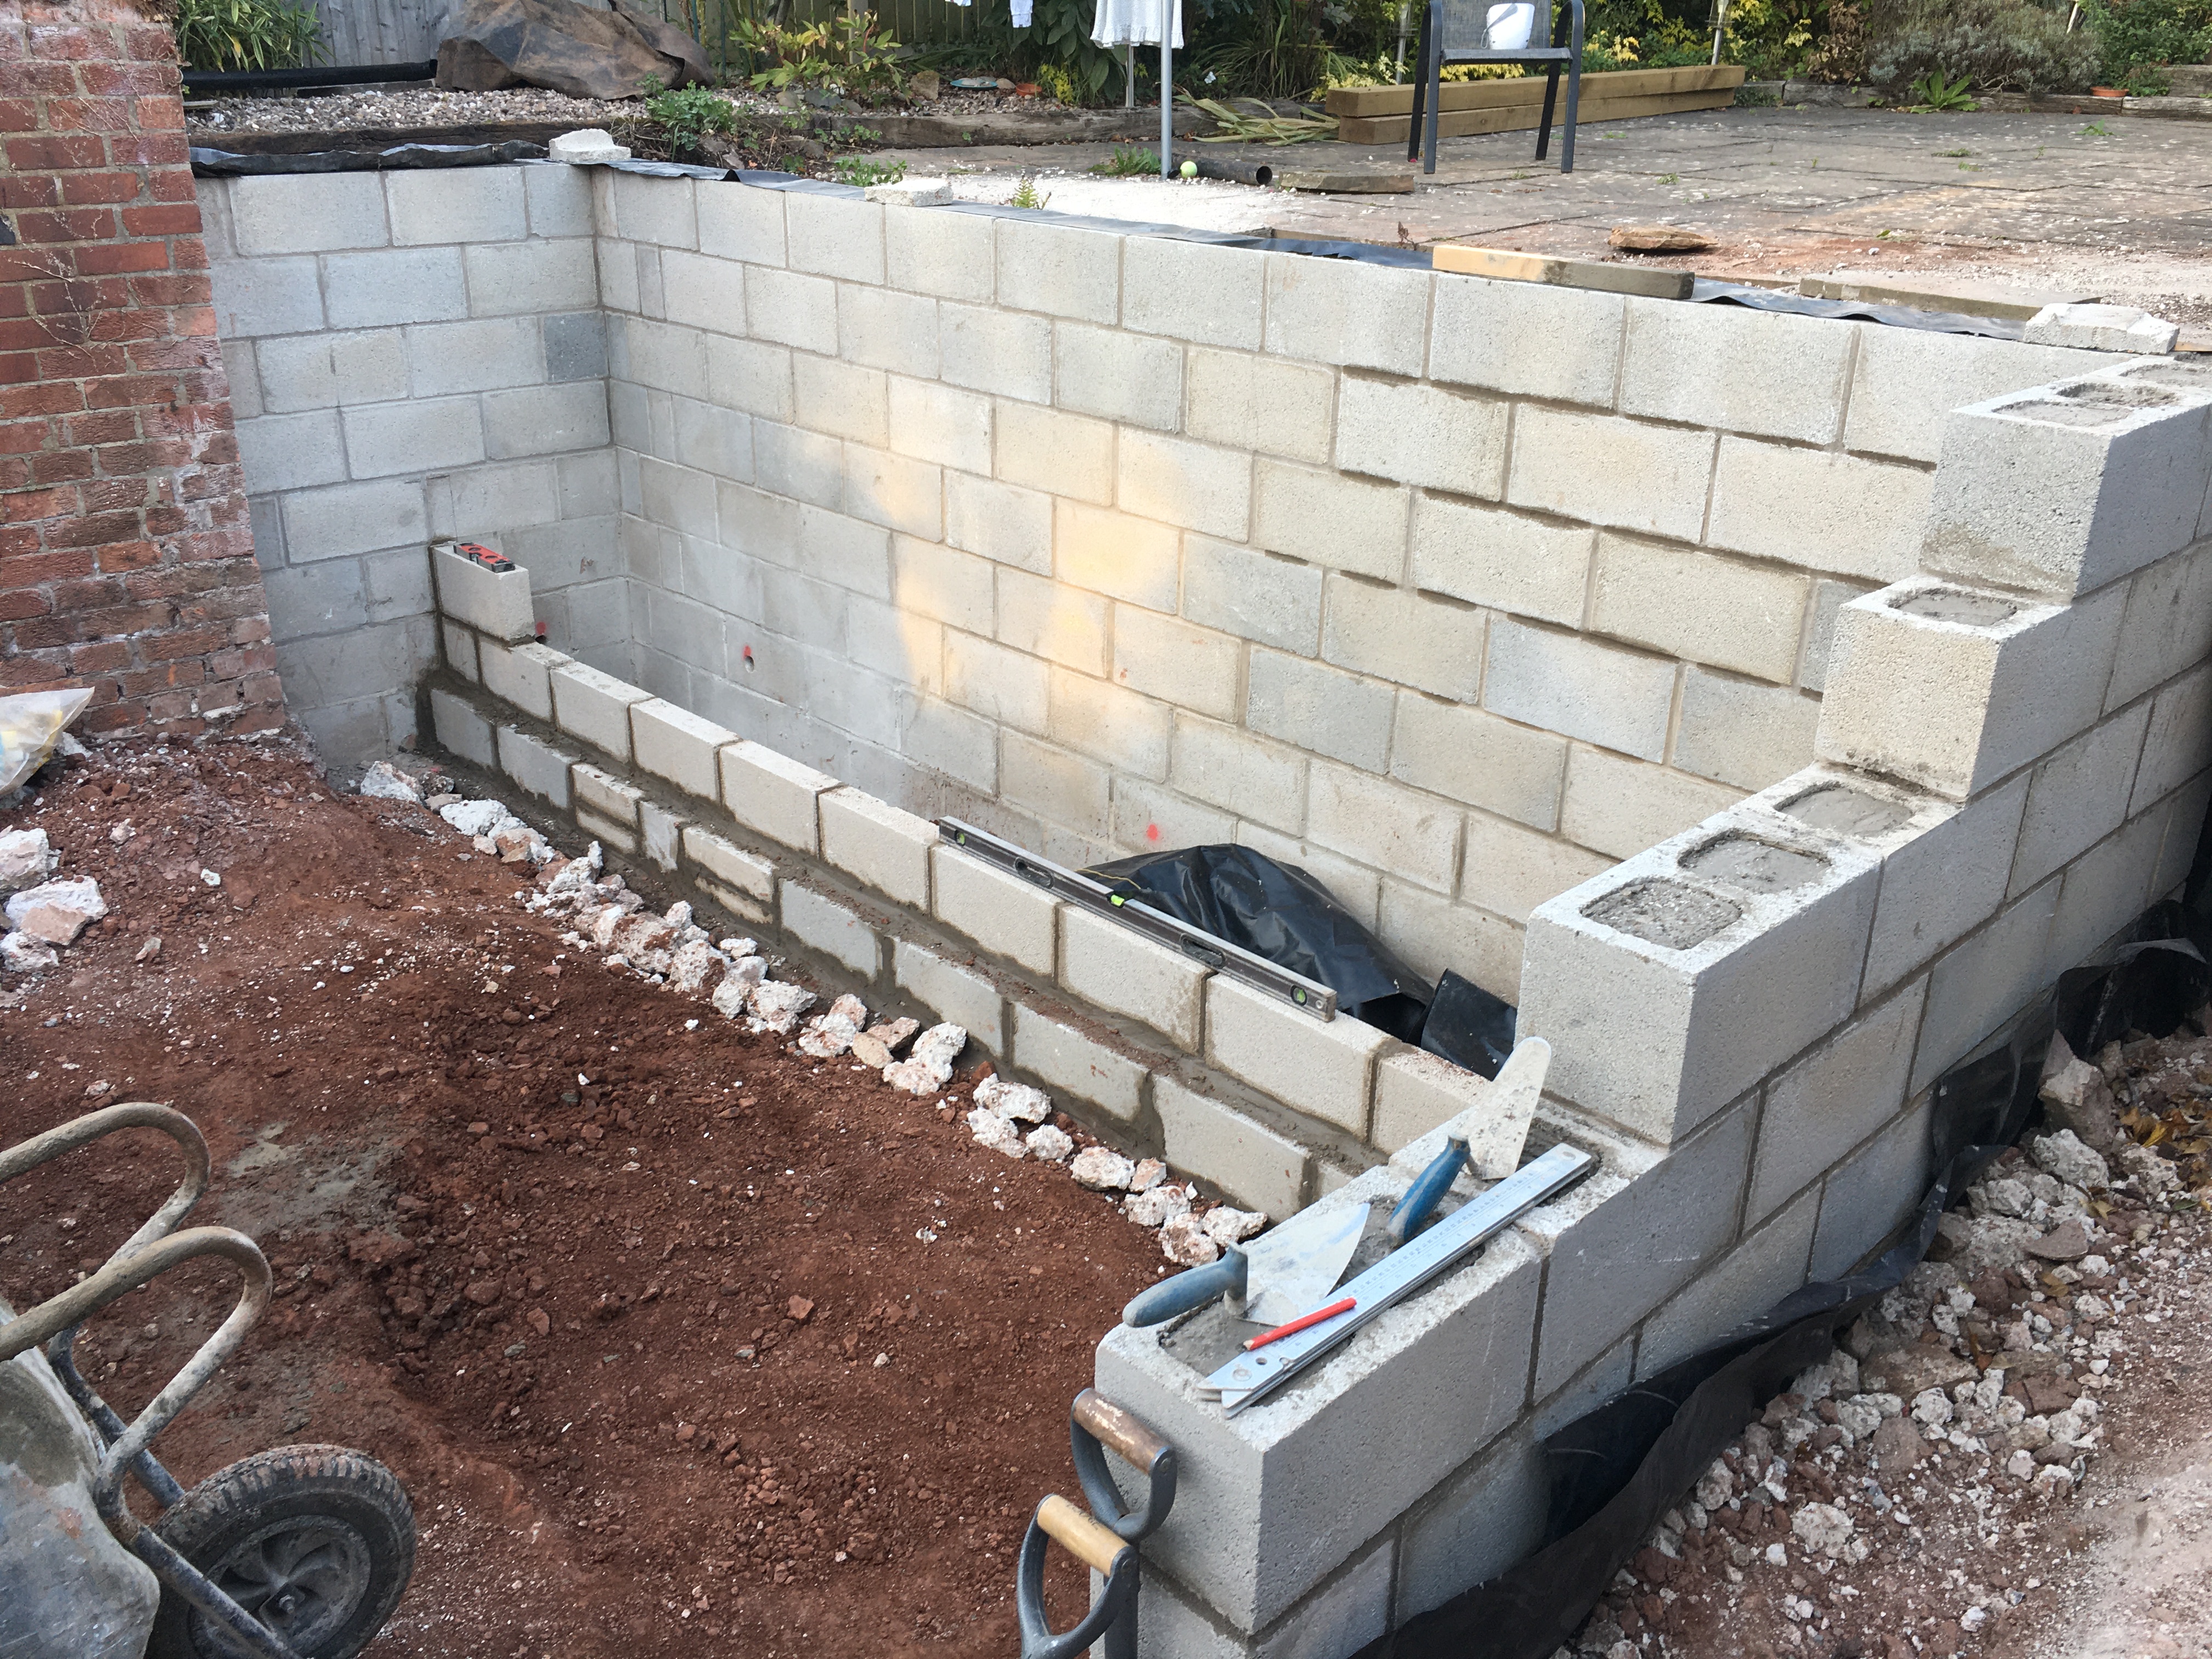
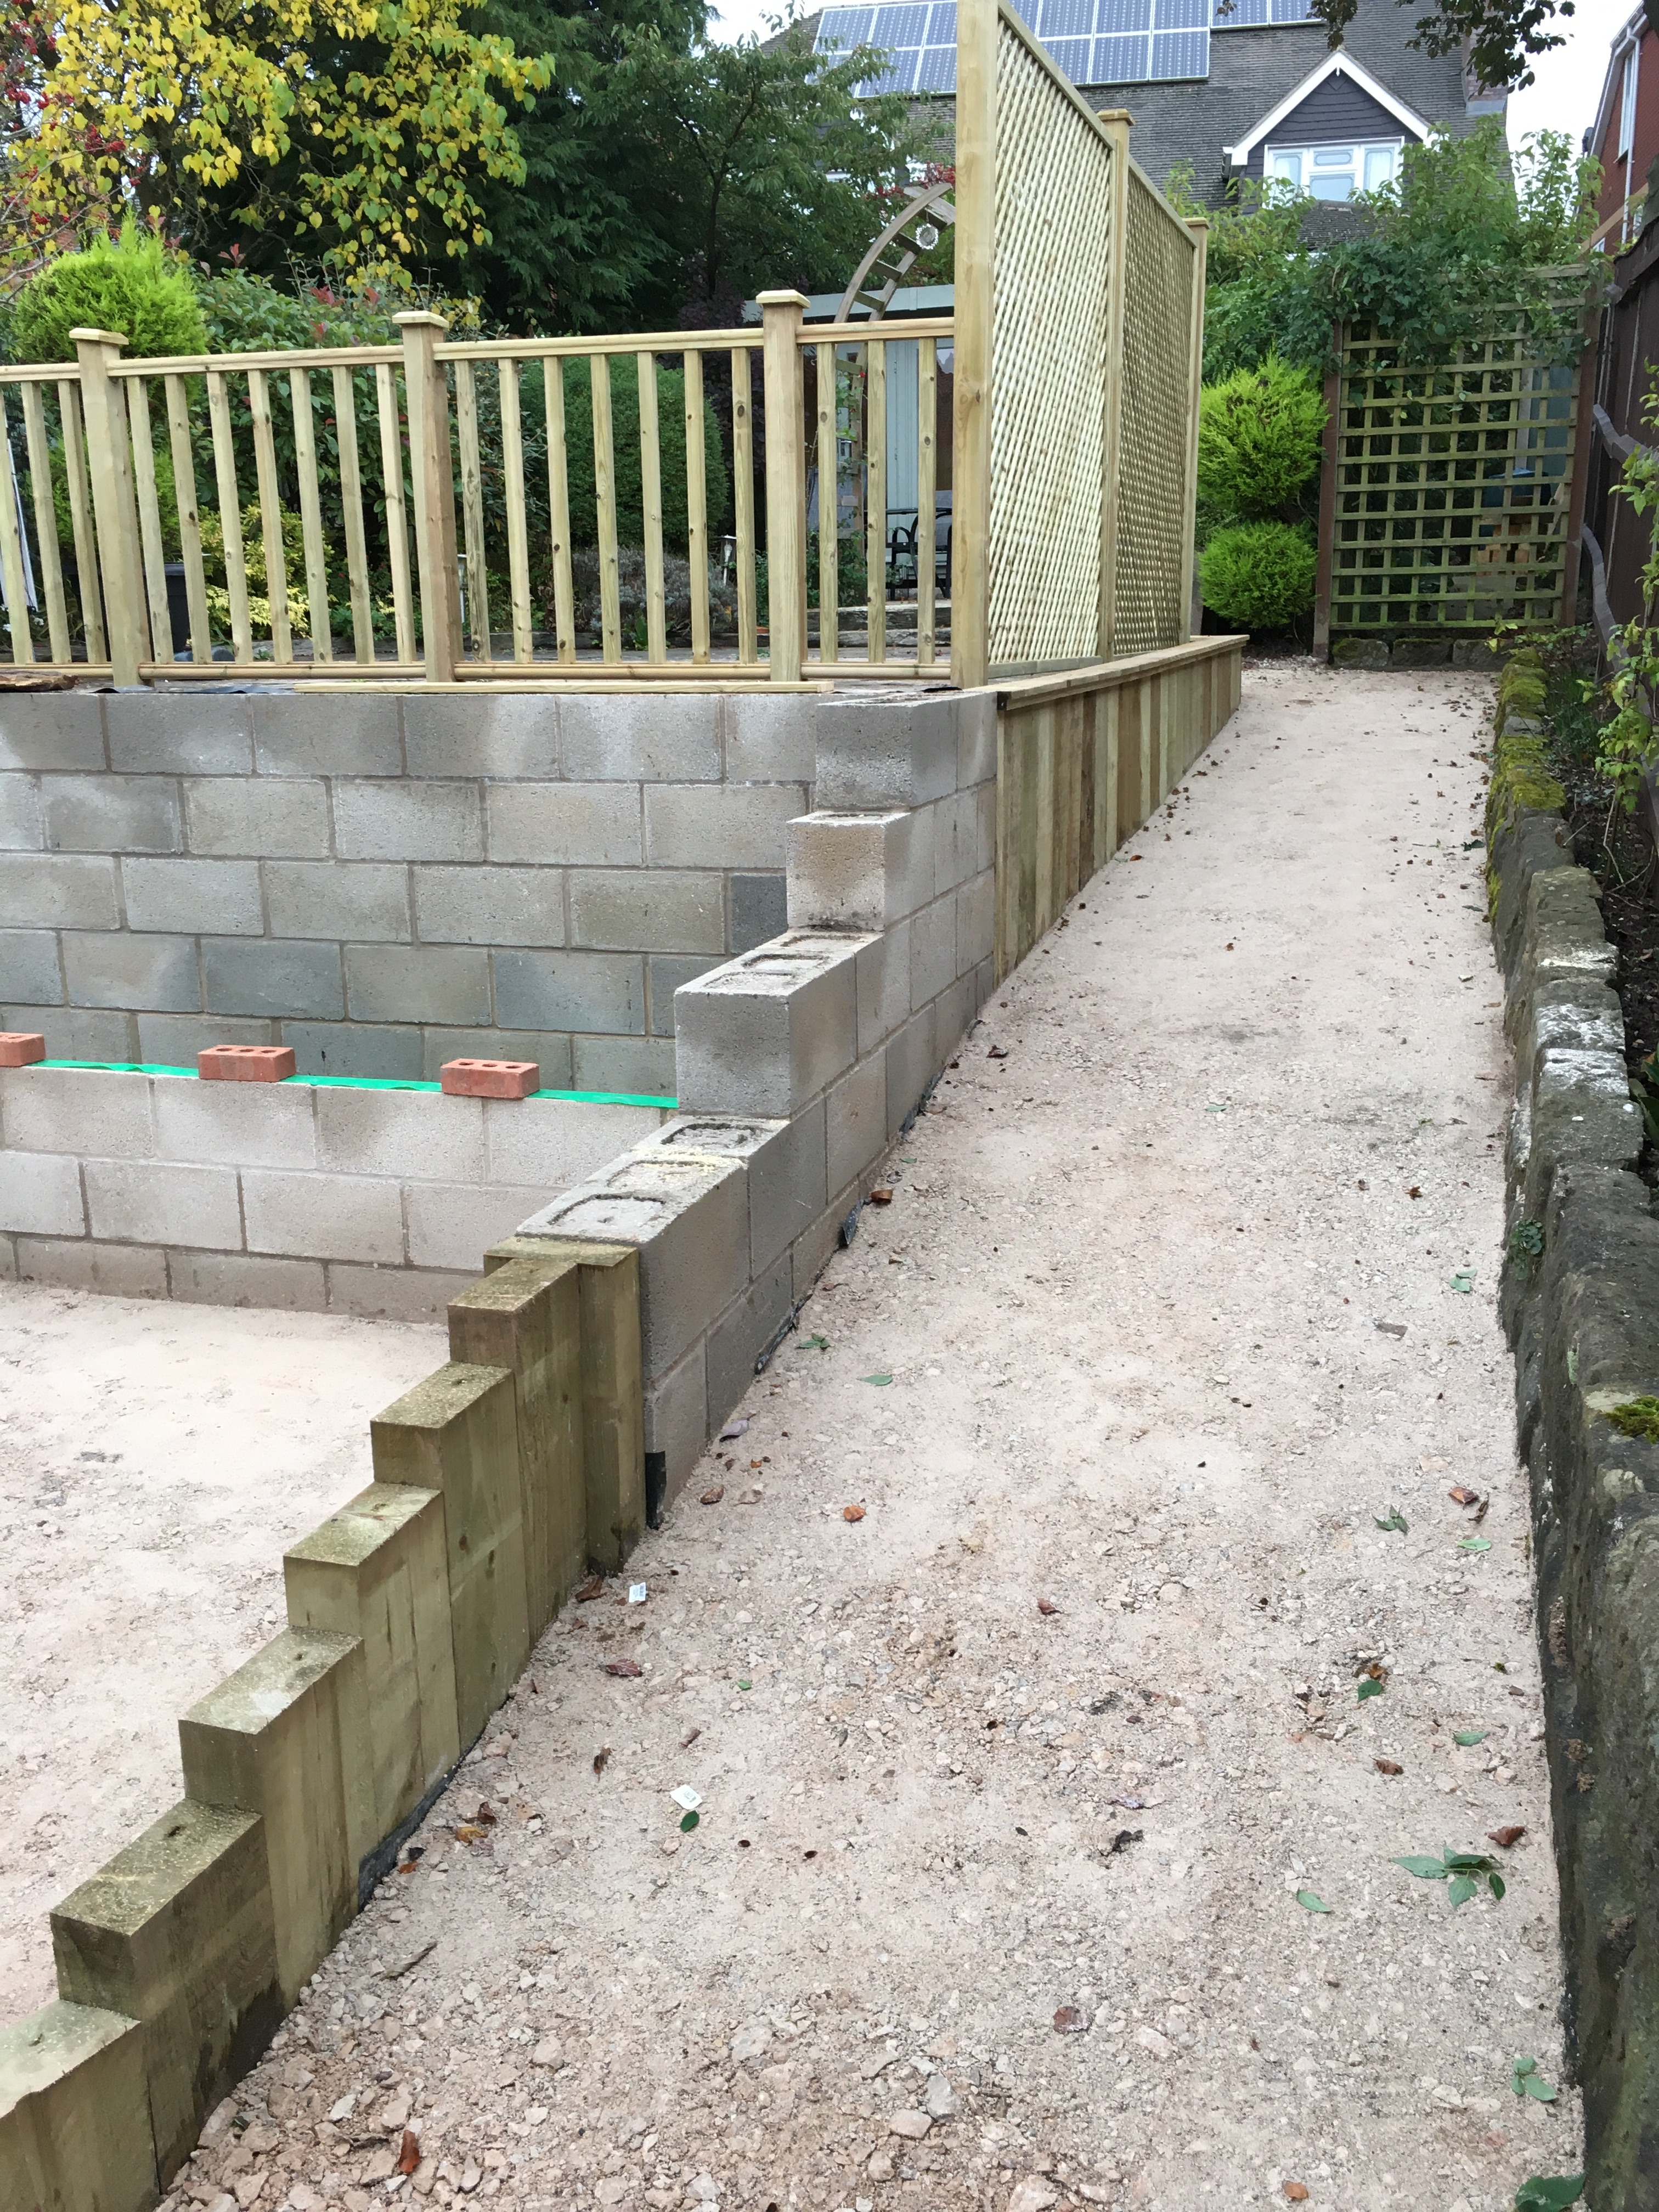
The top of the wall is finished and now straight! the inner sections of the wall will be rendered at a later date.
The outer wall is now complete and secure. The decorative ‘chimney’ section is done, together with a raised upper area towards the house and dogtooth edging to match the house. An extra six courses were added in bricks to get the correct level, including having to slice bricks in half to get the level.
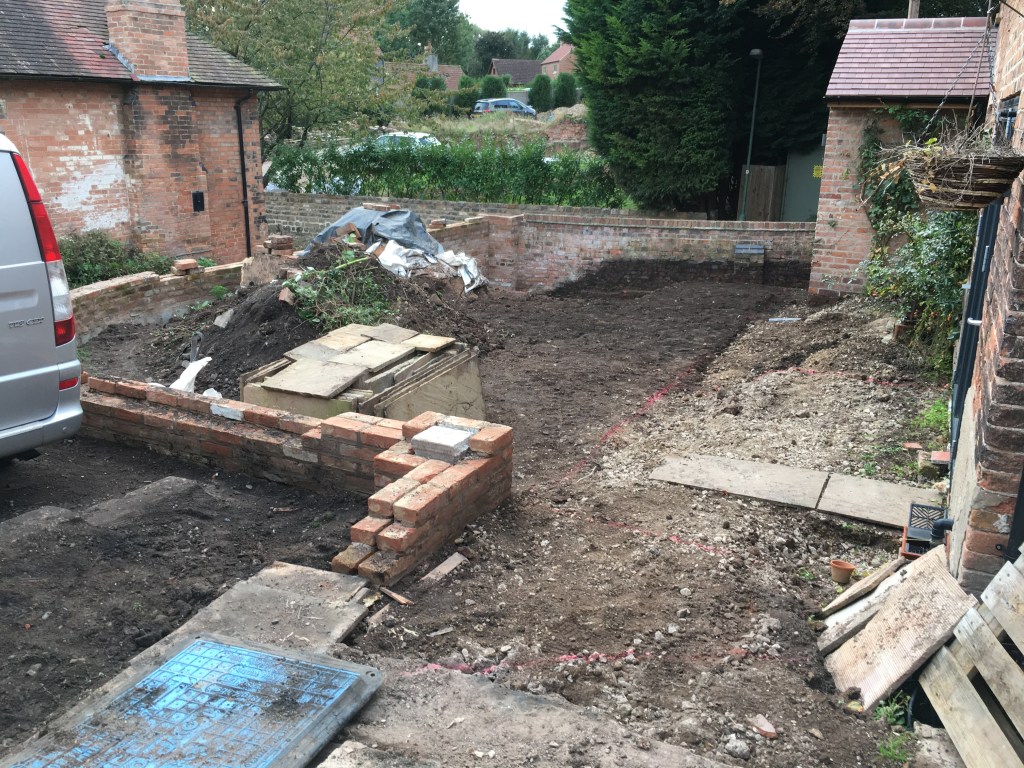
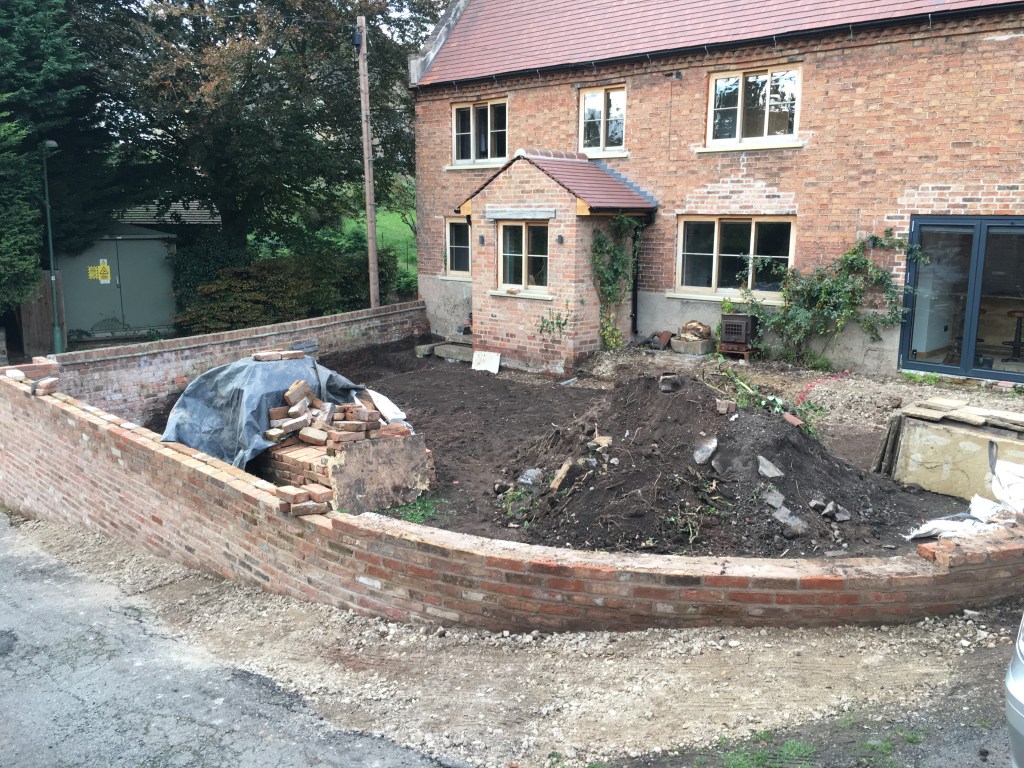
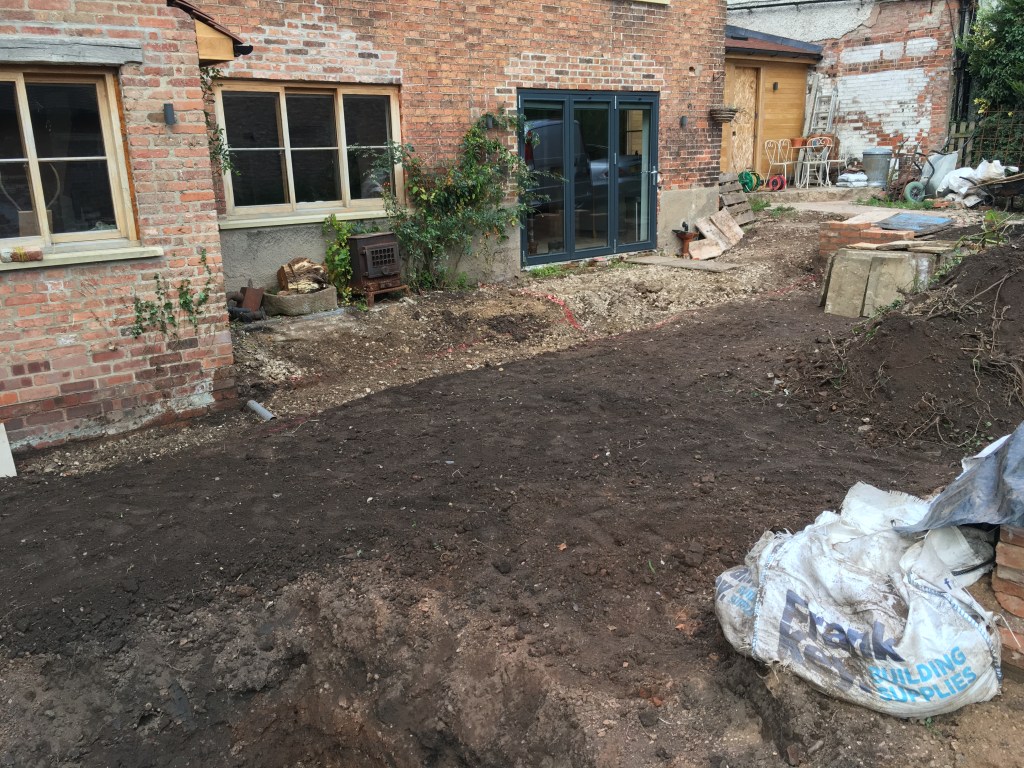
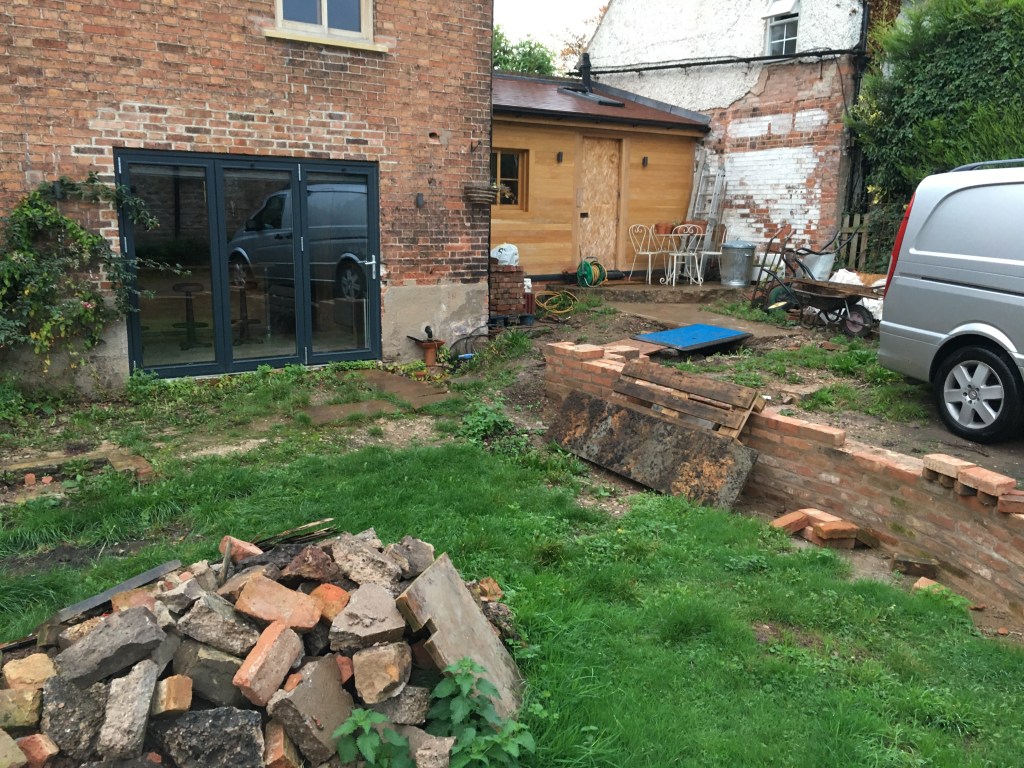
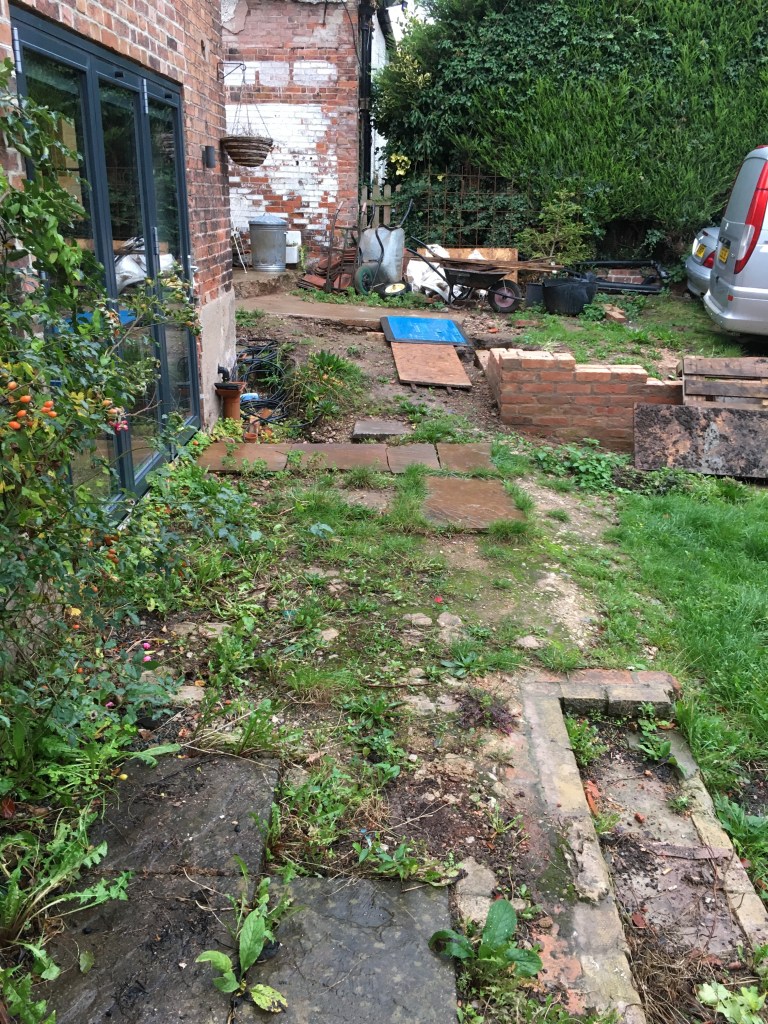
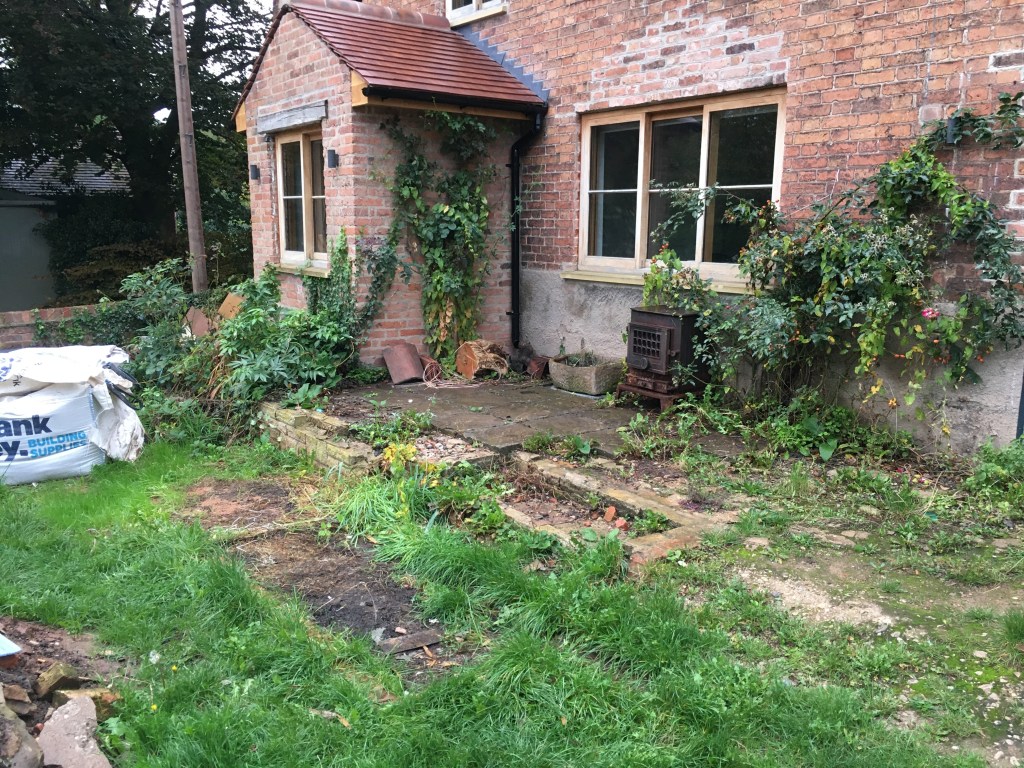
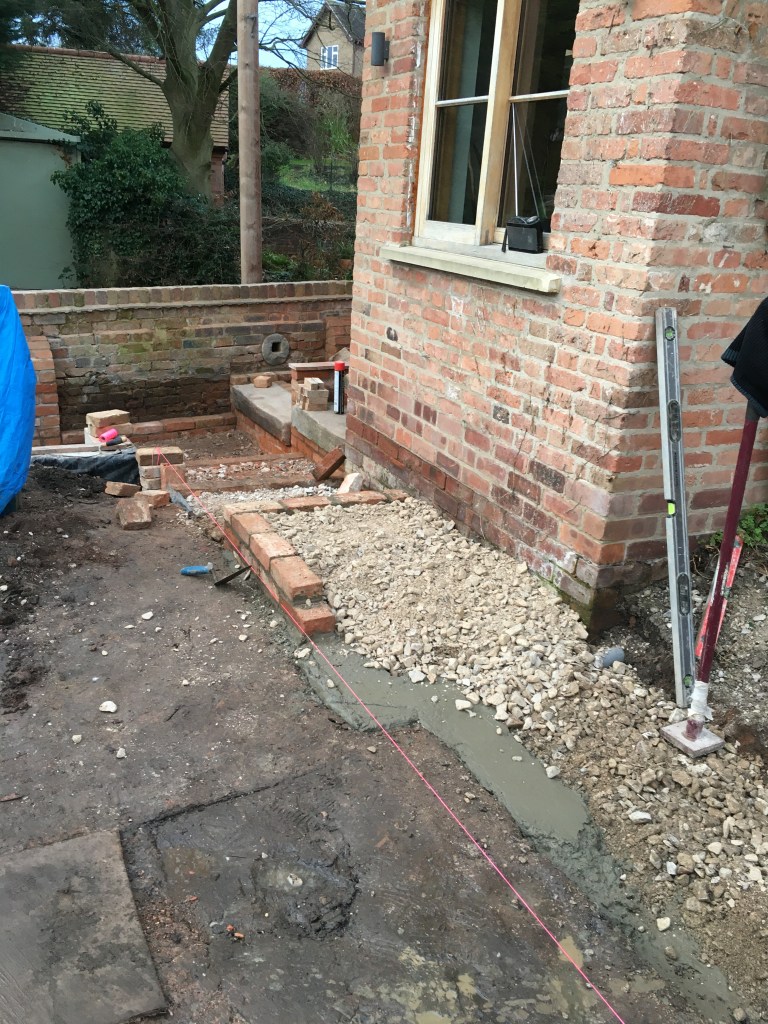
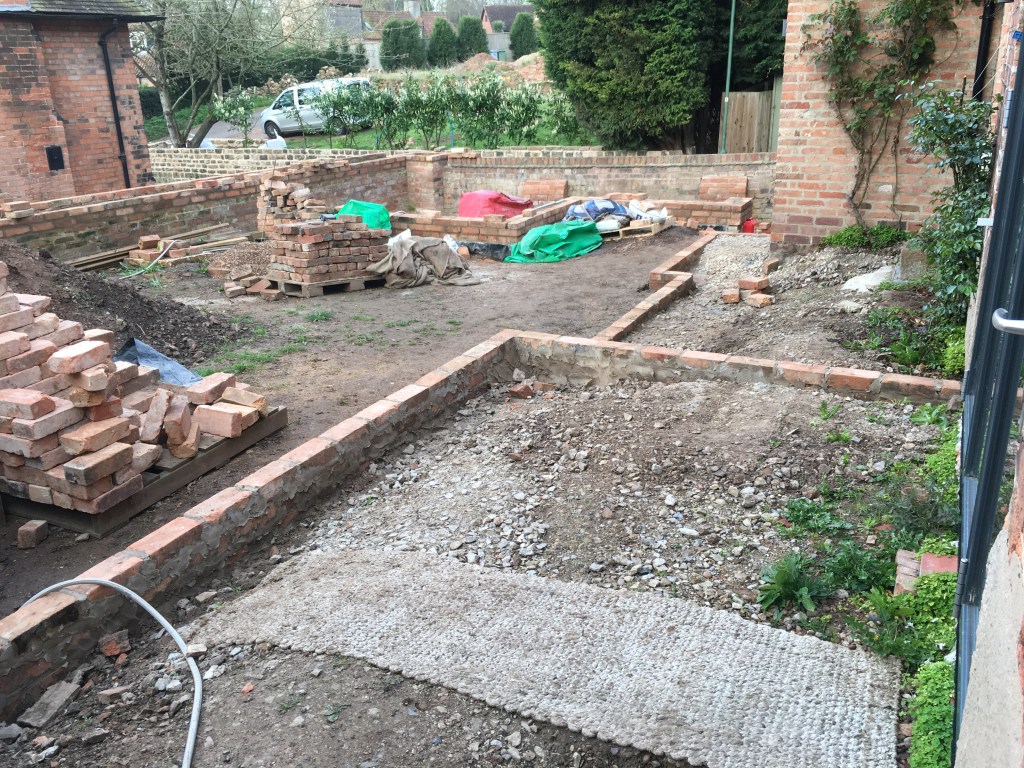
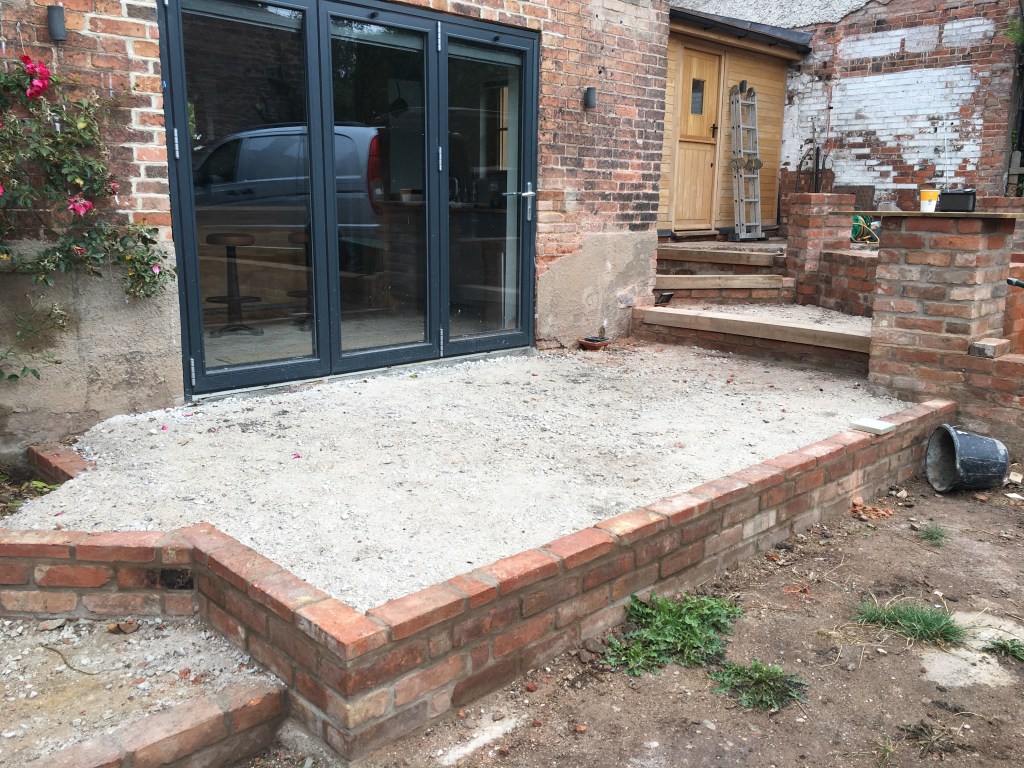
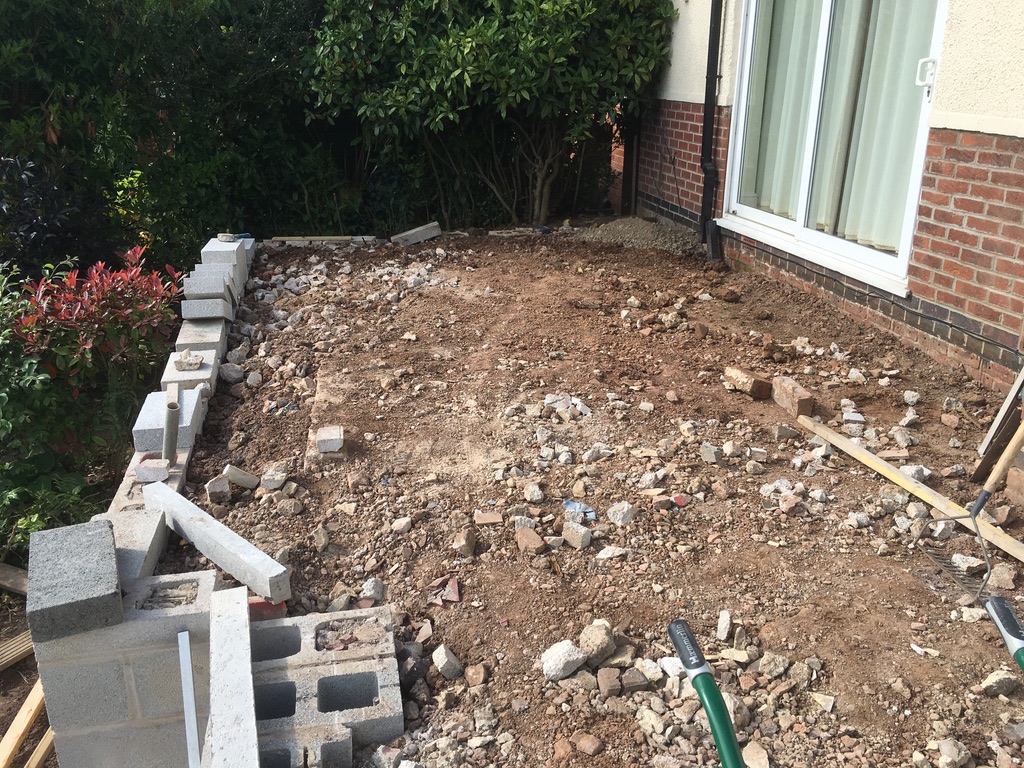
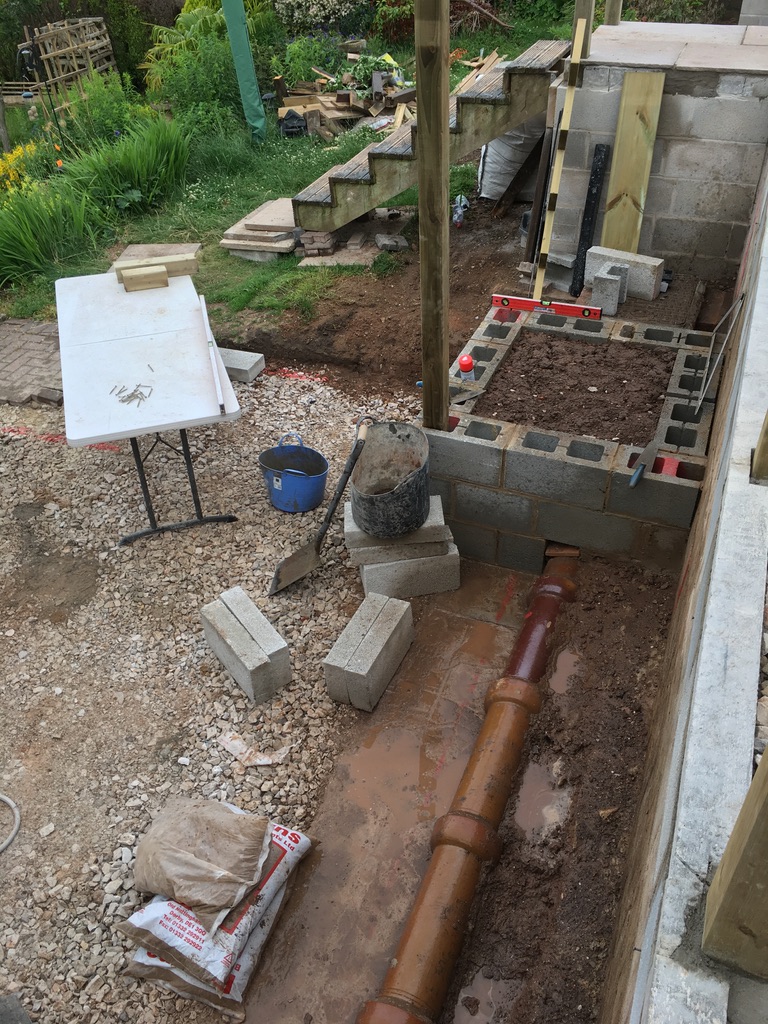
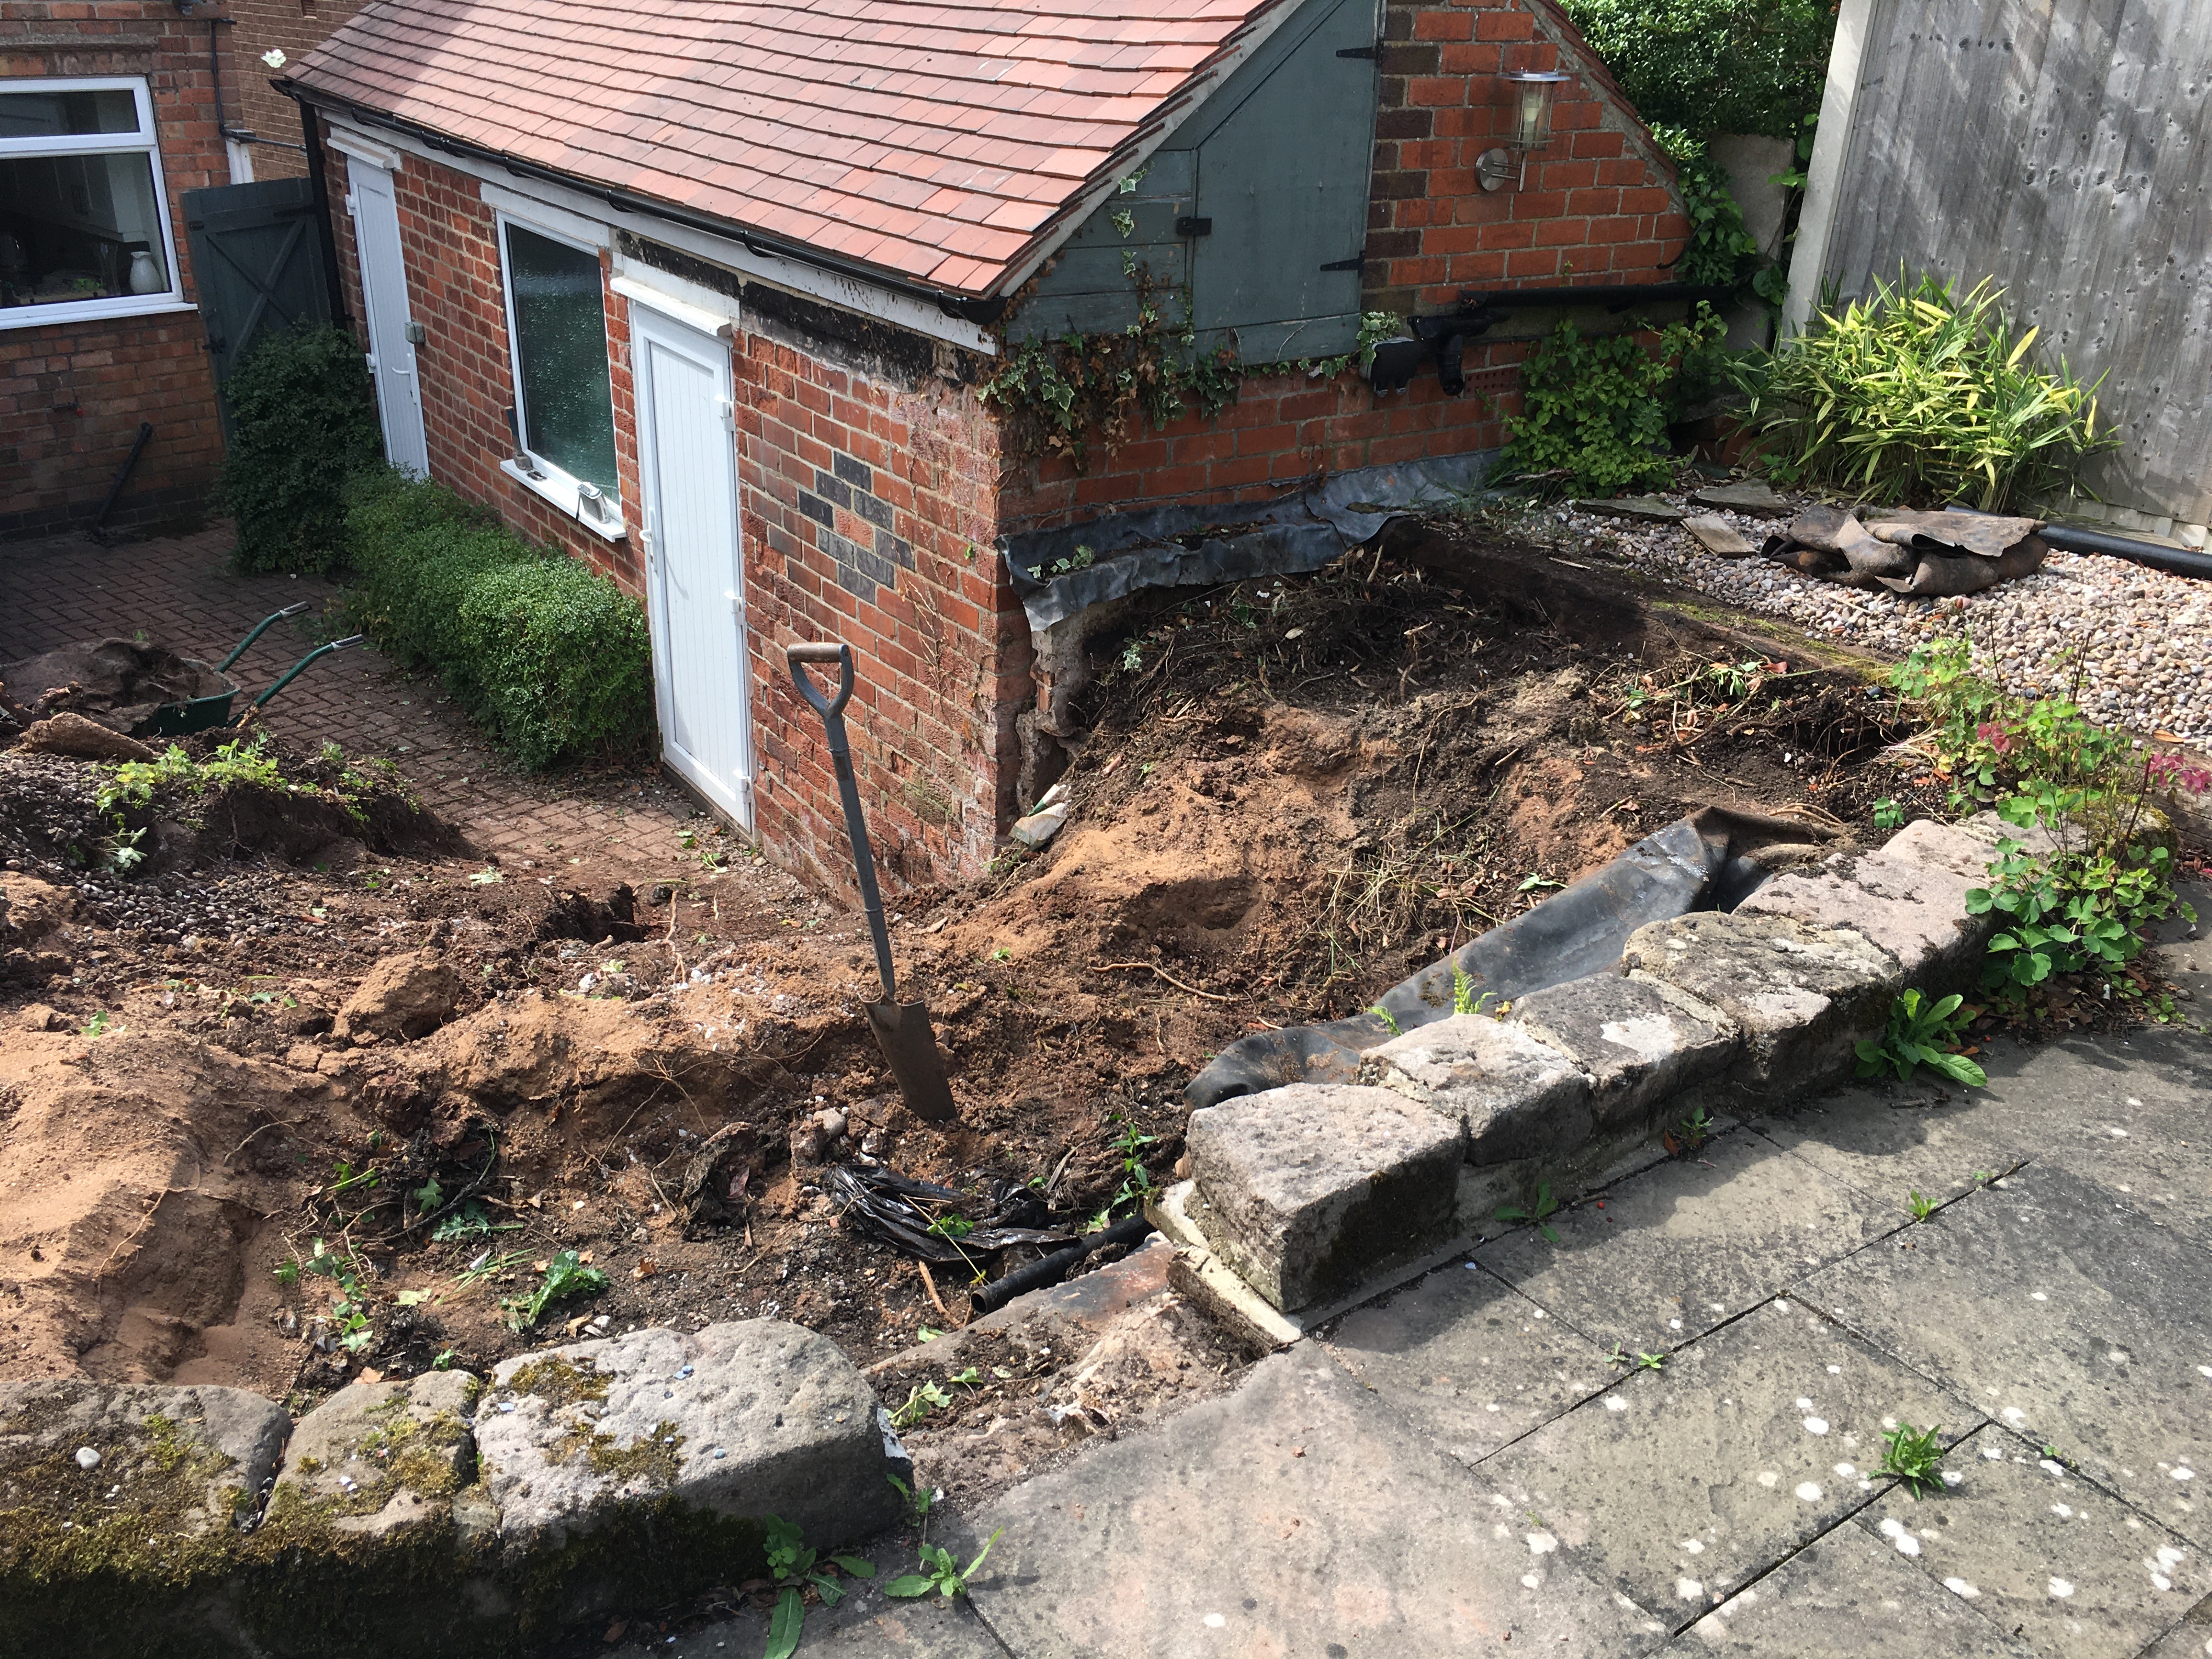
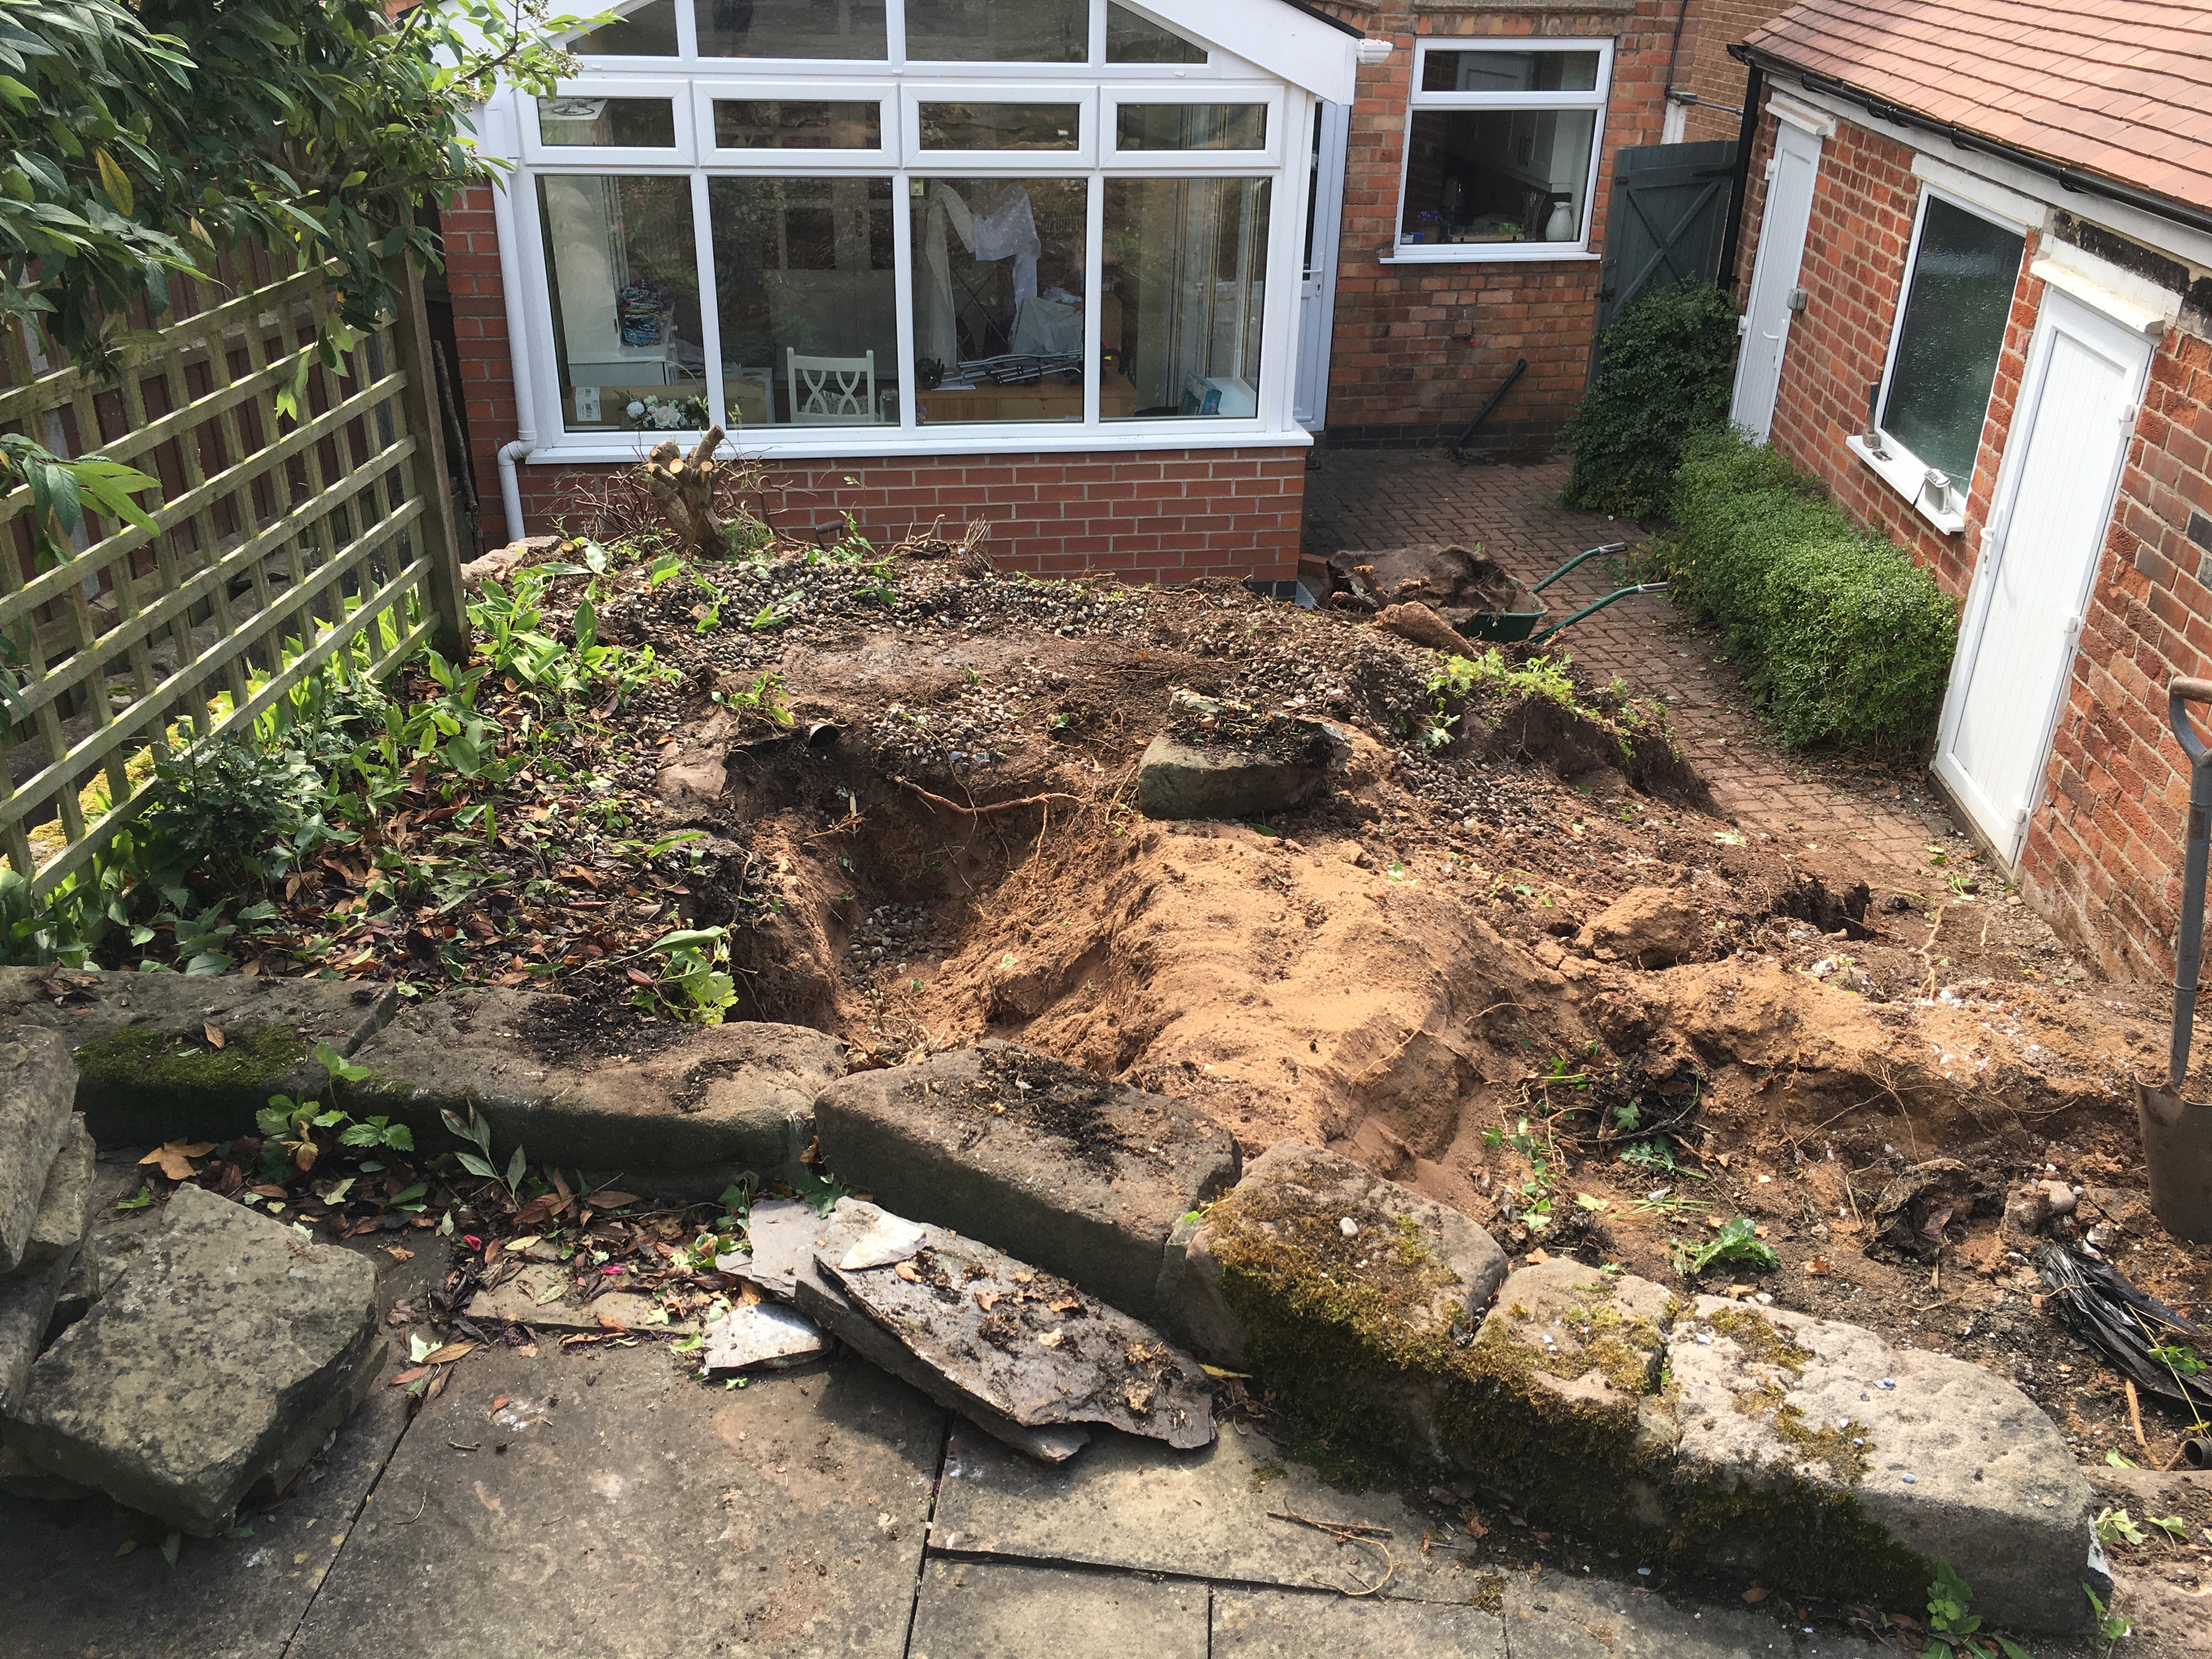
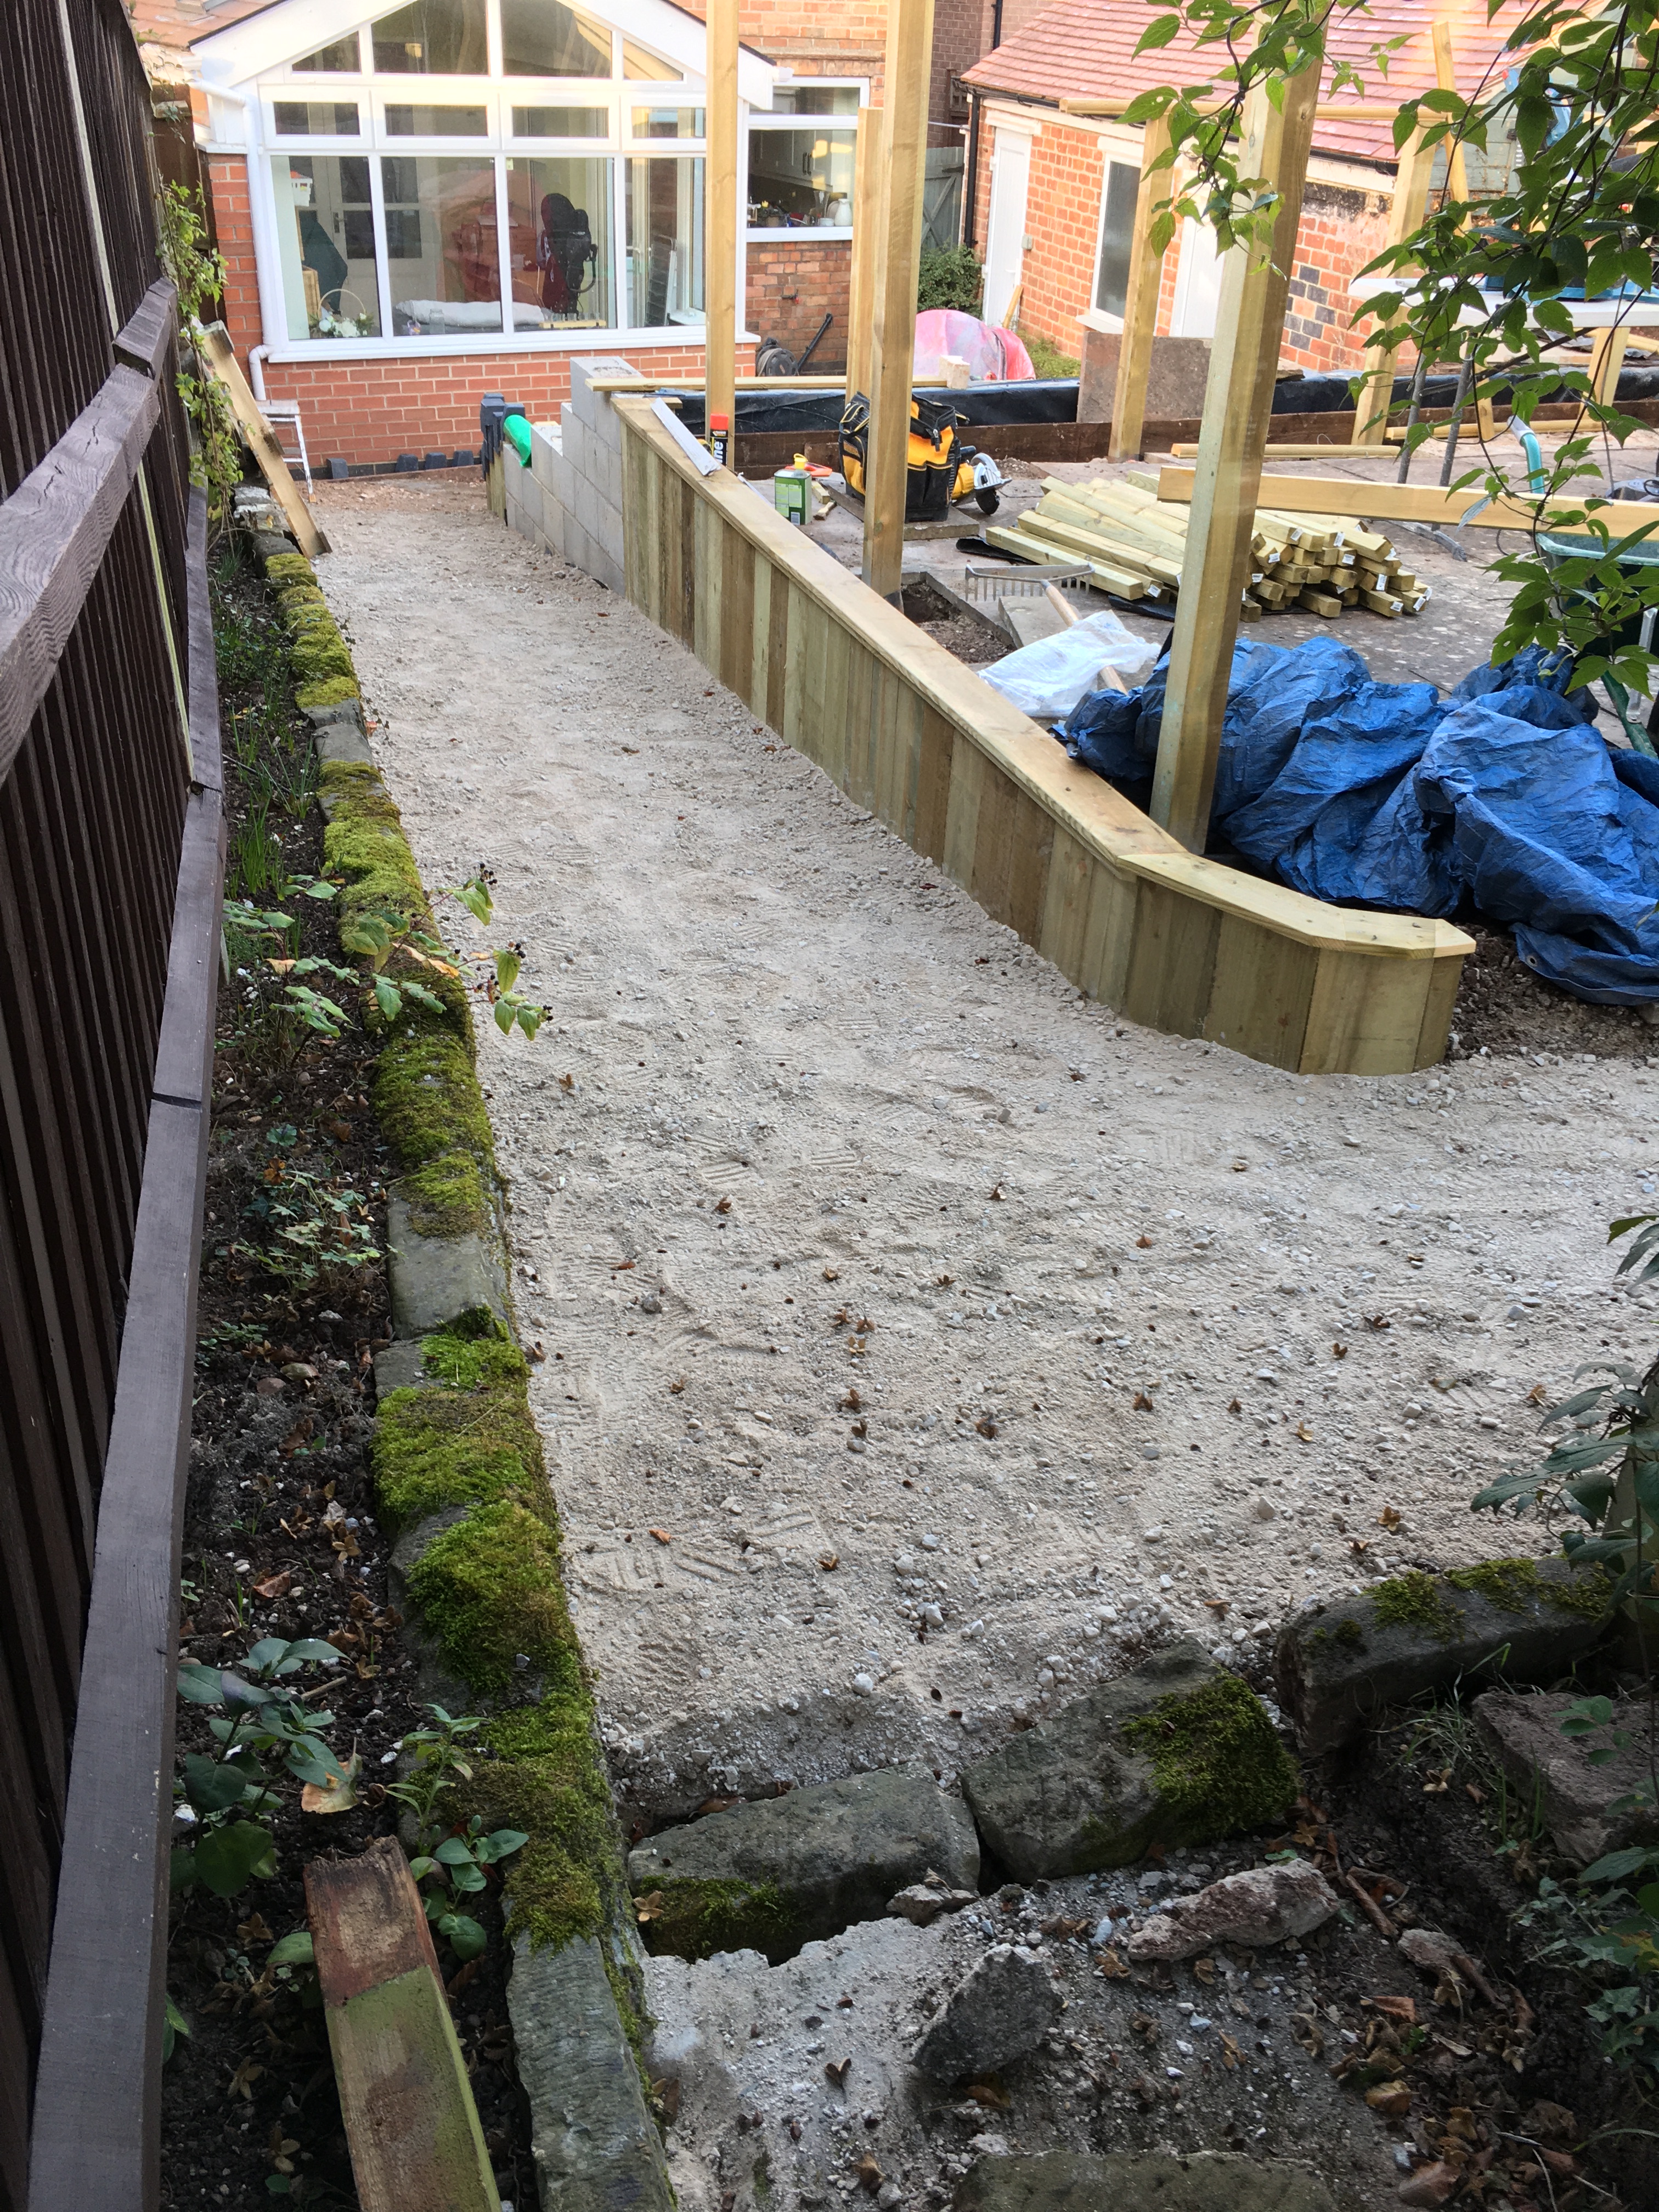
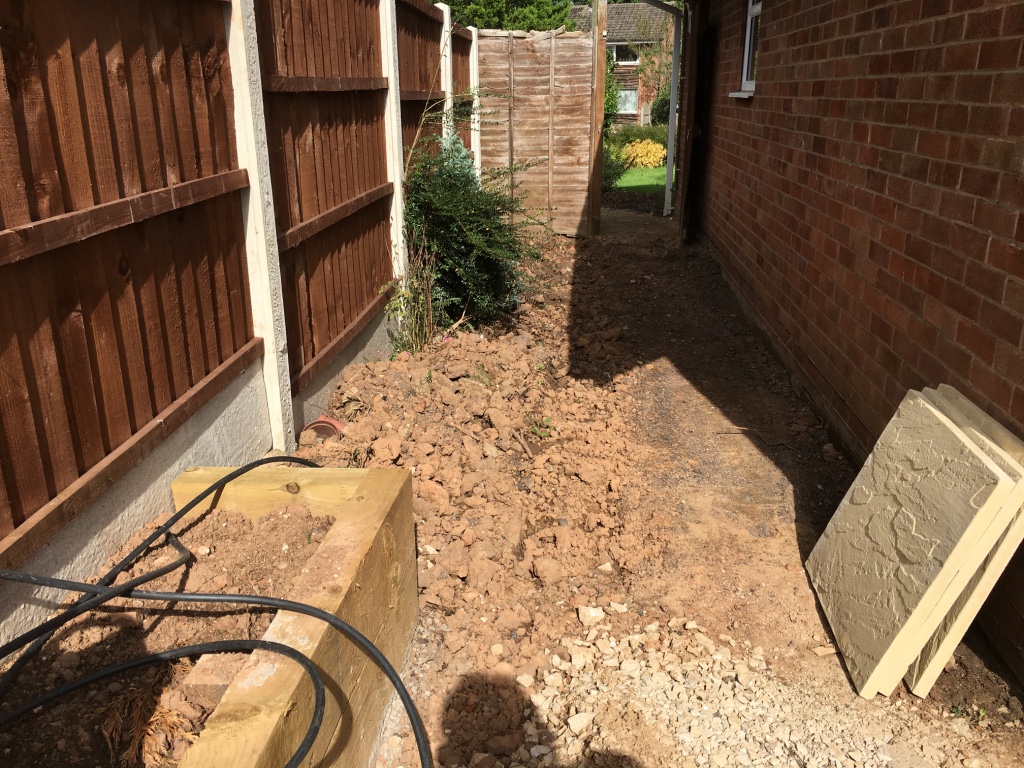
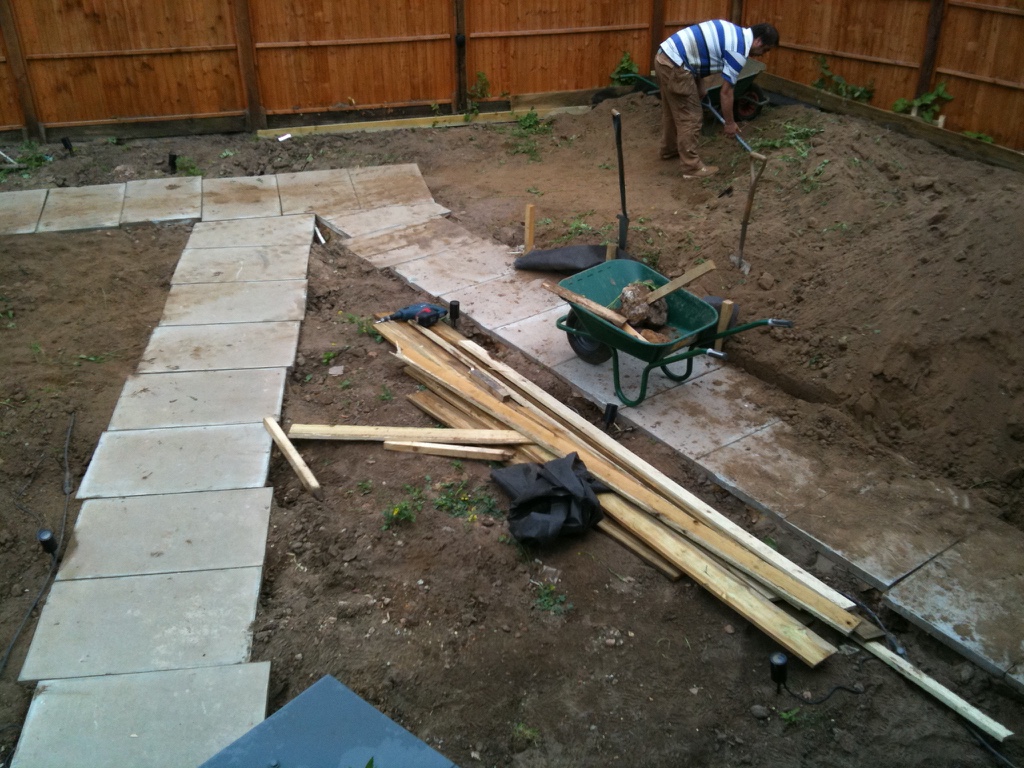
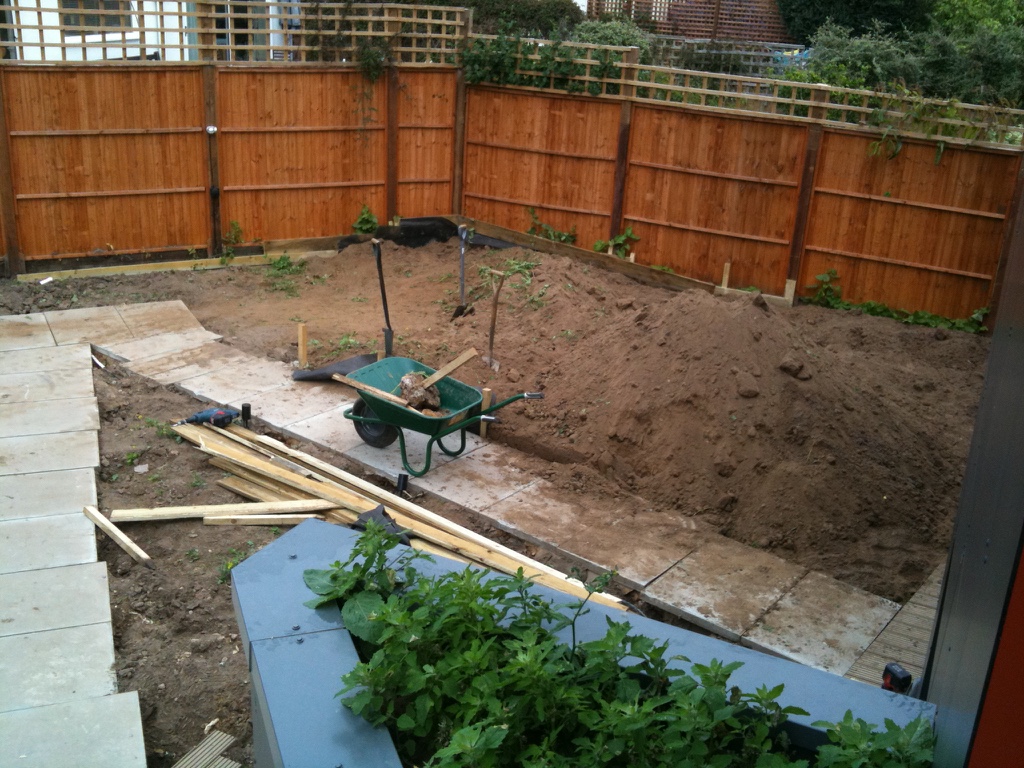
Now, moving back to the top of the garden. The pathway and upper patio areas are to be cleared.
The digger got to work and removed all the old concrete and slabbed areas.
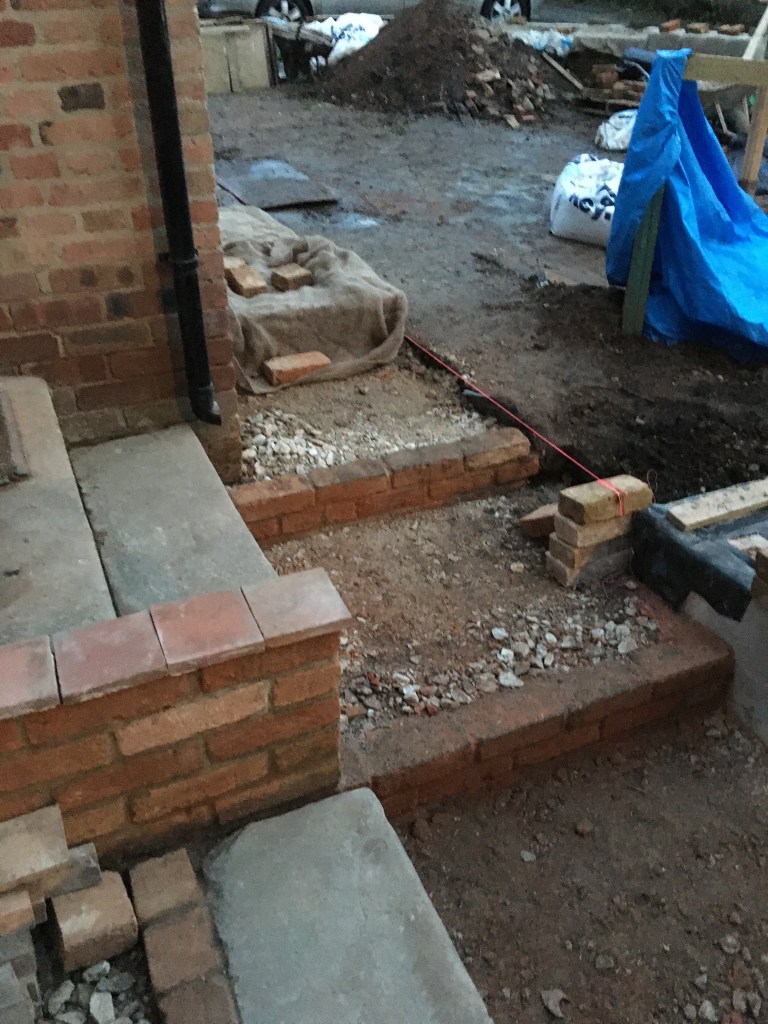
Large quantities of waste and unfortunately the original soil had to be removed, sadly there was no room to save it and it was of lovely quality. The upper path and steps were arranged and then the footings were sorted and yet more brickwork was added.
The upper patio was built and the level needed to be the same as the floor inside the kitchen, behind the bi-fold doors. A series of steps, using the old reclaimed bricks were created.
The upper patio is done and the steps to the lower garden are in.
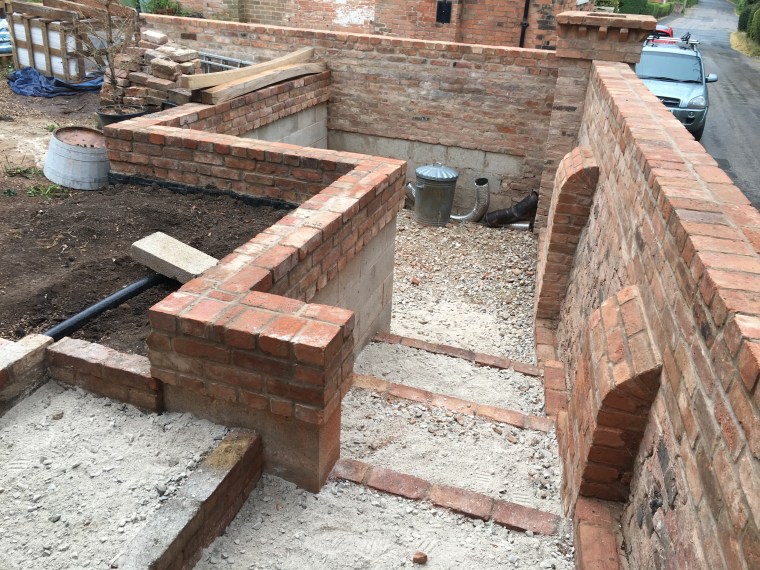
Now for the final area to be done. This was now the front door area. However, it had to be done in a way that anyone visiting didn’t walk towards the bi-fold door. So a design was created. Also, a major issue was a large concrete block that had to remain (due to a planning issue) and be applied to any plan.
The old wall was removed and a new design was created aiming visitors to the new doorway from the drive. Brick piers were added to give it height and direction.
It’s taking shape. At this point, a supply of reclaimed bricks became a real issue. Trying to get the same size bricks was becoming very difficult, so a mix had to be done, which was frustrating.
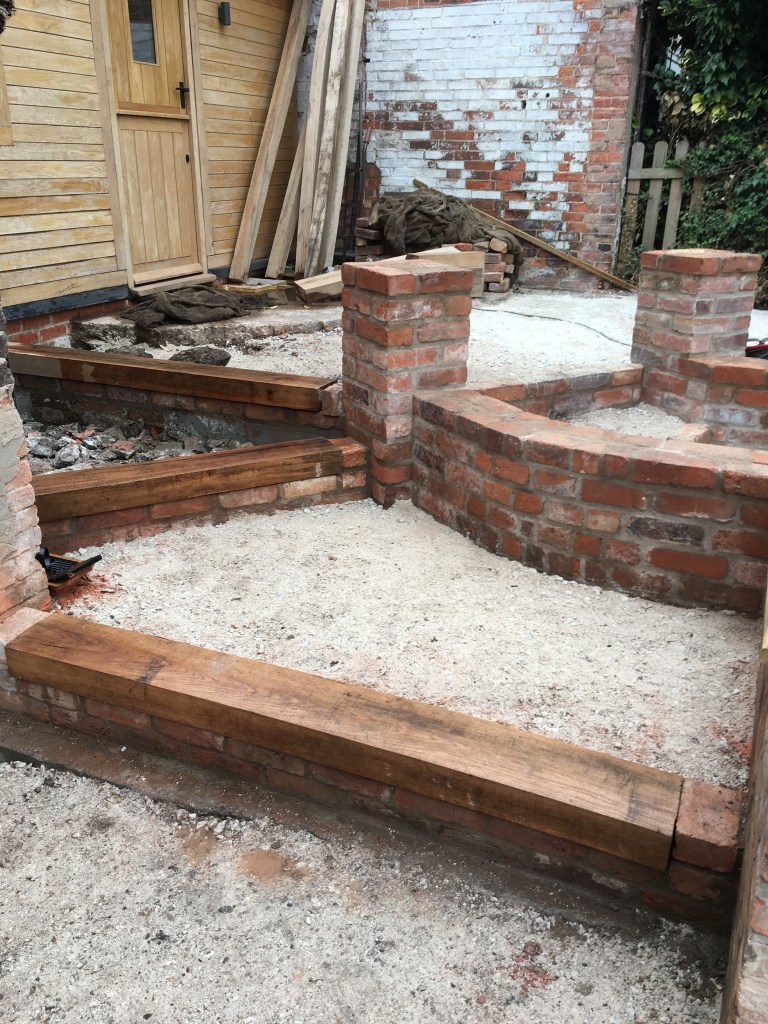
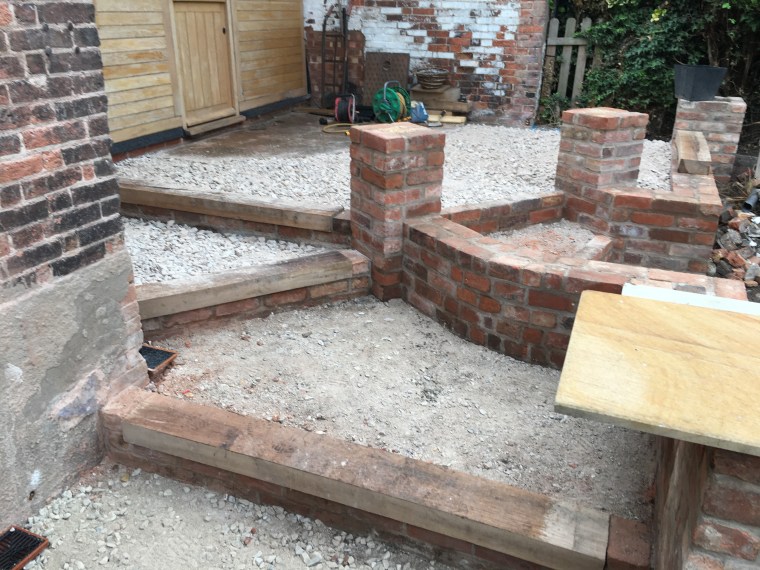
The point from the upper patio to the steps is now the area to sort out. The client wanted to use some old beams of oak he had got for the step edges so a plan was made to create that. An armored cable for electricity was added for a charging car point at the top of the drive and other electric points for the lower garden.
OAK TREADS ARE ADDED TO THE STEPS
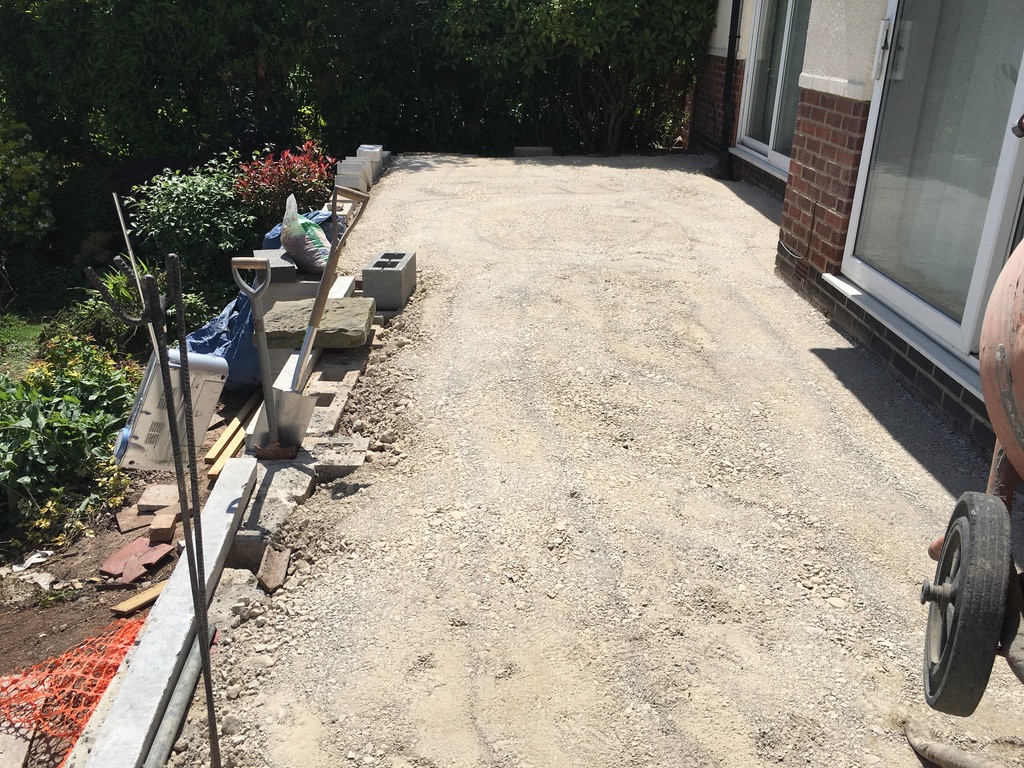
The final stage was the stone being added and the level flattened for slabbing.
And now the finishing touches to the levels…
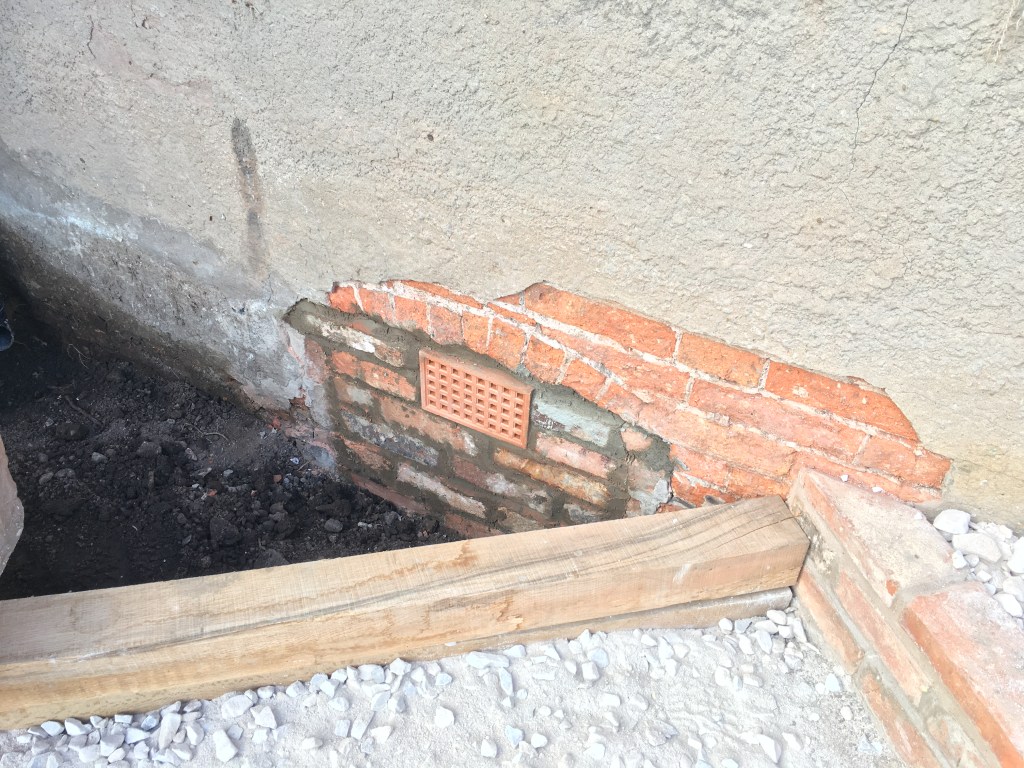
A stone air vent was added and the old coal doorway to the cellar was bricked off. This will be rendered at a later date.
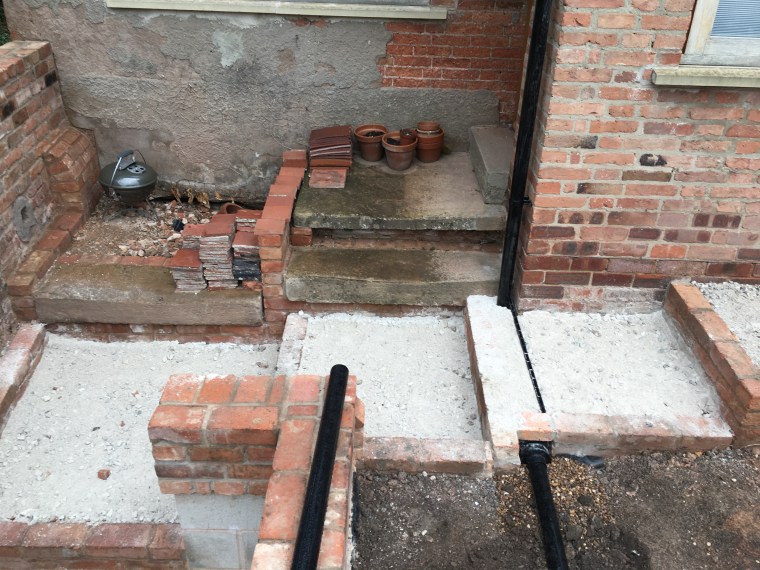
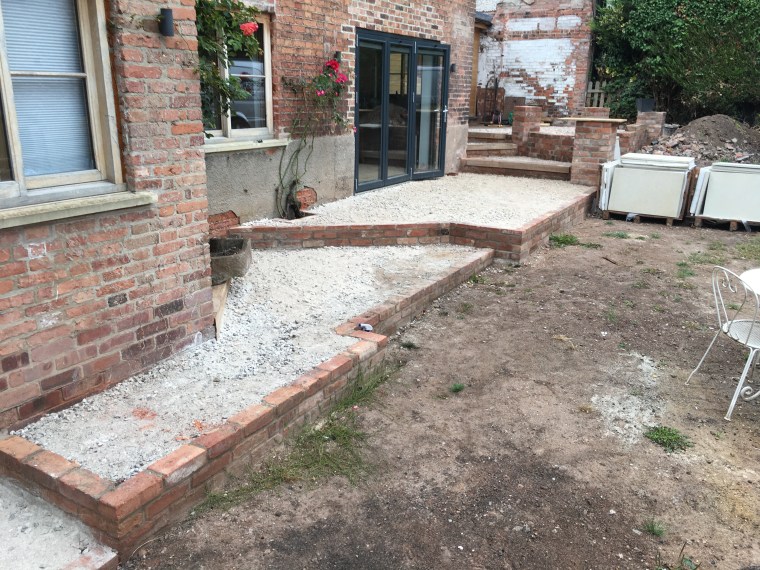
The lower seating area is now complete and awaiting slabs
The steps from the lower area are finished and a slot drain has been added to a soakaway from the porch roof.
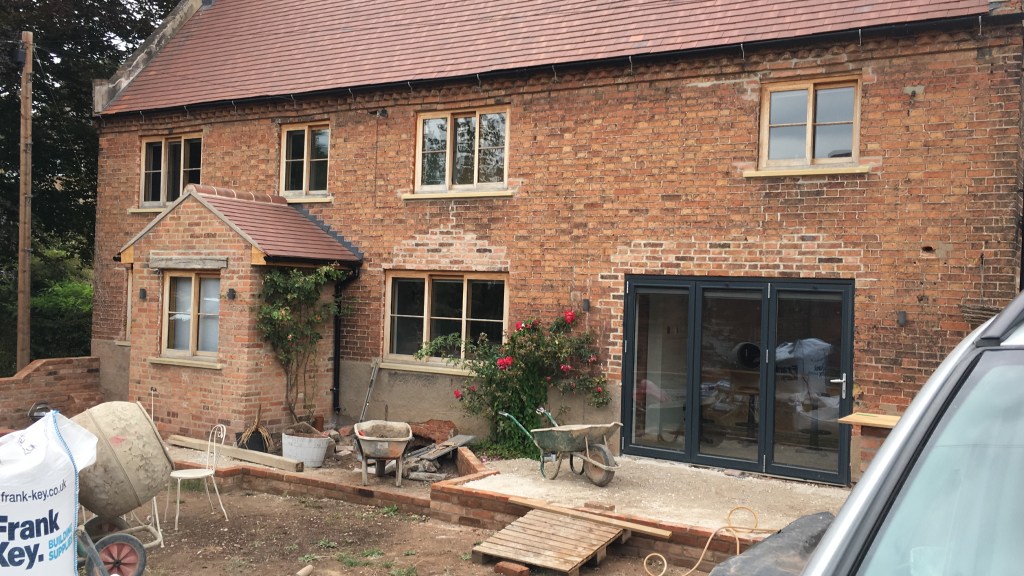
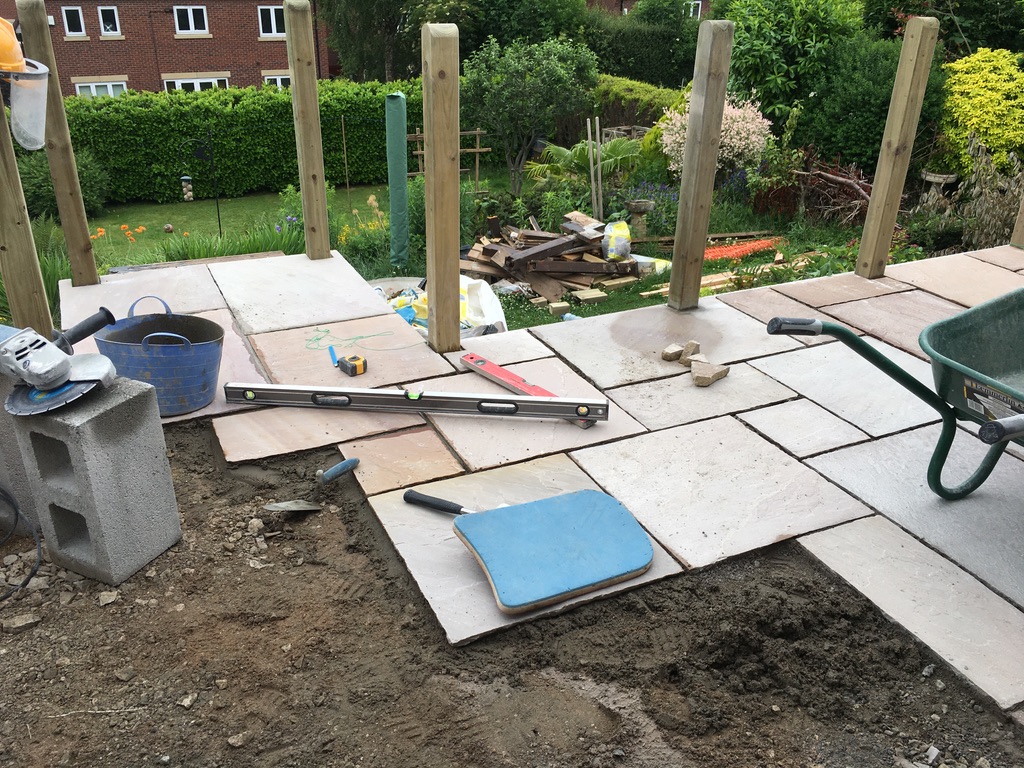
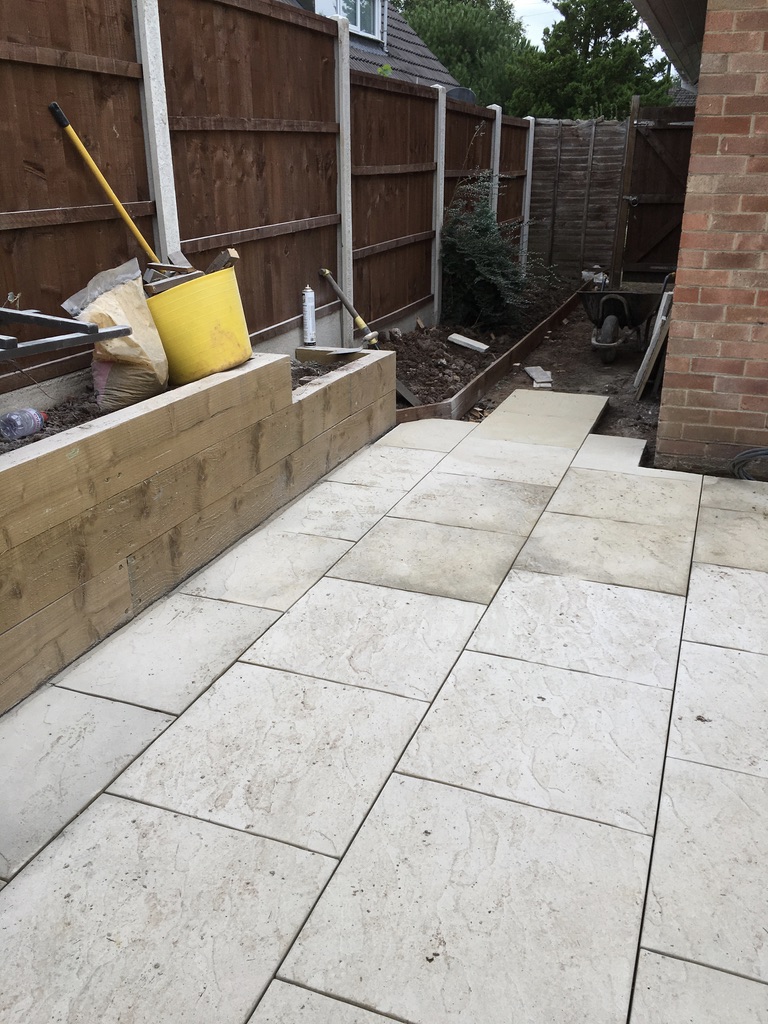
The upper patio is finished and leveled off, as you can see the slabs have been carried up and are just waiting to be laid…
As mentioned at the start, I was only going to do a few weeks of work here, but the client wanted me to do it all. Well, this never got finished by me due to time restraints. The decision was made that the client got someone in to do the slabbing. As all the design and hard work was done, that wouldn’t be an issue.
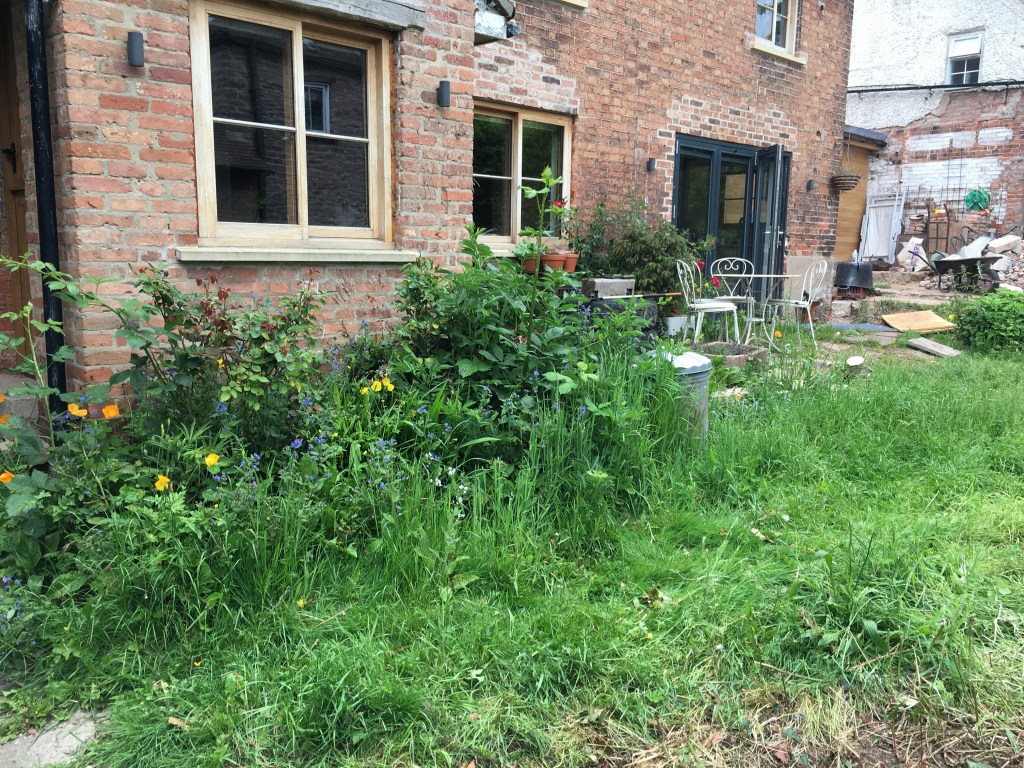
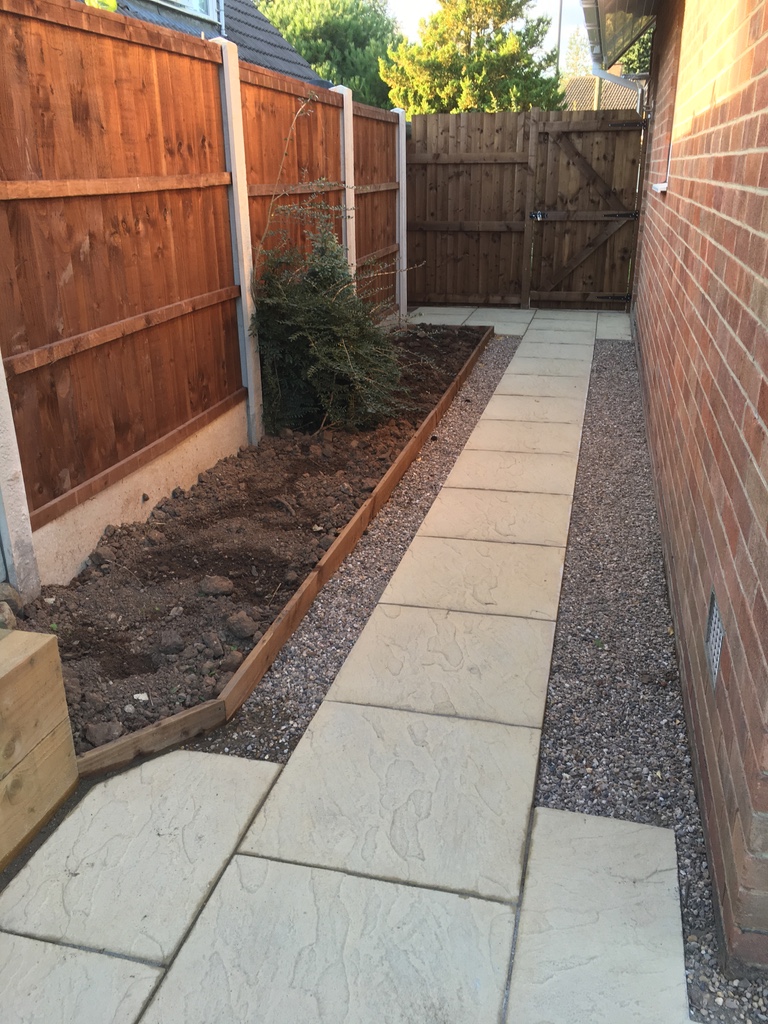
The remaining areas of lawn and planting were done at a later stage… Frustrating for me, but the time to do all the details how I wanted to do them was overrunning other work I had planned. I’m proud of what was achieved on this job and it’s been built to last for many years to come.
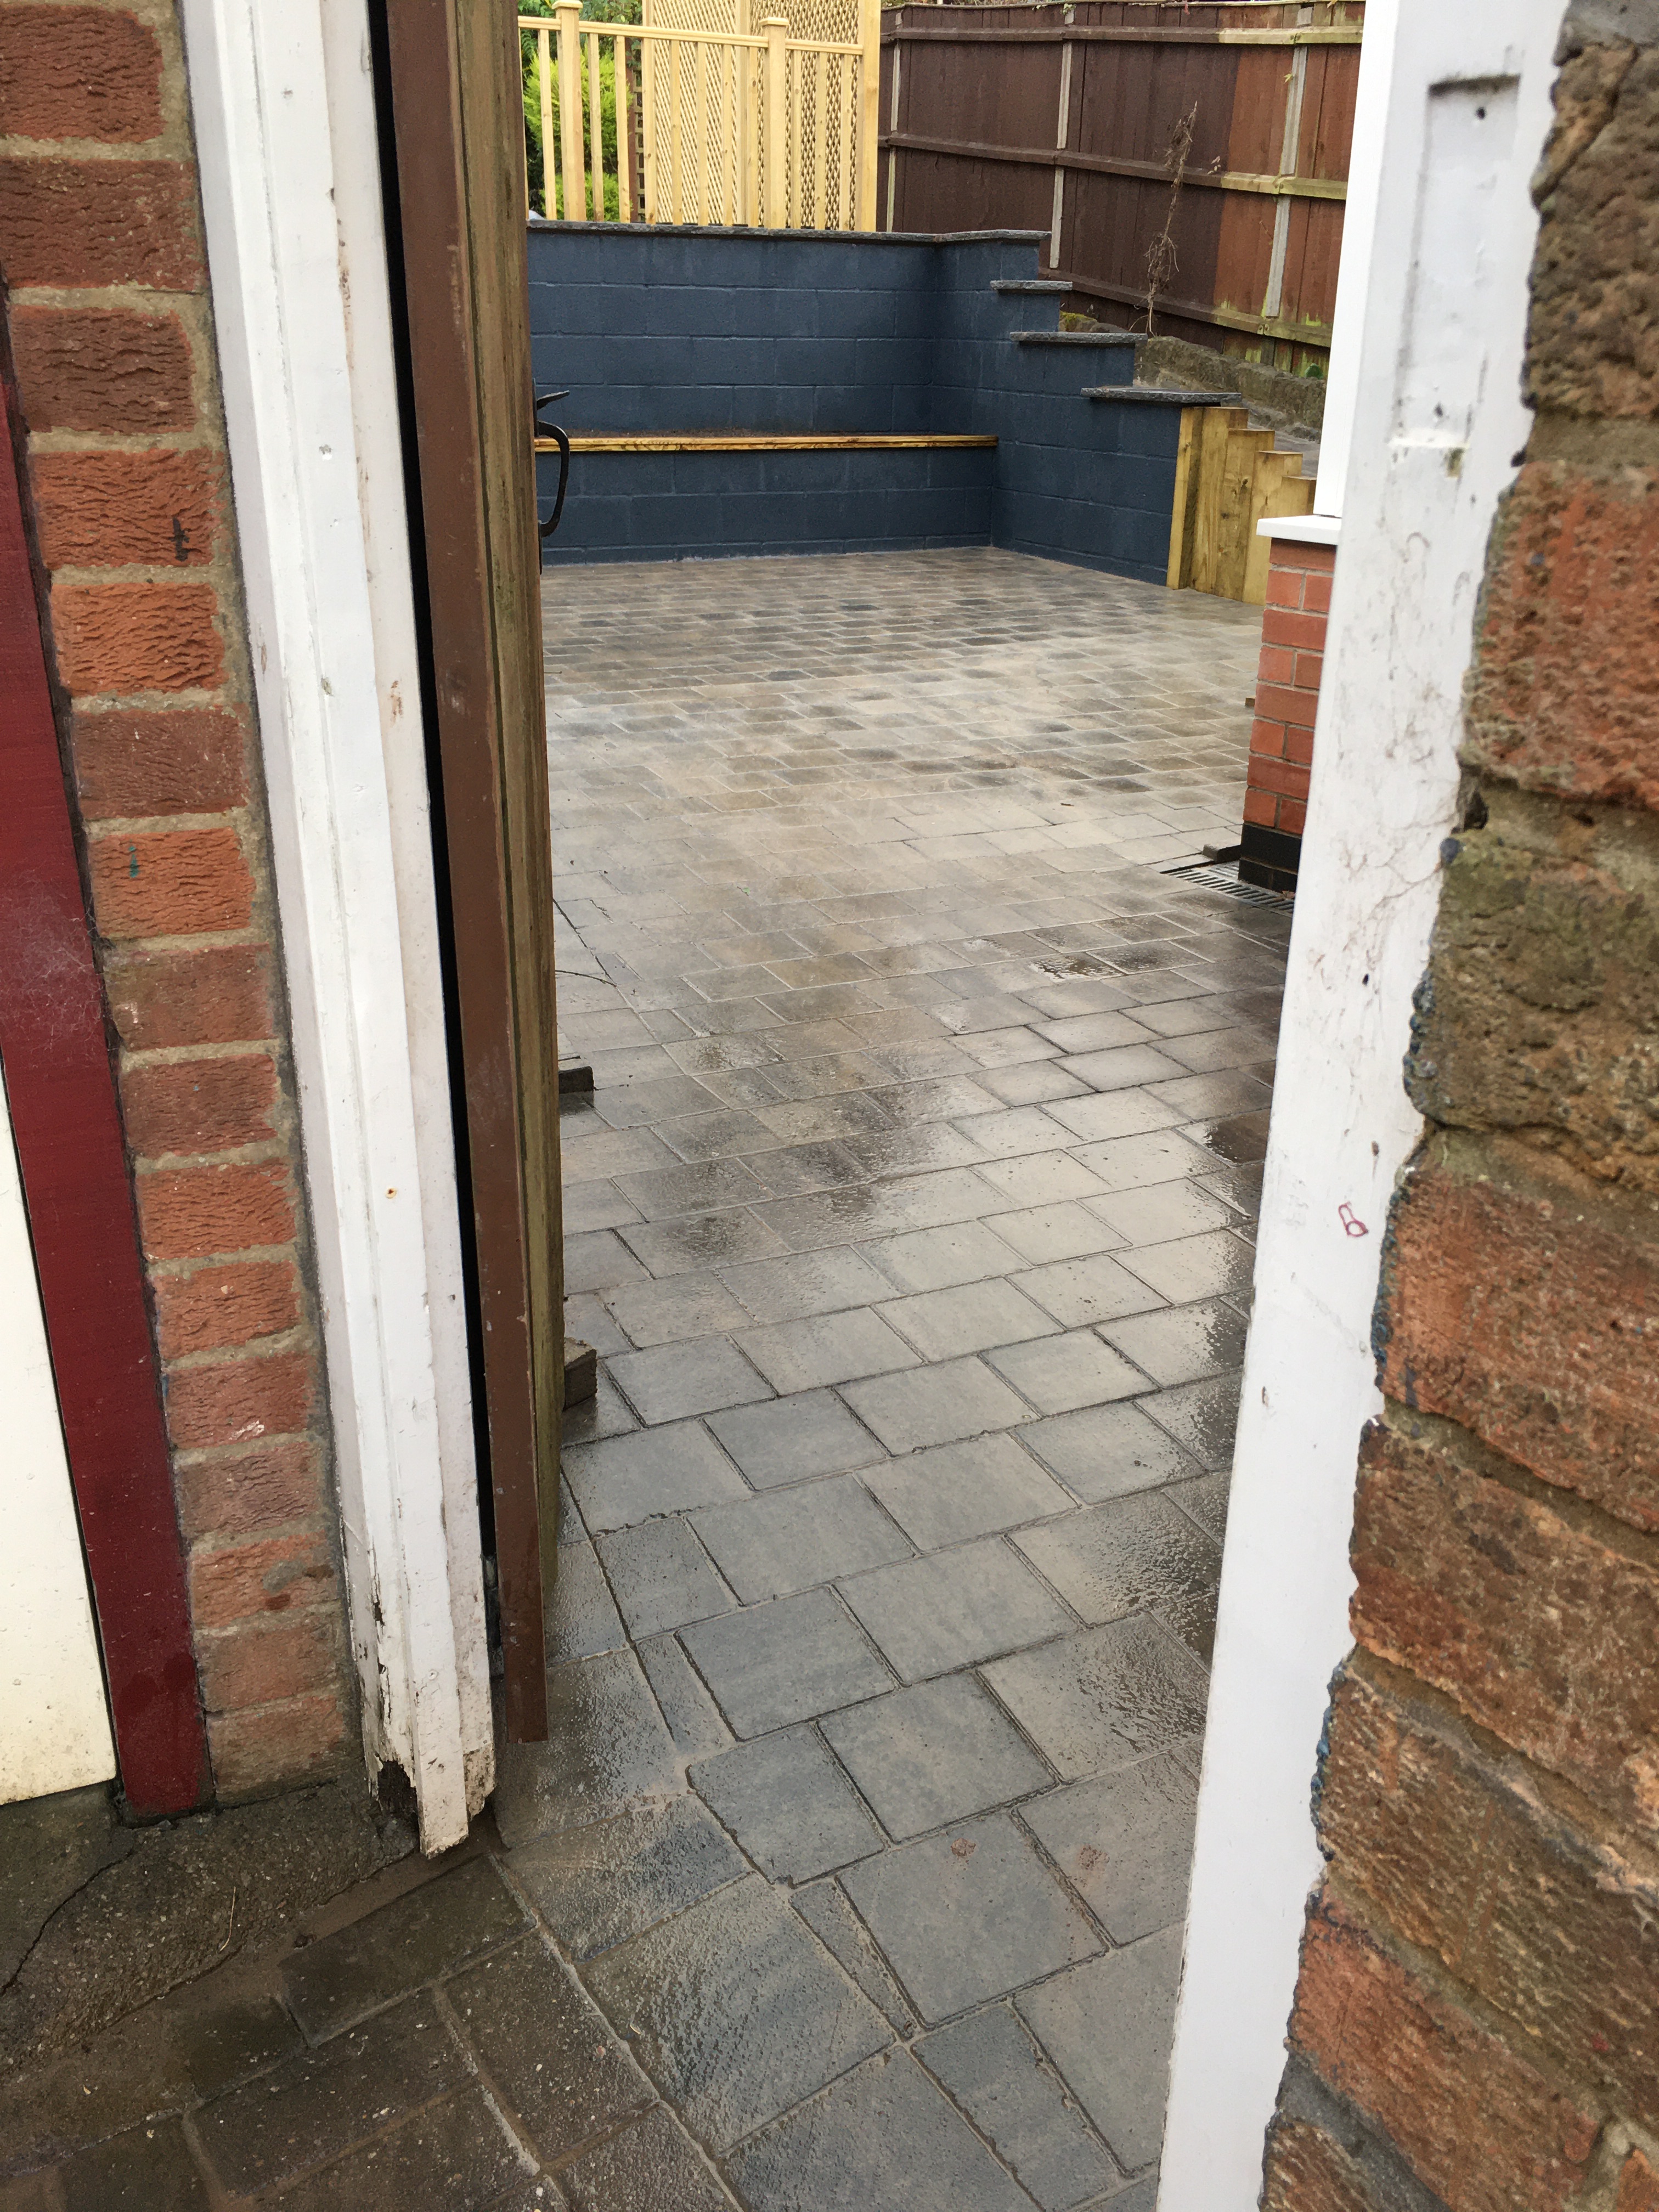
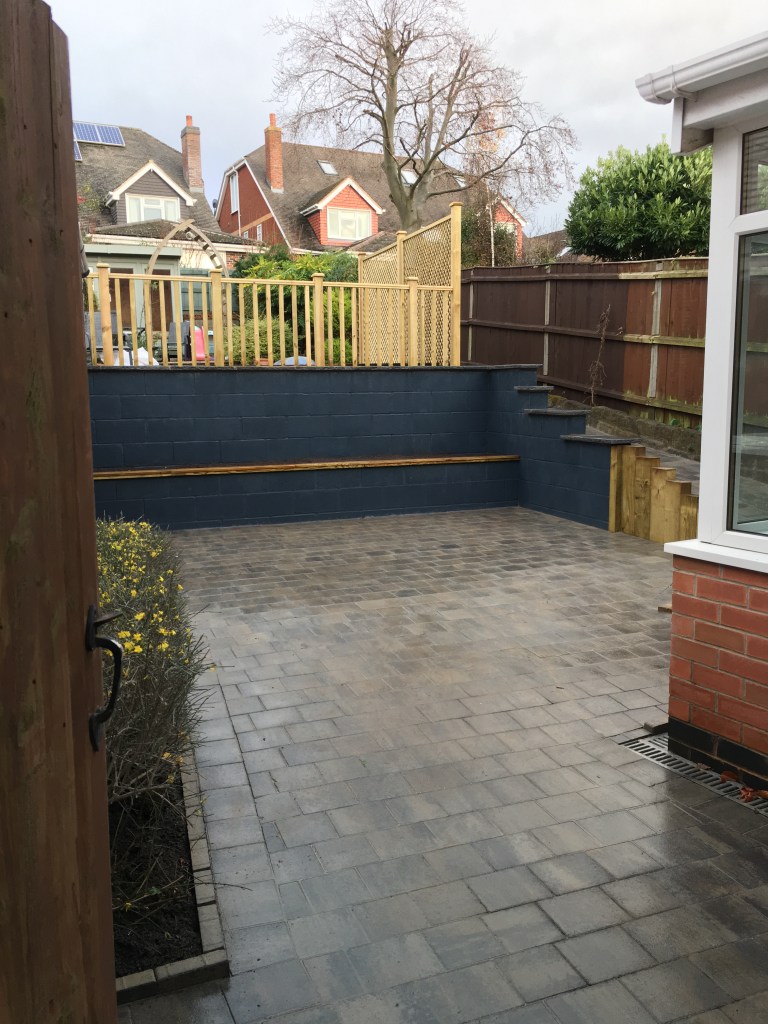
So how do you replace a concrete jungle with… more concrete, well this is how. Creating a low-maintenance area with elegance and fresh easy-to-control plants.
The new porous block paves will give way to ugly outdated slabs. Giving a better flow of water away from the house and using it to feed the new planting.
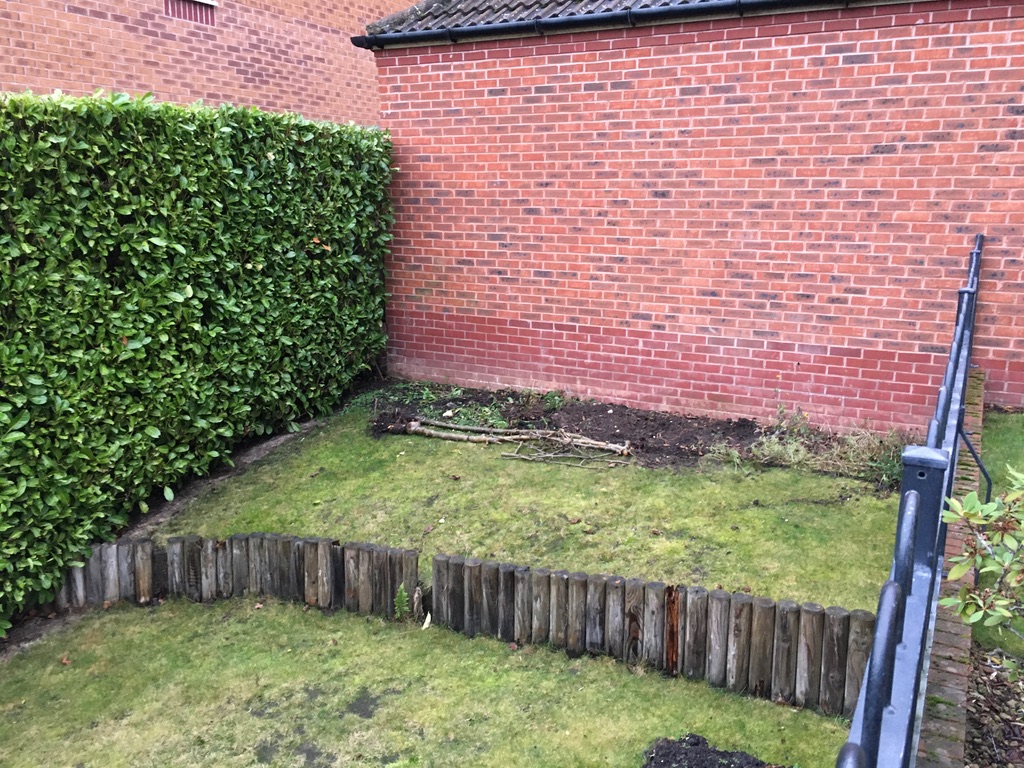
A MASS OF OLD FASHIONED SLABS
The main aim was to create a modern look with an emphasis on low maintenance. A more usable and controlled planting area and a level almost smooth finish for ease of use, but not plain.
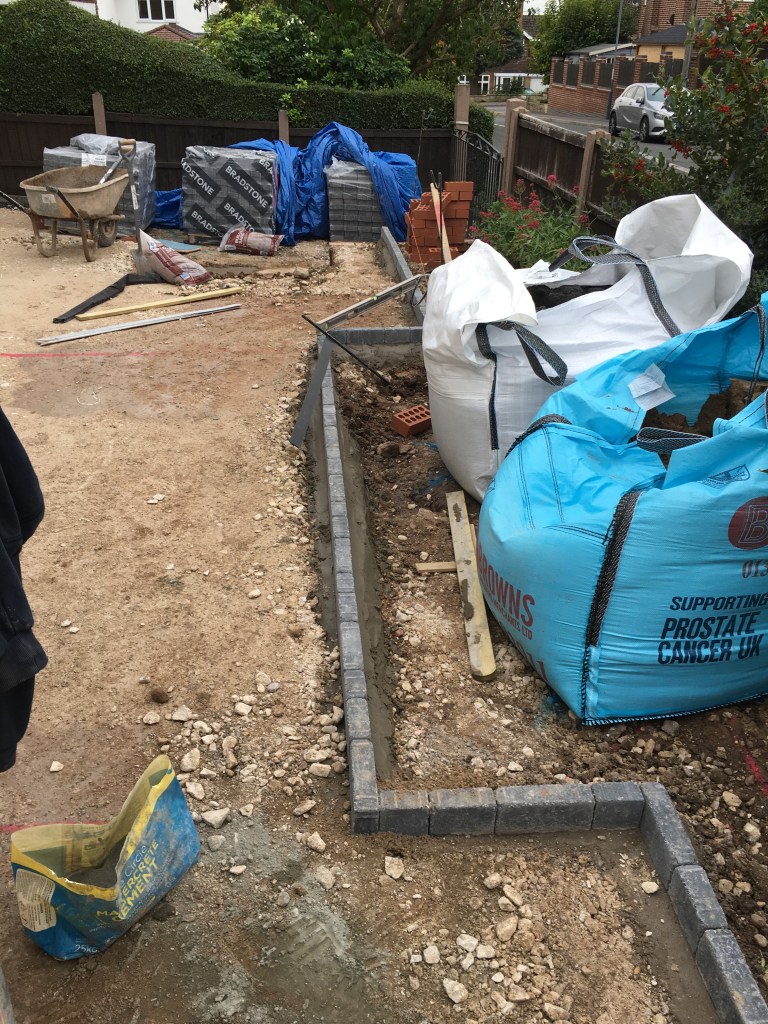
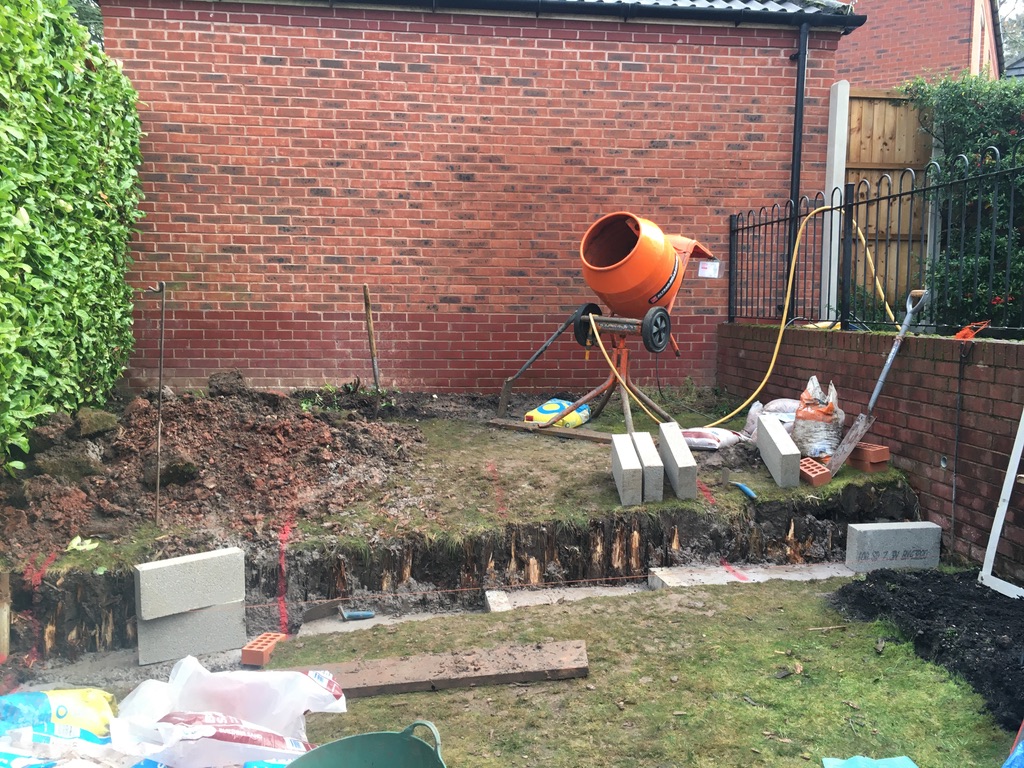
So let’s get stuck in. All the old is removed and a ground check is undertaken. Checking for pipes, wires, or concrete. In this case, it was concrete. Quite a lot of old concrete in odd areas. So it’s then all leveled as required and 5 tons of MOT type1 Stone is applied as a ground base.
The ground is leveled and MOT stone for strength and to level off
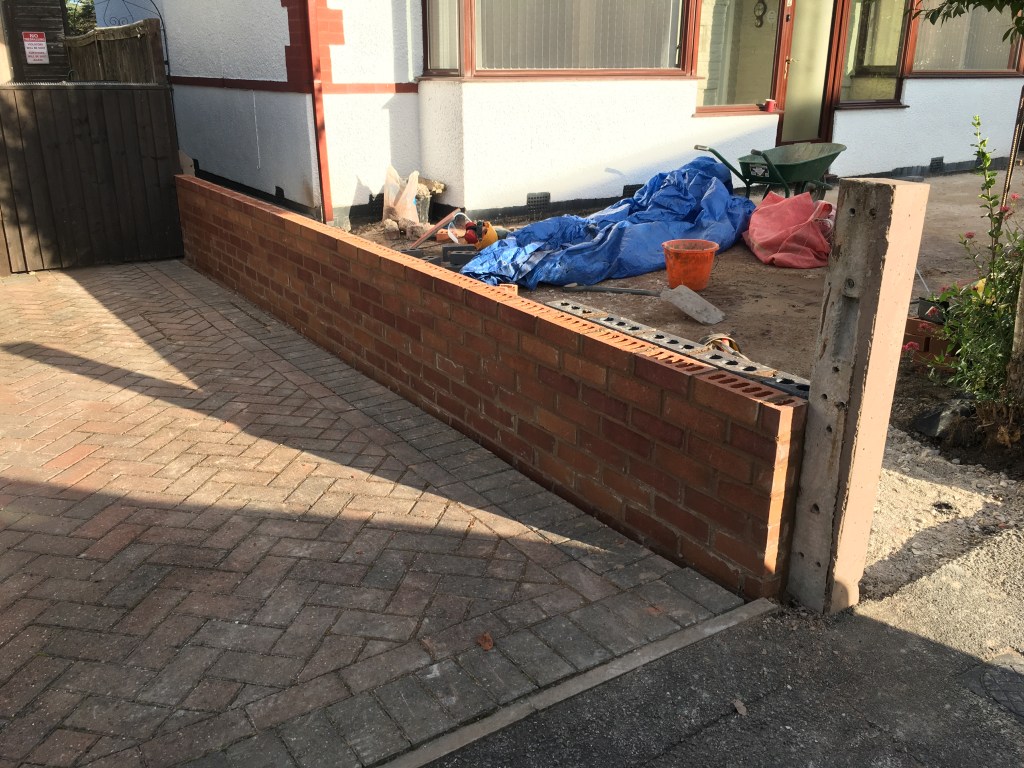
A new wall was planned between the two houses. We took the discussion to split the bricks to suit each house. One side had red bricks whilst the client’s house had grey-black to blend in with the finish.
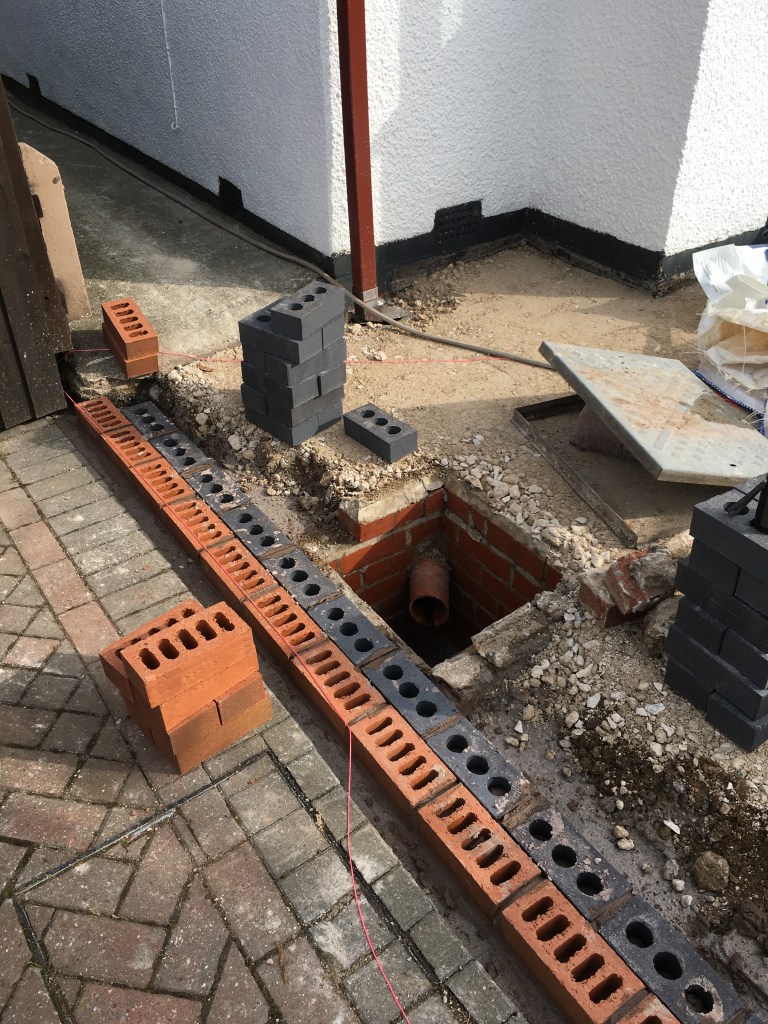
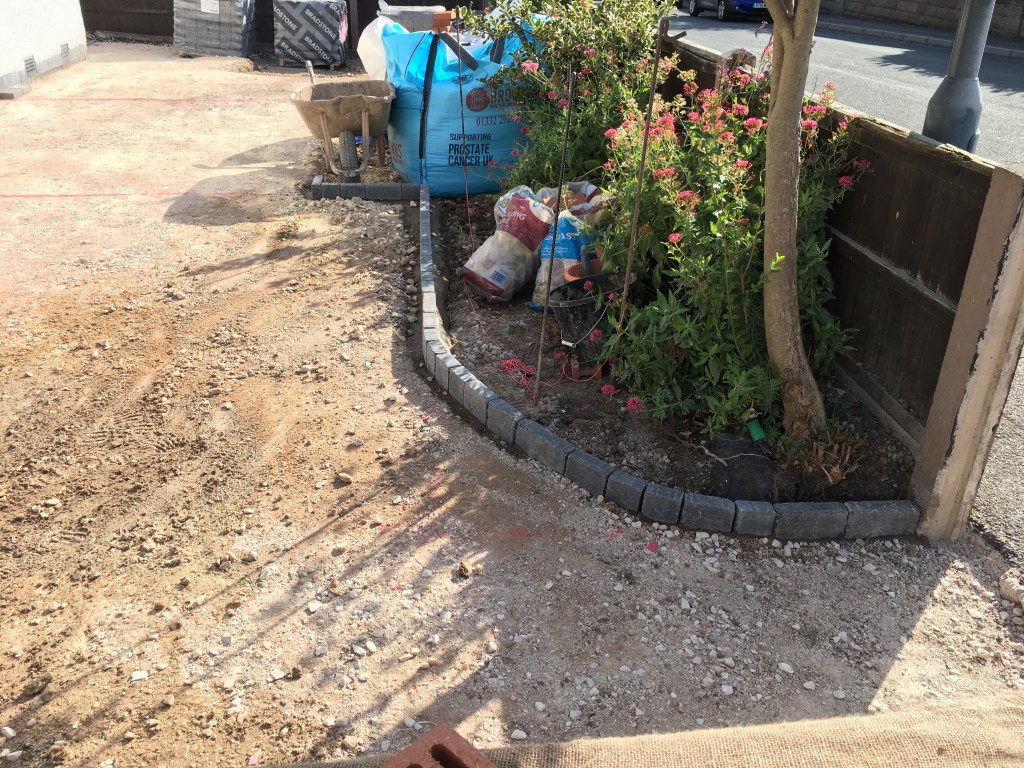
A Stone edging was added for the ‘new’ planting area. Footings were added for the steps to the drive area. New drain covers and a new waste drain.
It was decided that the original wall was left due to ground issues and the fence posts. So a new wall and step area were built to blend in with it but in a two-tone red/grey black finish.
Careful consideration was chosen for the water flow over the blocks. The water was to be spread evenly over the block area so it never creates a slippy section. So the water was moved to the new improved drain a the top left, with the largest amount of water going into the planted area and the rest towards the wall to run along that edge and out to the kerbside. The same was achieved with the lower steps onto the drive.
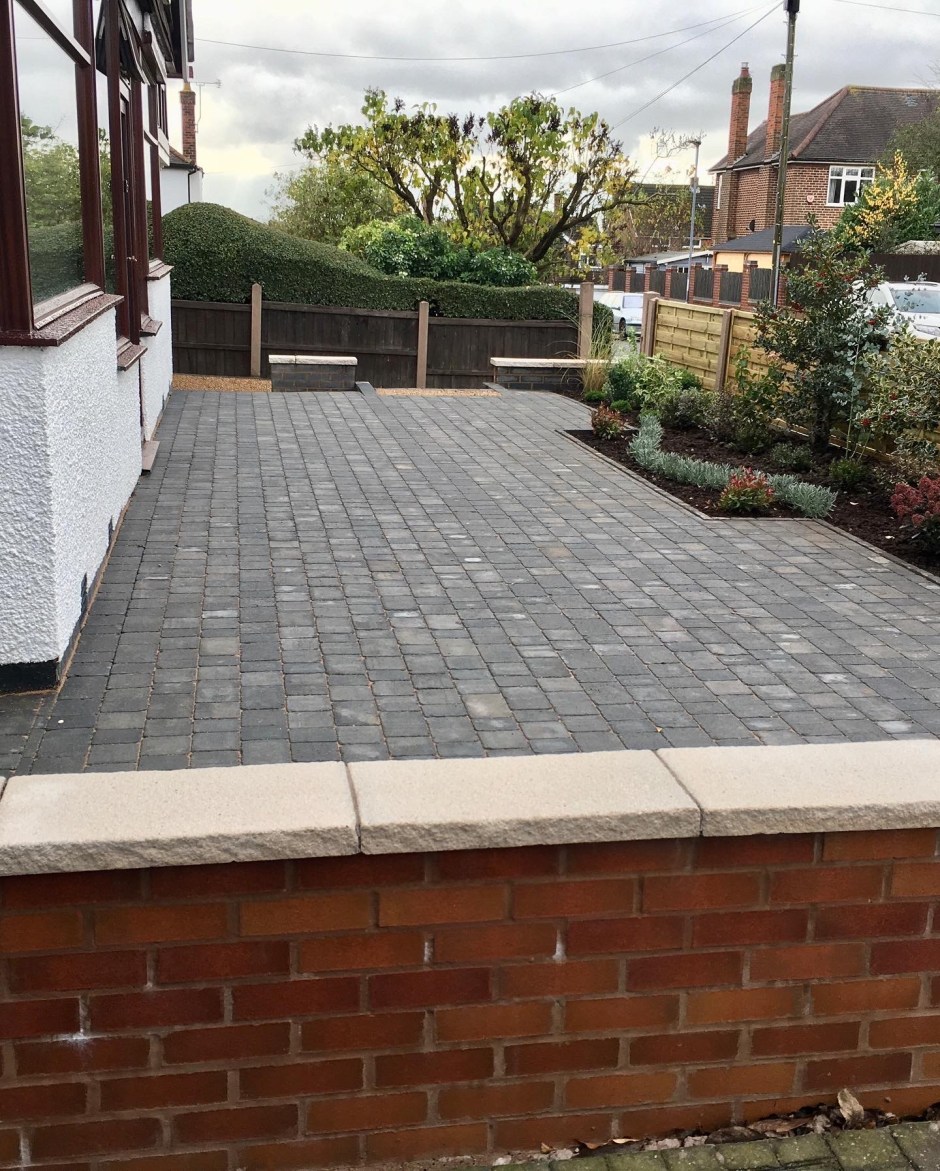
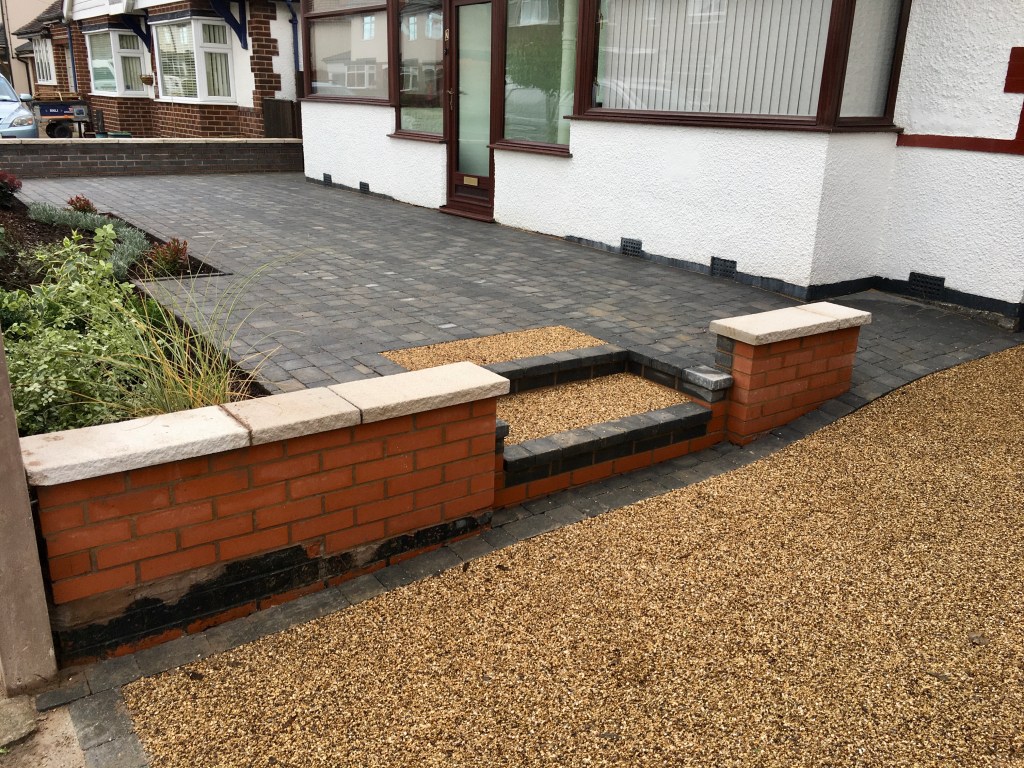
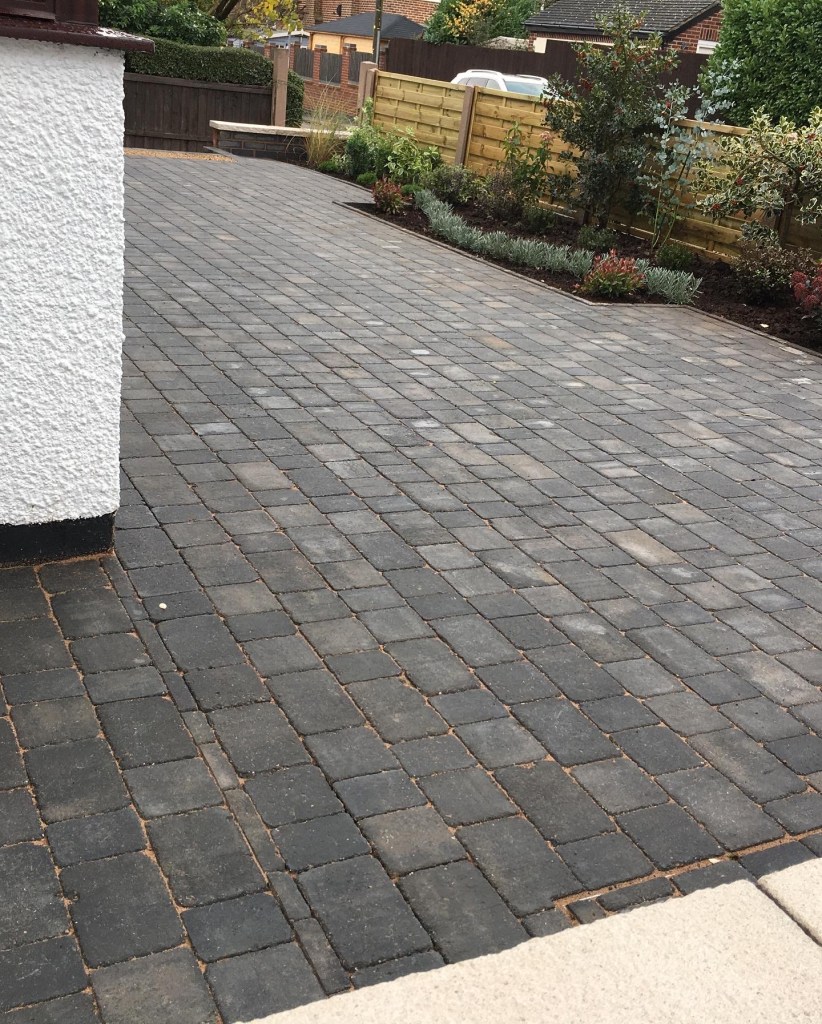
A new edge was formed for the driveway area and the blocks were started to be laid. The drive, although a little small for today’s cars was left as a useful parking area if required. You maybe wouldn’t get a 4×4 into the garage and would be a struggle on the drive. But a concrete grit path was done to complete the look. All the wall tops are now finished with textured coping.
The grit concrete drive is completed and the block paving is almost finished, now for the final touches. This is when it all starts coming together.
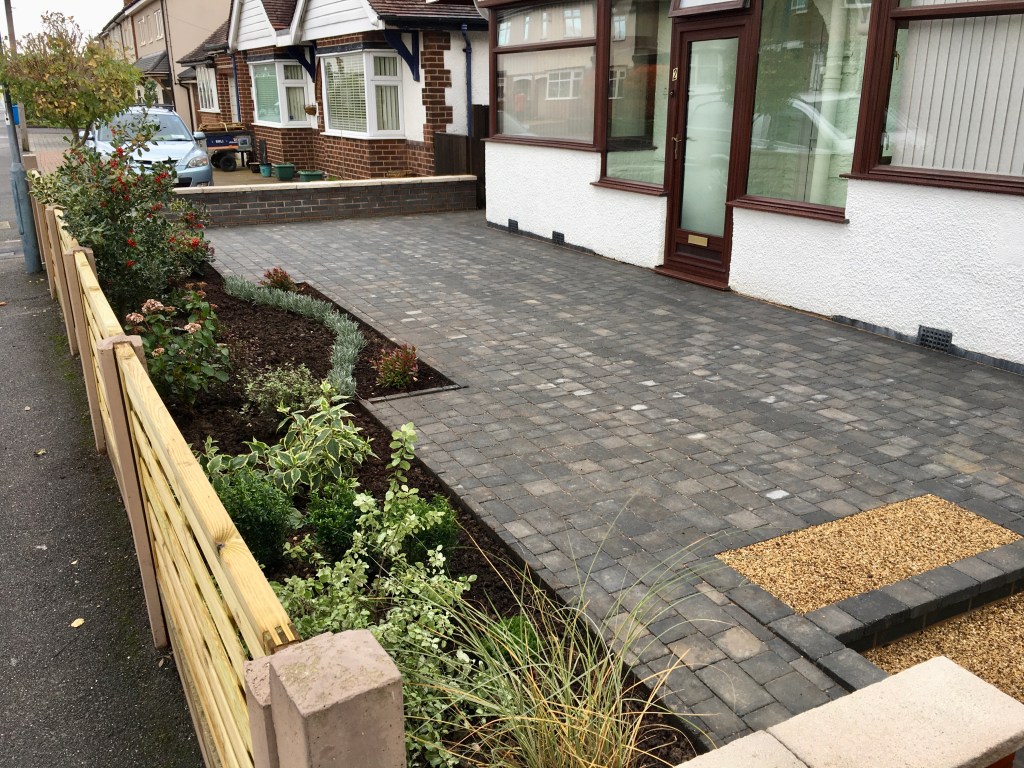
So, let’s finish off. Even completing the job with a new made-to-measure fence on the front and anti-weed infill kiln sand. I did really enjoy this job. When it all came together it felt so right and when it looks this good that’s even better!
After a final scheme of low-maintenance planting is added to new top-grade screened composted soil, it’s all finished. All but a few small touches will be done to some little details when the weather improves, mainly painting.
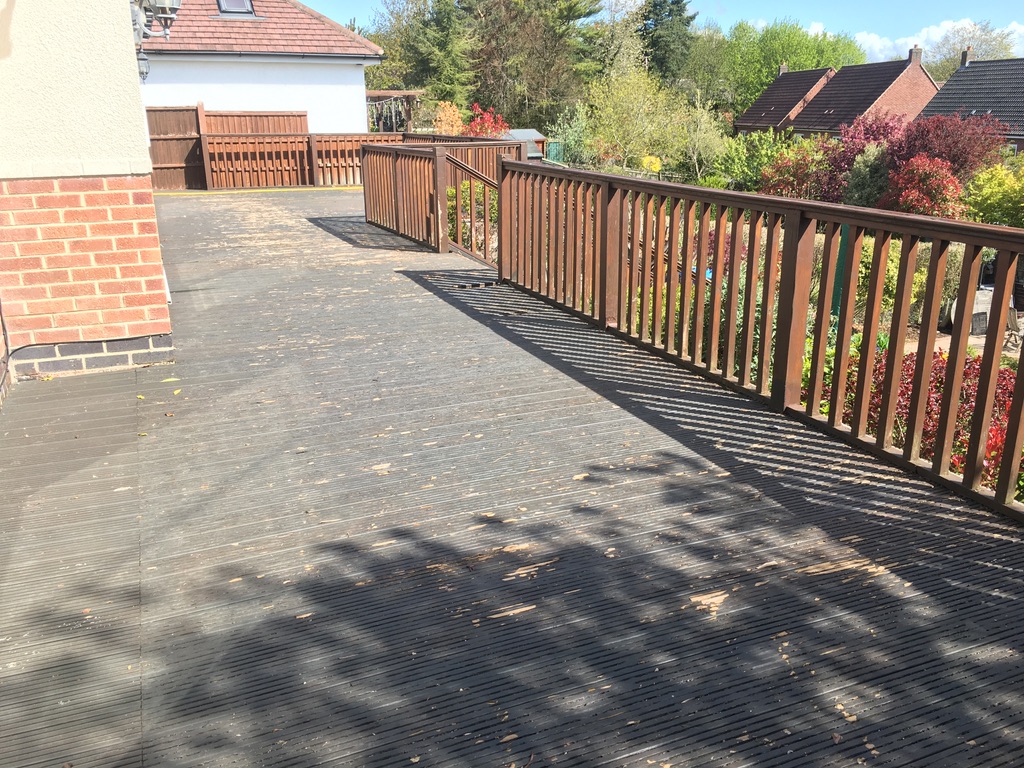
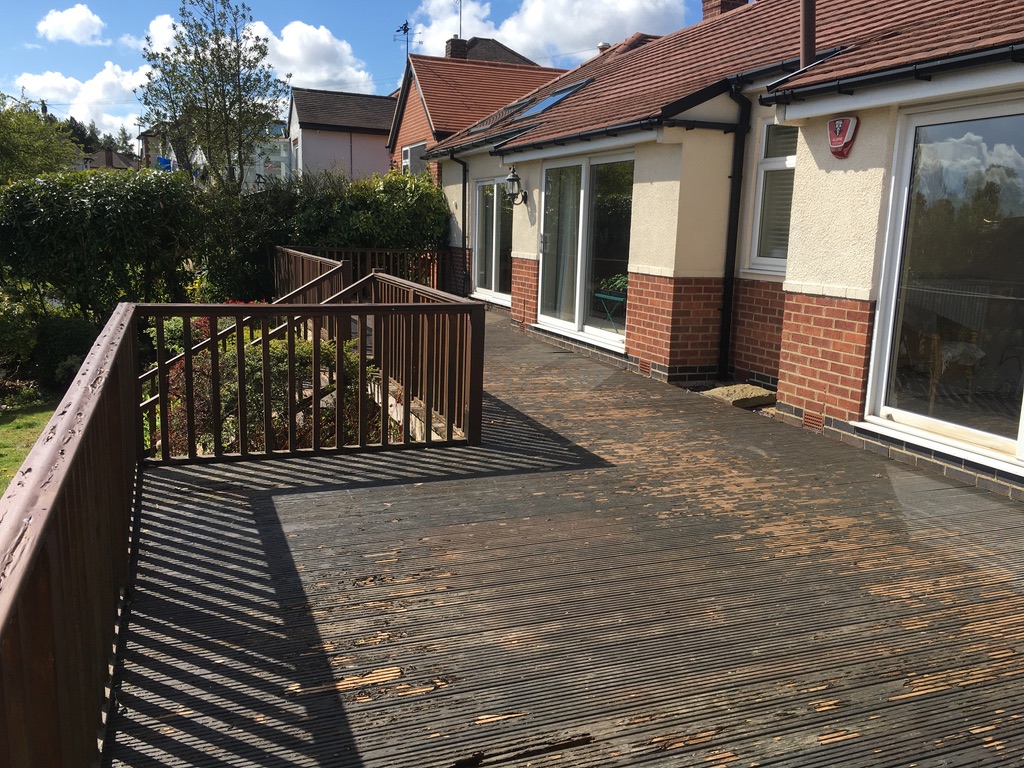
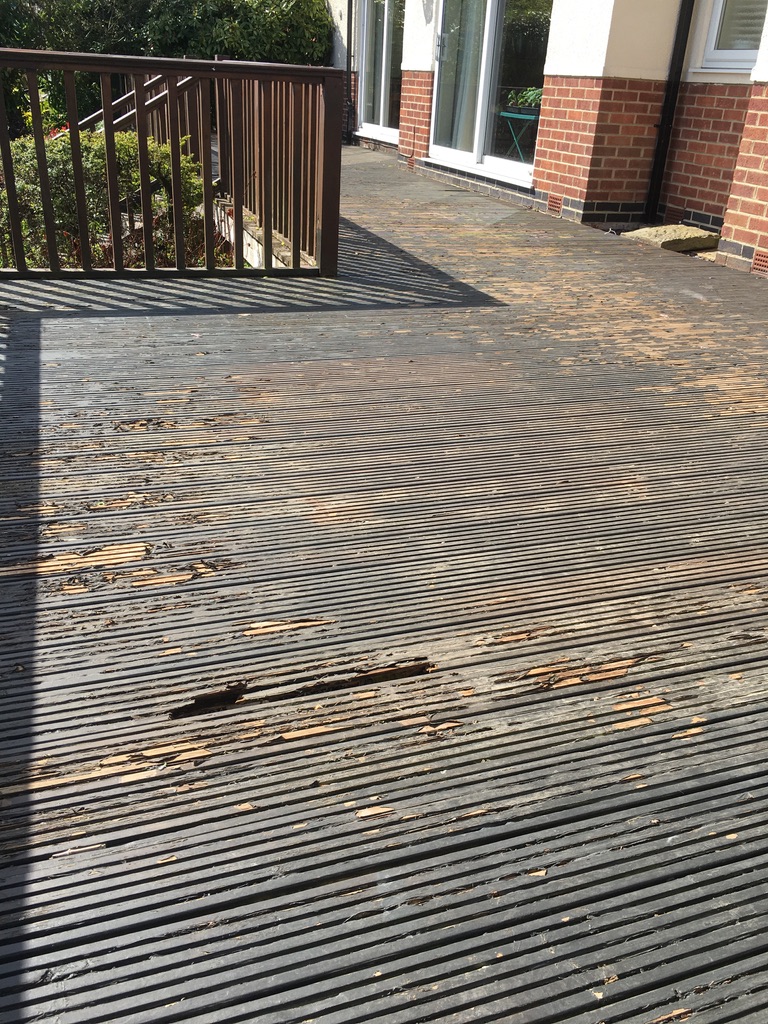
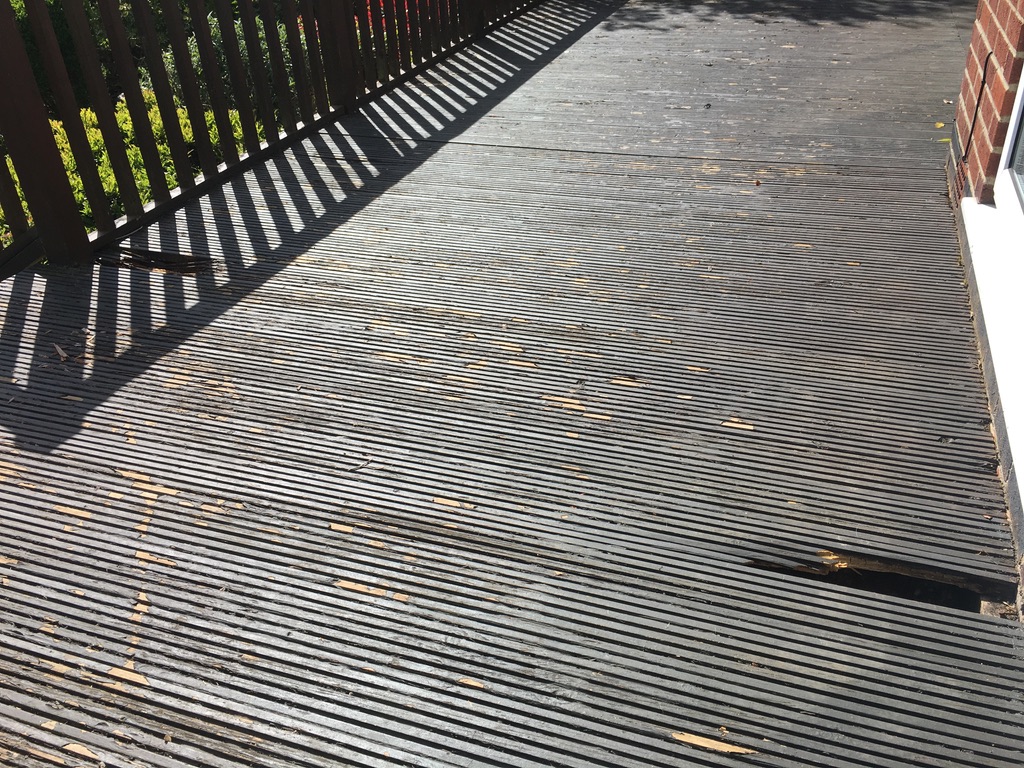
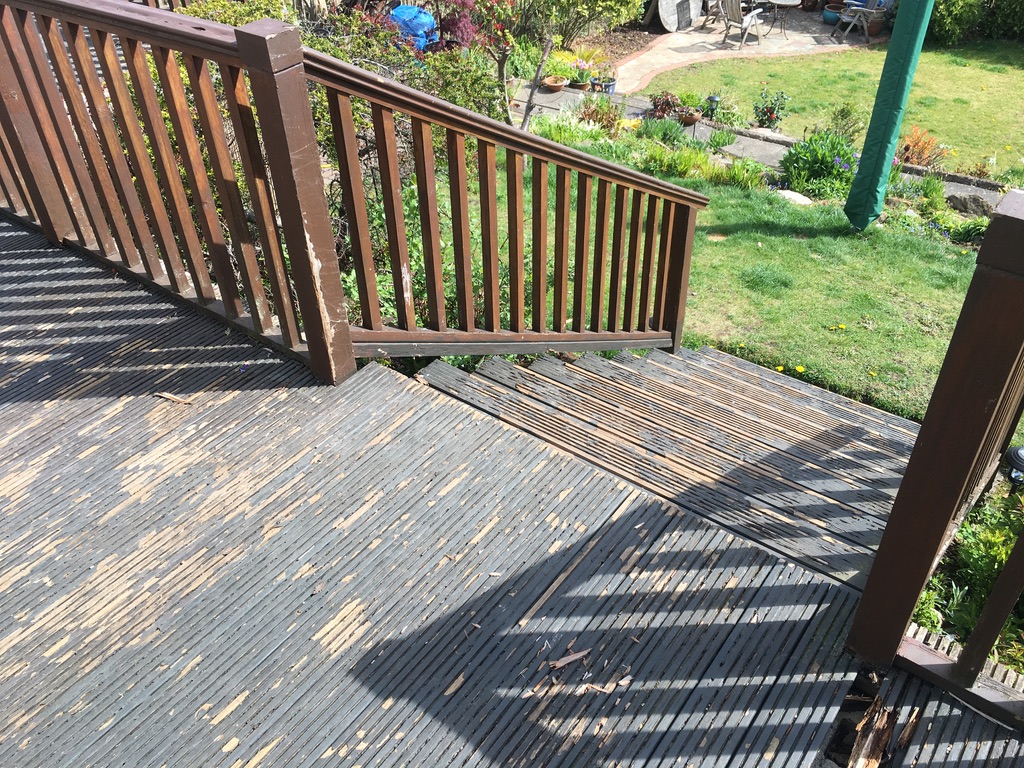
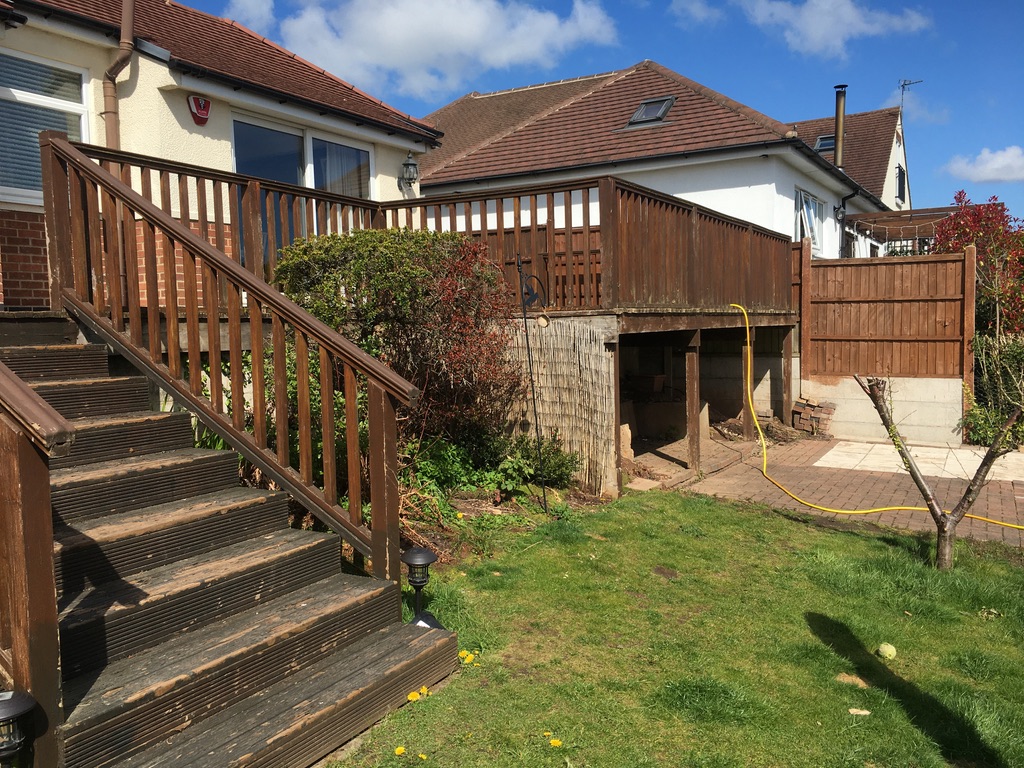
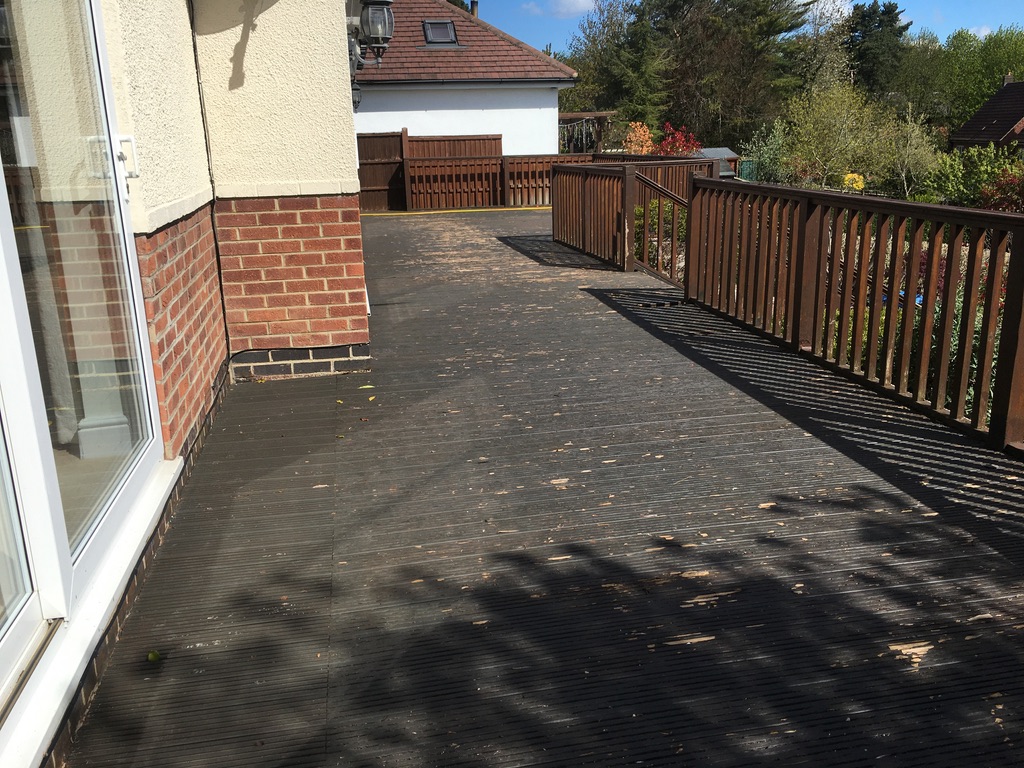
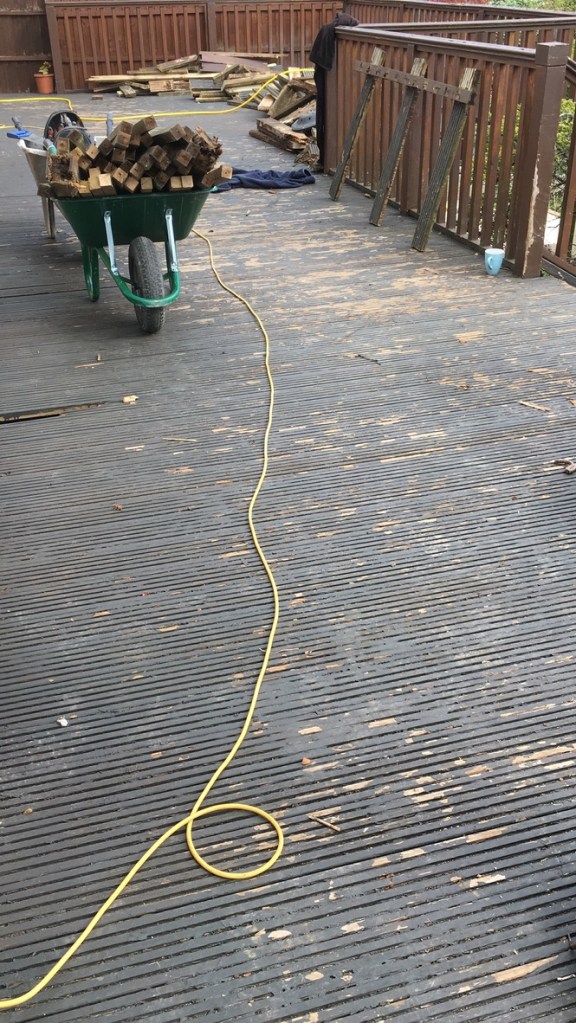
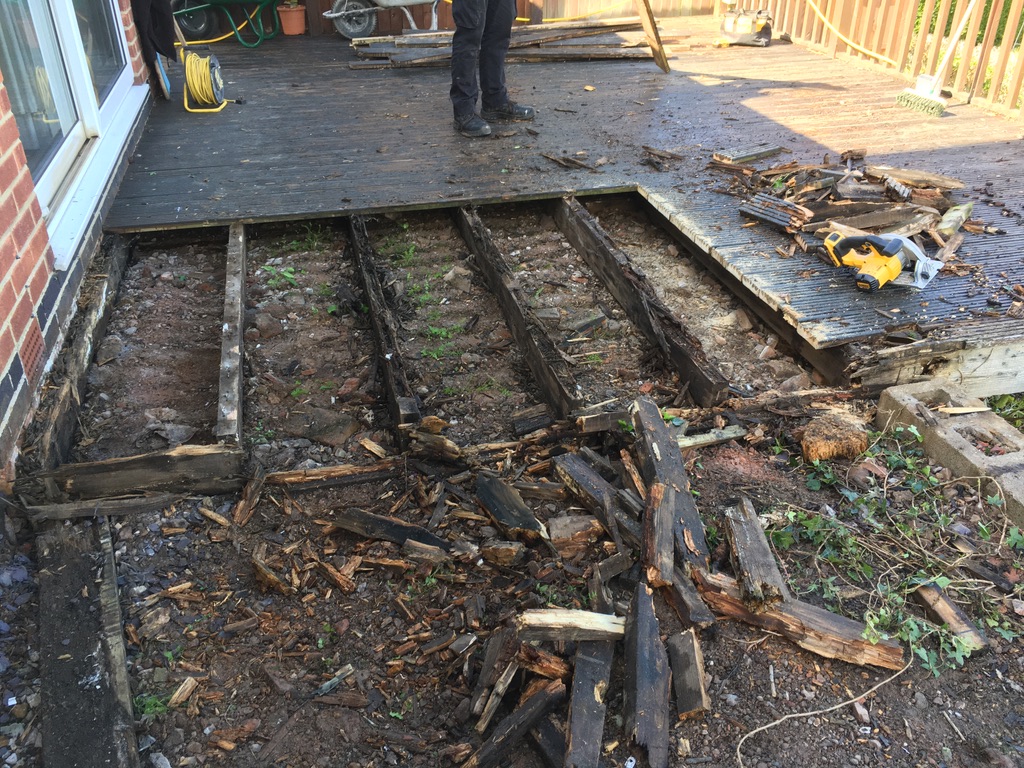
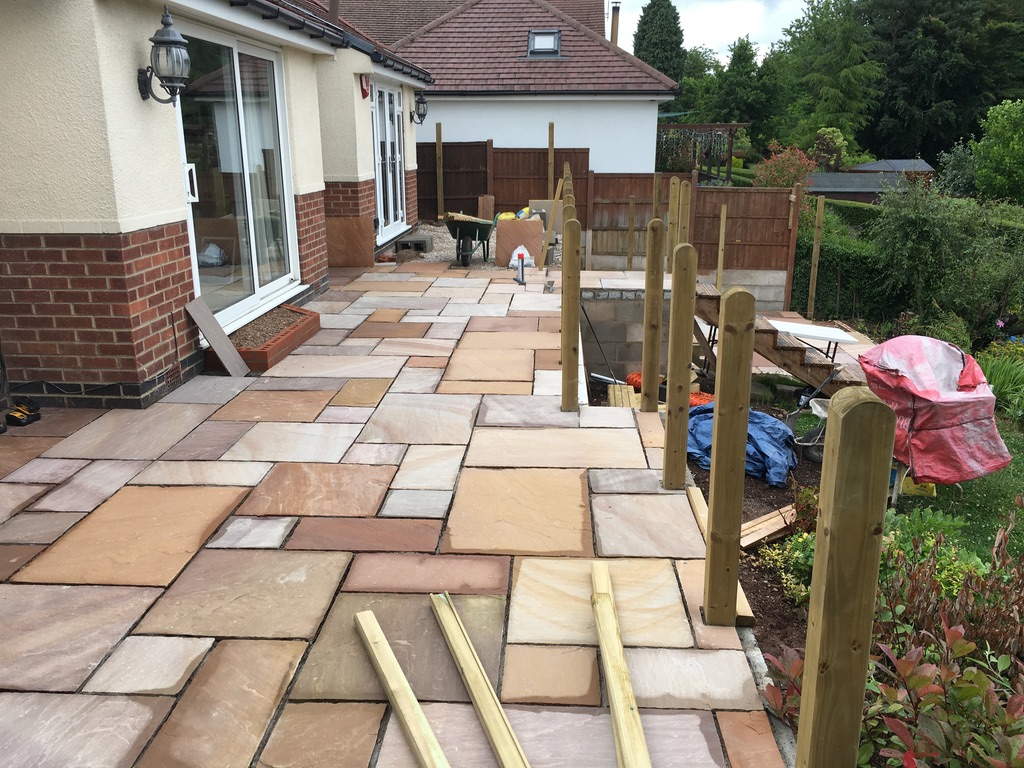
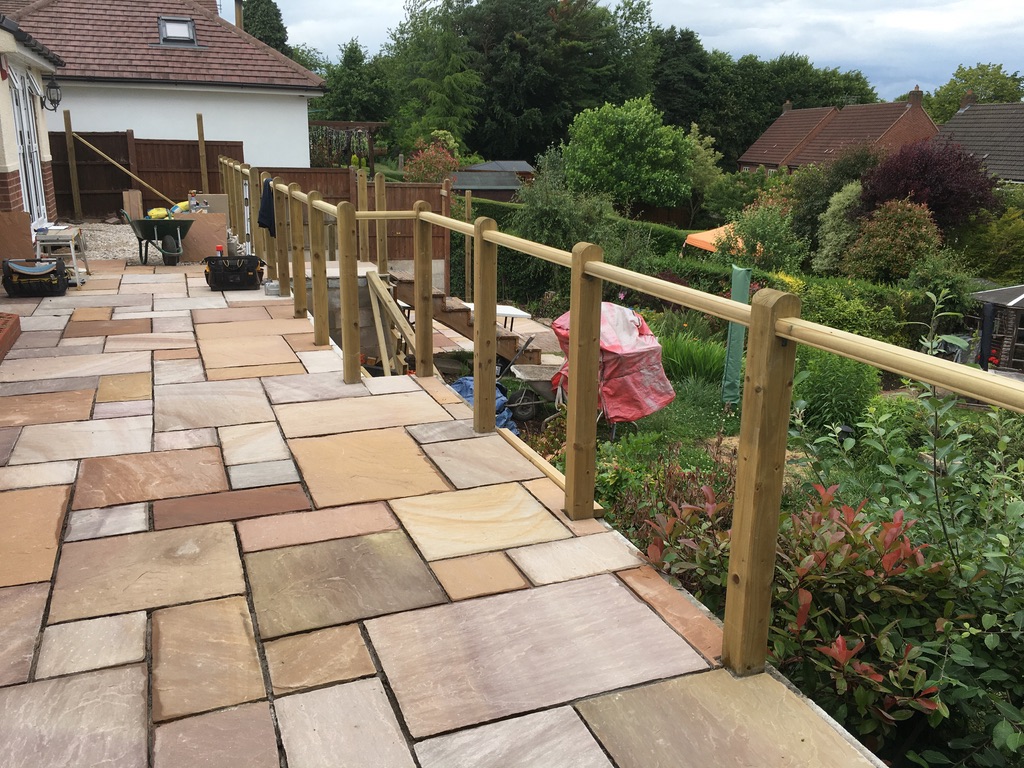
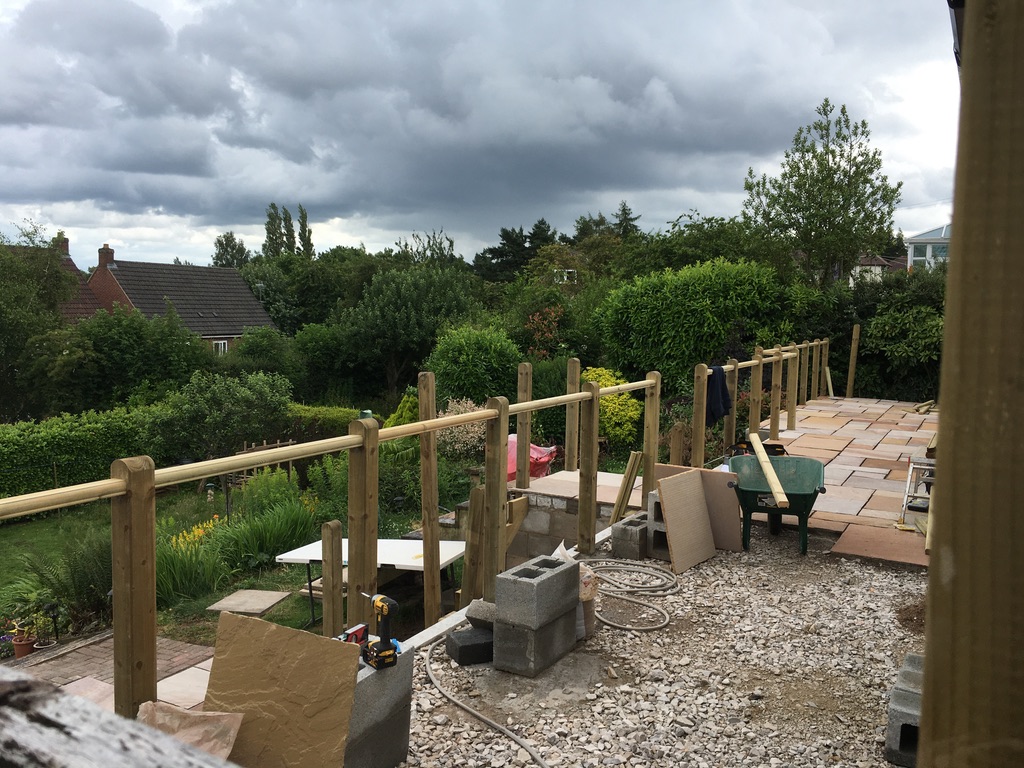
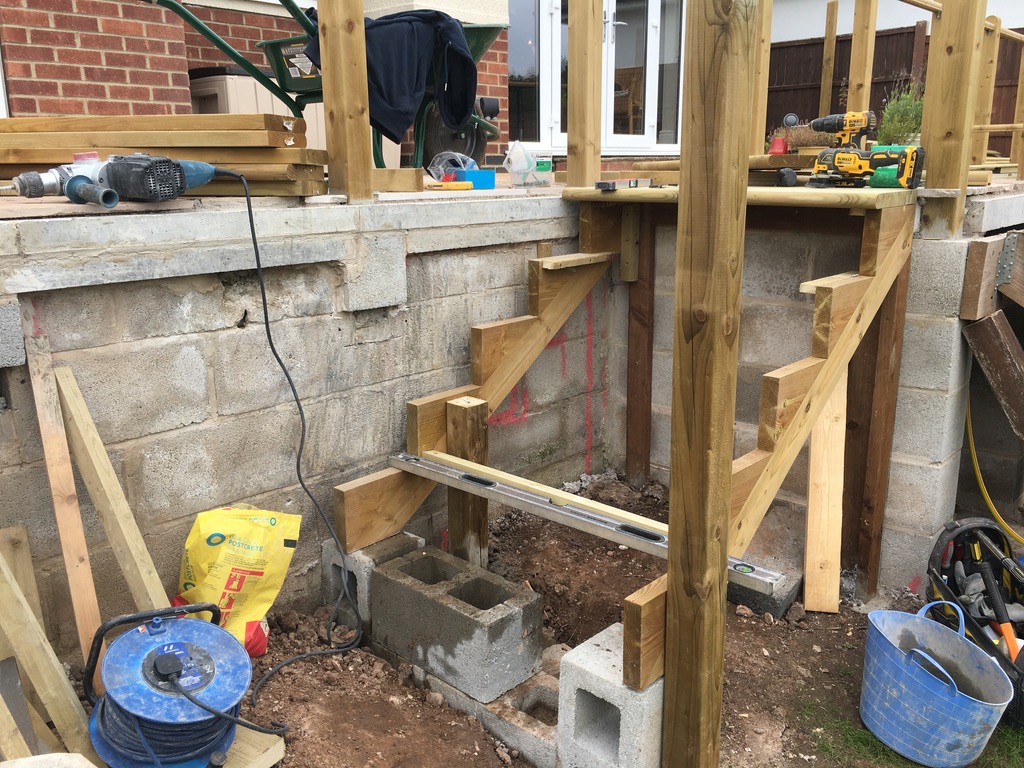
A Recent house move to a property that had the views but unfortunately, amass of rotten decking. This started in 2021. And took a while due to the complexity and delay in the aftermath of covid.
The size of the decking was almost overwhelming before taking into account other problems that may be hiding. Sections of it simply fell away and the under beams were mush.
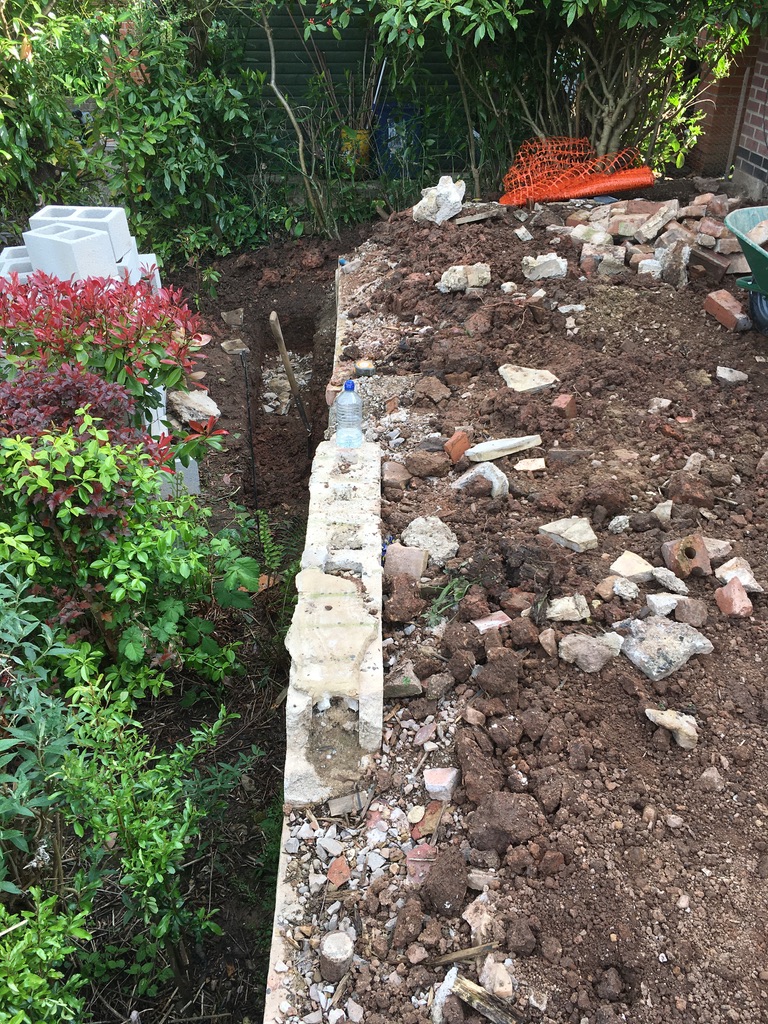
The upper ground area seemed ok, looked and felt solid to work on. However, the wall that was under the edge of the decking was totally out of line by about 18″ at it’s worse. So a new wall was deemed the only wall to correct it ready for the new design.
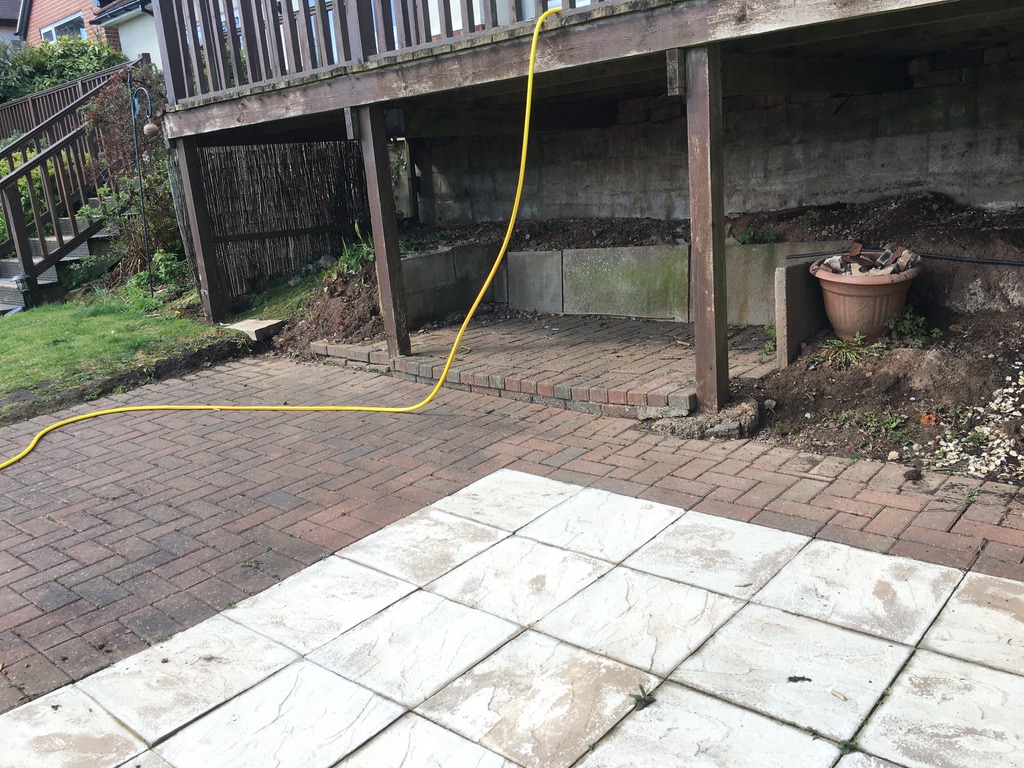
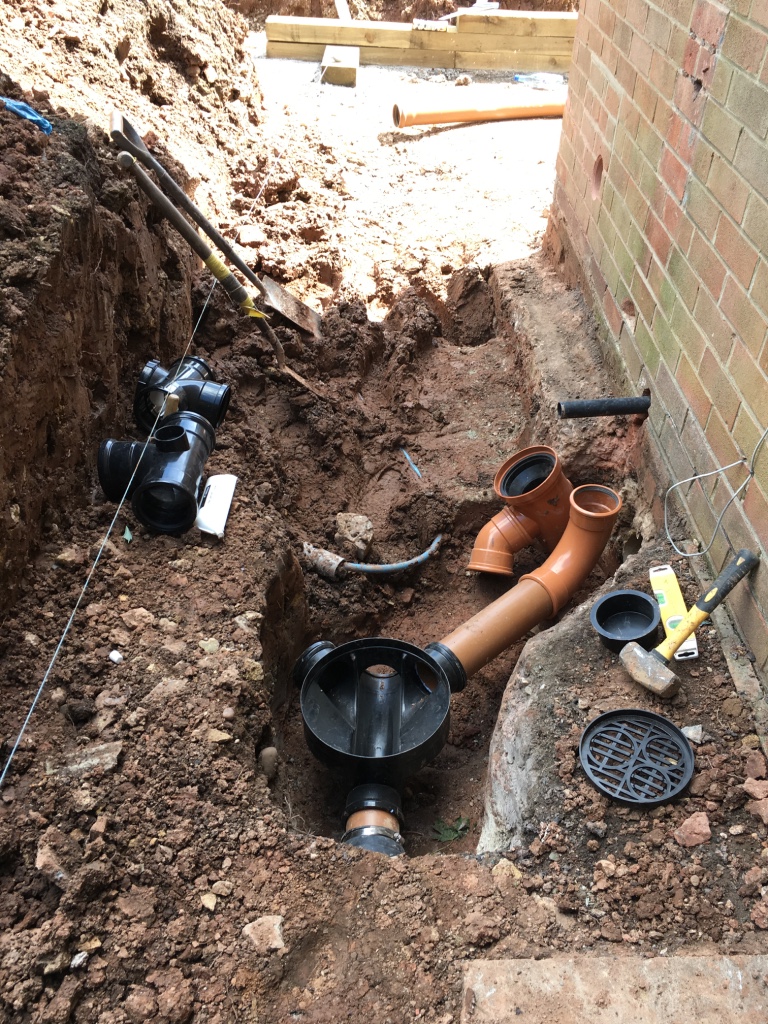
Now the first sight of a drain appears from under the old raised decking area. Although this was first seen on inspection, it did look like it came from the toilet of the house. No problem we can work around that…
So let’s build a new wall that covers the old wall to form a straight line which is needed along the new patio edge. This is fairly straightforward apart from the previous thought that the drain ‘from the toilet’ was actually a mains rain drain from next door and beyond…
The new wall is almost built and a secure ‘box’ the length of the drain is created to protect the mains pipe. This is additional work that you cannot expect till you start a job. If you notice in the above picture, you can see the old wall is out of line and was originally built to follow the pipe.
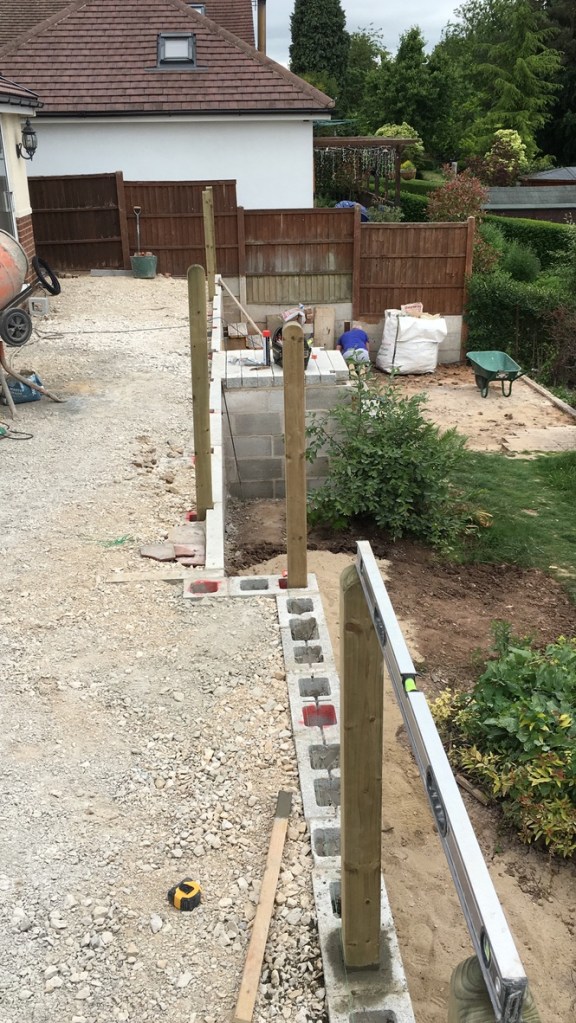
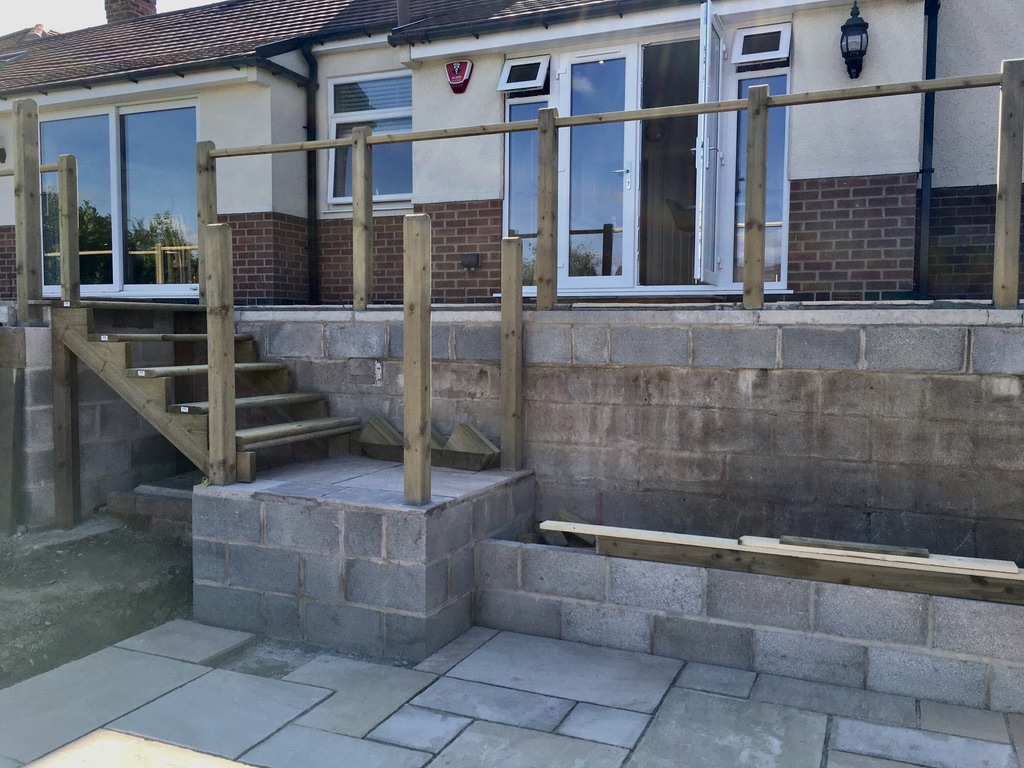
New block work is started for the new steps as can be seen in these two pictures. The old temporary steps are dismantled, moved, and rebuilt to a different area of the wall for use to access the lower area.
The intention is to put a row of posts along the top of the wall to form a secure fence, now this had to obviously be as straight as an arrow. Now the line of the house is out by 20cm, and the original old wall is simply just a mile out, so very careful judgment had to be made to get it right. A new course of blocks was added to give a straight line to the old wall and to get the height correct to align the doorways of the house for when the slabs are laid. This was honestly the most frustrating part of the job, it may have been easier to take it all down and build a new wall!
Backfill of the new wall and the start of the positioning where the new posts will go. This got very tricky and frustrating. It had to be perfect or it simply wouldn’t work! Drilling and breaking into the old wall. Emptying soil from the holes to add concrete for strength.
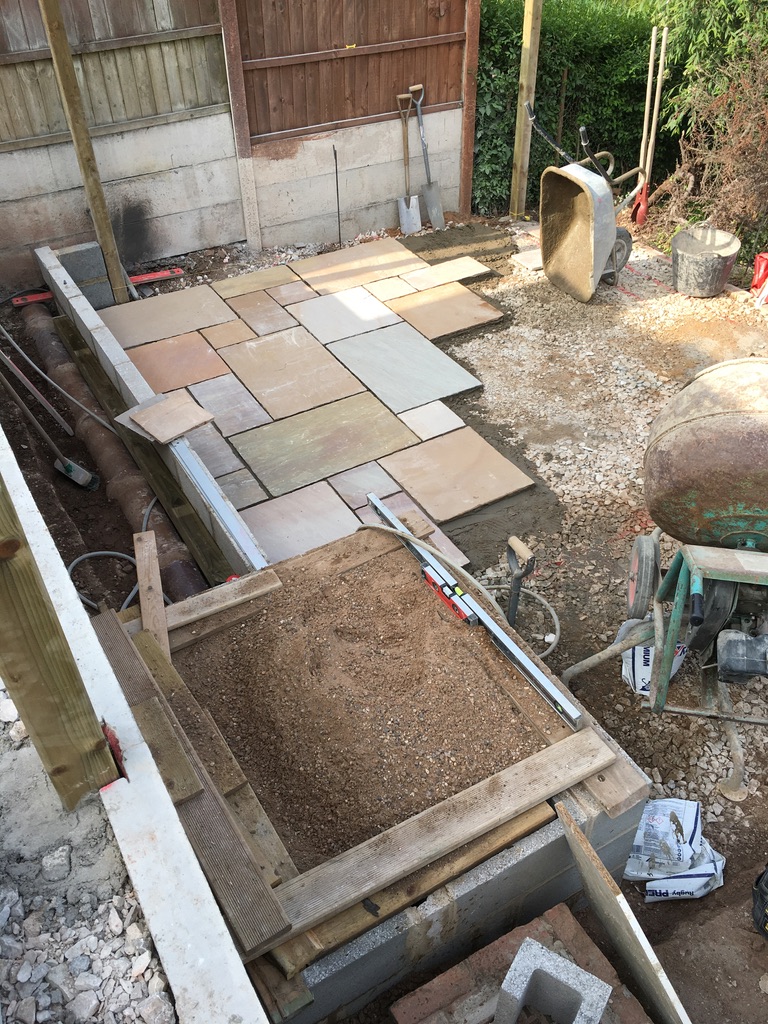
At least, a smooth surface to work with is finally down. Concrete sills are used to create a straight line and exhaustive cutting and drilling of the holes to get the posts accurate. An expensive and time-consuming way, but the best to get the right finish.
The new step area is built and it is decided to add a storage area inside which now means adding more concrete sills, another addition to the job. The first posts are added to the wall.
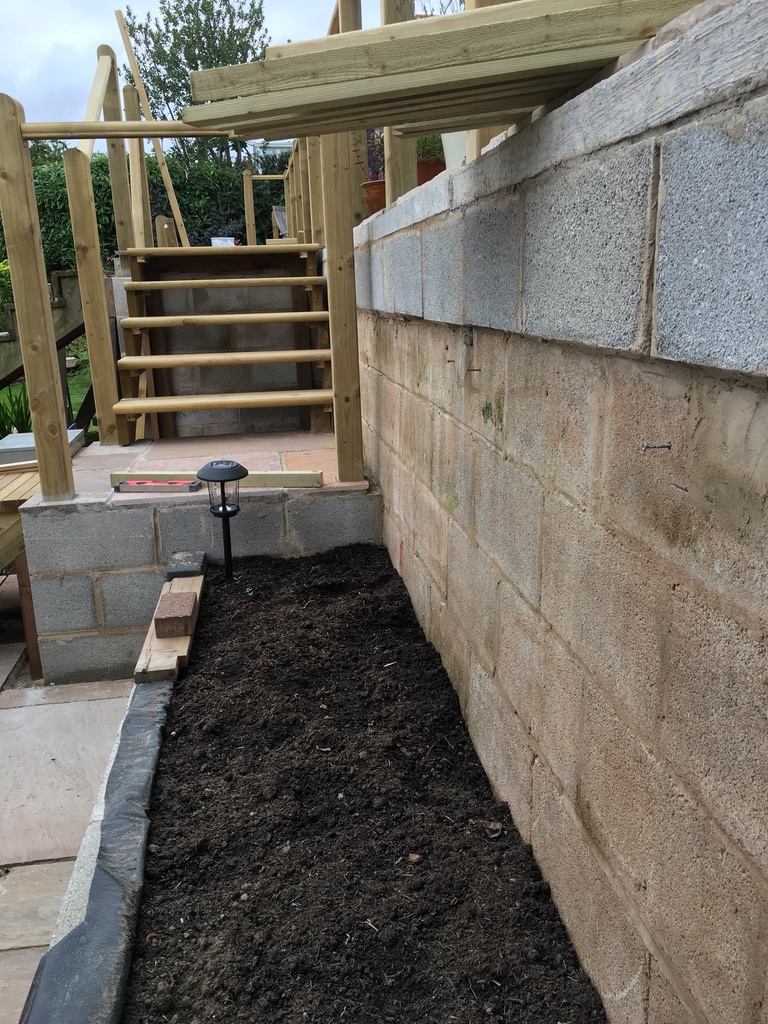
On the lower section of the garden, a wall is added to the job for a planting area and to cover the waste drain. The lower step section is built for the steps. This is on a much lower area so needs more height to work than the other side, and also to cover the main drains cover.
The slabs are now being laid, steps outside the patio doors are added and the support posts are in. The temporary steps are moved again to the new step section for access to the lower area which is ready for paving. Remember, the lower section of the garden is still being used by the owners whilst the garden is being done, so access was always needed.
The lower section is now paved with the step section ready. The final fence section at the top is created.
Above you can see how the straight line was created. A load of work to get it done but makes sense for a long-term quality job to take the weight and water ingress.
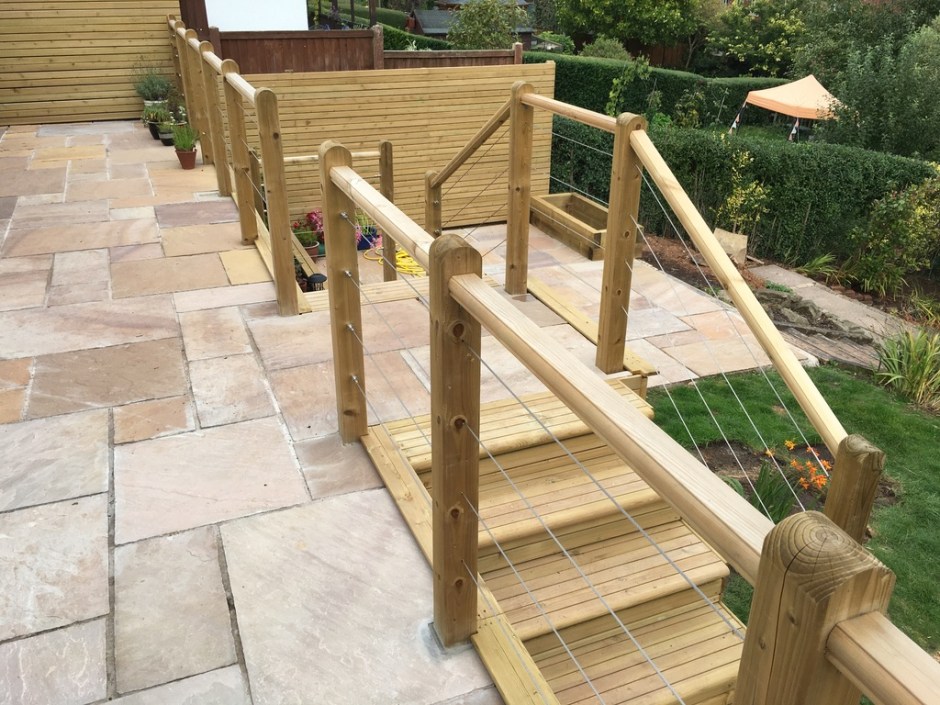
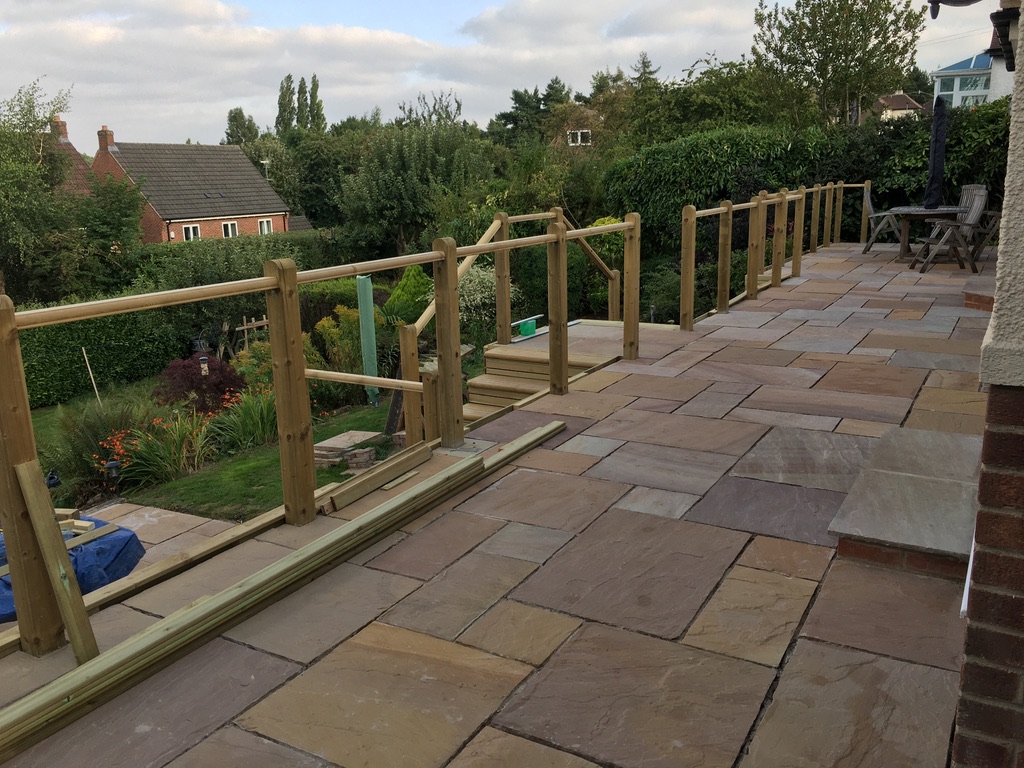
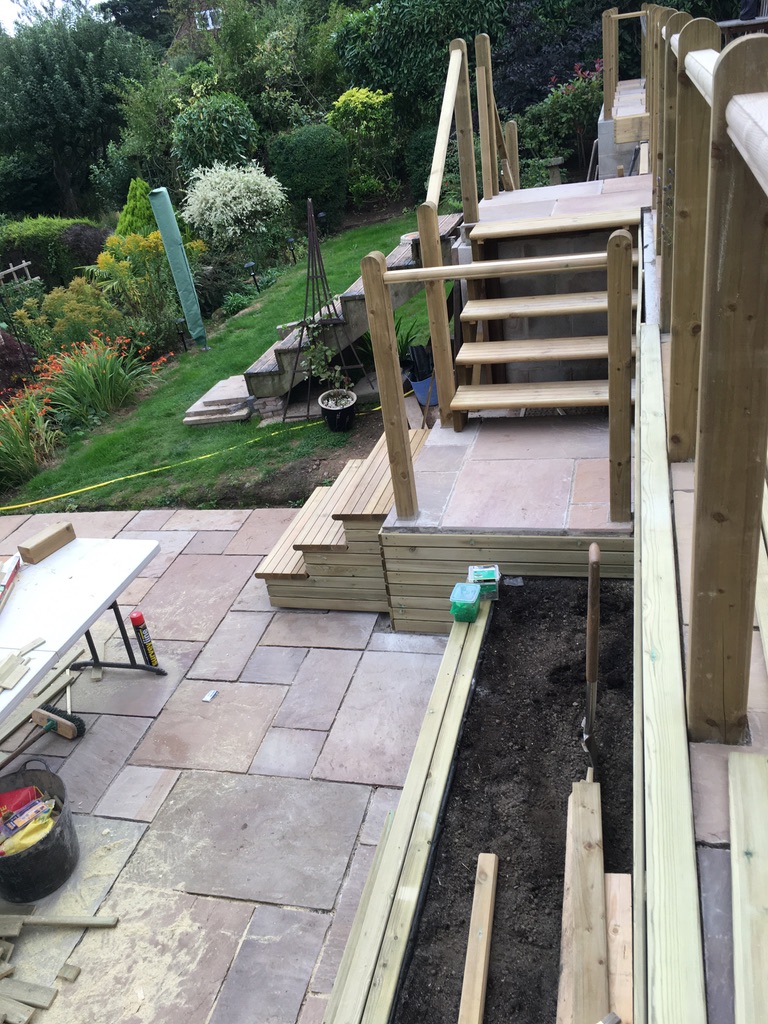
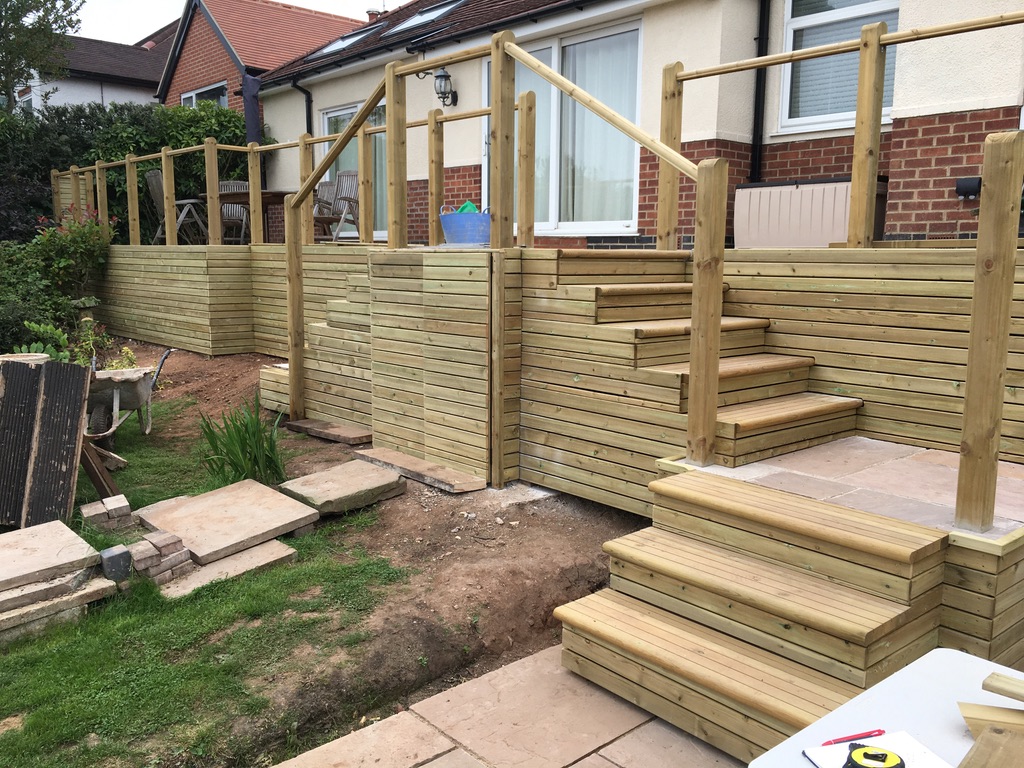
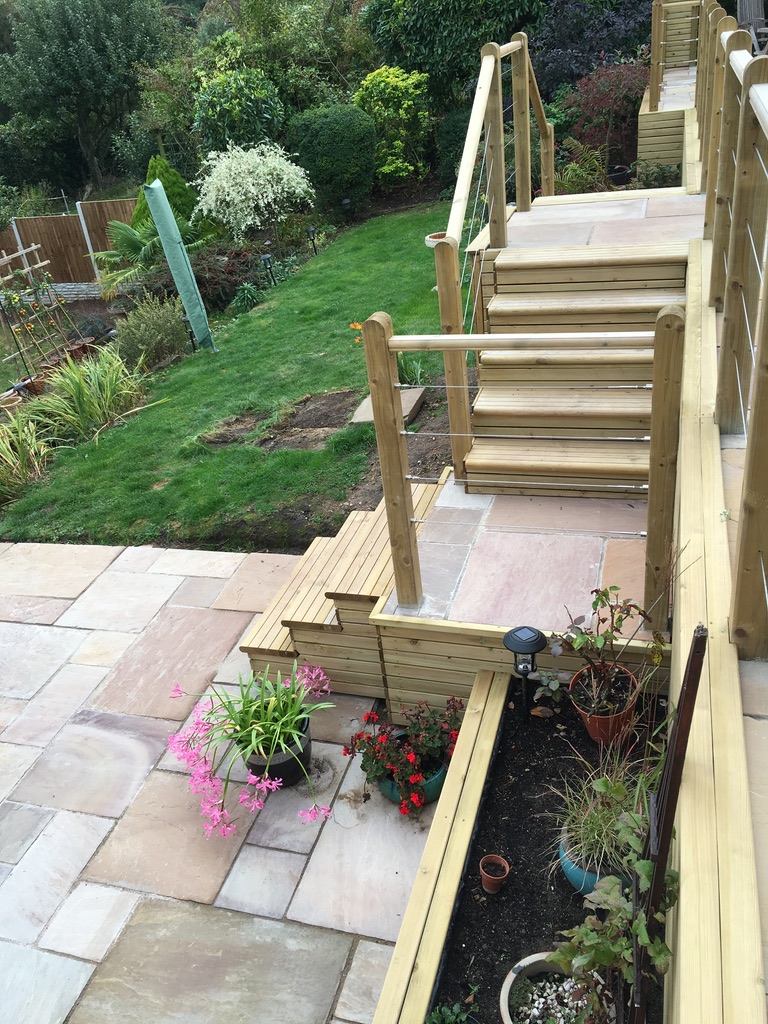
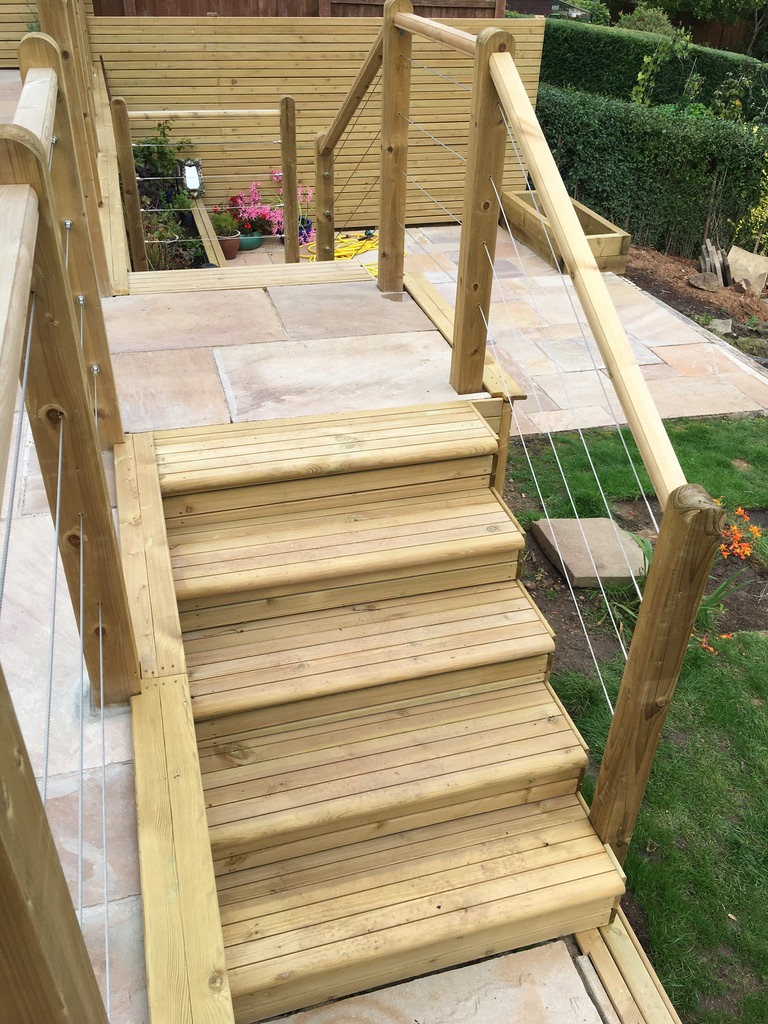
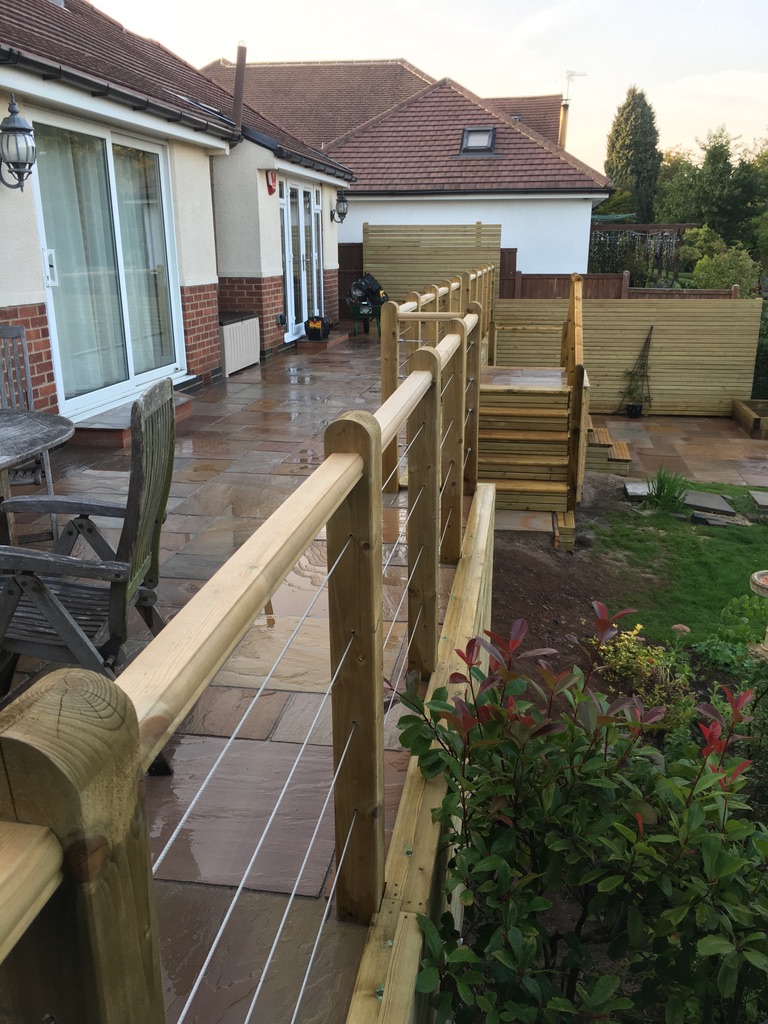
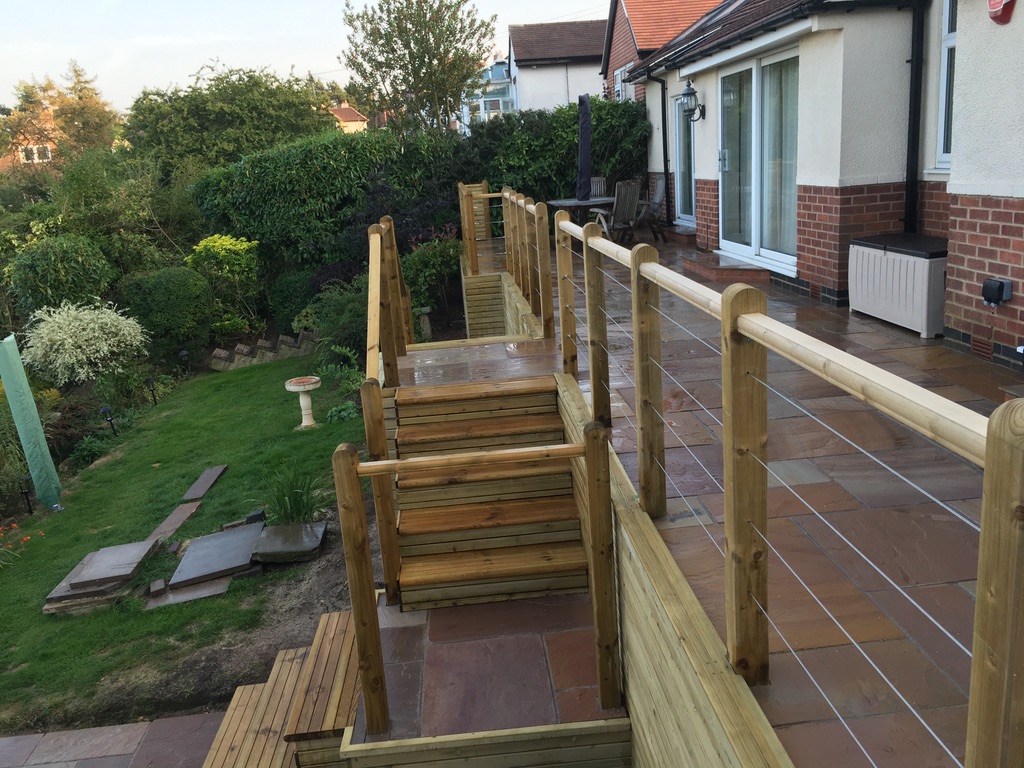
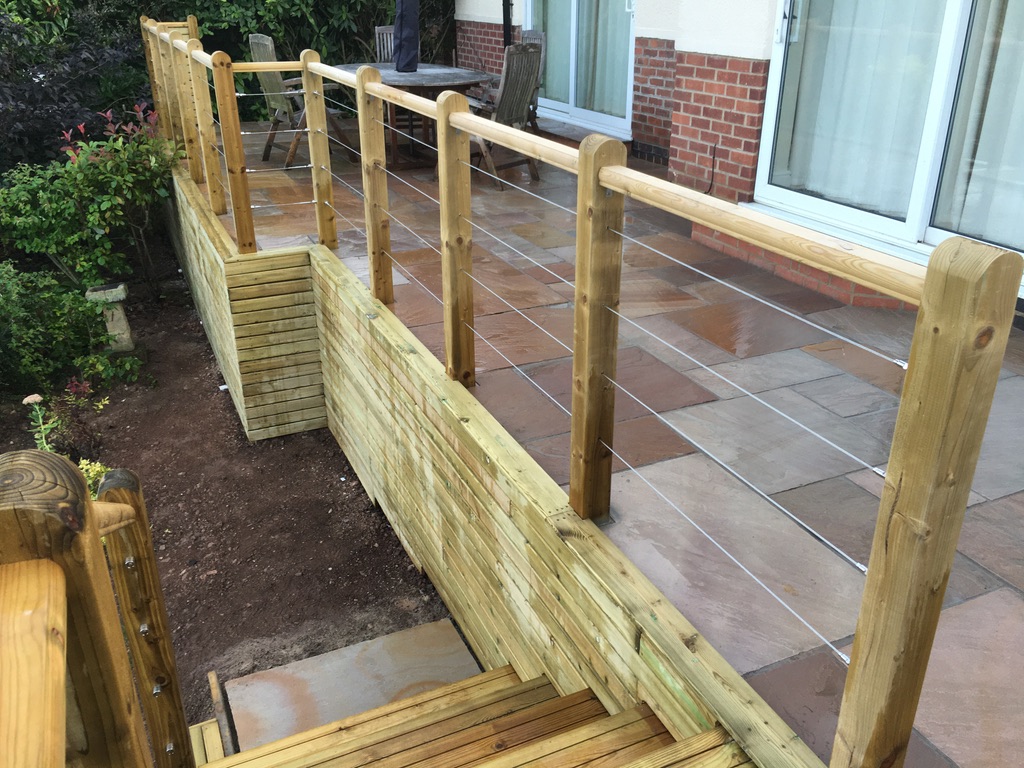
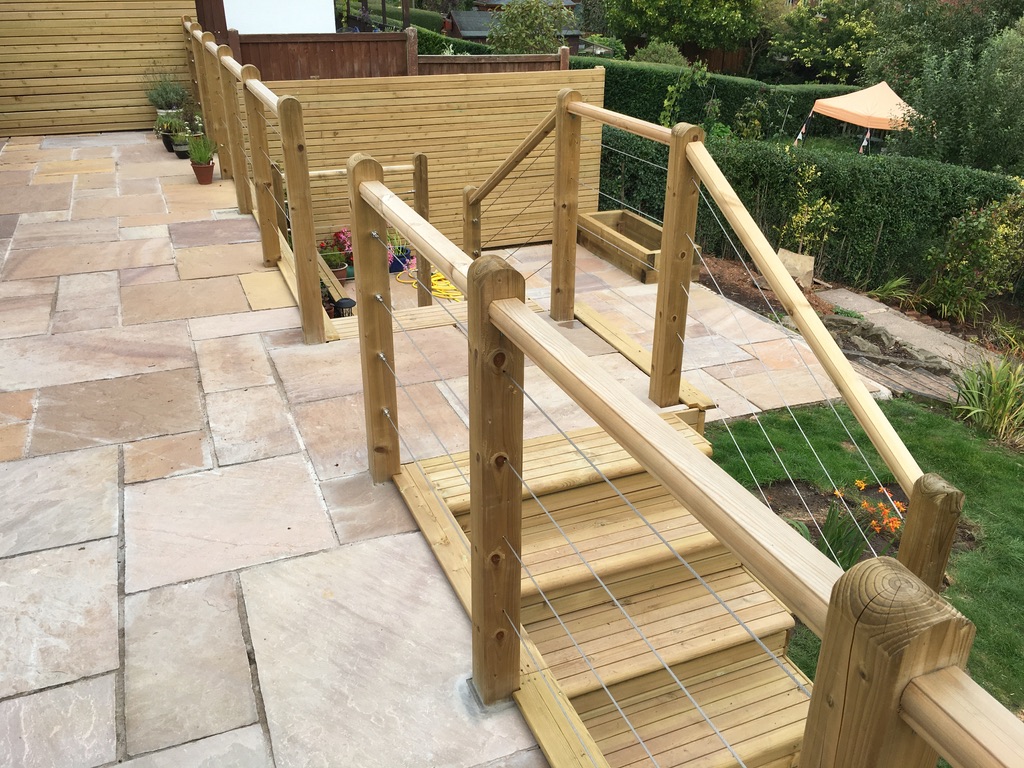
All 24 posts are now in and the handrails are connected. The steps are taking shape.
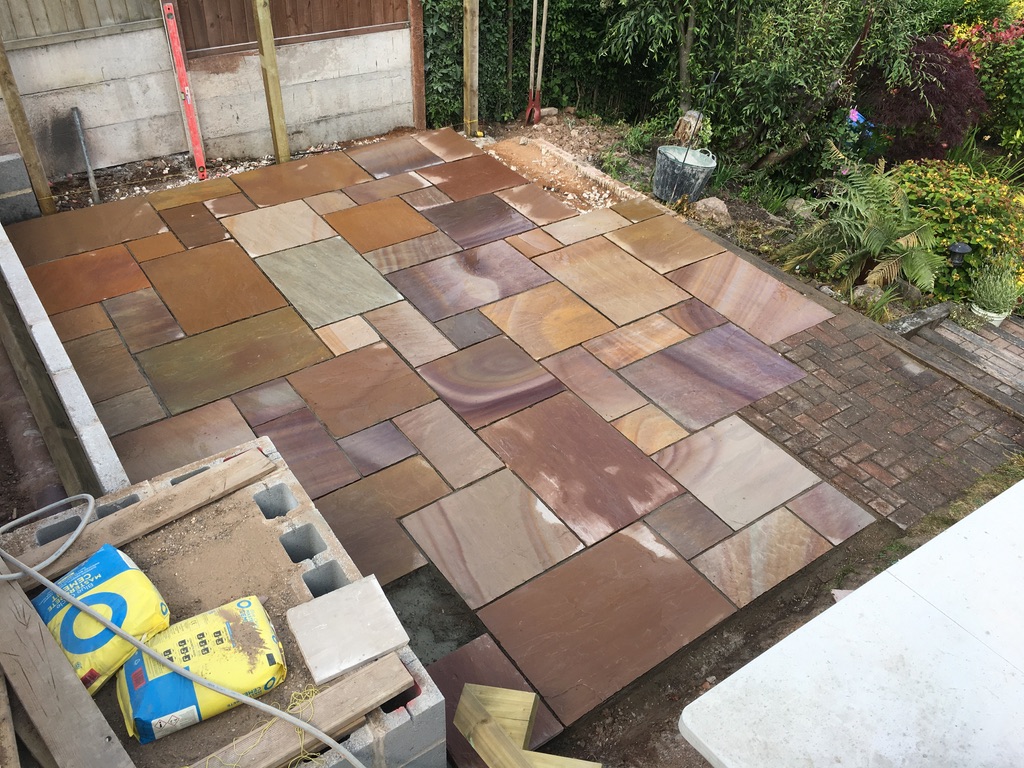
The paving is now complete on the top and bottom. The posts are in and 90% of the handrails are in, only the small sections at the ends and the step area aren’t connected yet.
The lower section steps are now in and the planting area is finished. The temporary steps are still being used to preserve the new ones.
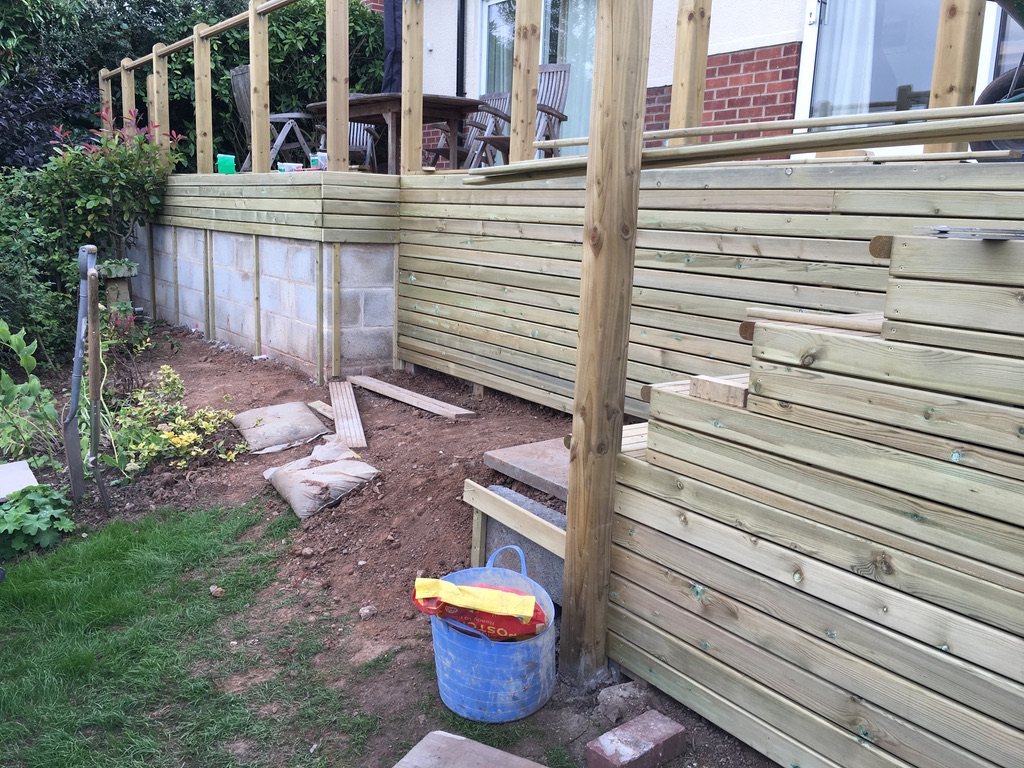
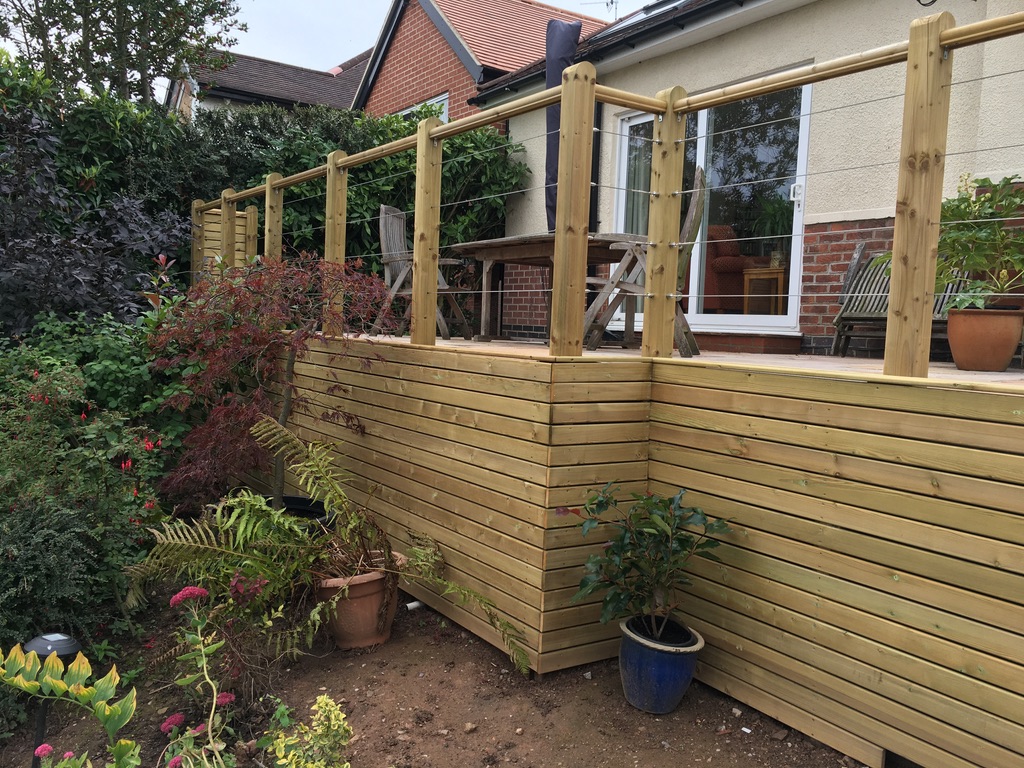
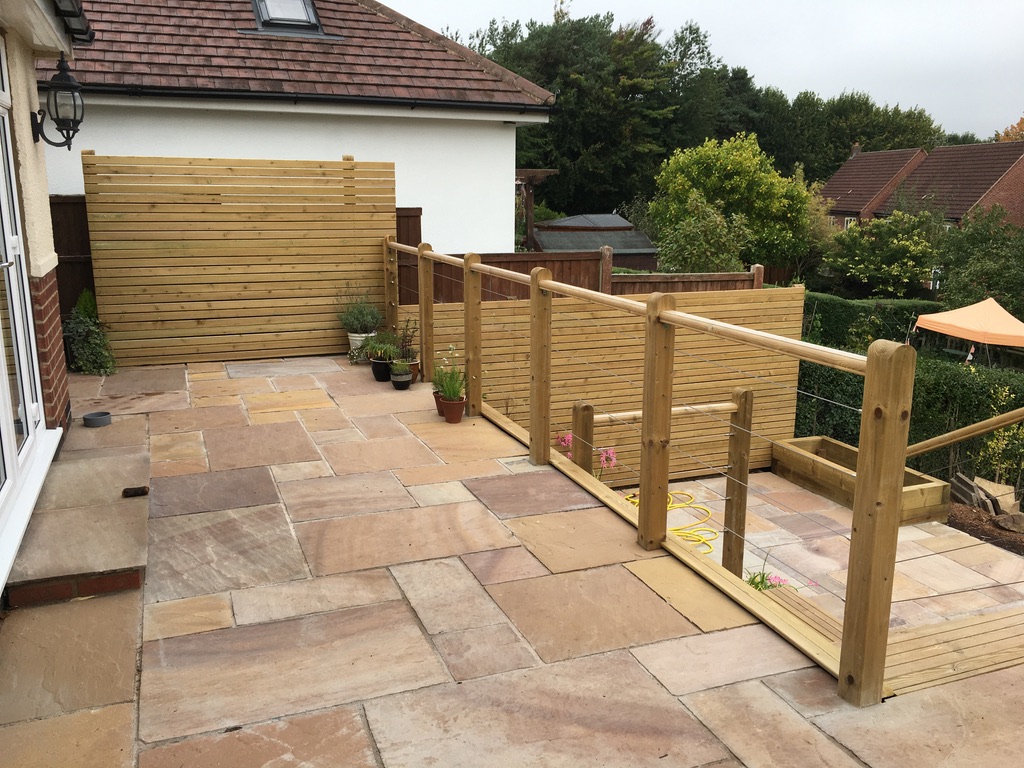
So how will the wall be finished? With high-quality made-to-order wood strips.
A special area for the drain-off water from the upper was created to run down the back of the wall and also to run under a wooden lip on the top section. Aesthetically pleasing to look at with a great intended design, to not increase damage to the wood.
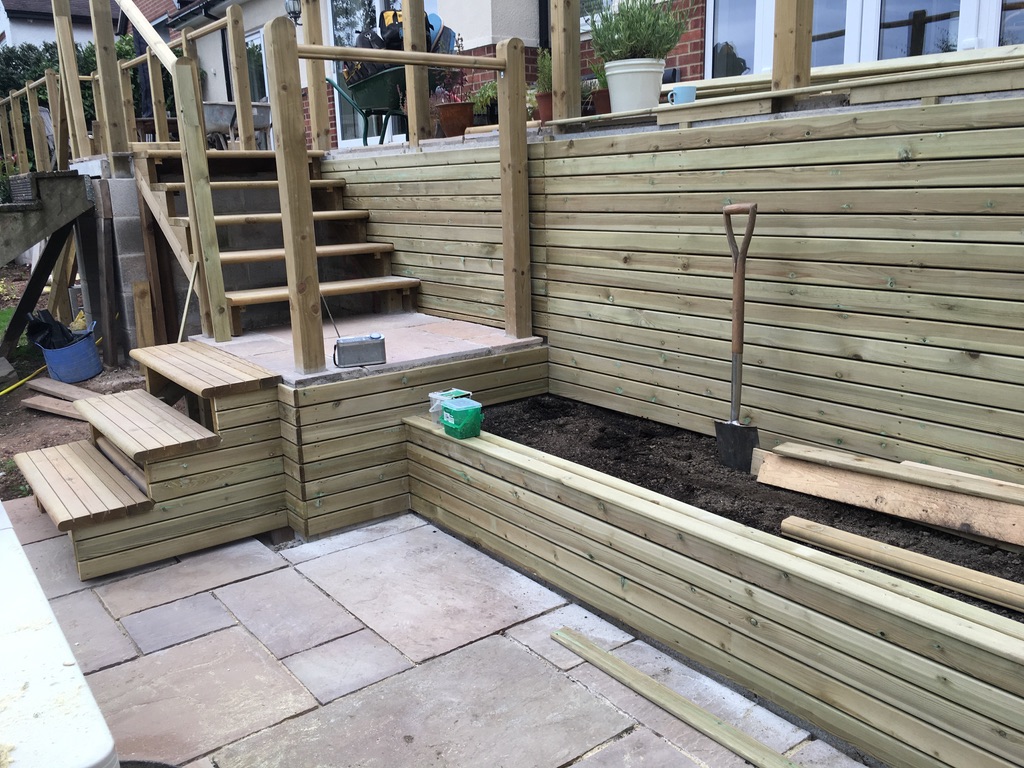
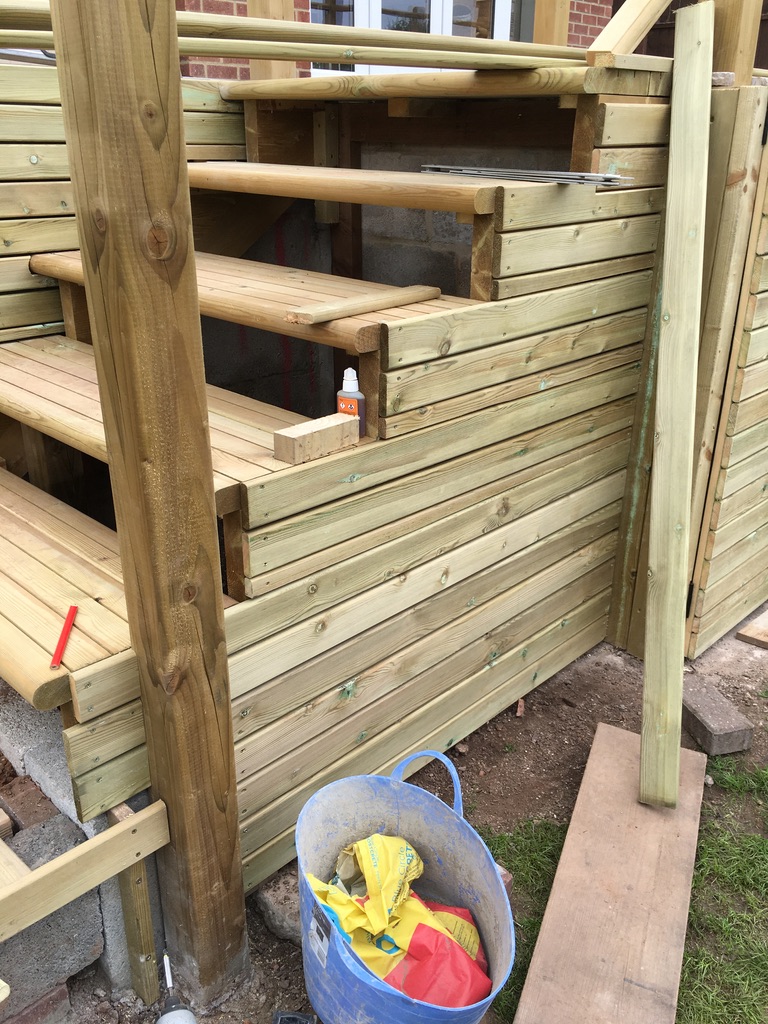
The other side of the garden is having a wooden treatment finish. The second steps are in. And the paneling has started.
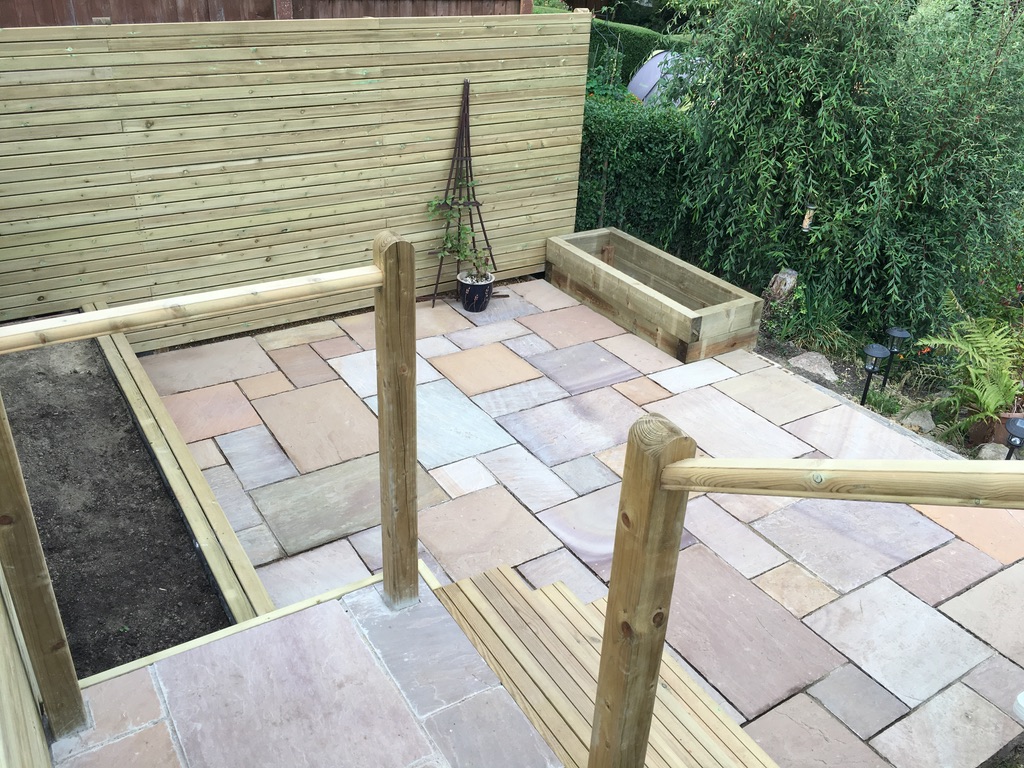
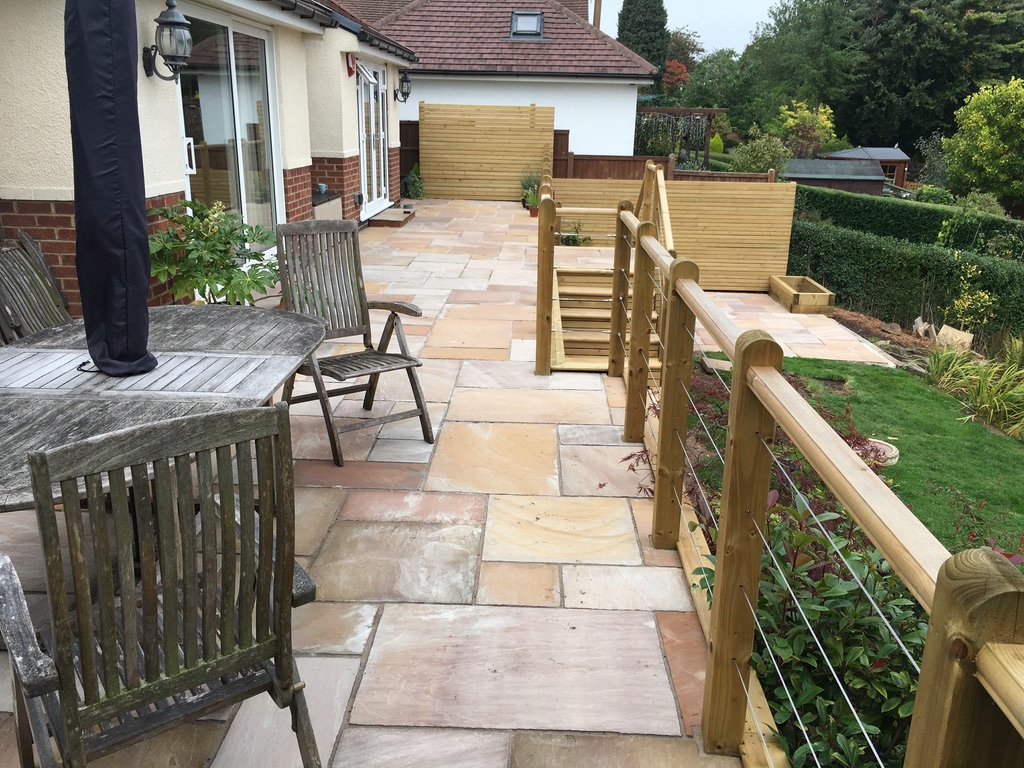
The final section of the job is now on. The under cupboard is now complete together with an outside tap. The old temporary steps are now gone. All the paneling and steps are complete.
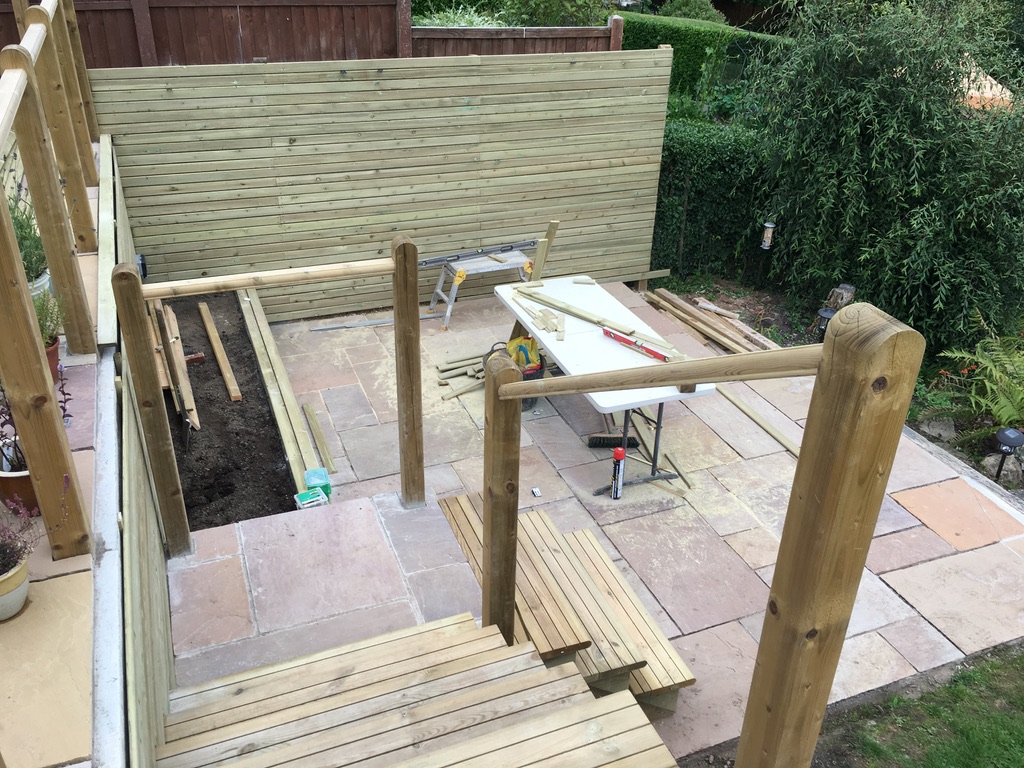
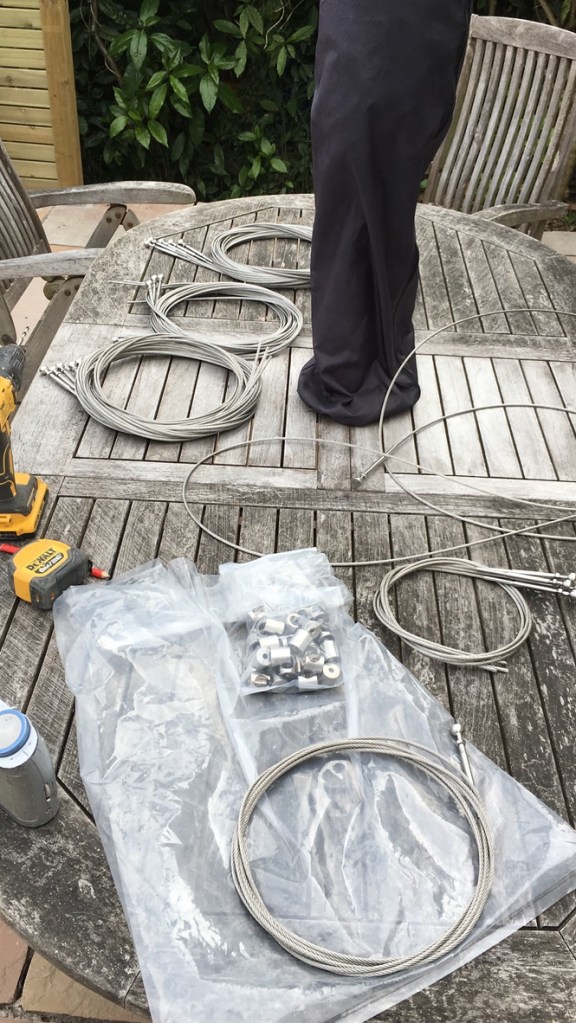
So, here’s the final phase. The wire supports. These are not cheap. On this table is c£900! But this is the best marine-type stainless steel from S3i. No room for errors when fitting this.
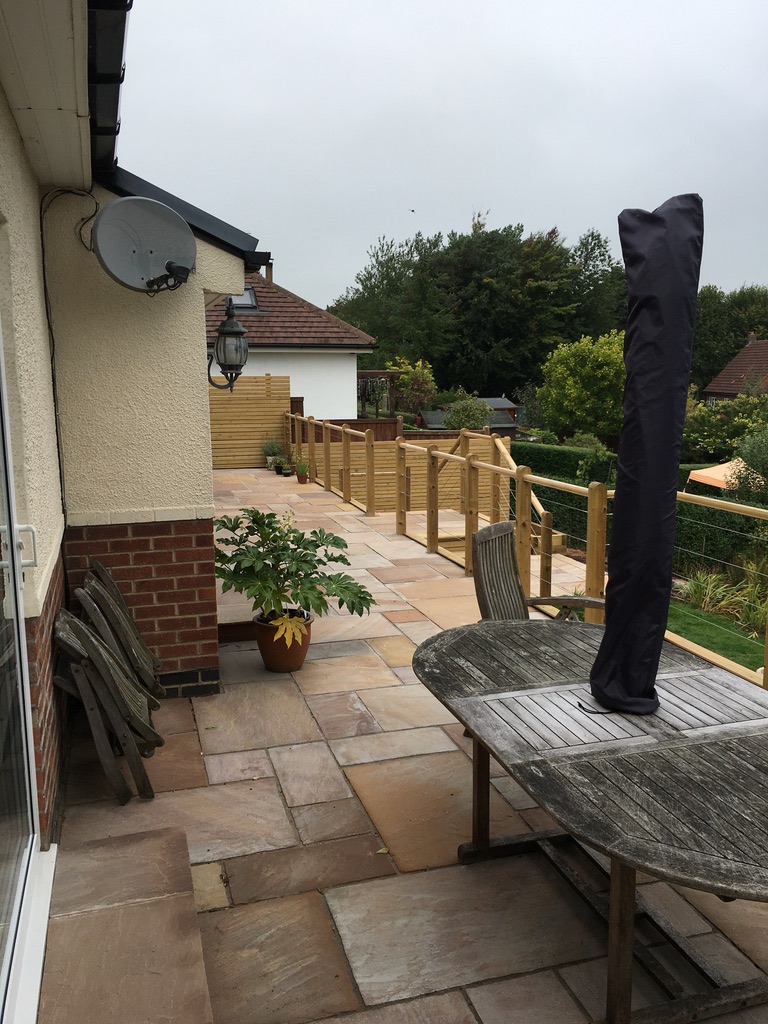
Let’s finally finish…
Before and AfterBefore and After
I hope you like the look of this job. Let me know if you want any form of landscaping. With over 21 years of being involved in the trade, any job can be undertaken.
Well, this was a straightforward ‘challenge’. A garden that needed to be suitable for family use and the important feature of needing wheelchair access to the upper section of the garden…
Now to try and sort the all-important pathway on the side. Working with a strange level and an uneven wall. The upper slabbed area was also in-line with the garage rather than the conservatory, which caused difficulties.
The lower area is now levelled and deep stoneage for drainage was added due to previous flooding of the lower areas
Now it’s about making the area smooth and usable. A final decision of block choice from the client was given and then ordered ready for the pathing.
The path is now ready to pave. The retaining area is sorted. A set of quality modern trellis is added to secure the drop from the upper paved area.Path awaiting for the final covering. Old trellis is turned and used to block the path to use the back for storage
The decision on the choice of wall finish will be completed at a later date, in the meantime, exterior paint was chosen to cover it. A trellis will be added and shrubs and planting in the lower soil area will help.
A lower garden area now exists. Seating on the lower wall area with planting behind it. Serious appreciation was utmost with the rainwater that was to flow down the path and collect in the lower back door area. Drainage and above all the direction of flow when the blocks were laid were a big consideration to prevent any flooding.
But the number one brief of the job was achieved, it must have wheelchair access from the lower garden to the upper garden and for it to have a smooth finish.
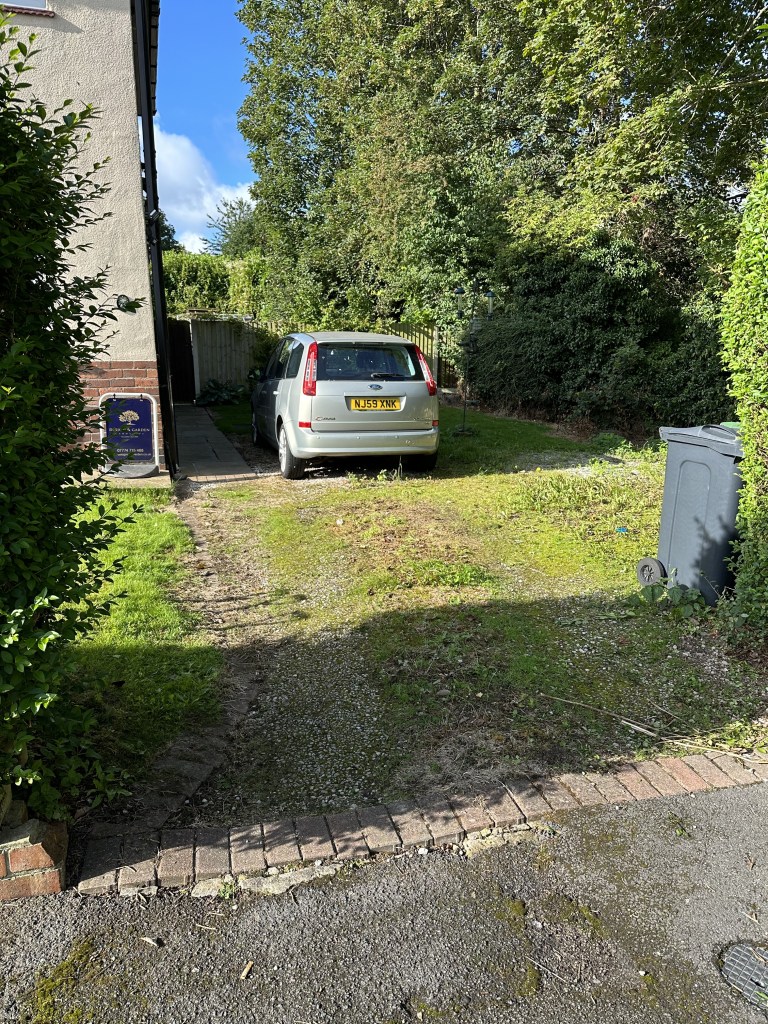
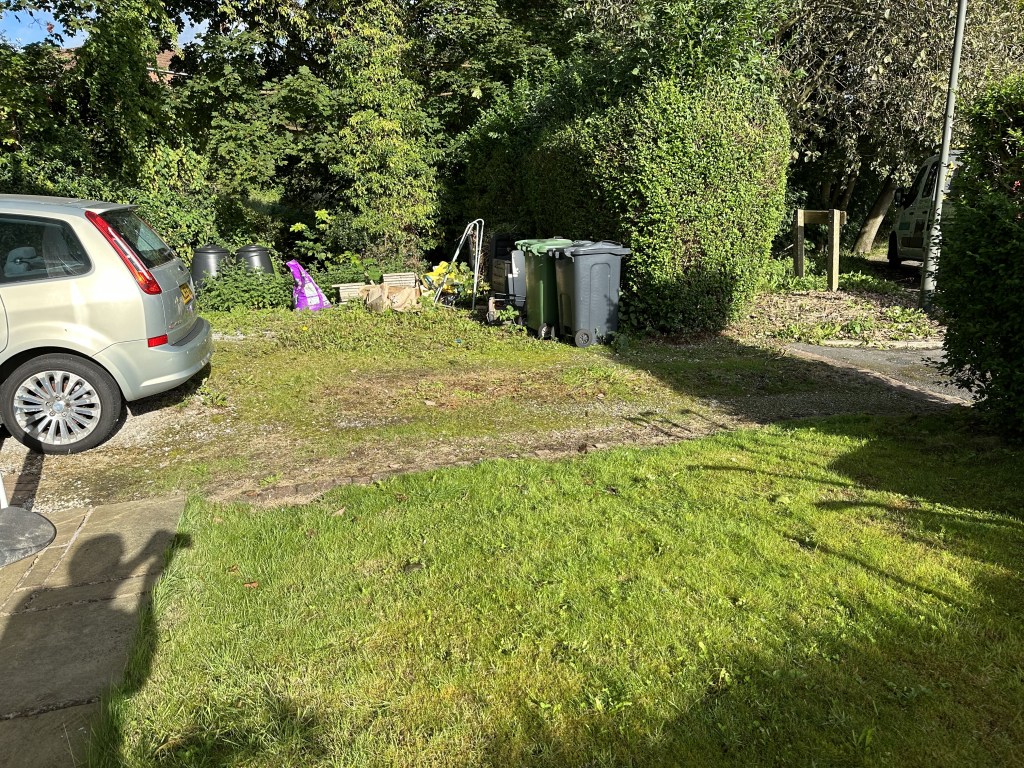
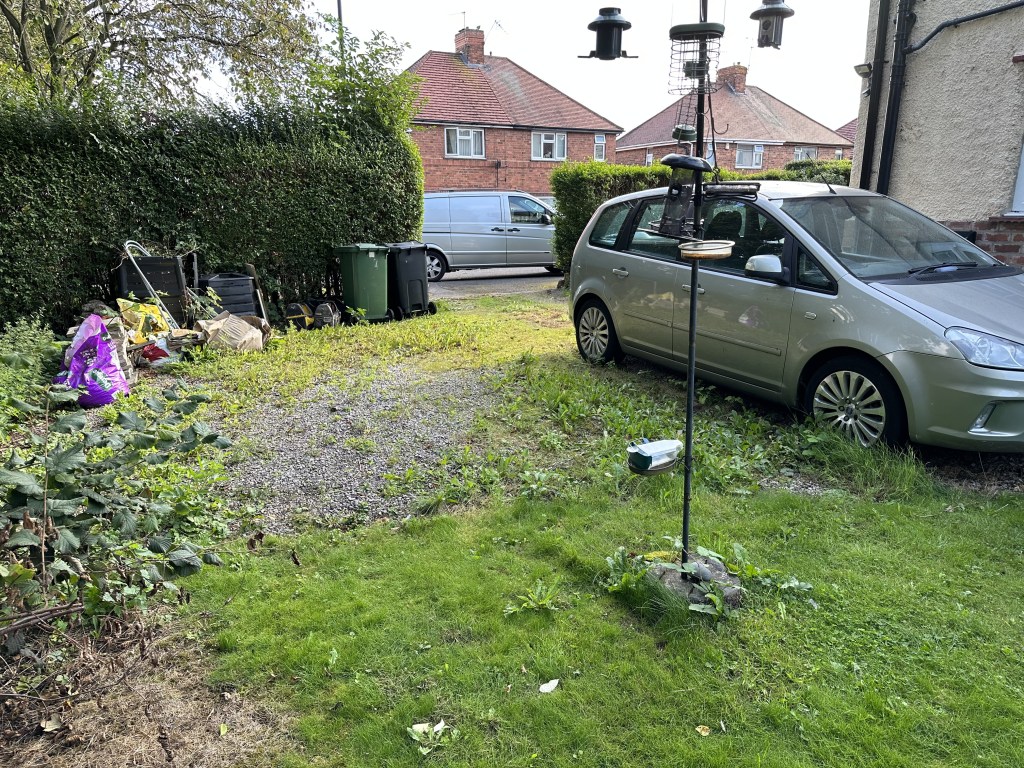
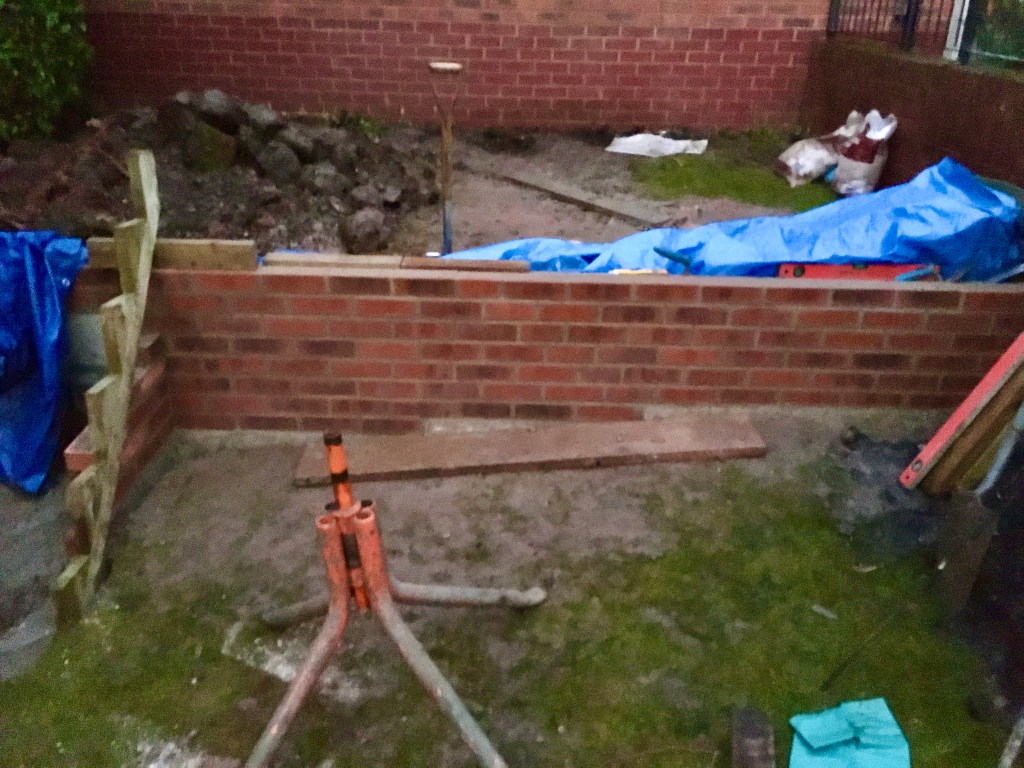
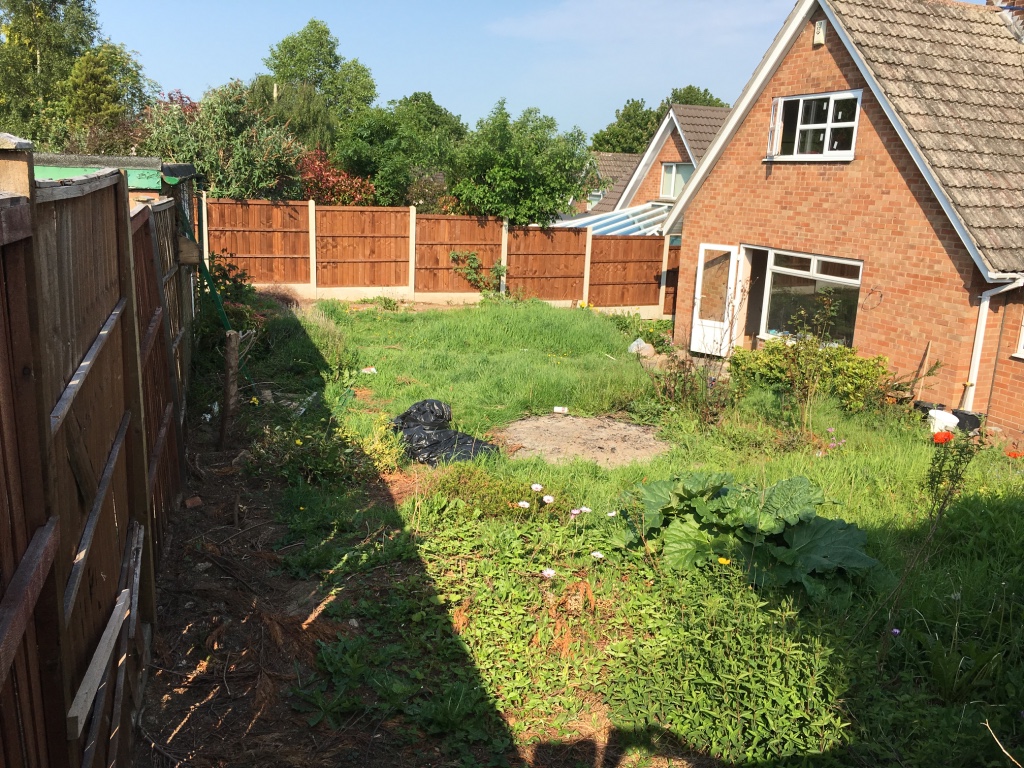
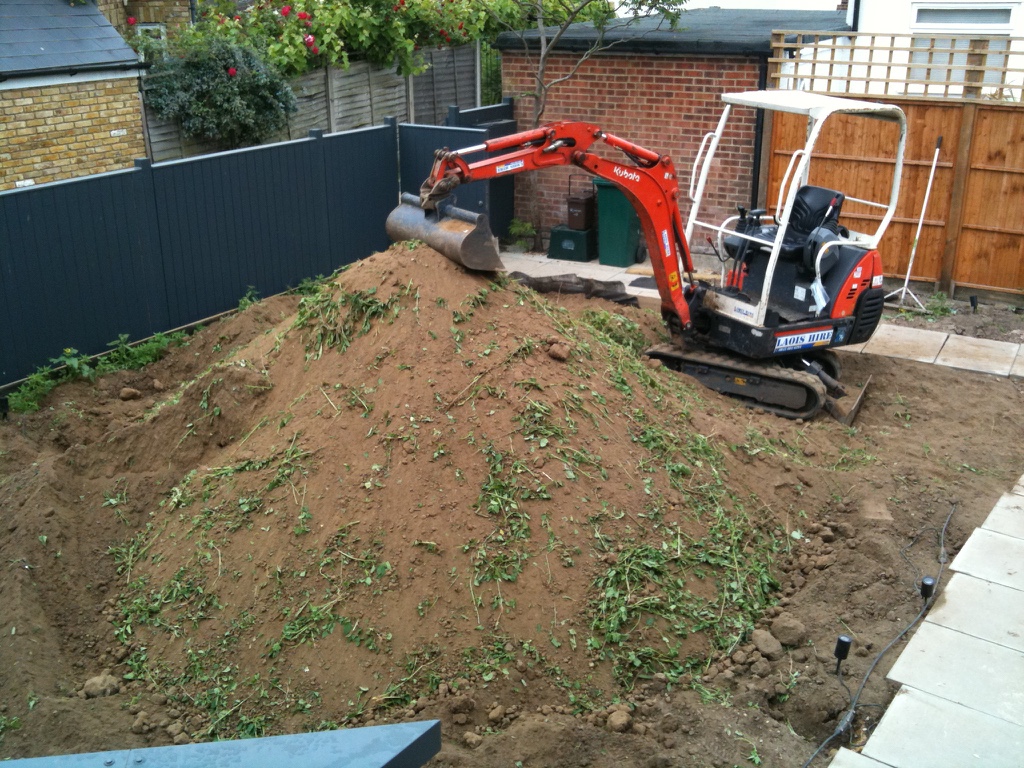
New build homes always have questionable gardens. Whether that is in size and levels or the incredibly poor grounds they’re left with. So a change was required but how to sort out such an awkward size and space…
What do you do with it?
Poor lawn, Poor soil, Poor view. The first job let’s remove the landscape poles, shouldn’t be so tricky… can you believe these were buried a metre deep and then concreted in! Why? The clay behind wasn’t moving and basically, all these posts do are rot at the touching point of the soil anyway. So that was the first day sorted together with extending the wall further forward to cater for it.
So, the footings are finally in and the progress on building a wall starts.
The general design is a small retaining wall to create a level area to build decking with a pergola for privacy from overlooking neighbours.
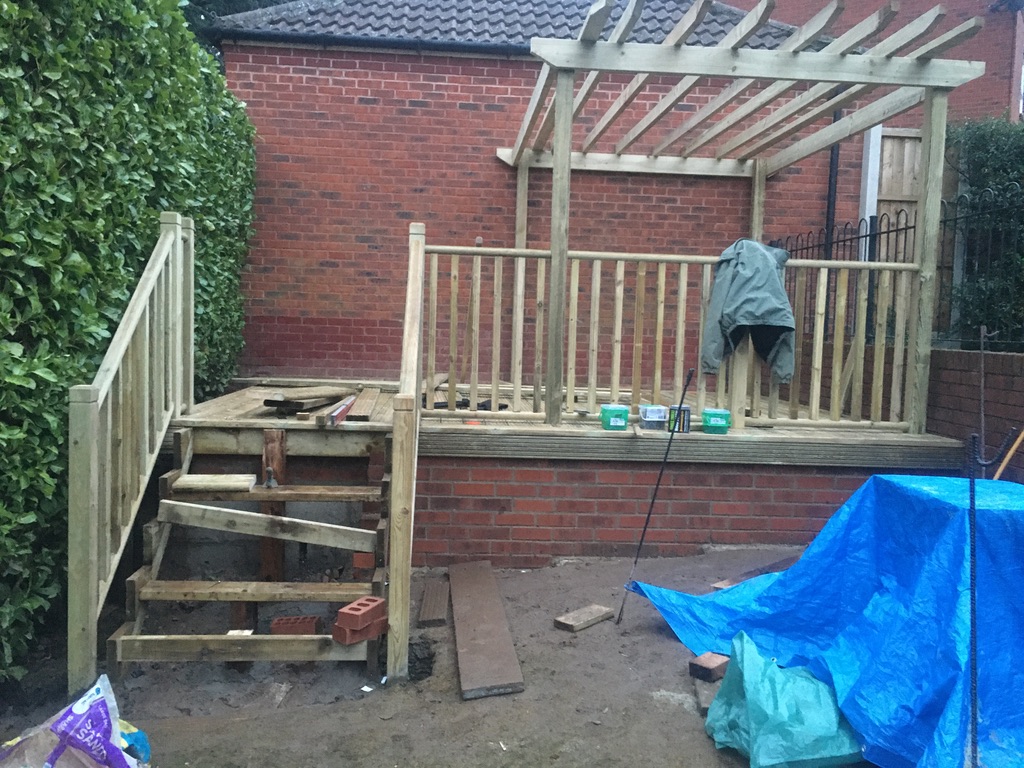
Despite the weather being cruel, work carried on and then the decking frame and pergola begins…
Using the wall to support the frame at the front, pergola frame-up. The next move is the steps and boarding.
The handrail and posts are in. Steps are aligned and ready to complete, leaving this till the last job due to the mud below. Then measuring and fastening the top rails on the pergola.
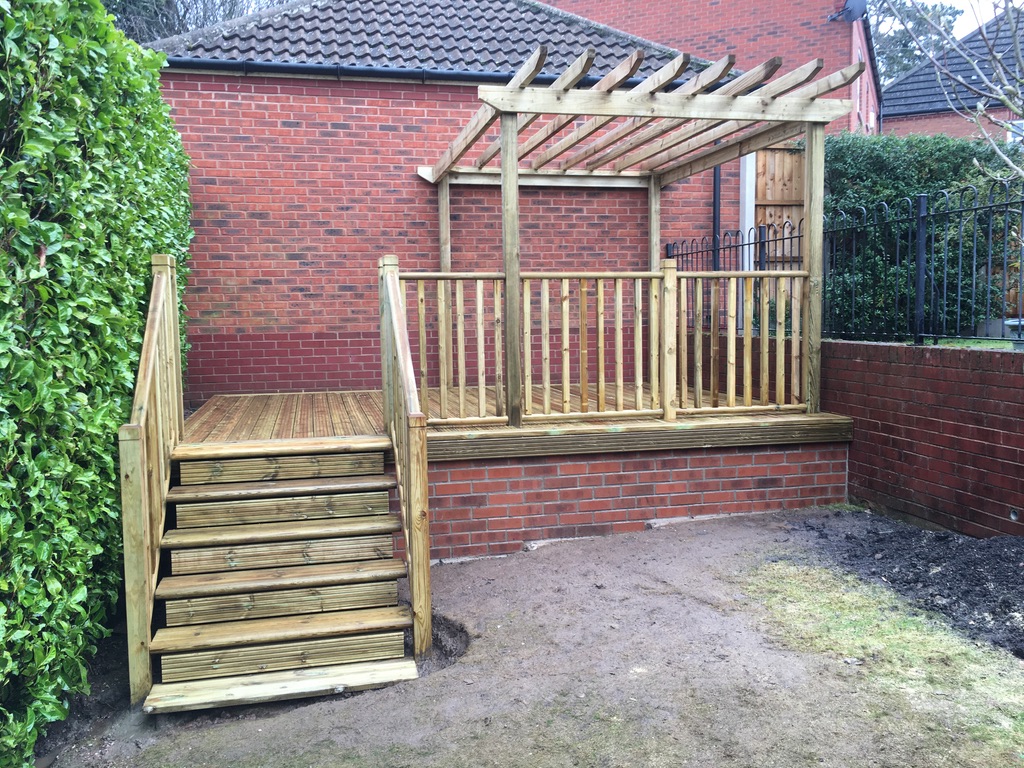
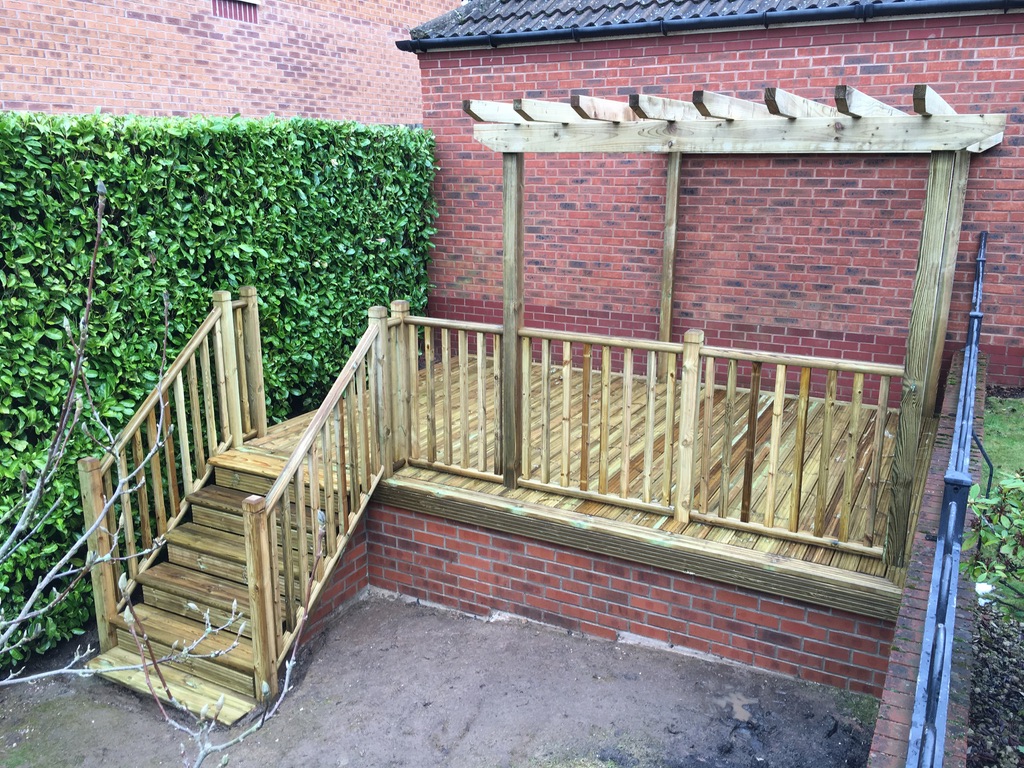
Finished. A temporary step is used for the bottom step until phase 2 is completed later on.
Ok, so now let’s sort the lower section, phase2. This was difficult due to the crazy level it held, the chronic soil condition, and being damp most of the time.
So a pathway is required to get to the new deck area from the steps (pictured right) which is the only access to the lower garden. Also as the garden goes lower that needs a path to the shed.
The lower section of the garden gets very wet with fairly poor soil.
A design was created that made the area usable & functional but looked modern and in keeping with the client’s wishes.
Also, the area had to have a large percentage of soil removed which meant taking it slowly up the steps to a skip at the front of the house, time-consuming but worth the effort. The other main feature is with the garden being on a slope the rainwater that’s been used to flowing naturally will be altered and that needs taking into consideration so the new works don’t get flooded or the neighbours’ gardens aren’t damaged from the change.
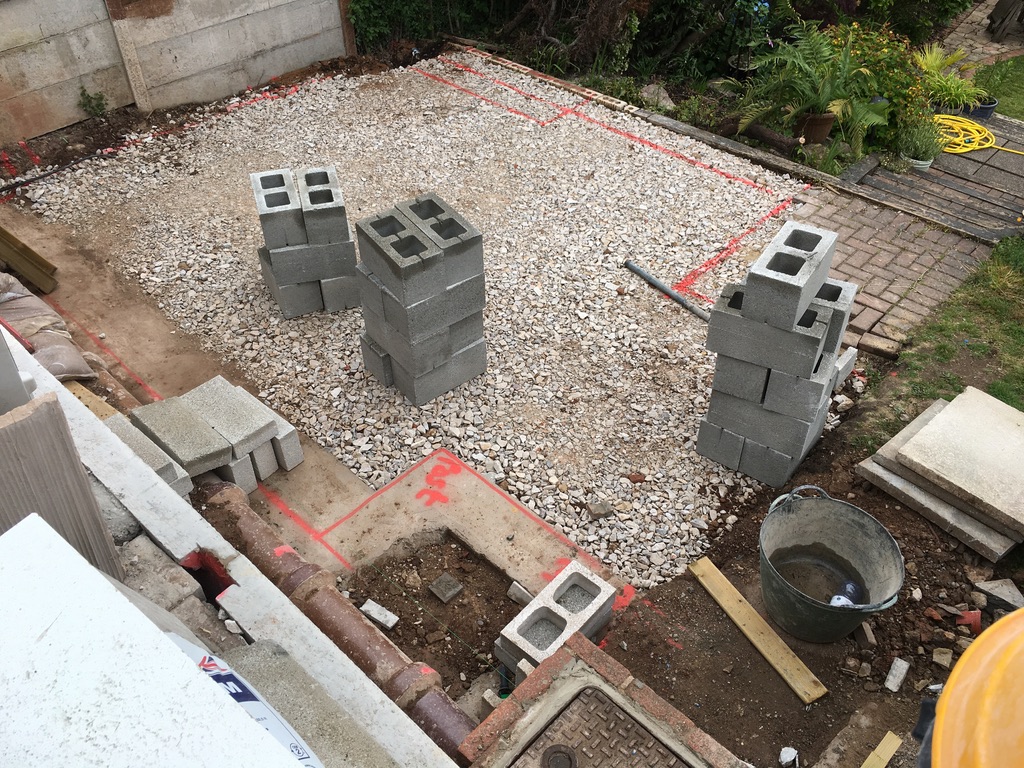
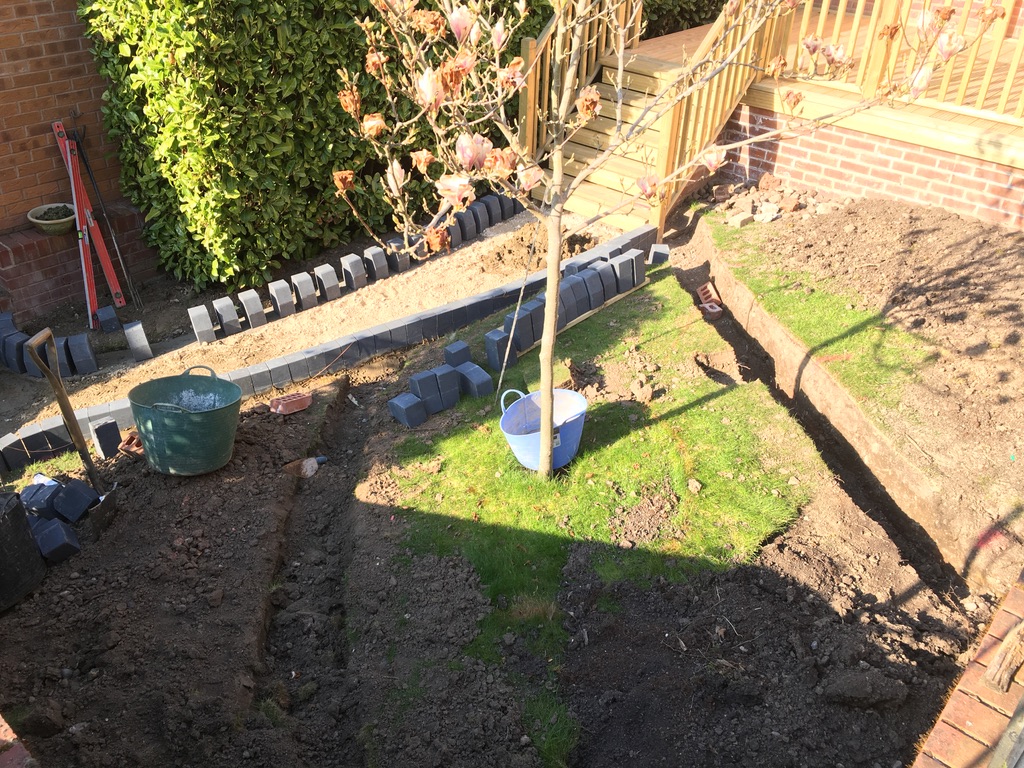
Two trench lines are dug ready for concrete footings and drainage is added. These are to create the levels that will become the planting areas.
Edges are formed to retain the soil and define the path. Water is filtered into the hedge by a hidden drain under the path from the upper area together with sections that lead the water to the Rose by the steps and then to newly created planting areas. The remaining water filters over the path to lower sections.
–––––––––––––––––––––––––––––––––––––––––––
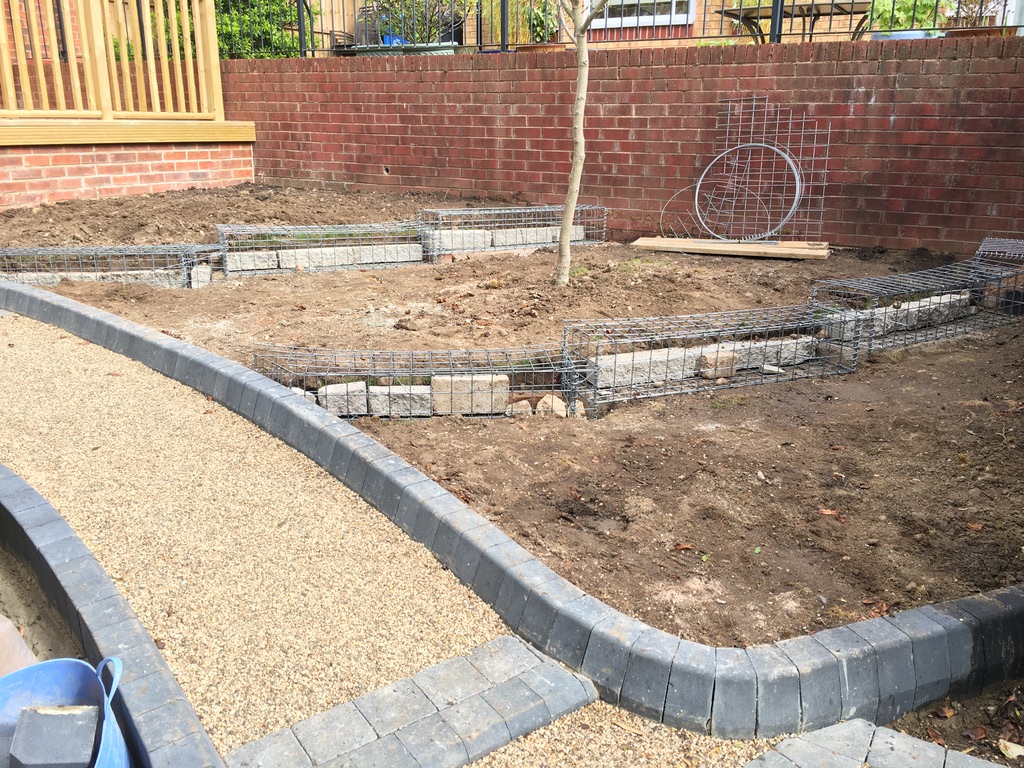
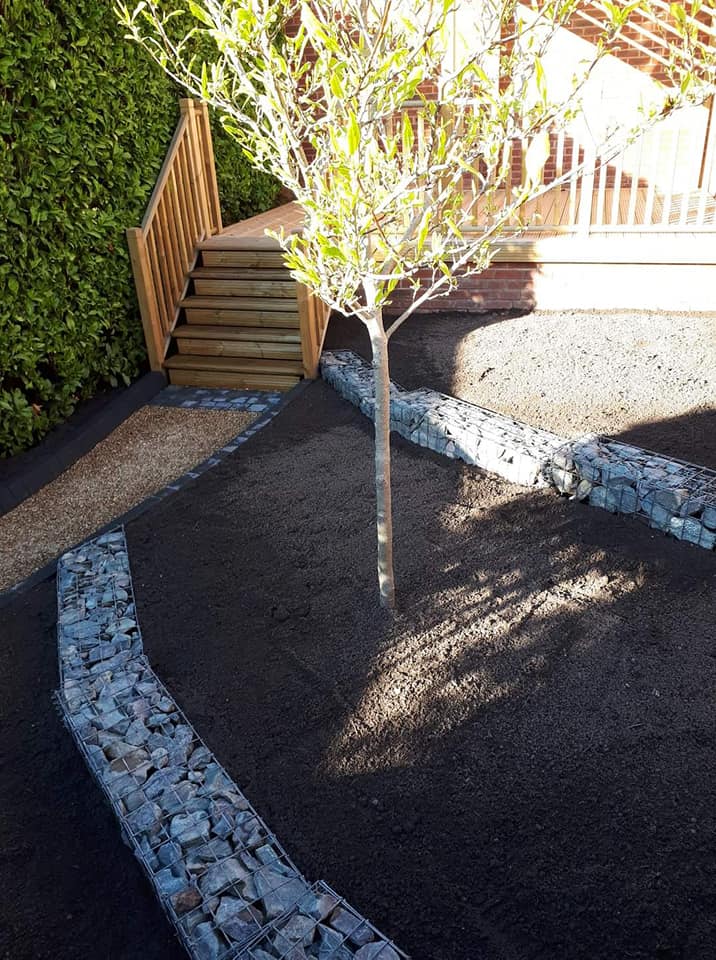
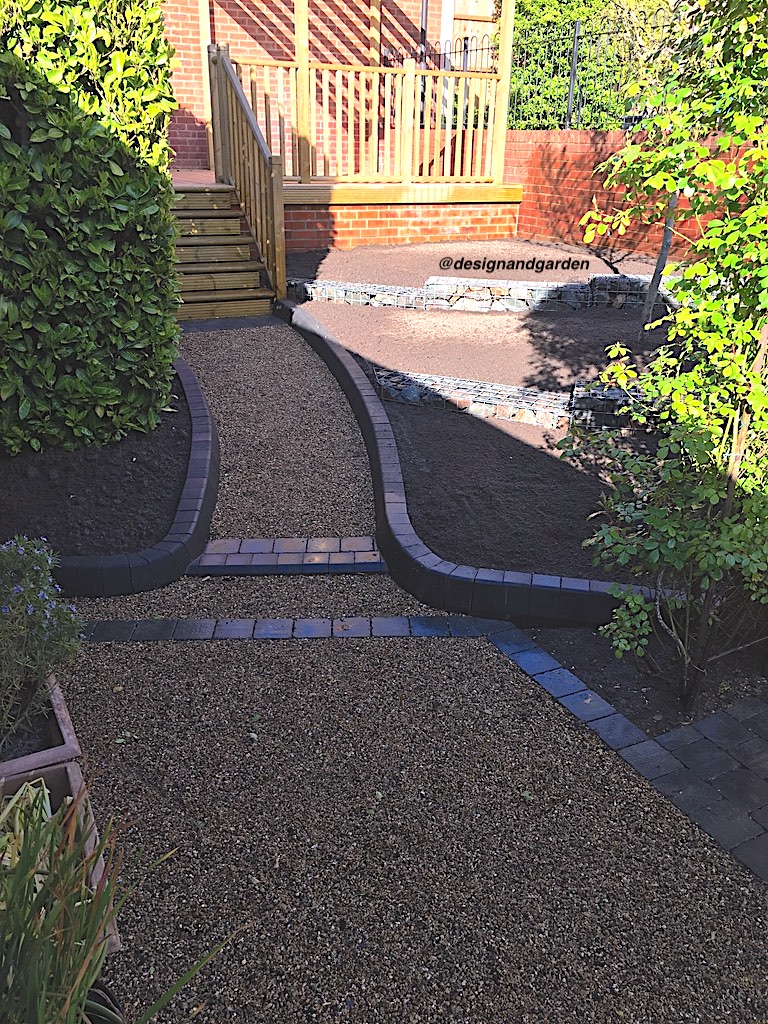
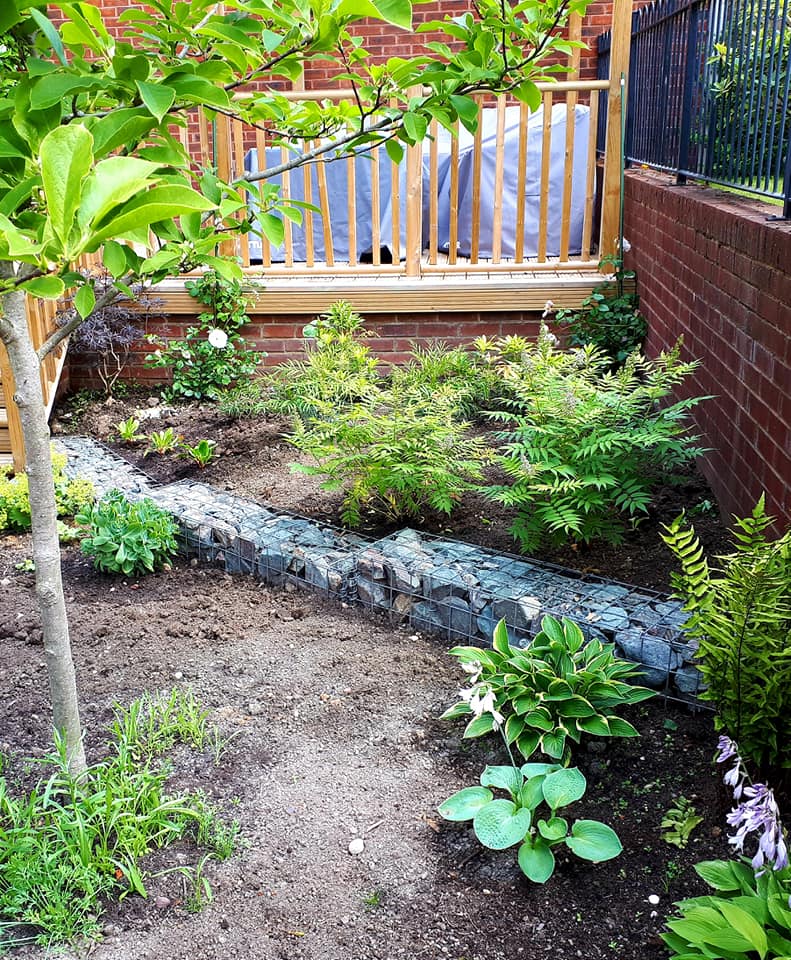
The old lawn area has now been rotovated and the next addition is being added. The use of Stone Cages, Gabions as they’re known, were used for a couple of reasons, one for the water issue and the second a preference by the client from a few choices offered.
Using the Gabions helps the ‘Levels Problem’, where the land level altered from side to side and front to back. All the soil has been turned, lawned removed and the worst of the soil removed.
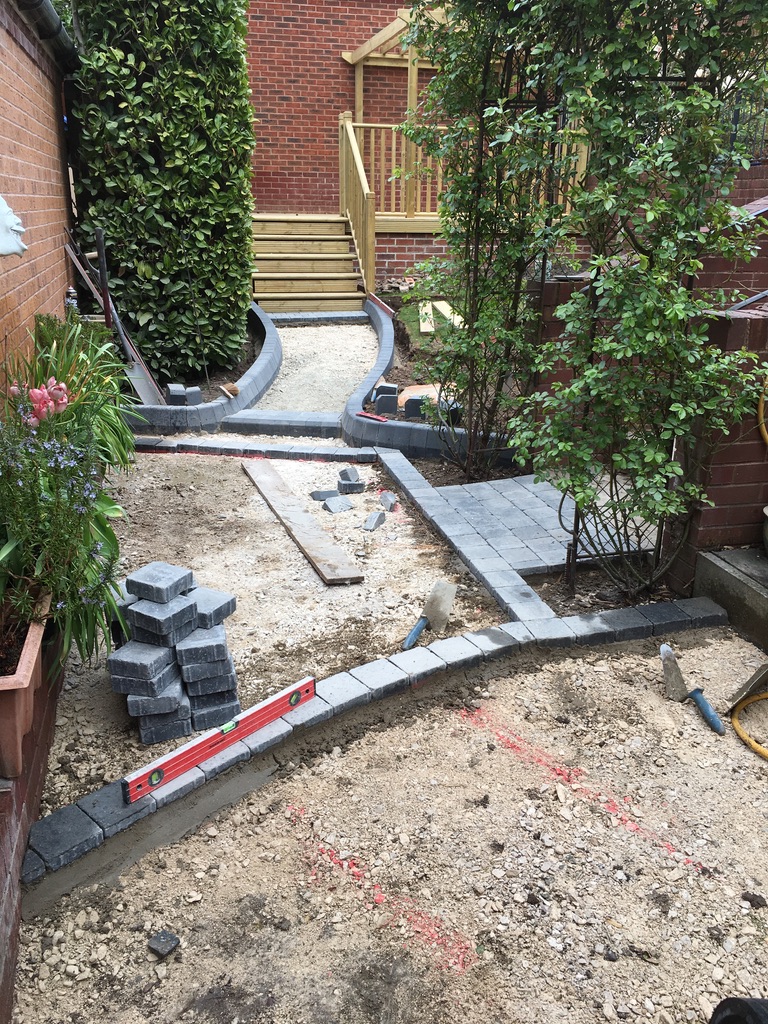
As the job is coming to a close the final touches are added. The pathway is a special concrete stone finish and the blocks are Bradstone. The Gabions are cut to size and fastened down to the concrete footings.
Stones are added, a high grade granite slate format. 4 tons of fresh top soil is added.
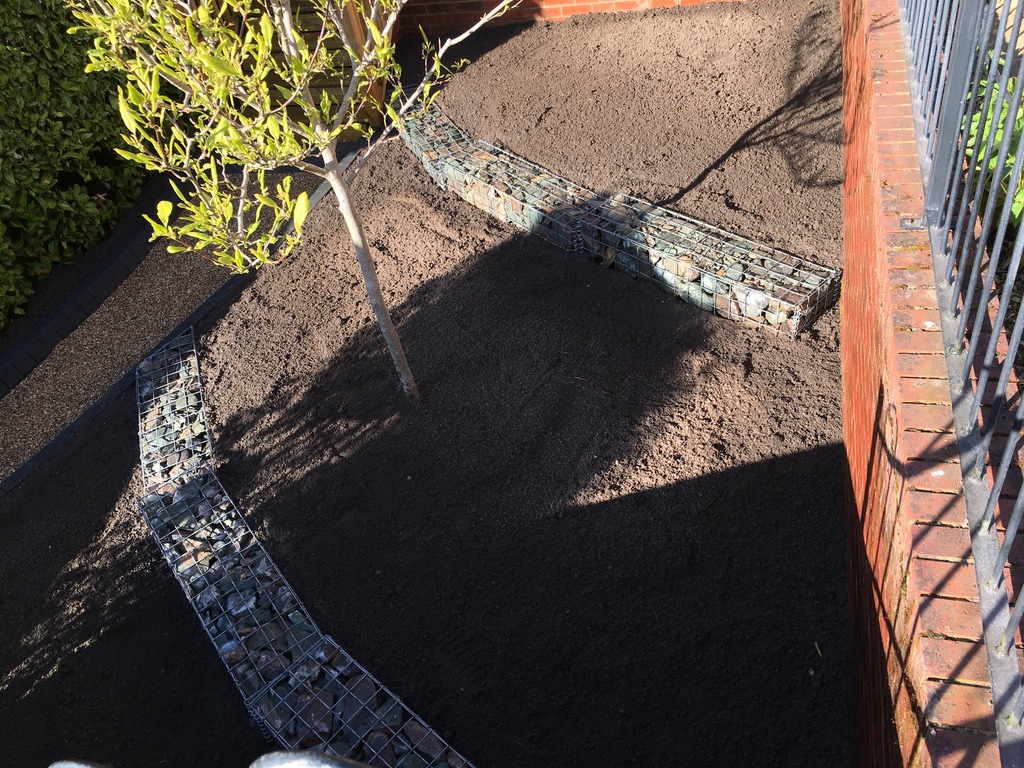
The bottom of the main stepsThe lower section of the garden, pathway to the shed and addtional planting area.
Getting there… the lower section coming to a finish.
THE FINISHED LOOK!
And here’s the finished look. No water issues, no weeding on the pathways, and now simply ready to plant and enjoy!
A picture was sent by the owner showing how plants are now being added…
–––––––––––––––––––––––––––––––––
Please get in touch if you want any Landscape works from a trusted landscaper of almost 20 years. With vision and attention to detail as a given!
Working with Property Developers is something that I’ve done for many years. This requires a different skill set for what is required and the budget is always a different decision to a developer, concentrating on different needs that builds a stunning garden yet not adding too much unnecessary ‘cost’ is the aim.
So onto the main works, aiming on creating a front lawn, that a new buyer to the house could create additional parking or make a planted area to suit. Making a design that keeps options open for the new buyer, this can help in selling the house.
Most of the plants were moved and re-used…
…filling the outer borders
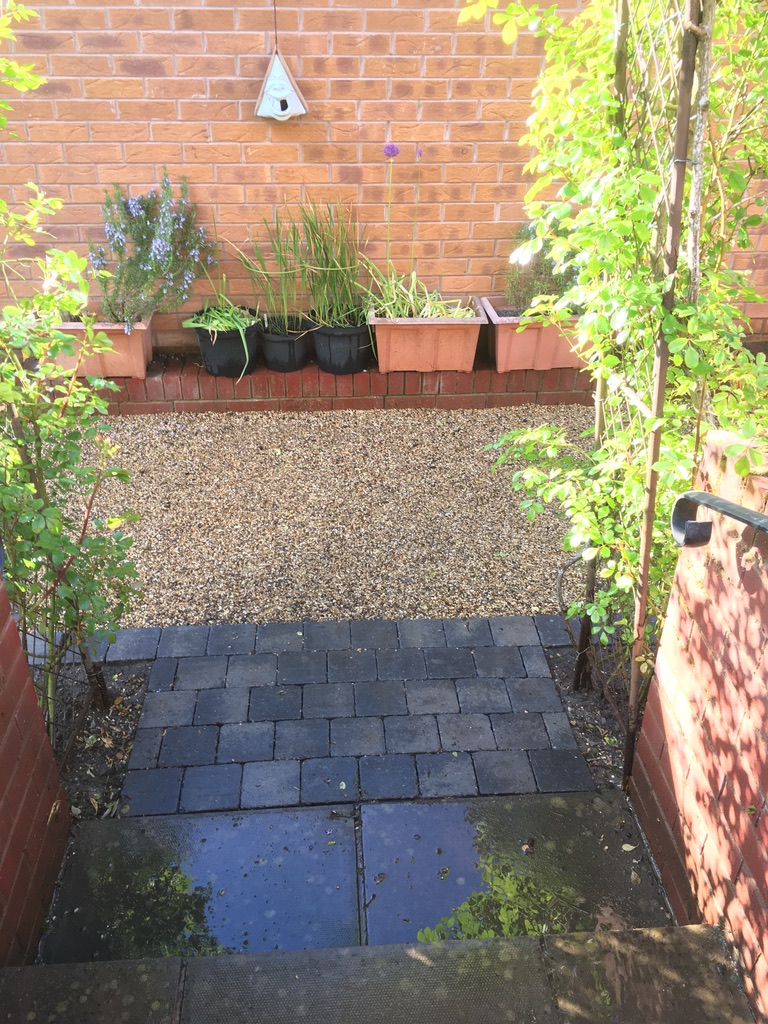
The front garden path, advised to be removed
Here’s the front Garden before the works began… the dated path through the front garden was removed to concentrate on one direct entrance to the front door. Thus creating privacy for the front windows and an element of safety… let’s be honest, it was only the postman that used it.
So when the rear garden needed the refresh, then a lot more digging and designing was required.
The brief was of course to work to a budget but to create a garden that had the look and feel that suited the house.
The bit where everything becomes a mess!
THE DIGGER IS IN AND 100’s OF TONS OF EARTH ARE MOVED AND SCULPTURE… LANDSCAPING AT IT’S FINEST!
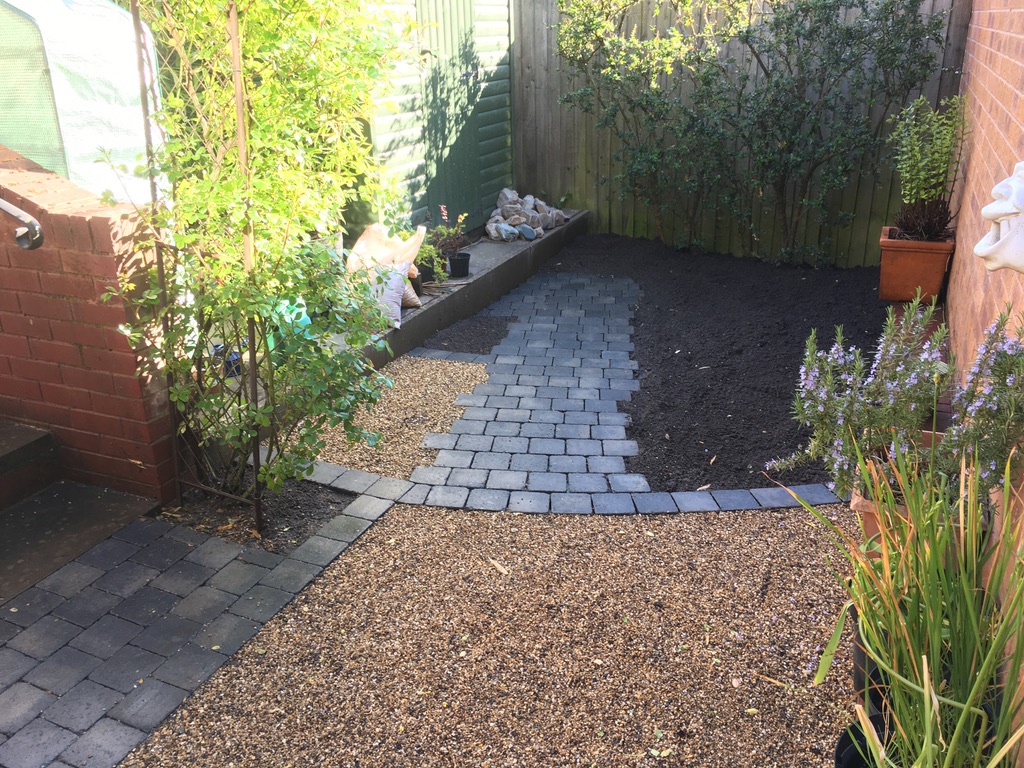
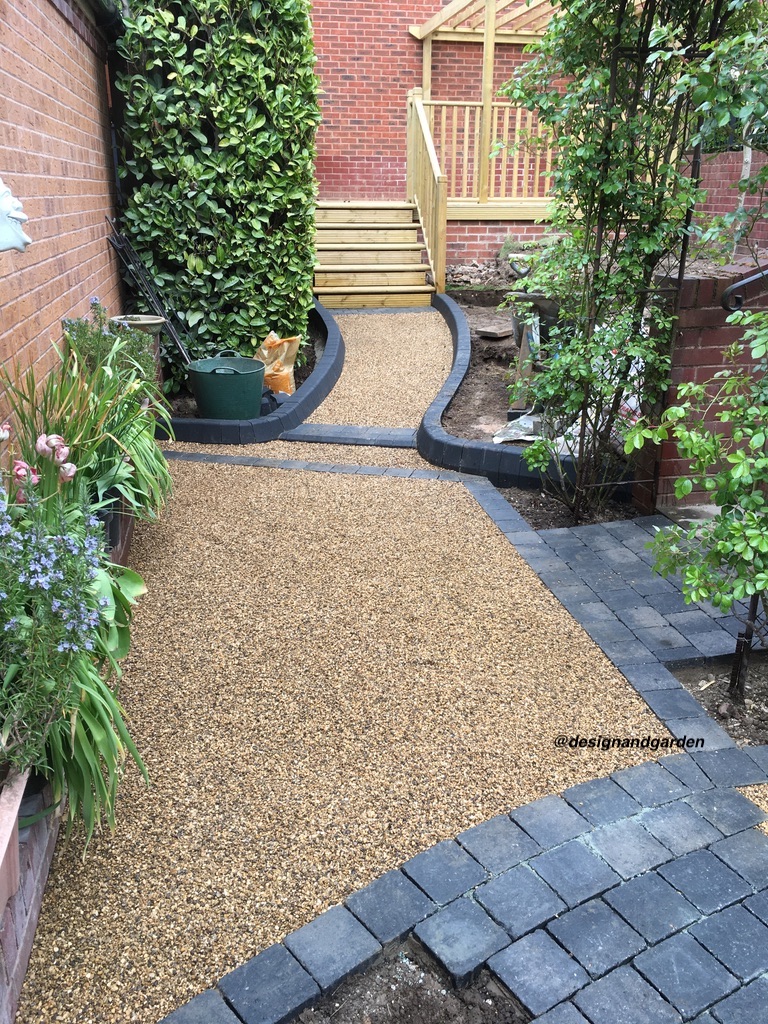
Now for the design to take form… path down from the garage to the lower patio. Wooden Sleepers were chosen over brick for speed and cost. Although these were laid on concrete footings and supported with back supports and anchor points. Water & drainage were of course taken into account.
The outline of the path and patio area are created… tracking the land flat ready for top soil and turf
So the final push to the end is in sight…
New drain for the toilets…
All finished
So the main steps from the lower ground to the upper parking and garage had to be usable and have easy access. Together with a patio area that would catch the sun and give some privacy.
Stage 1
Stage 2 – shape and measure
Stage 3 – walling in and ground ready to slab
Stage 4 – slabbing starts
Stage 5 – Nearly there… Remember, the house is being done-up so its not our rubbish!
So the final pictures show a transformation from an old dated and worn out unusable garden into a suitable & private garden with parking… ideally suited for the potential purchaser.
AND HERE’S THE FINAL PICTURES USED BY THE ESTATE AGENT. Wrapping a warmer look to the property with all the sides finished and a fairly low maintenance garden. The house sold in a matter of weeks.
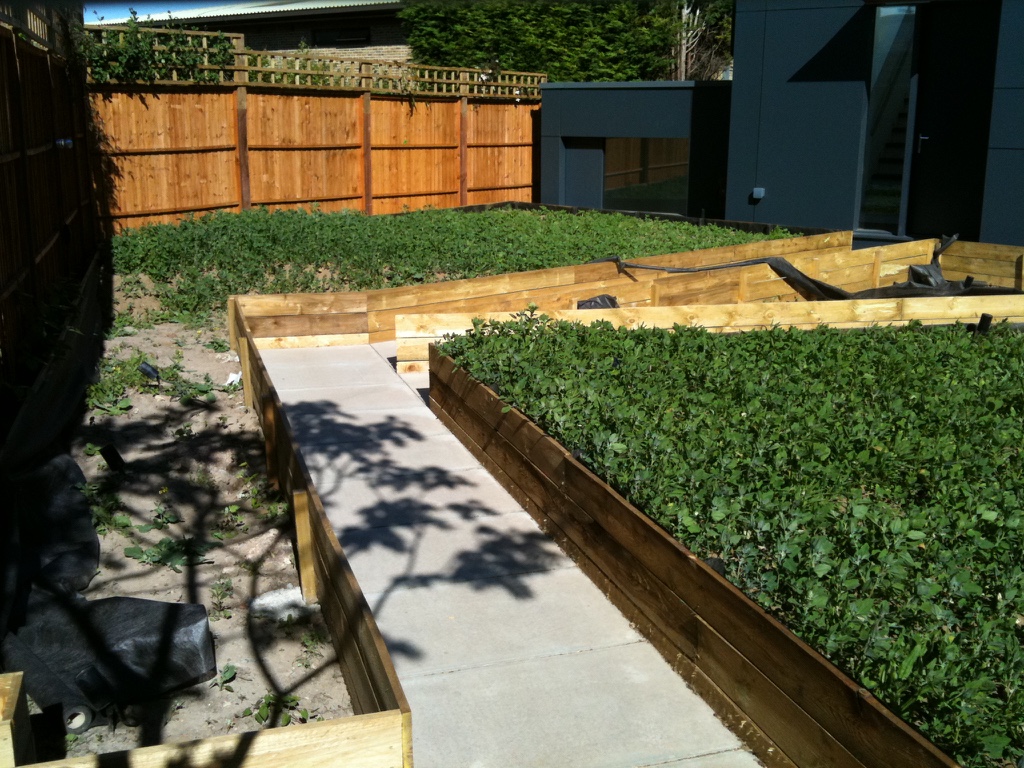
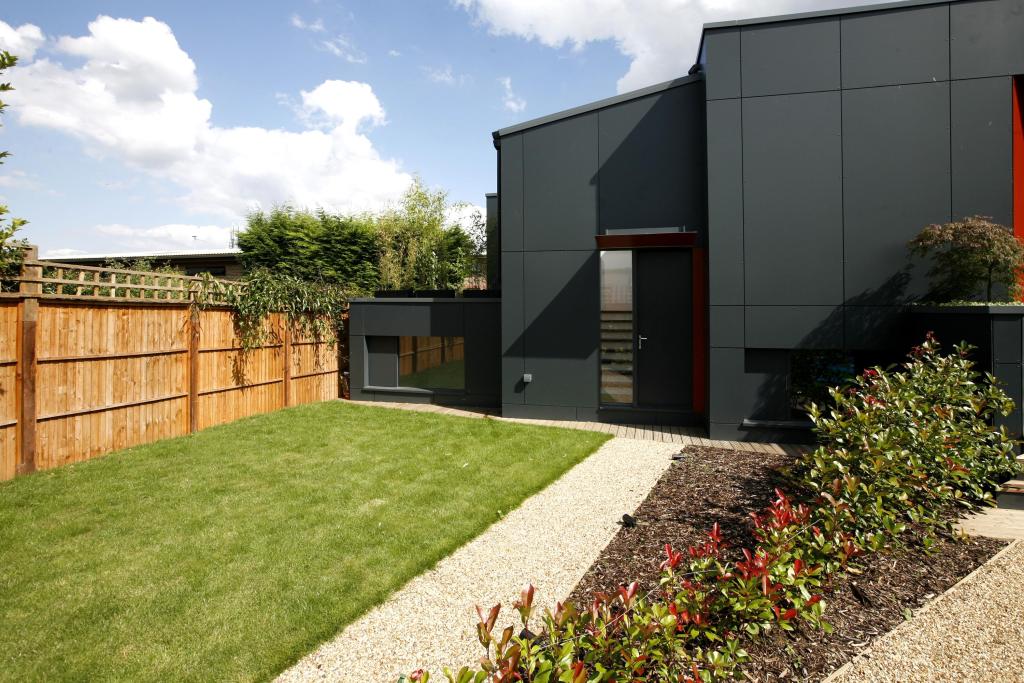
The property was split into two houses, one for the owners to live in and the other to be rented out. Thus the gardens had to accommodate this, yet didn’t need to look separate. So a nod to some privacy was needed.
Firstly a mass of ‘boxing’ that was holding about 80 ton of soil had to be moved. This included concreted posts a mass of wooden edges. Also being careful of the lighting that had been fitted. All a bit frustrating really, as this was constructed to aid it being signed off by the building inspector. It had been down for less than a month and now we were asked to remove it.
Once the difficulties of dealing with a very different system of ‘London Deliveries & Collections’ for materials and waste, together with the usual access difficulties, it was full steam ahead with getting the levels sorted.
So a final plan for planting and pathways was designed and decided on.
Then the first section of planting was created. This giving a screen for the ‘rented party’ using the path to access their property meant they don’t look into the main house, yet it wasn’t a hedge that could create a security issue.
Grounds all levelled and now turfed.
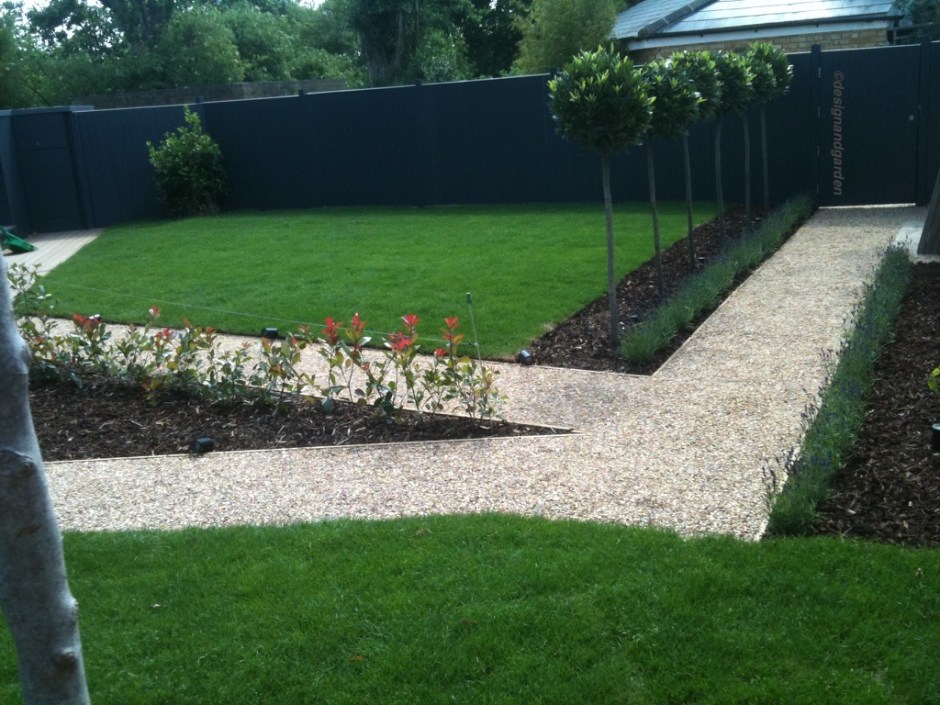
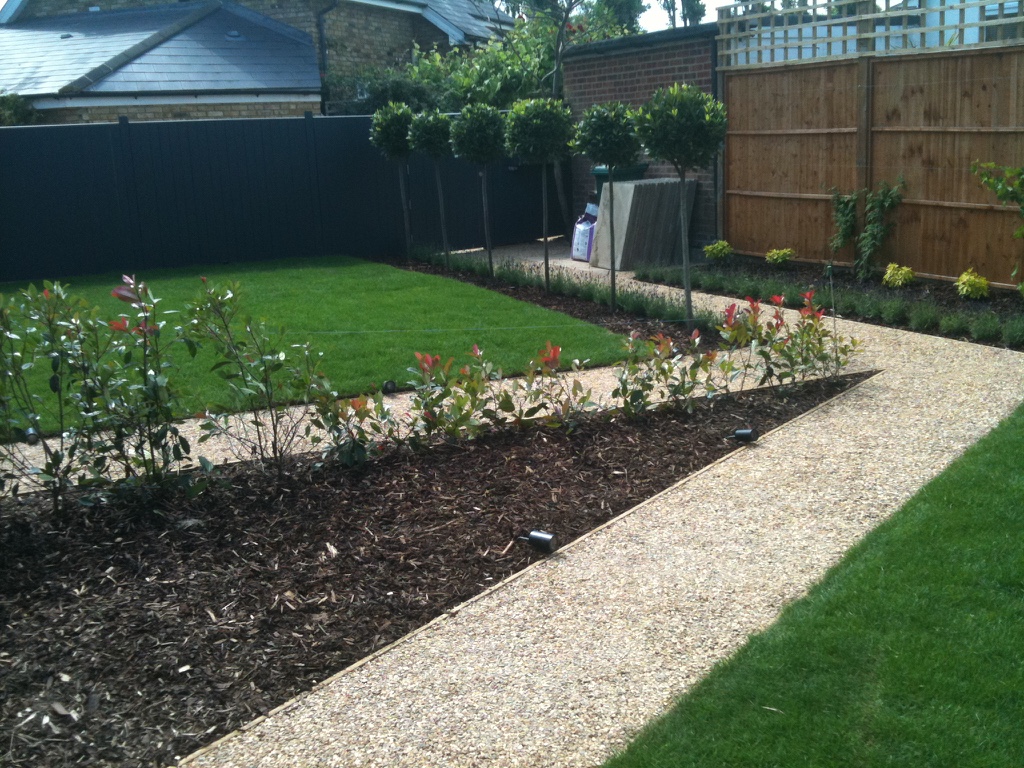
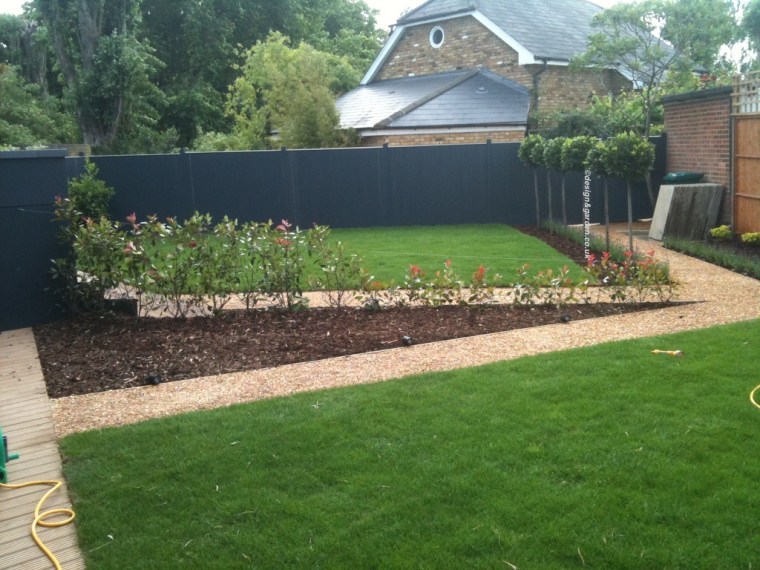
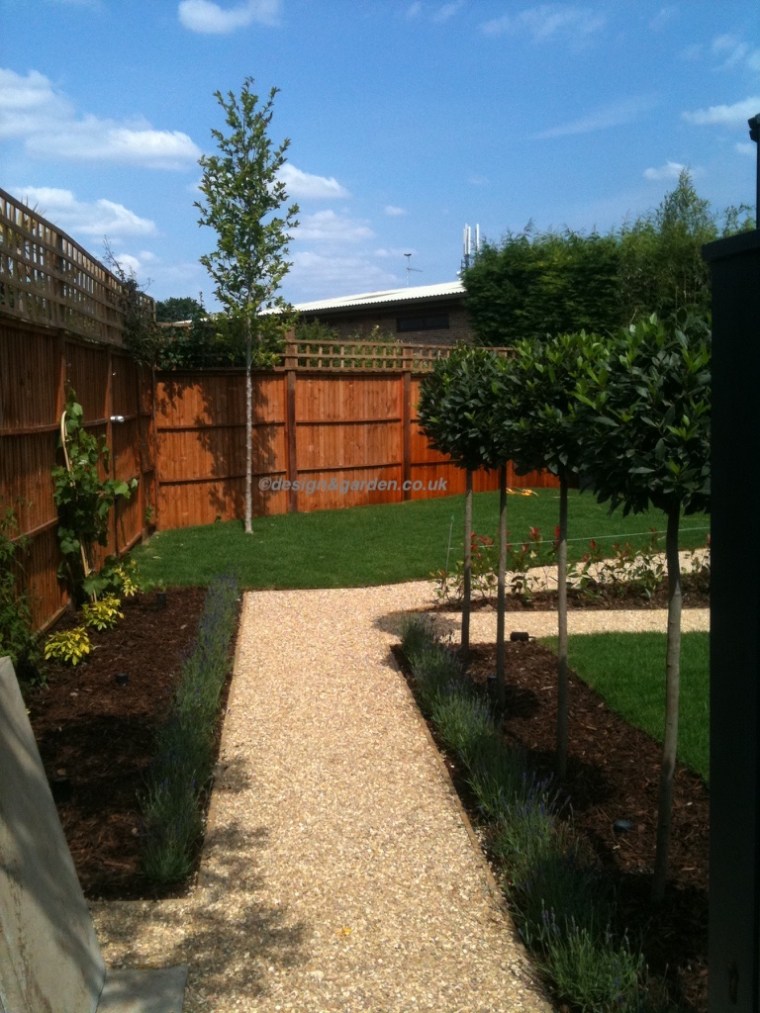
It was advised by us to create a neat yet low maintenance garden. A new addition of a baby to the family and a very busy working life, so the couple needed an easy to use garden and that was brought into the mix of design at any early stage.
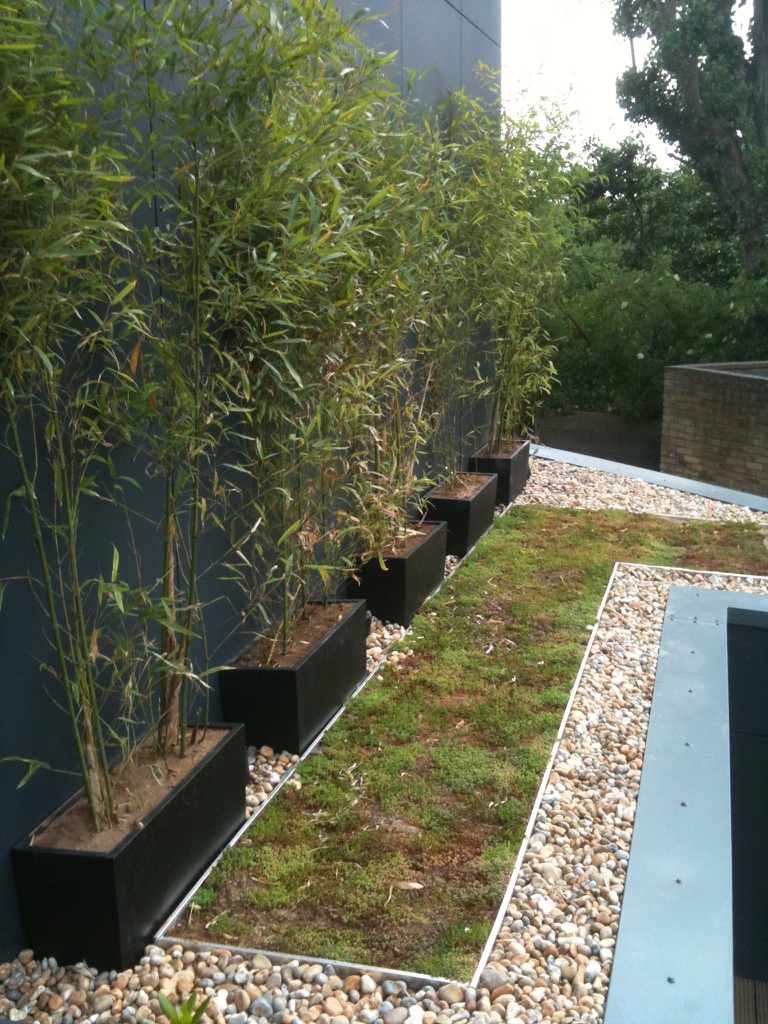
Using Bay Trees for a facial level screen, created privacy but could still see if someone was walking in. The lavender was a customer choice and works perfect with the plan. Using Photinia Red Robin for the hedge was a newish thing in 2011 but was to create hedge that wasn’t so dense but also to add a splash of colour once a year. All the roof had to have subtle planting as part of the planning conditions, such as bamboo in boxes, sedum and grasses.
This was an enjoyable job and have great memories of the works. Loved the fact that it overjoyed the family with the ease of the finish and the low maintenance that they’d never really thought was such a priority. The rented house was recently re- advertised and the garden is still looking good and loved
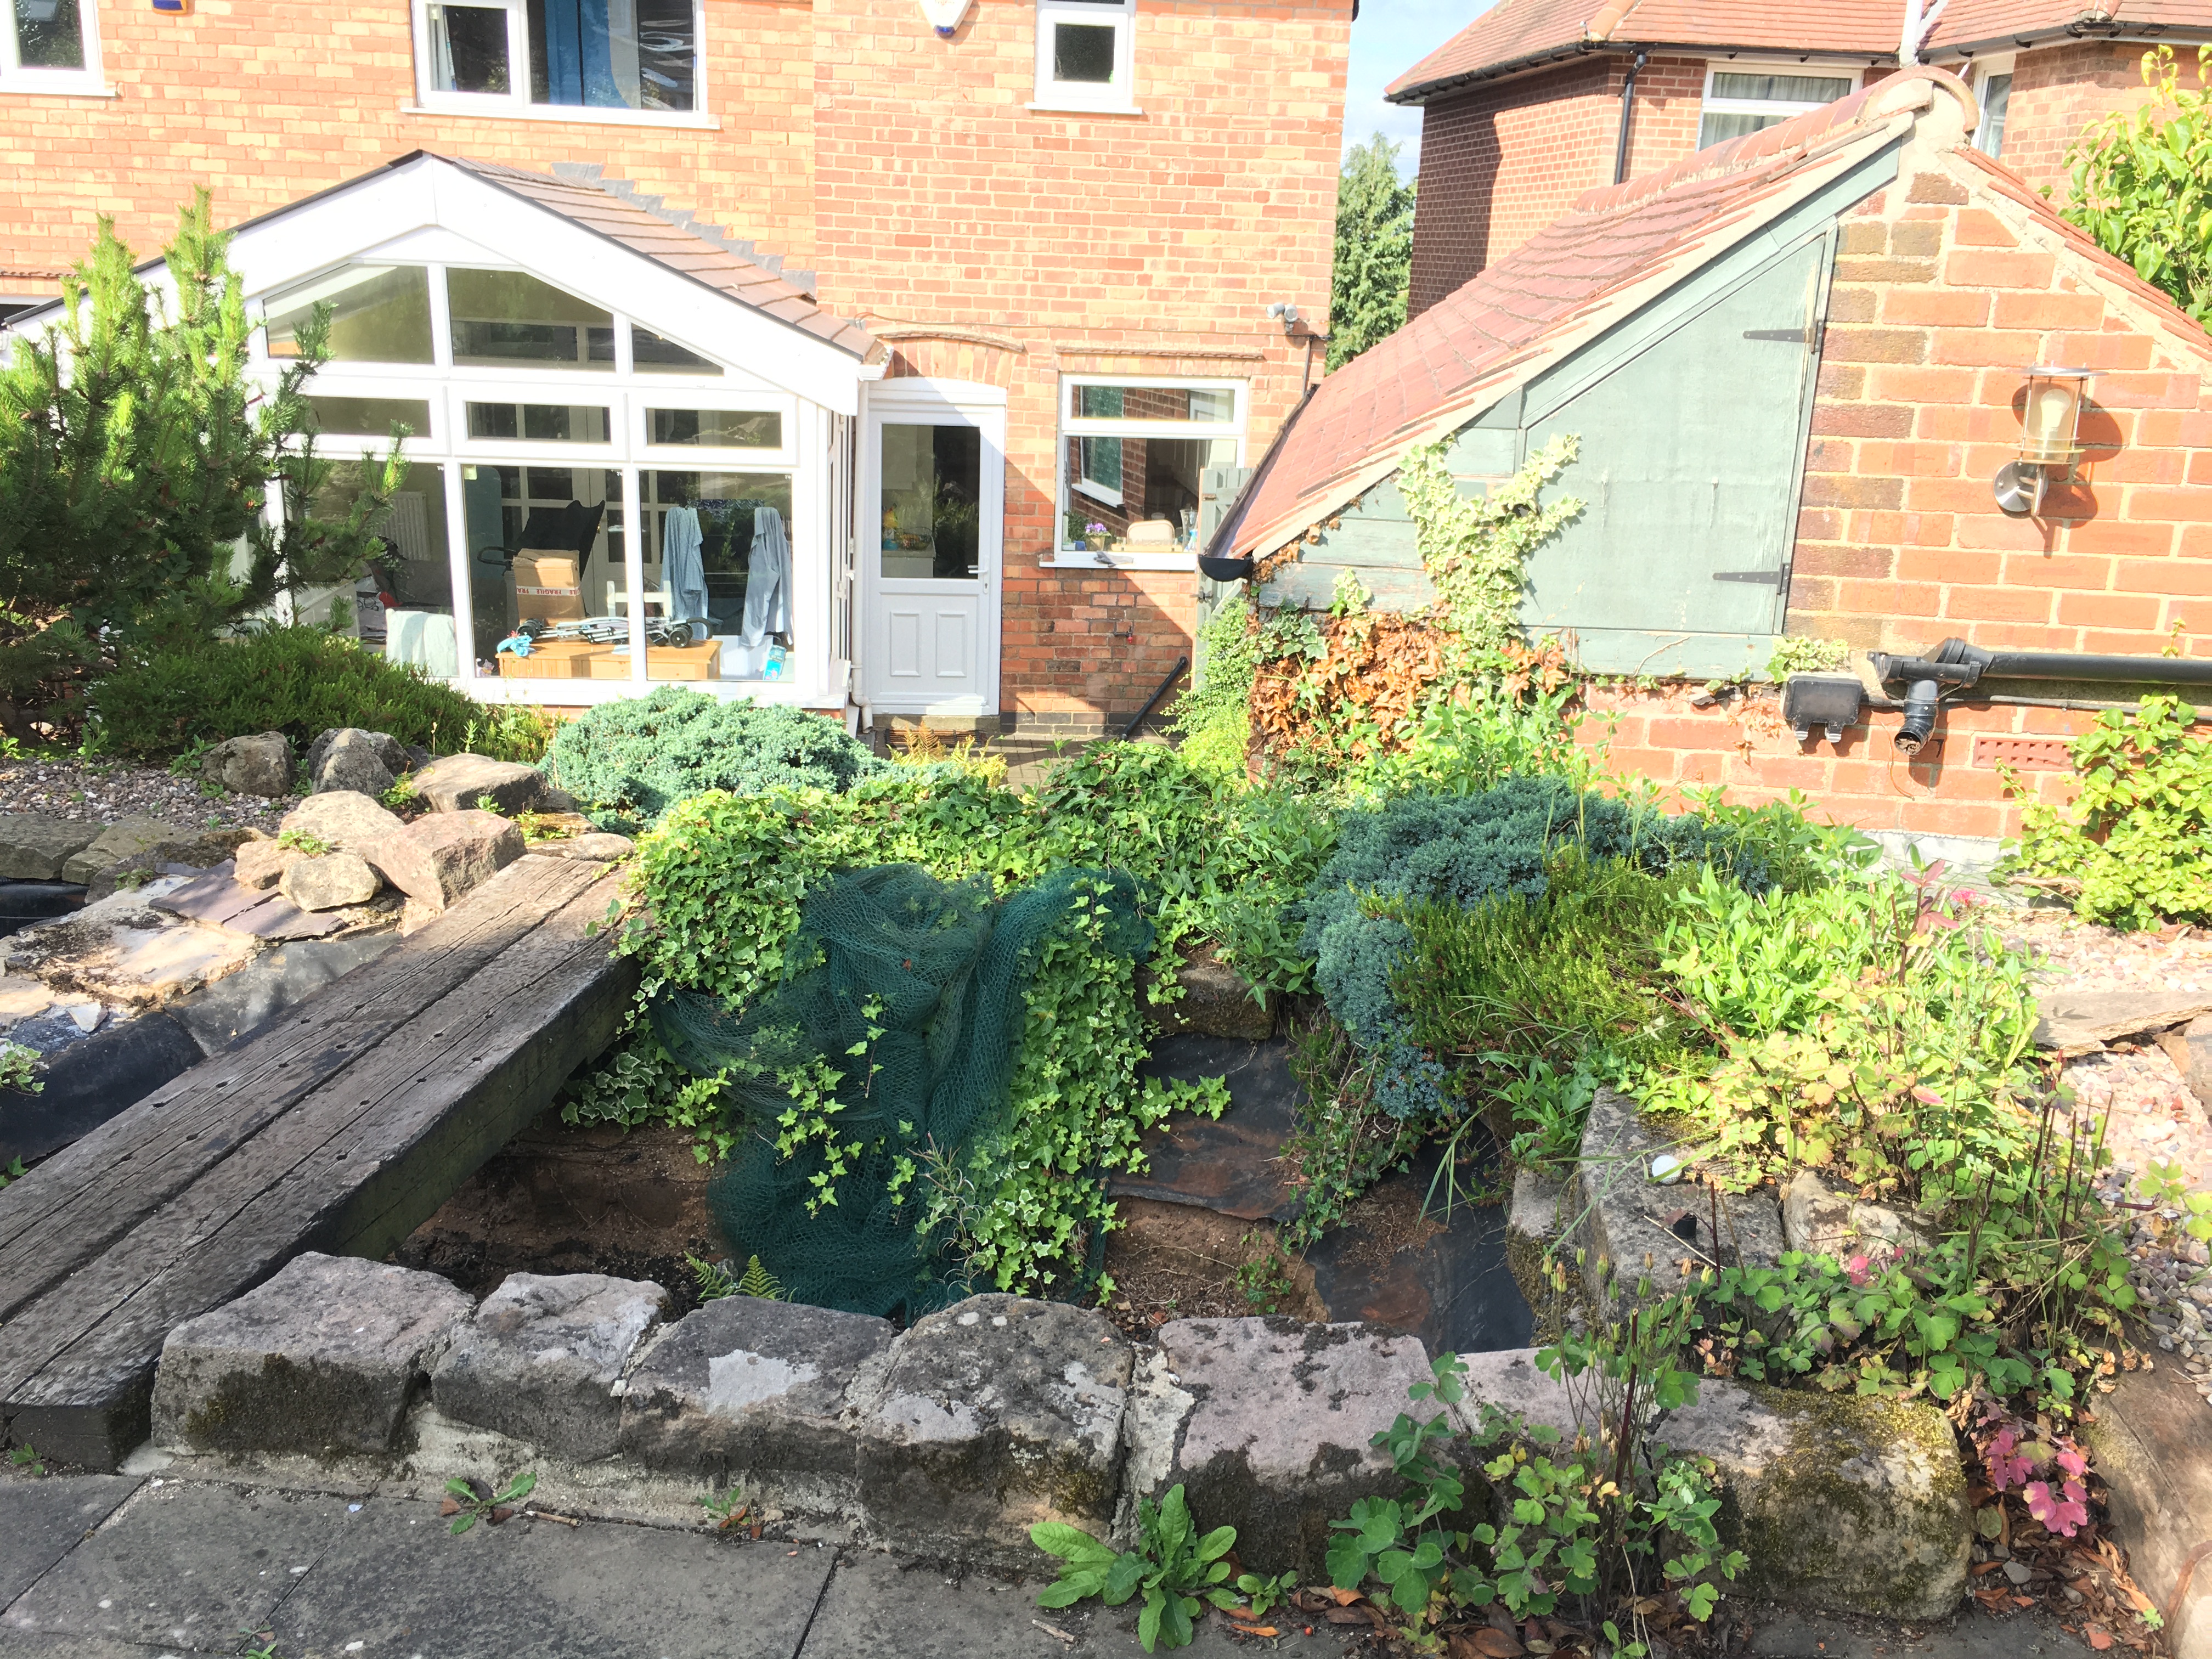
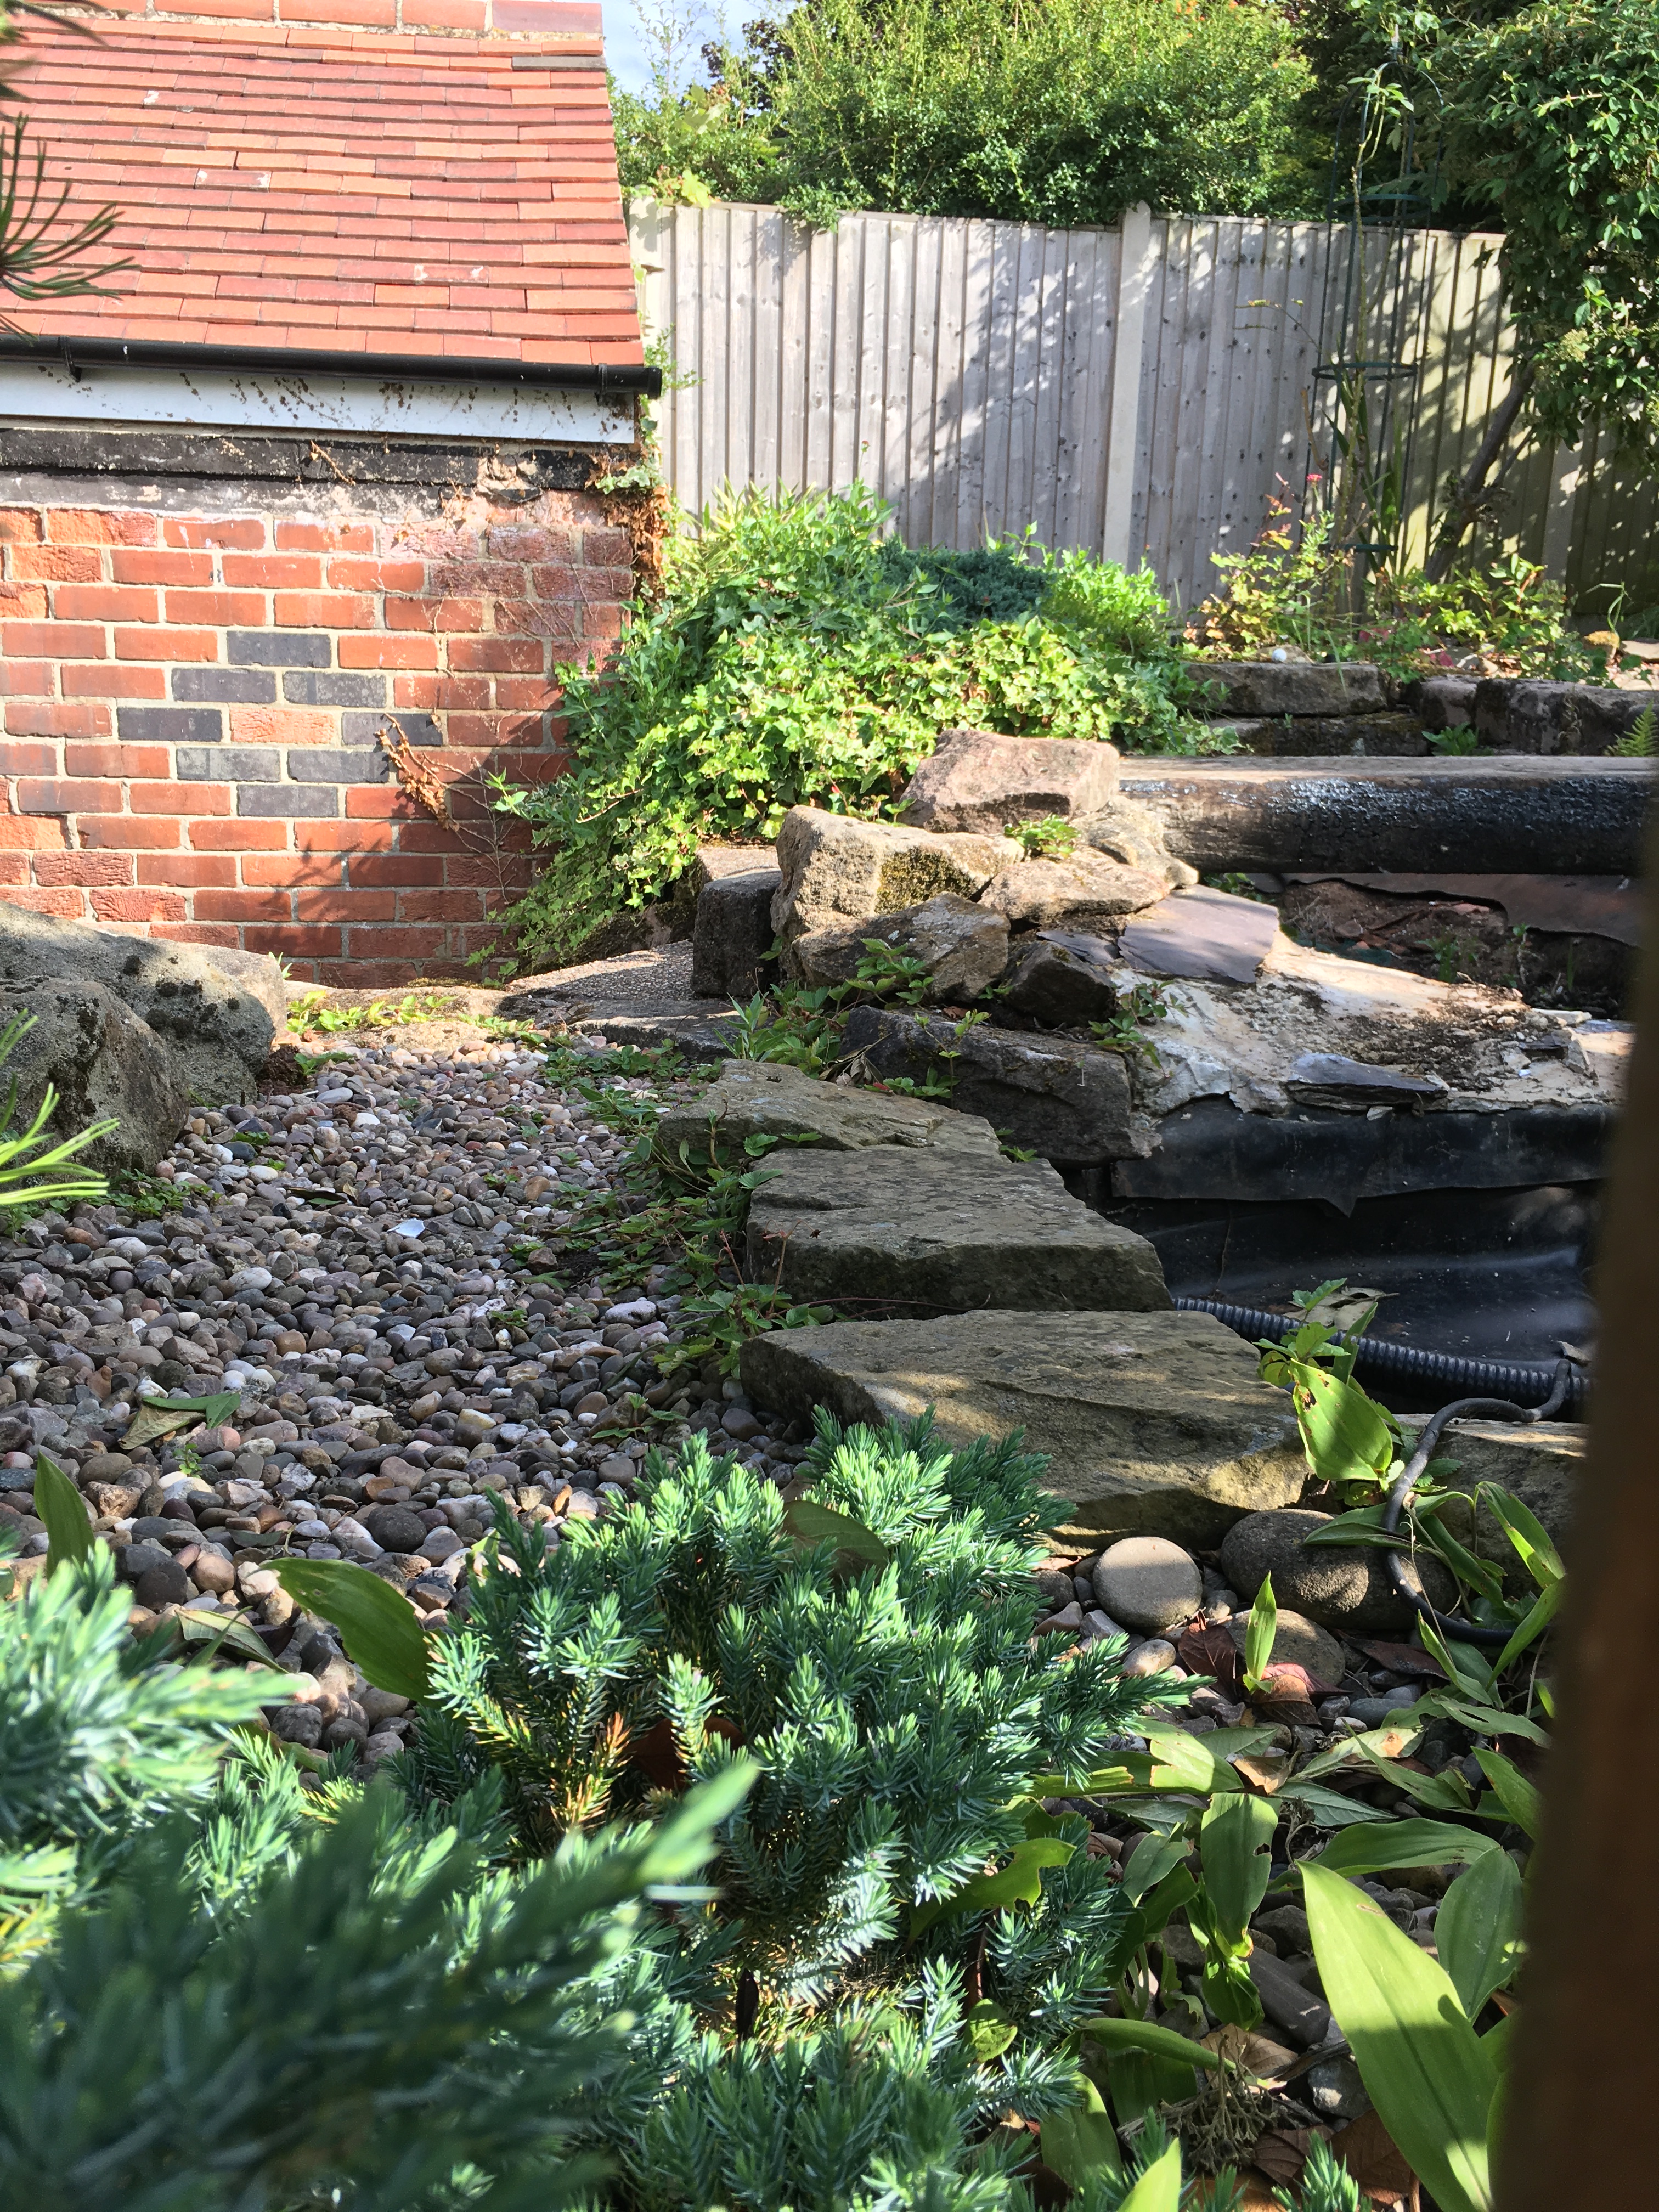
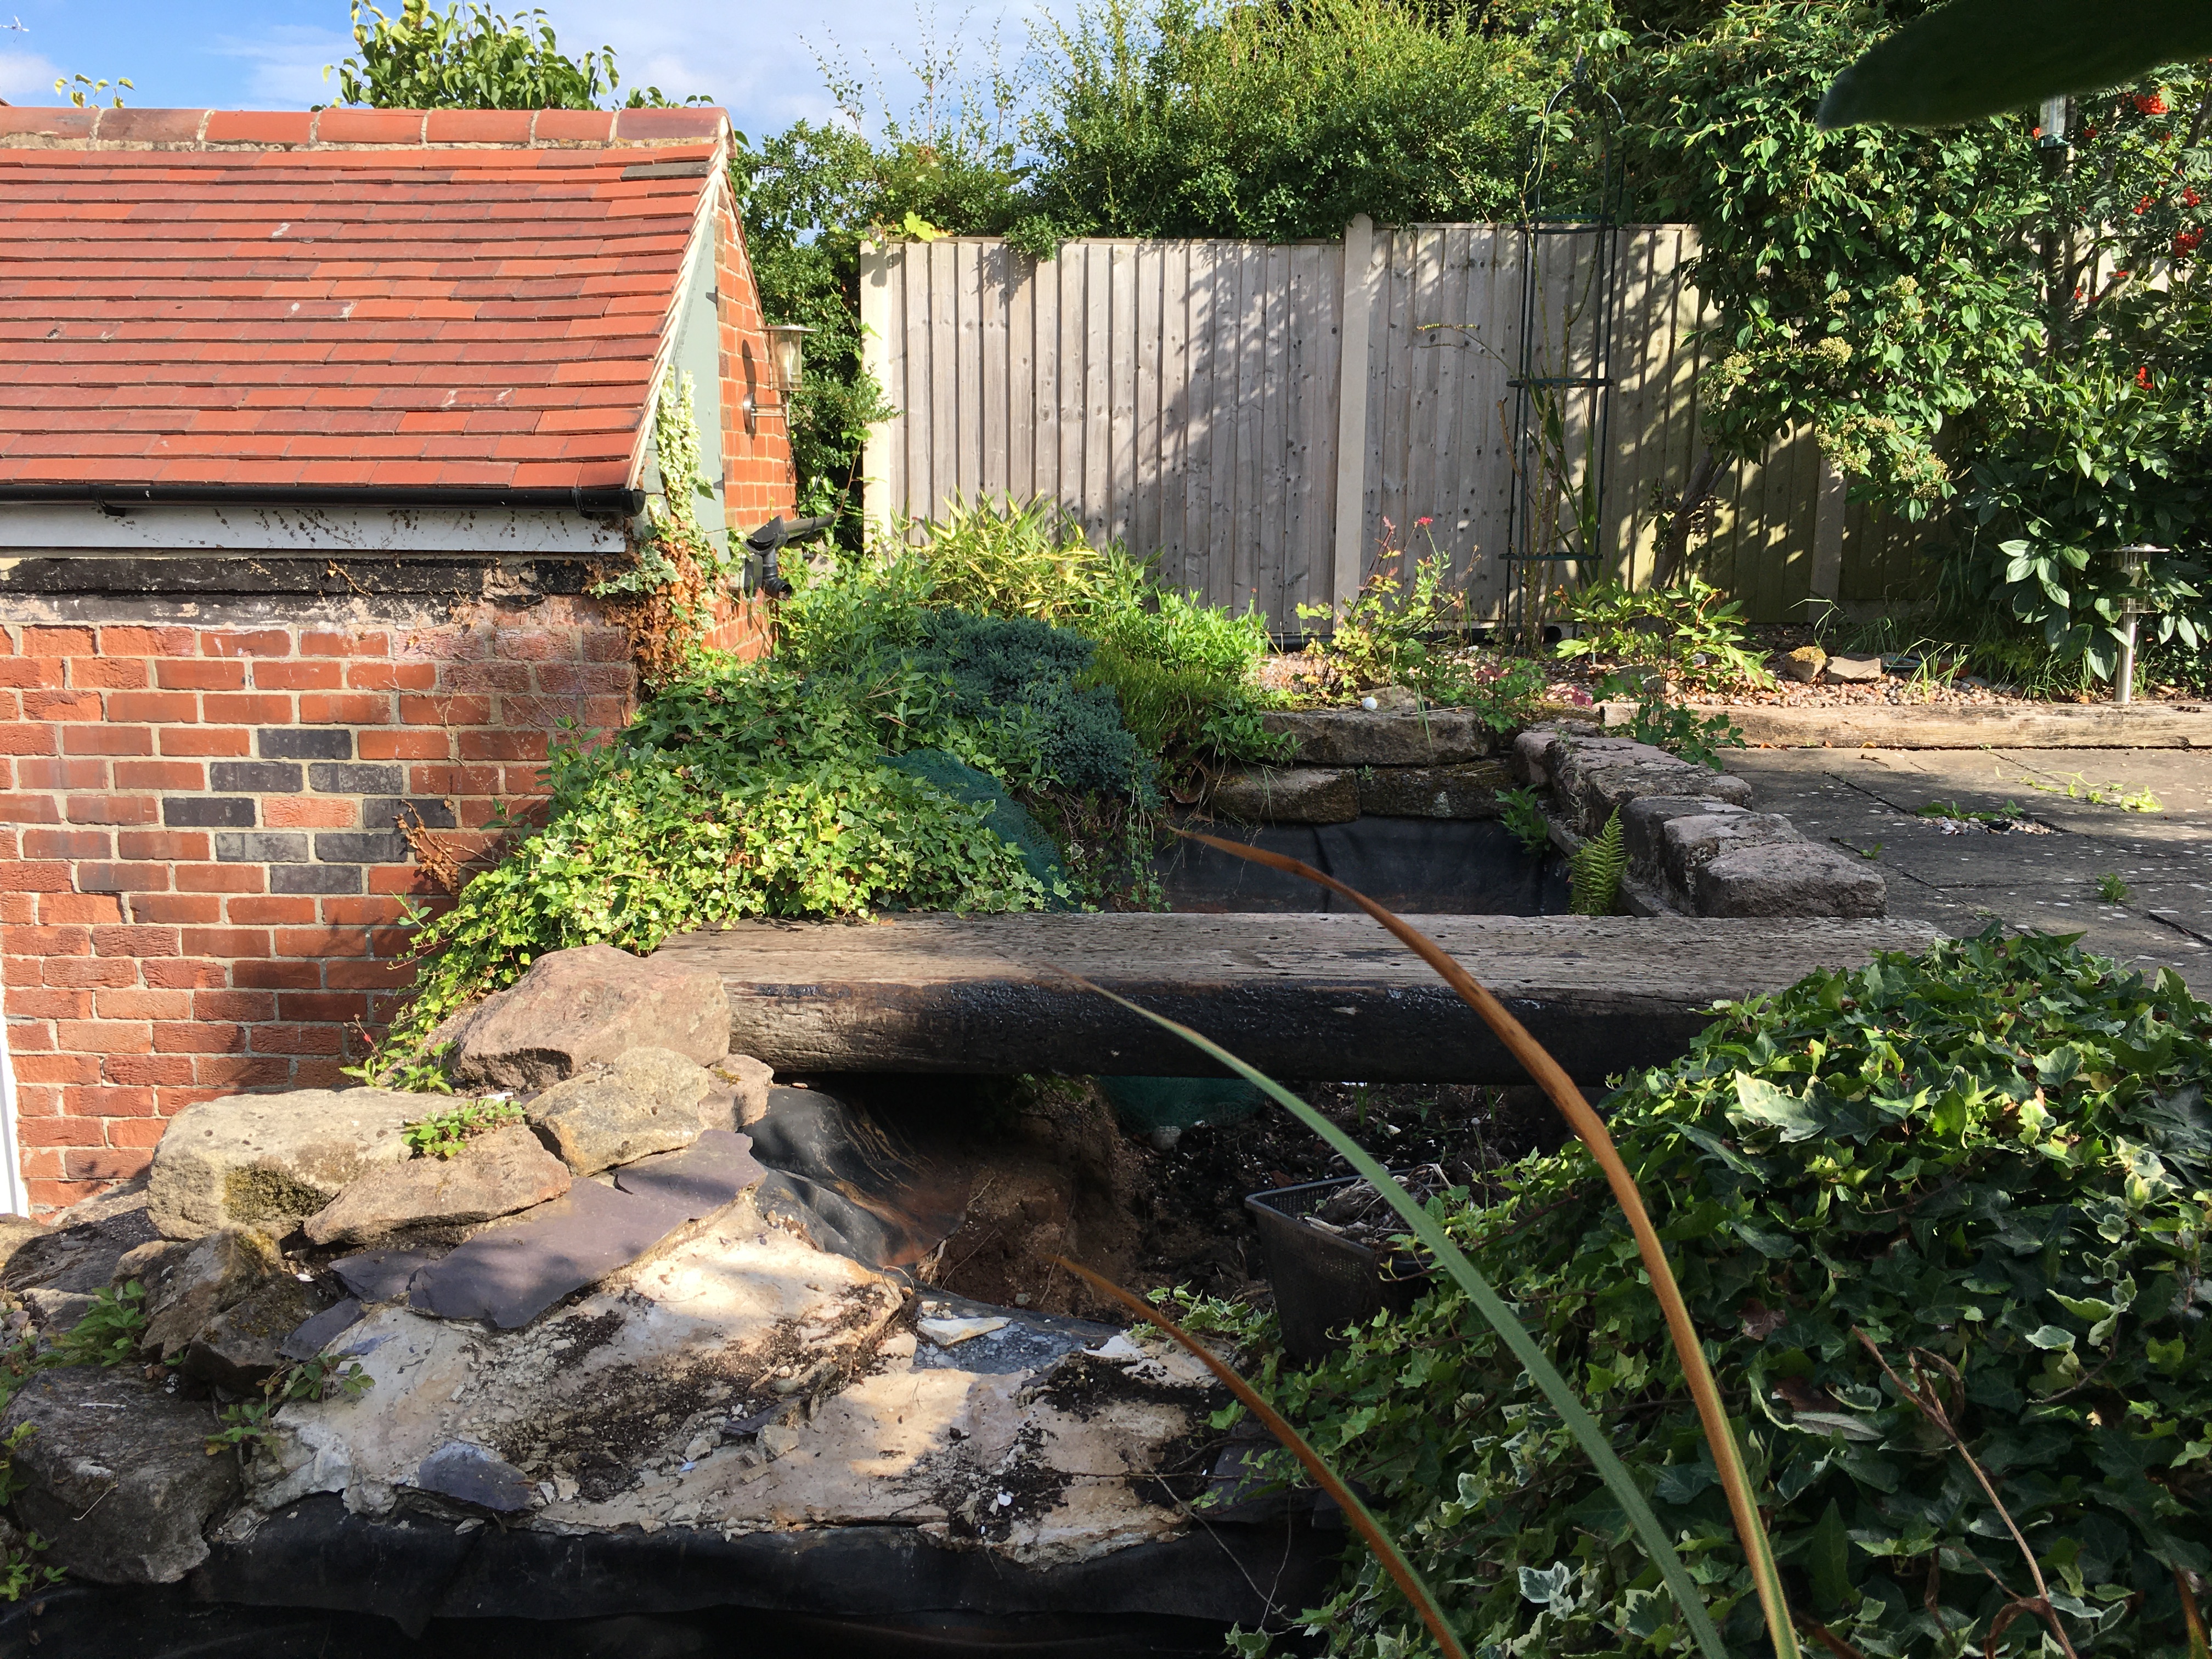
An owner who is a real garden lover, spending many happy hour, relaxing in the tranquility of their space needed that extra special finish to a much loved garden.
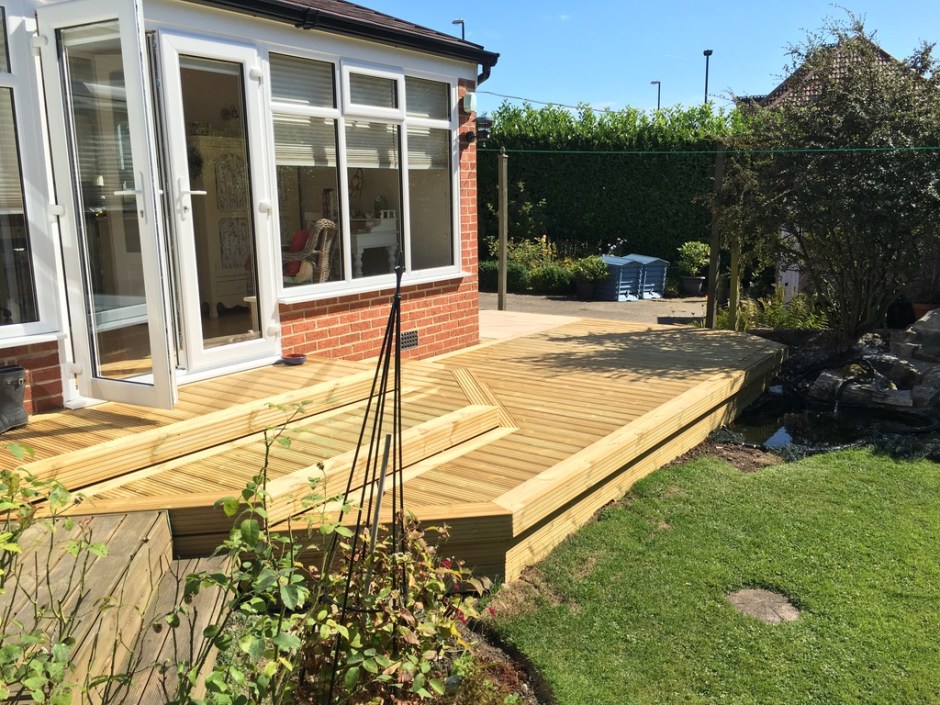
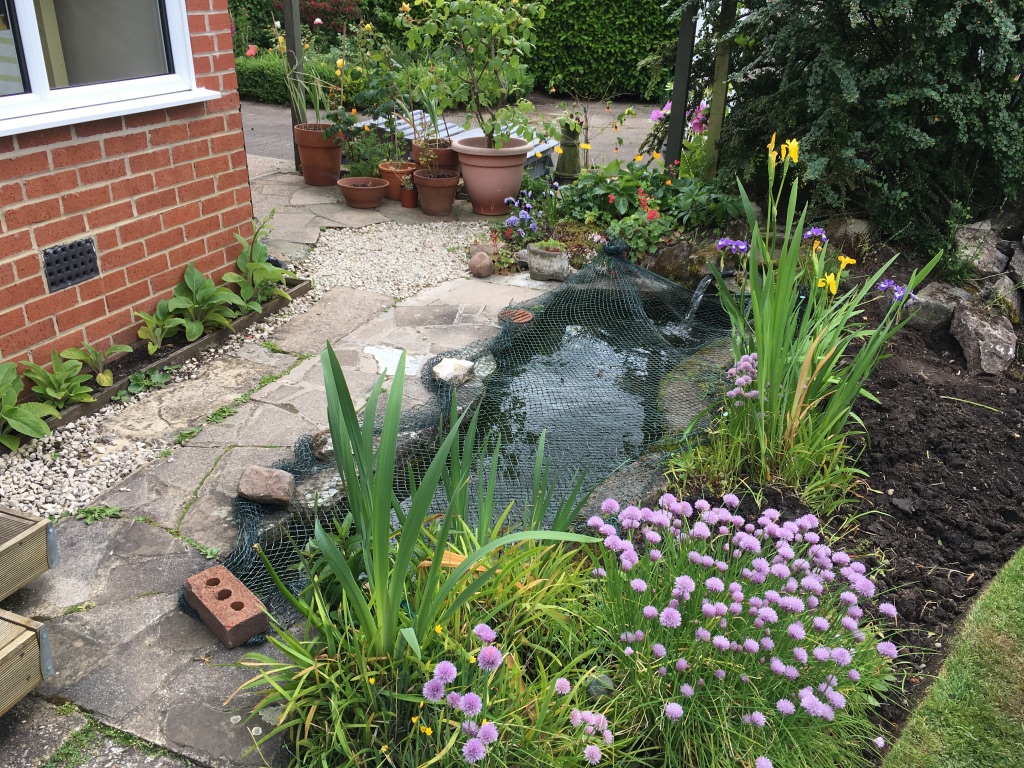
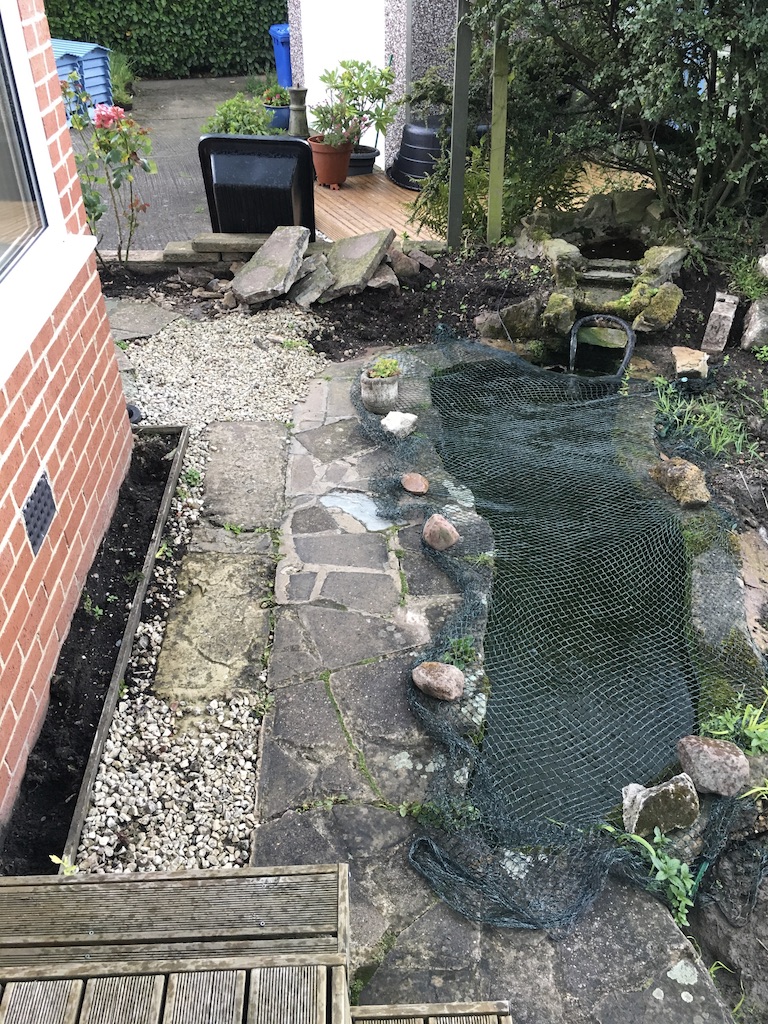
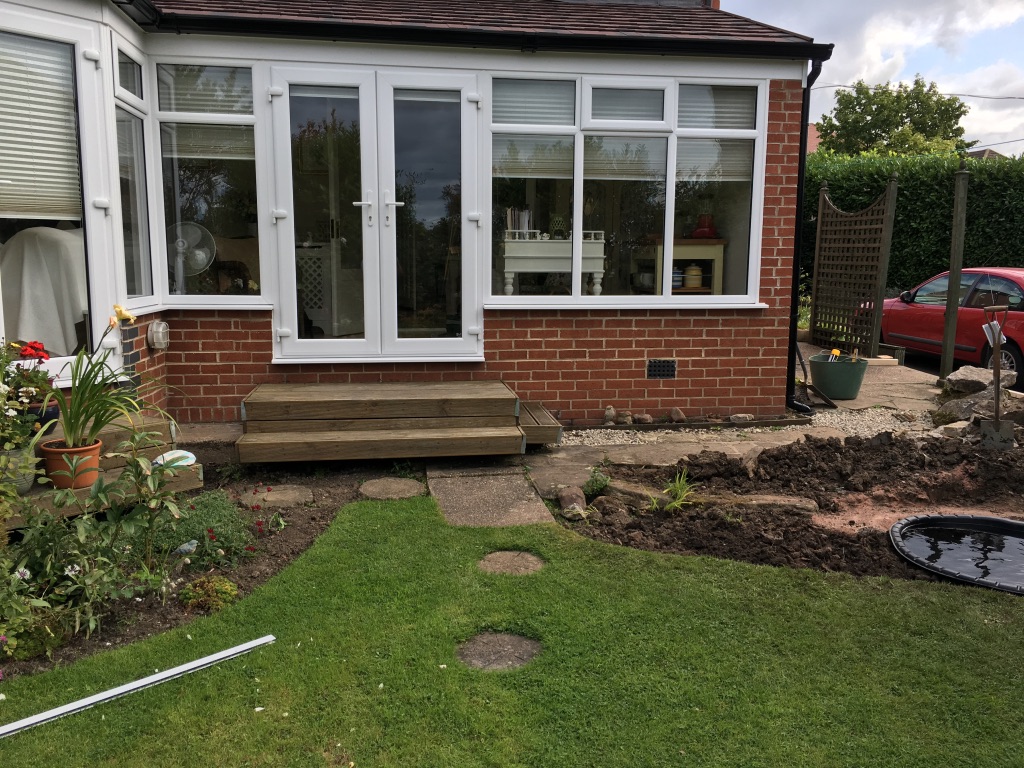
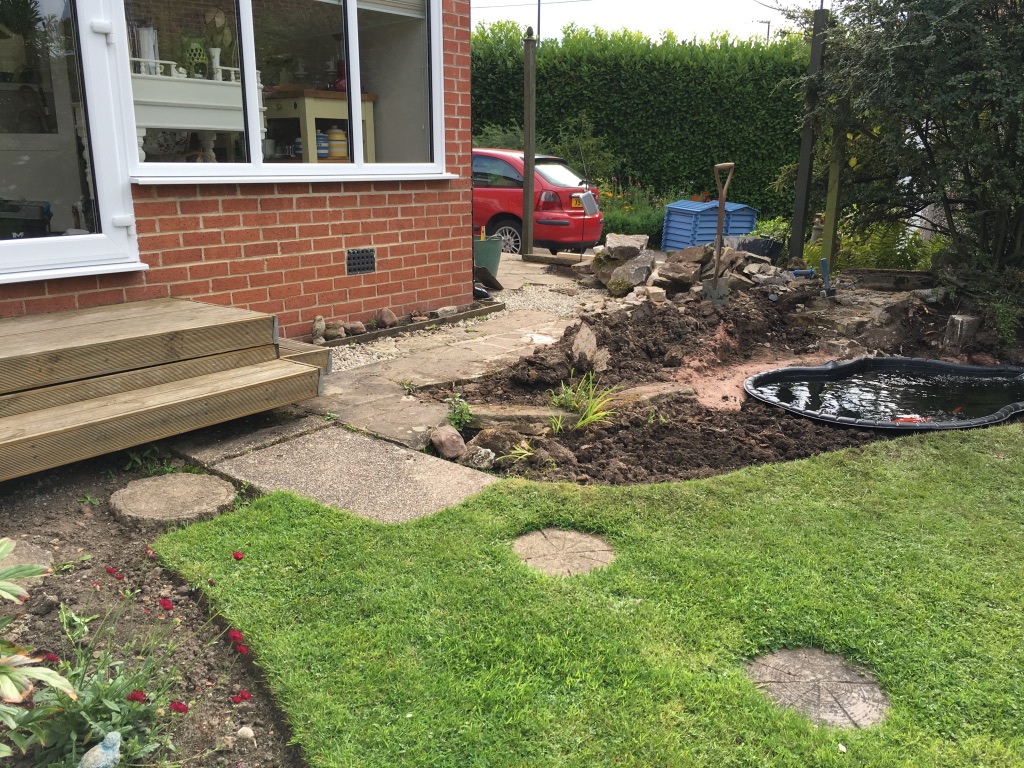
Removal of the old ‘dangerous’ decking and creating a safer level. Also moving the concrete fish pond slightly more into the garden. And finally creating a level area from the drive area to the new decking.
The original decking… the client had recently fell off the steps which gave reason to have it changed. The old pond with the clients treasured fish has seen better days…The new pond moved slightly more into the garden…
Let the changes begin…
So the first move was to move the fish pond further away from the house, but making it deeper and a little larger. We suggested to make the new pond go a little under the decking to have a shaded area for the fish.